FELLER ENGINEERING SS 242 User manual


SS 242


""


""
XAM
""


–
–
–
–
–


√
√
√
–
–

English
SS 242
Before operating this unit, Please read the instruction manual carefully.
This product is for household use only.
IMPORTANT SAFEGARDS
Before using the electrical appliance, basic precautions should always be
followed including the following:
1. Read all instructions.
2. Before using check that the voltage of wall outlet corresponds to the one
shown on the rating plate.
3. Do not use the appliance if the main cord, plug, light or the appliance itself
shows visible damage, or the appliance has been dropped or is leaking.
Take it to the nearest authorized service facility or a qualied serviceman for
examination and repair in order to avoid a hazard.
4. Do not allow the cord to come into contact with the soleplate when it is hot.
5. Burns may occur from touching hot metal parts, hot water, or steam
6. Do not let cord hang over edge of table or hot surface.
7. To protect against a risk of electric shock, never immerse the iron in water
or other liquids. If this has happened, do not use this appliance any more;
dispose of the appliance.
8. Keep the appliance out of the reach of children.
9. Do not leave iron unattended while connected into power supply or on an
ironing board.
10. Always place or use the appliance on a stable, level and horizontal surface.
11. The use of accessory not recommended by manufacturer may cause injury
to persons or damage to appliance.
12. When placing the iron on its stand, ensure that the surface on which the
stand is placed is stable.
13. The drain water cap must be always well closed during the use.
14. Never ll the water tank with hot water, scent, vinegar, starch, descaler,
fabric softener or other chemical reagent.
15. Unplug from outlet when not in use, before lling water or cleaning.
16. Do not use the appliance for other than its intended use.
17. This appliance can be used by children aged from 8 years and above
and persons with reduced physical, sensory or mental capabilities or lack 1
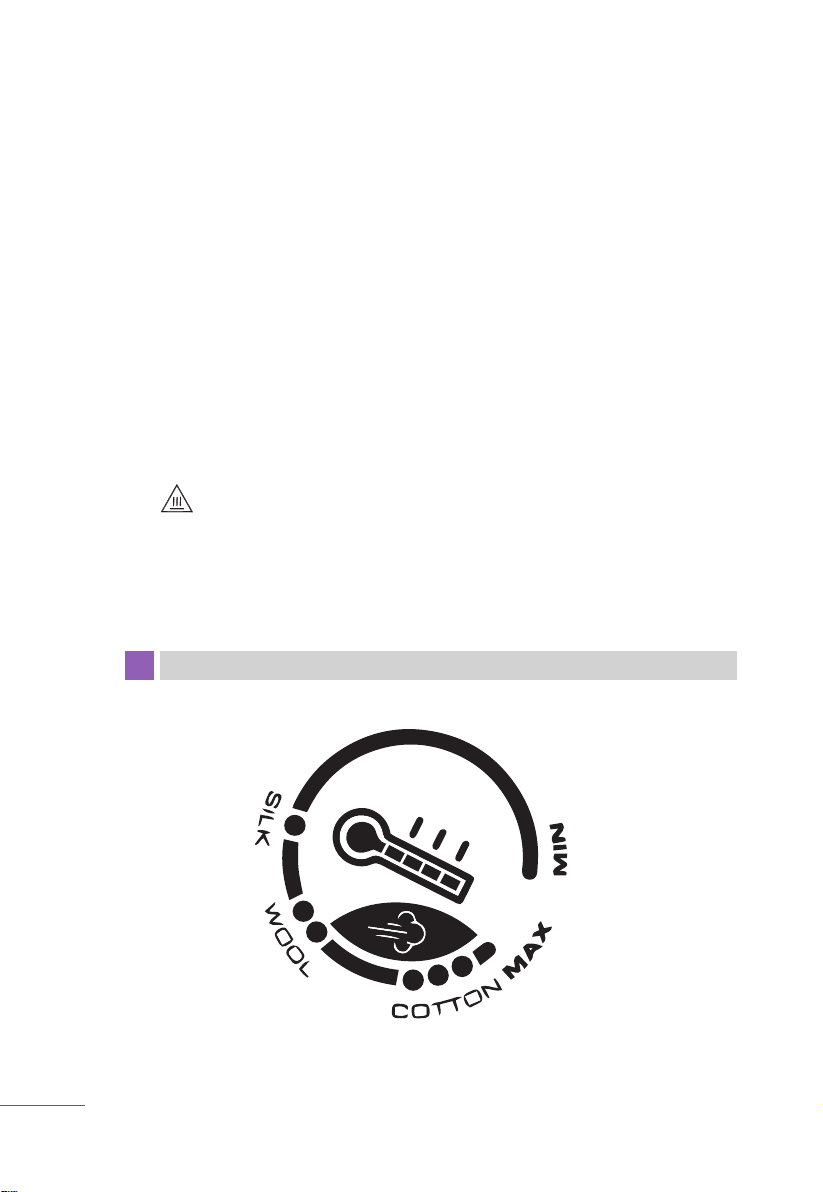
TEMPERATURE DIAL
of experience and knowledge if they have been given supervision or
instruction concerning use of the appliance in a safe way and understand
the hazards involved.
18. Children shall not play with the appliance. Cleaning and user maintenance
shall not be made by children without supervision.
19. The iron must not be left unattended while it is connected to the supply
mains;
20. The plug must be removed from the socket-outlet before the water
reservoir is lled with water.
21. The iron must be used and rested on a stable surface;
22. The iron is not to be used if it has been dropped, if there are visible signs of
damage or if it is leaking;
23. Keep the iron and its cord out of reach of children less than 8 years of age
when it is energized or cooling down.
24. Caution hot surface
25. Do not use outdoors.
26. Save these instructions
2

KNOW YOUR STEAM STATION IRON
Handle
Temperature dial
(see below)
Temperature indicator
Iron
Soleplate
Steam release button
Surge of steam control button
Filling cap
Trigger
Handle
Water tank
Thermal insulation cushion
Iron release button
Unit base
Control panel
(see below)
Cord clamp
Cord winding groove 3

CONTROL PANEL
Trigger
Grasp the water tank’s handle with the hand and press the trigger with one
nger, then you can take out of the water tank for lling water.
Filling cap
The lling cap is attached in the water tank, if less water in the tank, you shall
open the cap and ll water. After lling water, close it.
Power switch
Plug in the appliance and press down the Power switch, the power indicator
will be illuminated, also the low steam rate regarded as defaulted one and
its indicator will ash. Press down the Power switch for a while, both the
power indicator and low rate steam indicator will be extinguished, and the
appliance will be disconnected from the power supply.
Descaling indicator
Lack of water indicator
Power indicator
Low steam
rate indicator
High steam
rate indicator
Medium steam
rate indicator
Steam rate control button
(for increasing steam)Power switch
Steam rate control button
(for decreasing steam)
4

Steam rate control buttons
The steam rate can be selected low, medium or high with the two steam rate
control buttons (see the schematic illustration of Control panel). Any one to
be selected, its indicator will ash, after a few minutes, the indicator will be
changed to illuminating. At this time, the appliance can produce steam and
then you can use the steam for ironing.
Temperature dial
Turn the dial to set ironing temperature to meet the garment changed.
Temperature indicator
When the iron is heating up, the temperature indicator will be illuminated.
Once the iron has reached the selected temperature, it will extinguish. The
temperature indicator will be cycled on and o as the iron maintains the
selected temperature during ironing.
Steam release button
After pressing down the Power switch and choosing the desired steam rate,
it indicates the steam can be used for ironing until the steam rate indicator is
changed ashing to illuminating. At this time, press the steam release button
with a little force, the steam will be sprayed from the soleplate continuously.
When loosen the steam release button, the appliance can only be used for
dry ironing without steam.
Surge of steam control button
After pressing down this button, you can get powerful steam instantly for
better ironing and removing tough wrinkle.
Lack of water indicator
If less water in the tank, the indicator will be illuminated, following with two
“D” sounds of buzzer, the steam generator stops working. It prompts you
need to add water into the tank. If the pump keeps pumping water for more
than 1 minute, the indicator will be ashed. At that time, just the iron can
work.
5

BEFORE FIRST USE
1. 1. Remove any sticker, protective foil or storage cover from the soleplate.
2. 2. Heat up the iron to maximum temperature and iron over a piece of
damp cloth for several minutes for the purpose of removing any residue
on the soleplate according to the section of“Steam ironing”.
NOTE: It is normal that strange odor comes out from the unit for the rst use.
This will cease after a short while.
NOTE: Some particles may come out of the soleplate when you use the iron
for the rst time. This is normal; the particles are harmless and stop coming
out of the iron after a short while.
Descaling indicator
If the descaling indicator illuminating, it indicates the steam generator shall
be cleaned by virtue of the mineral deposits collecting to a degree. When
the system ensures the mineral deposits have been removed, the indicator
will be extinguished.
Water tank
The water tank has two chambers, one chamber is used for storing water
for ironing as normal water tank; the other chamber is used for collecting
drainage during automatically cleaning.
Iron release button
The iron can be tightly secured onto the thermal insulation cushion by the
iron release button. After the iron is secured, the whole steam station iron
can be lifted up by grasping the iron’s handle. To remove the iron, just need
to press down the iron release button.
Cord clamp
When not in use, the steam supply hose and power cord shall be stored. Pull
out the cord clamp rst, after winding the cord around the cord winding
groove, push the cord clamp back.
6

USING YOUR STEAM STATION IRON
The appliance has two iron portions. You can use dry ironing or steam iron-
ing, the details refer to the following:
Dry ironing
1. Put the iron on the steam station iron’s thermal insulation cushion.
2. Connect the plug to wall outlet and press down the Power switch and
the power indicator will be illuminated.
3. Turn temperature dial to your desired setting, which is depended on the
fabric of garment, and the temperature indicator will illuminate. Refer to
IRONING TIPS latter. The iron starts heating.
4. When the temperature indicator turns o, the selected temperature is
reached. You now can start ironing.
WARNING: Never touch hot soleplate at any time before cooling down!
Steam ironing
1. Grasp the water tank’s handle with one hand and press the trigger with
one nger to take out of the water tank, then open the lling cap and
ll water into it. You had better use puried water with less calcium par-
ticles. After it, close the lling cap. The max capacity of water tank is 1.7L,
the water level shall not be exceeded the MAX mark.
2. Replace the detachable water tank properly.
3. Put the iron on the steam station iron’s thermal insulation cushion.
4. Connect plug to the wall outlet, press down the Power switch and the
power indicator will be illuminated, and the defaulted low steam rate
indicator will ash. Turn temperature dial to your desired setting, which
NOTE: When you switch on the appliance, the steam generator may produce
a pumping sound. This is normal; the sound tells you that water is pumped
into the steam generator.
NOTE: During the heating process of the soleplate, there will be little steam
coming out from the soleplate automatically and this phenomenon will con-
tinue for about 3 seconds, This is normal.
7

AUTO CALC CLEAN FUNCTION
This appliance is equipped with an Auto Calc Clean function. Over time,
scale particles build up inside the steam generator. If the descaling indica-
tor illuminating, it indicates the steam generator shall be cleaned by virtue
of the mineral deposits collecting to a degree (after using 6 to 8 tanks of
water). The appliance automatically performs a Calc Clean process to clean
itself from scale.
Note: After the descaling indicator illuminating, the appliance may not enter
to Auto Calc Clean process unless the appliance is suciently cold.
1. When the Auto Calc Clean process takes place, the descaling indicator
ashes and you can hear short beeps. Wait approximately 2 minutes for
is depended on the fabric of garment, and temperature indicator will
illuminate. Refer to IRONING TIPS latter.
5. The water in the tank will be heated, after a few minutes, the tem-
perature indicator will be extinguished, which indicates the soleplate
temperature has achieved the selected temperature. If the indicator of
defaulted steam rate has been changed ashing to illuminating, it indi-
cates you can take out of the iron and iron the garment with steam by
pressing the steam release button of the iron.
6. According to your requirement, you can select the desired steam out-
put for each garment, there are three modes of low, medium, high on
available. Make sure that there is enough water in the tank.
Caution: 1) Do not touch hot soleplate at any time before cooling down!
2) Never direct the steam at people!
3) Don’t emit the steam directly to the people.
7. During operation, if there is less water in the tank, the lack of water in-
dicator will be illuminated, following with two beeps can be heard. At
that time, you should rell the water tank through the lling aperture or
move out of the water tank to rell it.
8. After nish ironing, press and hold the Power button for a while, and the
appliance will be turned o and all the indicators will be extinguished.
Or you can put the iron the thermal insulation cushion, if there is no
steam sprayed out from the soleplate within 10 minutes, the appliance
will be turned o automatically. Remove the plug from the wall socket.
But the soleplate is still hot, never touch it with hand, place it on the
thermal insulation cushion until it cools down completely.
8
Table of contents
Languages:


