manuals.online logo
Brands
  1. Home
  2. •
  3. Brands
  4. •
  5. Festool
  6. •
  7. Power Tools
  8. •
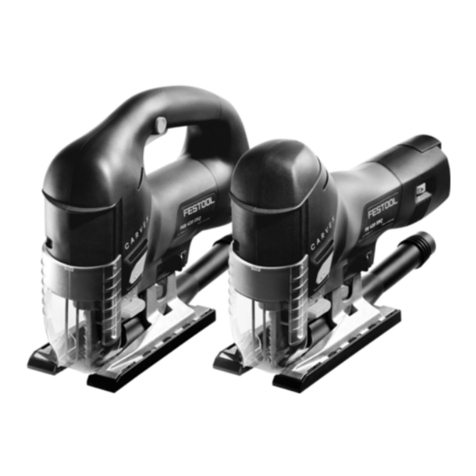
  9. Festool Carvex PSB 420 EBQ User manual

Festool Carvex PSB 420 EBQ User manual

Festool JigsawPage 1
Tool description
A jigsaw is a saw which uses a reciprocating blade to cut
irregular curves, such as stenciled designs, in wood, metal, or
other materials.
General tool Safety
PPE
• Always wear eye protection.
• Wear a dust mask where appropriate
• Wear hearing protection
• DO NOT wear gloves
Personal Safety
• Do not wear loose clothing.
• Remove Jewellery.
• Keep hair tied up.
Do not overreach. Keep proper footing and balance at all
times. This enables better control of the tool in unexpected situations.
Consider those around you, inform them before starting the equipment so they can use relevant
PPE, ensure there are no trip hazards and reassess the area once all cables and extraction hoses
are connected.
Do not use a power tool while tired or rushed. A moment of inattention and incorrect use of PPE
while operating power tools may result in serious personal injury and or death.
Dust extraction, ensure this is connected and properly used. Use of dust collection can reduce
dust-related hazards.
Power Tool Use and Care
Do not force the power tool.
Correct settings will do the job better and more safely at the rate for which it is designed.
Do not use the power tool if the switch does not turn it on and off. Any power tool that cannot
be controlled with the switch is dangerous and must be brought to the attention of a technician
before further use.
Disconnect the plug from the power source (remove battery) before making any
adjustments, changing accessories, or storing the tool. This will reduce the risk of starting the tool
accidentally.
Festool JigsawPage 2
Visual bade inspection. With the saw unplugged, inspect the blade. Always check the saw blade
to make sure it does not have missing teeth or is bent. Do not use a damaged saw blade. bring
this to the attention of a technician before continuing. Properly maintained tools with sharp cutting
edges are less likely to bind and are easier to control.
Check material condition before cutting. Remove any foreign objects such as nails or screws
from the material to prevent damaging the tool and its cutting blade. Do not use green or wet wood
as the water and sap content can damage the tool and its cutters.
Specic Safety Rules for Reciprocating Saws
Keep hands away from the blade and cutting area.
Do not reach underneath the workpiece. The blade is fully exposed under the workpiece.
Never hold the piece being cut in your hands or across your leg. It is important to support the work
properly to minimize body exposure, blade binding, or loss of control.
Check that there is enough space under the workpiece for the reciprocating saw blade. If the saw
blade strikes another object, it may cause a kickback.
Never cut material that is thicker than the length of the saw blade.
Do not touch the saw blade after prolonged cutting. The saw blade may be hot and cause burns.
Festool JigsawPage 3
Functional description
•
Festool JigsawPage 4
Changing the saw blade
The Jigsaw features tool-free blade changing. Used blades
can be ejected from the saw without touching the potentially
hot blade. New blades are inserted into the holder with just a
simple twist.
WARNING! Always disconnect the saw from the power supply
(power cord or battery) before making any adjustments to the
saw or installing or removing the blade.
CAUTION! After prolonged use, the used sawblade may be
hot. Take care not to touch the sawblade until it has cooled.
1. Unplug the saw or remove the battery. This procedure may
require you to touch the blade with your ngers, so make sure
the saw cannot start unexpectedly.
2. If the splinter guard is installed, remove it as described
further down in this induction.
3. Slide the blade release lever forward until the blade is ejected from the spring loaded holder.
4. Place the new blade into the diagonal slot on the blade holder, press it fully in, and rotate the
blade until it locks into place with the teeth facing forward. If the blade does not rotate easily, it is
not pressed in far enough. The small tabs on the side of the blade must be inside the blade holder.
5. Adjust the blade guide as described below.
Adjusting the Blade Guide
The Jigsaw features a lower blade guide to ensure that the
blade stays straight and true in the cut.
WARNING! Always disconnect the saw from the power
supply (power cord or battery) before making any
adjustments to the saw or installing or removing the blade.
1. Unplug the saw or remove the battery. This procedure
may require you to touch the blade with your ngers, so
make sure the saw cannot start unexpectedly.
2. Install a blade in the saw as described above.
3. Remove the Main Base as described on further down.
4. Using the provided 2.5 mm hex key, loosen the adjustment screw enough to ensure the blade ts
loosely between the jaws of the blade guide.
Festool JigsawPage 5
5. Carefully push back on the blade to ensure it is tting between the parallel faces of the blade
guide jaws.
6. While wiggling the blade back and forth, tighten the adjustment screw until the jaws are almost
touching the blade.
Take care not to over-tighten the adjustment screw. If the jaws are too tight to the blade, you
will have excessive wear on the jaws, and it may even prevent proper pendulum action.
If the jaws are too loose, the blade won’t be well guided in the cut.
For optimal adjustment, you should be able to wiggle the blade side-to-side just a little bit.
Changing Base Inserts
Standard Insert: This is a general purpose insert that is supplied with the saw, and may be used in
all applications.
Felt Insert: The felt insert provides a soft felt surface to the base of the jigsaw for mar-free cutting
on nished materials. The bottom of the felt insert has a tight hook- &-loop surface that holds the
replaceable/disposable felt pads in place.
Phenolic Insert: This insert provides a smooth, hard, and low-friction base for abrasive
environments that could scratch softer inserts.
Dimpled Insert: This insert is designed to provide smooth operation on rough surfaces, such as
rough-sawn lumber. The dimples (rounded studs) glide over and between the rough features of the
workpiece surface.
Stainless Steel Insert: This insert is ideal for working on steel, aluminum, and other very hard
materials that would scratch even the phenolic insert.
Festool JigsawPage 6
1. Remove the dust collection port as described below. The
release tab on the base insert cannot be pressed in
when the dust collection port is in place.
2. Either remove the main base from the saw, or remove the
sawblade.
3. Press down on the back of the release tab and slide the
base insert forward about 1/2 inch.
4. Lift the base insert off the main base to remove it.
Installing/Removing the Dust Collection Port
The dust port is used to connect a dust extractor to the jigsaw.
It may be used with the standard base or the guide rail base.
However, the dust port cannot be used with the angled base.
To remove the dust port from the base, press down on the
release tab and slide the port out from the base.
To install the dust port, slide it into the base until the release tab
clicks into place.
Changing the Main Base
Three bases are available for the Jigsaw. The bases can be installed and removed without tools.
Standard Base:
The standard base is used to mount any of the optional base inserts. The standard base can be
used with the dust collection.
Guide Rail Base: Also called the adapter base, is used to guide the saw using either a Festool
guide rail, or the Festool trammel (for cutting circles). The guide rail base can be used with dust
collection.
Angle Base: The angle base is used for making bevel cuts with the jigsaw. The two pads can be
angled from +45° to -45°. The Angle base cannot be used with dust collection.
Festool JigsawPage 7
1. Unplug the saw or remove the battery to prevent accidental
startup.
2. Rotate the base release lever outward until the clamp is clear
of the main base.
3. Lift the main base off the bottom of the saw.
NOTE: Make sure the guide rail base is installed parallel with the
blade by wiggling it side to side before
closing the release lever. If it is installed with a slight skew to the saw blade, it may cause the saw
to drift off the cutting line when using the saw with a guide rail or trammel.
WARNING! Always disconnect the saw from the power supply (power cord or battery) before
making any adjustments to the saw or installing or removing the blade.
Installing/Removing the Battery
To install the battery, slide it into the receptacle on the rear of the saw until
it clicks into place. To remove the battery, press in on both left and right
release buttons, and slide the battery out of the receptacle.
Setting the Pendulum Stroke
A pendulum jigsaw moves the blade in an orbital motion. On the downstroke, the blade is guided
away from the cut, and on the upstroke, the blade is guided toward the cut.
The Jigsaw has 4 settings for the pendulum stroke, ranging from a wide orbit to no orbit
(straight up and down). Because a jigsaw cuts only on the upstroke, this orbital type of motion is
more efcient.
The orbital motion allows the saw to cut more aggressively and improves
the life of the blade. However, the larger the orbit and more aggressive the
cut, the rougher the cut may be.
To change the pendulum stroke, rotate the lever to settings 0 (off) through
3 (maximum orbit). The lever/setting may be changed regardless whether the
saw is running or not.
Use a larger orbit (higher number) for aggressive
cutting in softer materials. Use a smaller orbit, or no
orbit, for harder materials such as harder woods or
when smoother cuts are desired. Also, when cutting
thinner materials, a lower orbit setting may produce
better results. The pendulum stroke should be set to
zero when using a tungsten carbide blade.
Festool JigsawPage 8
Installing the Splinter Guard
The clear plastic splinter guard serves as a zero-clearance throat along the blade to reduce
splintering of the topside of the workpiece. The splinter guard is a consumable component that is
replaced when it wears or when blades of different thicknesses are used.
1. Unplug the saw or remove the
battery to prevent accidental starting.
2. Rotate the pendulum stroke lever to
the zero position as shown above.
3. Slide the plastic splinter guard onto
the ribs on the main base, but not far
enough to touch the blade.
4. Turn the saw on, and press the front of the splinter guard against a table to allow the sawblade
to cut into the splinter guard as it slides the rest of the way on the base.
5. For added life, as the splinter guard wears, you can push it farther back into the base until the
gap is gone.
Setting the Variable Speed
To set the speed of the saw, rotate the speed dial to the desired setting. The speed may be
adjusted while the saw is running.
The more you press in on the variable trigger, the faster the saw will operate, until it reaches the
speed setting of the speed dial.
The optimal speed of the saw is somewhat subjective, but is predominately determined by the type
of material being cut.
The actual speed that delivers the best results for a specic cut may depend on other factors, such
as blade type, workpiece
brittleness, desired smoothness of cut, etc. The table provides a general guideline for blade
speeds, but your actual speeds may vary (“A” indicates maximum speed).
Festool JigsawPage 9
Turning the saw On & Off
The saw has power switches on the left and right side of the main
housing.
The saw also has a variable speed trigger in the handle.
To use the power switches on the barrel, slide either switch forward
to start the saw, and then release the switch. The saw will continue
to run until you slide either of the switches forward again. Practice
your hand positioning on these switches with the saw off
before cutting for the rst time.
The speed of the saw will be determined by the speed control
dial described above.
It is not necessary to hold the switch forward while the saw is
running.
Either switch may be used to turn the saw on or off.
To use the variable speed trigger, press in on the trigger
release and pull up on the trigger.
The speed of the saw will be controlled by how much the trigger is pulled, but the speed control dial
determines the maximum available speed.
It is not necessary to continue to hold the trigger release button, but it is necessary to continue to
hold the variable trigger depressed for the saw to run.
The automatic speed control function is not available when the trigger is used.
Sawblade Selection
The shank of Festool sawblades are color coded according to their general usage intention. These
colors are listed below. The specialty blades are an exception in that each blade will have its own
special purpose and material type. These include carbide tipped blades, ceramic cutting blades,
and serrated foam blades.
• Using Dust Extraction
To use the dust extraction system, install the dust collection port seen above.
Festool JigsawPage 10
Dust extraction
Attach the hose of the extraction to the dust collection port securely.
Remember the extraction will need to be set to manual as the tool is powered by battery.
Keep the extraction hose over your shoulder so you don’t trip on it as you move with the saw.
Using the Jigsaw with a Guide Rail
When the optional guide rail base is installed on the
jigsaw, the saw may be used with a Festool guide rail
for performing straight cuts.
The distance from the rear edge of the guide rail to the
center of the blade is approximately (35mm).
1. Install the optional guide rail base
2. Position the guide rail parallel to the desired cut line,
and 1⅜” (35mm) away from the center of the cut. Note,
you will need to subtract ó the thickness of the blade
to set the distance to the edge of the cut instead of the
center of the cut.
3. Clamp the guide rail to the workpiece.
NOTE: The body of the jigsaw does not press down on the guide rail. To reduce the chance of
slipping, it is recommended to clamp the guide rail.
4. Place the jigsaw base over the rear T-slot of the guide rail and perform the cut as normal.
Using the Trammel to Cut Circles
The optional circle cutter (trammel) permits the jigsaw to cut circular holes in a workpiece from the
minimum and maximum sizes shown in the table.
1. Identify the location of the center of the arc or
circle you wish to cut.
2. Drill a 4mm (5/32”) hole at the center of the
arc or circle.
3. Loosen the clamping knob and extend the tape measure until the index pointers are pointing to
the desired radius. The radius is 1/2 the diameter of a circle.
Festool JigsawPage 11
4. Retighten the clamping knob.
5. Insert the trammel point pin through the trammel point of the
circle cutter, and into the hole you drilled into the workpiece
above.
There are 2 trammel points on the circle cutter. One is for
clockwise rotation and the other for counterclockwise rotation.
Use the trammel point that is directly across from the sawblade
when the circle cutter is mounted to the jigsaw.
6. Install the desired sawblade into the saw.
7. Install the guide rail base on the saw as described on
8. If you are cutting a full circle, you will need a starting point
for the sawblade that lines up with your circle.
8a. Using a pencil and the cutting indicator, trace out a
portion of the circle where you will manually begin cutting.
8b. Drill a hole on the waste-side of your circle large enough
to insert the sawblade into.
8c. Use this starting hole to manually begin cutting the circle
just enough to get the sawblade lined up with the cut.
9. Place the jigsaw onto the circle cutter and continue with
the cut.
10. Before completing the cut, make sure that both the waste
piece and the saved piece are supported.
Making Bevel Cuts
Bevel cuts may be made with the optional angle base. The angle base provides bevel angles up
to 48° to the left and to the right. It can also function on both inside and outside corners for edge
registration.
Festool JigsawPage 12
To adjust the bevel angle, rotate the adjustment knob on the
rear of the angle base. Rotating the knob clockwise raises
the bevel feet. Rotating the knob counterclockwise lowers
the bevel feet.
For setting the approximate angle, the angle base includes
a built-in angle indicator that shows the angle between the
base and the blade.
The best way of setting the bevel angle is to set the angle between
the left and right bevel feet. The angle between the bevel feet will be
twice the bevel angle.
Housekeeping
Before starting any cleaning, disconnect the tool from the power
supply.
You may need to intermittently stop operations to clean away dust build from the area of work and
the tool.
The tool should be cleaned after every use. Use a vacuum with the brush attachment for the
outside of the tool. For safe and proper working, always keep the machine and ventilation slots
clean.
Never used compressed air to clean the tool. This will cause dust to be pushed into the atmosphere
for you and others to breath in as well force dust into the motor and xings of the tool.
Ensure the tool and accessories are placed back where they belong.
Do not leave tools out. If you are unsure where tools are stored, please speak to a technician.
Tips
• Protect high gloss nishes by covering your cutting area with masking tape.
• To cut from the center of a workpiece, drill a hole to start from. This will also help to go round
right angled corners, allowing you to rotate the blade freely
• Control your speed, the harder the material, the slower the speed should be. This will help
reduce strain on the blades.
• Bring the jig saw up to speed before engaging with the material. This will help prevent kickback.
• When cutting metal, sandwich it between two pieces of scrap wood to prevent shredding
• Jigsaws can give a rought nish to your cut as it cuts on the upwards pull, unlike a bandsaw or
circular saw. Finer tooth blades will reduce this but it is always best to cut outside your line to
leave room for nishing
• Corners can be tricky with a jigsaw, instead of forcing the blade round, reverse and adjust the
angle bit by bit.

Other manuals for Carvex PSB 420 EBQ

1

This manual suits for next models

3

Other Festool Power Tools manuals

Festool Domino XL DF 700 EQ User manual

Festool

Festool Domino XL DF 700 EQ User manual

Festool OF 1400 EQ User manual

Festool

Festool OF 1400 EQ User manual

Festool RG 150 E Installation instructions

Festool

Festool RG 150 E Installation instructions

Festool OF 1010 EQ User manual

Festool

Festool OF 1010 EQ User manual

Festool Domino DF 500 User manual

Festool

Festool Domino DF 500 User manual

Festool Carvex PS 420 EBQ Installation instructions

Festool

Festool Carvex PS 420 EBQ Installation instructions

Festool MFK 700 EQ User manual

Festool

Festool MFK 700 EQ User manual

Festool 1400 EQ User manual

Festool

Festool 1400 EQ User manual

Festool BG-RG 150 Installation instructions

Festool

Festool BG-RG 150 Installation instructions

Festool Trion PS-300Q User manual

Festool

Festool Trion PS-300Q User manual

Festool PSB 400 EBQ User manual

Festool

Festool PSB 400 EBQ User manual

Festool Domino DF 500 Q User manual

Festool

Festool Domino DF 500 Q User manual

Festool Carvex PSC 400 EB User manual

Festool

Festool Carvex PSC 400 EB User manual

Festool Duplex LS 130 EQ Installation instructions

Festool

Festool Duplex LS 130 EQ Installation instructions

Festool CARVEX PSBC 420 Installation instructions

Festool

Festool CARVEX PSBC 420 Installation instructions

Festool PF 1200 E User manual

Festool

Festool PF 1200 E User manual

Festool LR 32-SYS User manual

Festool

Festool LR 32-SYS User manual

Festool OFK 700 EQ User manual

Festool

Festool OFK 700 EQ User manual

Festool Trion PS-300Q User manual

Festool

Festool Trion PS-300Q User manual

Festool Carvex PSC 400 EB User manual

Festool

Festool Carvex PSC 400 EB User manual

Festool Duplex LS 130 EQ Manual

Festool

Festool Duplex LS 130 EQ Manual

Festool OFK 500 Q User manual

Festool

Festool OFK 500 Q User manual

Festool Domino XL DF 700 EQ Installation instructions

Festool

Festool Domino XL DF 700 EQ Installation instructions

Festool PSC 420 EB Installation instructions

Festool

Festool PSC 420 EB Installation instructions

Popular Power Tools manuals by other brands

Toolzilla TZ18PRO Digital Instruction Manual

Toolzilla

Toolzilla TZ18PRO Digital Instruction Manual

ACDelco ARW1201 8S Product information manual

ACDelco

ACDelco ARW1201 8S Product information manual

Parkside PDSP 1000 A1 SANDBLASTER GUN Operation and safety notes

Parkside

Parkside PDSP 1000 A1 SANDBLASTER GUN Operation and safety notes

Makita DHR242 instruction manual

Makita

Makita DHR242 instruction manual

Wacker Neuson BS 60-4s Operator's manual

Wacker Neuson

Wacker Neuson BS 60-4s Operator's manual

Guild PSJ750GH instruction manual

Guild

Guild PSJ750GH instruction manual

Ryobi R18JS Original instructions

Ryobi

Ryobi R18JS Original instructions

Clarke CCT48 Operation & maintenance instructions

Clarke

Clarke CCT48 Operation & maintenance instructions

Clarke CMPS2 Operation & maintenance instructions

Clarke

Clarke CMPS2 Operation & maintenance instructions

National Flooring Equipment 5200QL OPERATING & SERVICE MANUAL

National Flooring Equipment

National Flooring Equipment 5200QL OPERATING & SERVICE MANUAL

Cocraft Pro Edition JT18-P Original instructions

Cocraft

Cocraft Pro Edition JT18-P Original instructions

Paslode SCS200 Operating manual and schematic

Paslode

Paslode SCS200 Operating manual and schematic

Parker Karrykrimp 2 Technical manual

Parker

Parker Karrykrimp 2 Technical manual

Maruzen DH205 operating manual

Maruzen

Maruzen DH205 operating manual

Makita TM3010C instruction manual

Makita

Makita TM3010C instruction manual

Beta 599 DGT/6 instructions

Beta

Beta 599 DGT/6 instructions

Jet JAT-301 Operations & parts manual

Jet

Jet JAT-301 Operations & parts manual

Westfalia 92 86 28 Original instructions

Westfalia

Westfalia 92 86 28 Original instructions

manuals.online logo
manuals.online logoBrands
  • About & Mission
  • Contact us
  • Privacy Policy
  • Terms and Conditions

Copyright 2025 Manuals.Online. All Rights Reserved.