manuals.online logo
Brands
  1. Home
  2. •
  3. Brands
  4. •
  5. Festool
  6. •
  7. Saw
  8. •
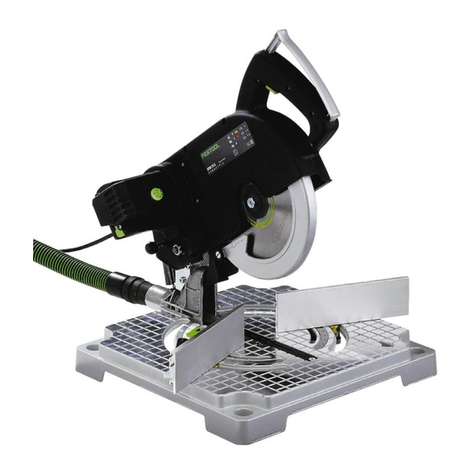
  9. Festool KS 120 KB User manual

Festool KS 120 KB User manual

Mitre SawPage 1
Tool Description
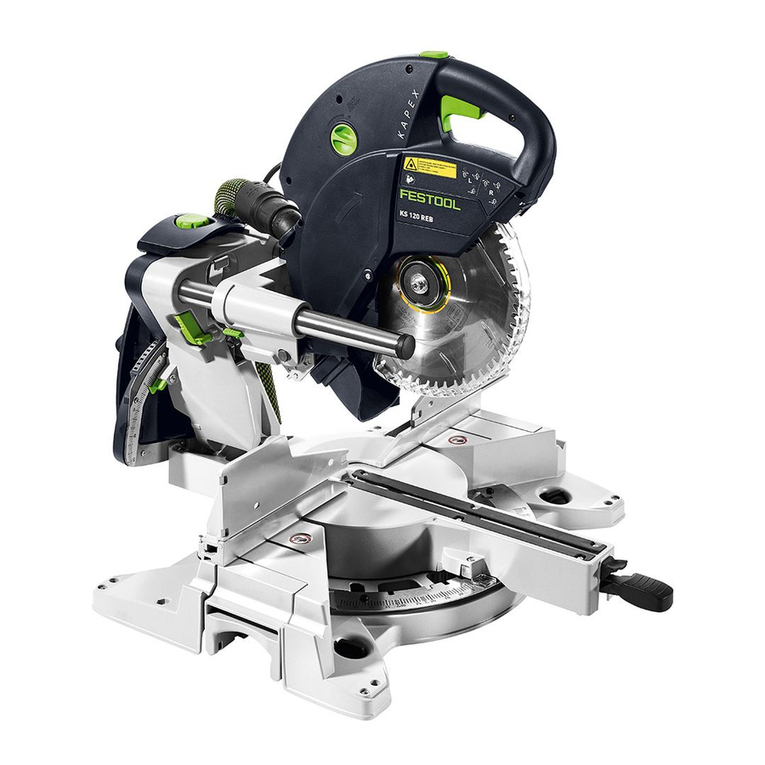
A miter saw is a specialized tool that lets you make cuts at a variety of
angles. The saw has a blade mounted on a swing arm that pivots left
or right to produce angled cuts.
General Tool Safety
PPE
Always wear eye protection.
• Wear a dust mask were appropriate
• Wear hearing protection
• DO NOT wear gloves
• Do not wear loose clothing.
• Remove Jewellery.
• Keep hair tied up.
Consider those working around you, inform them before starting the equipment so they can
use relevant PPE, ensure there are no trip hazards and reassess the area once all cables and
extraction hoses are connected.
Do not use a power tool while tired or rushed. A moment of inattention and incorrect use of PPE
while operating power tools may result in serious personal injury and or death.
Power Tool Use and Care
Do not force the power tool. Correct settings will do the job better and more safely at the rate for
which it is designed.
Do not use the power tool if the switch does not turn it on and off. Any power tool that cannot
be controlled with the switch is dangerous and must be brought to the attention of a technician
before further use.
Use sharp and clean cutters. If the cutting tool looks blunt, worn or chipped, bring this to the
attention of a technician before continuing. Properly maintained tools with sharp cutting edges are
less likely to bind and are easier to control.
Check material condition before cutting. Remove any foreign objects such as nails or screws
from the material to prevent damaging the tool and its cutters. Do not use green or wet wood as the
water and sap content can damage the tool and its cutters.
Mitre SawPage 2
Specic Safety Rules for the Mitre Saw
Be certain the mitre saw is mounted or securely placed on a level, rm work surface before
using. A level and rm work surface reduces the risk of the miter saw becoming unstable or tipping.
Make sure all controls and clamping handles are secured before starting any operation.
Unsecured clamps or adjustment handles can cause the saw and/or workpiece to move
unexpectedly.
Never remove or disable the blade guard. Inspect the blade guard before use. If the guard is not
functioning correctly do NOT continue any operations and speak with a technician.
Use clamps to support workpiece. Use clamps to support workpiece whenever possible. Do not
use this saw to cut pieces that are too small to be securely clamped. Clamp the offcut side of the
workpiece when using a length stop. An unsecured offcut can bind between the length stop and the
saw blade.
Keep hands out of the path of the sawblade. Never cross your hand over intended line of
cutting.
For proper control, never “pull” the saw through the cut, always chop or push cut
Cut only one workpiece at a time. Multiple workpieces cannot be adequately clamped or braced
and may bind on the blade or shift during cutting.
Keep workpieces rmly against the rear fence when cutting. Never cut workpieces that do not
lay at or are curved in any way. A curved workpiece can be grabbed by the blade and propelled
back against the fence.
Mitre SawPage 3
Functional description
The Mitre saw is intended to cut wood, plastic, aluminum, and similar materials. Using the tool in
contravention to this induction may lead to injury and/or death.
Mitre SawPage 4
Functional description continued
Mitre SawPage 5
Dust Extraction
Connect the saw to a dust extractor to reduce dust during operations on wood.
NOTE Extraction must NOT be used when cutting Aluminium.
Ensure the dust extraction port is facing away from others who are working in the space.
Plug the power tool cable into the front of the extractor and set to full suction and Auto.
Operation
Setting the Motor Speed The optimal speed of the saw is predominately determined by the type
of material being cut. Turn the speed control dial to the number shown in the table to the left. The
speeds listed in the table are just rough guidelines, and actual results may vary.
Laser Guide
CAUTION! Laser Radiation. Do not look directly into the laser beam.
The laser system scans across the path of the sawblade to indicate
where the blade will cut the workpiece.
The two laser beams shine down on the workpiece on either side of
the sawblade. The sawblade will cut the workpiece between the two
laser lines.
To turn on the laser, press the On/Off button on the rear of the motor
near the speed control dial. Pressing the button a second time will
turn the laser off. The laser will also automatically shut off if left on for
more than approximately 30 minutes.
Mitre SawPage 6
Power Trigger and Plunge Release
The power trigger turns on the saw but also releases the motor head
to plunge downward. To help prevent accidental starting of the saw,
the trigger lock must be pushed to release the trigger to power the
saw.
To start the saw (activate the sawblade), press the trigger lock and
squeeze the trigger. The saw head can then be plunged downward.
To plunge the saw head down without starting the saw, squeeze the
power trigger, but do not press the trigger lock.
Using the Hold Down Clamp
The hold down clamp ts in a socket on either the left or right sides of the saw. To insert or remove
the clamp, rotate it to the rear to unlock it from the socket, as shown in the rst image below. To
lock the clamp in its socket, rotate it to the forward position, as shown in the centre image below.
To secure the workpiece, press down on the green knob and rotate the locking handle down, as
shown in the image on the right, below. To release the clamp, rotate the locking lever up.
Setting the Mitre Angle
A mitred cut is where the saw head is rotated side-to-
side. The saw is capable of mitring 50° to the left and 60°
to the right. Positive stops are located at 0, 22½, 30 and
45°.
1. Release the mitre lock by lifting up on the handle.
2. Press down on the mitre stop release lever and rotate
the mitre to the desired angle.
Mitre SawPage 7
To stop at the one of the preset lock positions, release the mitre stop lever just before reaching the
angle, the mitre stop will click as it locks into position. Can you change the spelling of Mitre in the
caption?!
To set the mitre angle to ½ degree between the primary
angles, line up the ½° Vernier indices with the adjacent
angle index marks. (The example below shows 20 ½°)
3. When the desired mitre angle is set, engage the mitre lock by pressing down on the mitre lock
lever.
Setting the Bevel Angle
A beveled cut is where the saw head is tilted to the left or right from vertical. The saw is capable of
beveling up to 47° to the left and right.
The bevel range selector engages a series of angle stops. The selector has three settings. The rst
setting, (0-45°) limits the bevel travel between 0 degrees and 45 degrees to the left. The second
setting (±45°) limits the bevel travel between 45 degrees to the left and 45 degrees to the right. The
last setting (±47°) limits the bevel travel to the full extent of the saw, which is 47 degrees to the left
and to the right.
1. Release the bevel lock by lifting the lever.
2. As necessary, turn the bevel range selector to the desired range.
3. Rotate the bevel adjustment knob until the bevel index pointer is pointing to the desired angle.
(There is a duplicate pointer on either side of the saw.)
4. Lower the bevel lock lever.
Mitre SawPage 8
Using the Auxiliary Fence
The auxiliary fence provides support for taller workpieces. The
two halves of the fence can be pushed towards or away from the
blade or be removed completely. Making beveled cuts requires
the auxiliary fence to be moved away from the blade area.
To move the auxiliary fence, lift the locking lever, slide the fence,
then lower the locking lever.
To remove the auxiliary fence, lower the limit screw by turning it clockwise, then slide the fence out
of the retaining slot.
Setting the Depth Limit
The depth limit is used for making partial cuts that do not cut all the way through the workpiece.
When the depth limit is engaged, the sawblade’s vertical travel is limited from going below the
preset height.
The height is easily adjustable by turning the depth limit knob. Turning the knob clockwise ¼-turn
raises the sawblade by approximately 1mm, and turning it counterclockwise lowers the sawblade.
To engage the depth limit, pull the knob forward. To disengage the depth limit, push the knob back.
Housekeeping 1010 (Small) & 1400 (Large)
It’s important that once you have nished your operation, you clean the tool sufciently and
replace all the components to the designated storage space. If you are unsure where items live,
please speak with a technician. Do Not leave them out or place them randomly in the Makerspace
cupboards.
To reduce the risk of electrocution or other personal injury, always unplug the tool from the power
supply outlet before performing any maintenance or cleaning work on the tool.
Mitre SawPage 9
Keep the tool clean.
Dust and debris from some materials can be extremely abrasive and cause components within the
tool to wear prematurely. It is important to keep moving parts cleared of abrasive dusts. Wood dust
can attract atmospheric moisture and corrode the cutters and its xings.
Dust down the saw with the extraction and the brush attachment once nished. Do Not use
compressed air to clean the saw as this will put ne dust particles into the atmosphere for others
and yourself to breath in. You can also inject foreign objects into the motor through the ventilation
openings.
Cutting Techniques
There are two basic cutting
techniques for sliding mitre saws.
These are Chop-Cut, Push-Cut.
Never pull cut.
Chop-Cut
A chop-cut is used for cutting
narrow or tall stock, where the
front edge of the workpiece is
behind the centre of the sawblade.
For this type of cut, the saw head
is brought straight down into the
cut.
Push-Cut
A push-cut is used for cutting wider boards, but is also usable in most situations where a chop-
cut could be used. For this type of cut, the saw head is pulled out toward the operator, plunged
downward, and the primary cutting of the workpiece occurs as the saw head is being pushed back
toward the rear of the saw.
For more accurate cuts, mark your cutting length with a thin pencil line. A thick line will result in a
less accurate cut length.
• When tting one piece to another, it may be helpful to make the initial cut slightly long, then
sand the cut to the nal length after test-tting the piece.
• When cutting a new board, cut off the original factory end to ensure a square, fresh end, before
measuring for your nal length.
• When cutting multiple pieces of varying lengths from a limited supply of stock, always cut the
longest pieces rst, and cut the remaining pieces from the leftovers.
• Do not force the blade through the cut. A cleaner edge will be achieved with a steady, moderate
feed rate.
• A chop-type of cut yields the lowest tear out on the front and top edges of the cut, but the most
tear out on the rear side of the cut.
• A push-type cut yields moderate tear out on the top surface, but the best cut edge.
Other Festool Saw manuals

Festool TS 75 EQ User manual

Festool

Festool TS 75 EQ User manual

Festool AXT 50 LA User manual

Festool

Festool AXT 50 LA User manual

Festool AT 65 E User manual

Festool

Festool AT 65 E User manual

Festool TKS 80 EBS User manual

Festool

Festool TKS 80 EBS User manual

Festool KAPEX KS 120 EB Installation instructions

Festool

Festool KAPEX KS 120 EB Installation instructions

Festool HKC 55 EB User manual

Festool

Festool HKC 55 EB User manual

Festool Symmetric SYM 70 E User manual

Festool

Festool Symmetric SYM 70 E User manual

Festool HK 132 E Installation instructions

Festool

Festool HK 132 E Installation instructions

Festool IS 330 EB Installation instructions

Festool

Festool IS 330 EB Installation instructions

Festool TSC 55 REB User manual

Festool

Festool TSC 55 REB User manual

Festool HK 55 EQ User manual

Festool

Festool HK 55 EQ User manual

Festool TS 75 EQ User manual

Festool

Festool TS 75 EQ User manual

Festool SSU 200 EB User manual

Festool

Festool SSU 200 EB User manual

Festool PRECISIO CS 70 EBG User manual

Festool

Festool PRECISIO CS 70 EBG User manual

Festool PRECISIO Series Installation instructions

Festool

Festool PRECISIO Series Installation instructions

Festool UG-KAPEX KS60 User manual

Festool

Festool UG-KAPEX KS60 User manual

Festool HK 132 E User manual

Festool

Festool HK 132 E User manual

Festool TKS 80 EBS User manual

Festool

Festool TKS 80 EBS User manual

Festool Precisio CS 50 EB Installation instructions

Festool

Festool Precisio CS 50 EB Installation instructions

Festool KAPEX KS 120 EB User manual

Festool

Festool KAPEX KS 120 EB User manual

Festool KA-KS 120 User manual

Festool

Festool KA-KS 120 User manual

Festool PRECISIO CS 50 EBG User manual

Festool

Festool PRECISIO CS 50 EBG User manual

Festool HK 55 EBQ Installation instructions

Festool

Festool HK 55 EBQ Installation instructions

Festool ATF 55E User manual

Festool

Festool ATF 55E User manual

Popular Saw manuals by other brands

Ryobi EBW4023L Owner's operation manual

Ryobi

Ryobi EBW4023L Owner's operation manual

Wellsaw 1270 Operator's manual

Wellsaw

Wellsaw 1270 Operator's manual

Bosch Keo Original instructions

Bosch

Bosch Keo Original instructions

Dimas FS 600 F operating instructions

Dimas

Dimas FS 600 F operating instructions

Belle Minitile 180 Operator's manual

Belle

Belle Minitile 180 Operator's manual

Makita DSD180 instruction manual

Makita

Makita DSD180 instruction manual

wood shark 2275 instruction manual

wood shark

wood shark 2275 instruction manual

Daewoo DALRC18-1 user manual

Daewoo

Daewoo DALRC18-1 user manual

Makita DLS714 instruction manual

Makita

Makita DLS714 instruction manual

ATIKA PTK 250 S Assembly and operating  instruction sheet

ATIKA

ATIKA PTK 250 S Assembly and operating instruction sheet

Flex CSE 55 T operating instructions

Flex

Flex CSE 55 T operating instructions

ATIKA UZT 250 Original instructions

ATIKA

ATIKA UZT 250 Original instructions

Diamond Products CC800M Operator's manual

Diamond Products

Diamond Products CC800M Operator's manual

GYS 051805 manual

GYS

GYS 051805 manual

DeWalt DW876 Original instructions

DeWalt

DeWalt DW876 Original instructions

HIKOKI CD 3605DA Handling instructions

HIKOKI

HIKOKI CD 3605DA Handling instructions

Skil 5750 Operating/safety instructions

Skil

Skil 5750 Operating/safety instructions

Milwaukee SSD 1100 X Original instructions

Milwaukee

Milwaukee SSD 1100 X Original instructions

manuals.online logo
manuals.online logoBrands
  • About & Mission
  • Contact us
  • Privacy Policy
  • Terms and Conditions

Copyright 2025 Manuals.Online. All Rights Reserved.