6
Beginning in August 2003, the control board for the GR-1 & 2 Series grinders was changed. The following
programming instructions apply only to new models with software version 0.9 and above. For earlier
models, see the User’s Guide that was supplied with the unit.
The Programming Instructions are also on a label on the underside of the lower cover.
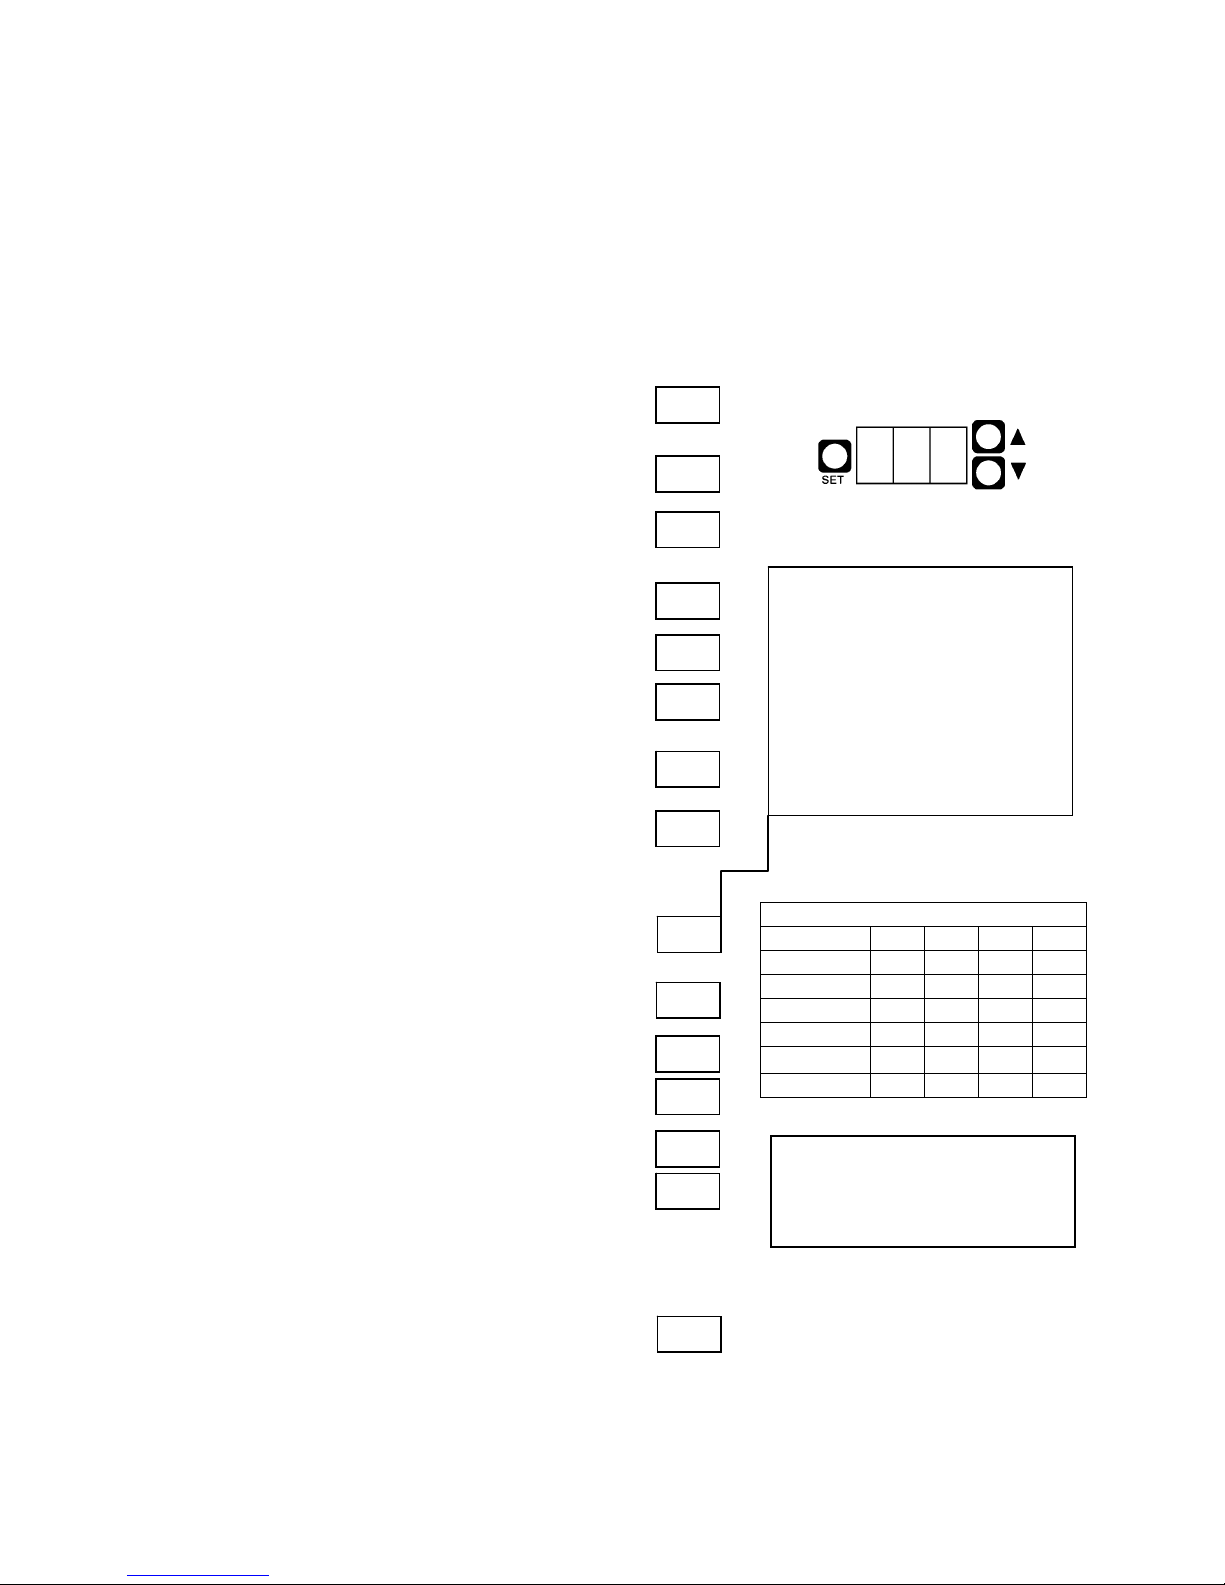
Programming Instructions – Software Version 0.9 and Above
fTurn the power switch off.
fRemove the lower cover.
fTurn the power switch on.
The currently programmed model number will flash
briefly. (example: 12 = GR-1.2, 23 = GR-2.3)
fThen, if the software default settings are currently
programmed, the display will read DEF. If not,
the display will be blank.
fHold SET for 5 seconds, until the display reads SET.
fRelease SET, the software version will be displayed.
(Example: 0.9, 1.0, etc.)
fPress SET. The display will read TYP briefly,
followed by the currently programmed model number.
Press the UP and DOWN buttons until the correct model
number is displayed. (GR-1.2 = 12, GR-2.3 = 23, etc.)
fPress SET. The display will read DEF.
Press SET to skip this section.
To reset the unit to factory default settings, hold SET for
5 seconds, until STO is displayed briefly. This will exit
programming mode. To re-enter programming mode, hold
SET for 5 seconds again.
fPress SET. The display will read DLY briefly,
followed by the current motor delay setting in seconds.
(GR-2.2 & 2.3 only)
Press UP and DOWN to adjust.
fPress SET.The first switch number will be displayed
briefly, followed by the current setting in seconds.
Example: LH1 = Left side small batch, 7.0 seconds
fPress SET. The next switch number will be displayed
briefly, followed by the current setting.
Example: LH2 = Left side medium batch, 13.5 seconds.
fContinue this way until all switches are programmed.
See the chart for switch designations.
fImportant! To save your changes and return to operating
mode, you must hold SET for 5 seconds until the display
reads STo.
23
TYP
SET
DEF
LH1
LH2
7.0
13.5
.
23
DEF
STo
STo
8.0
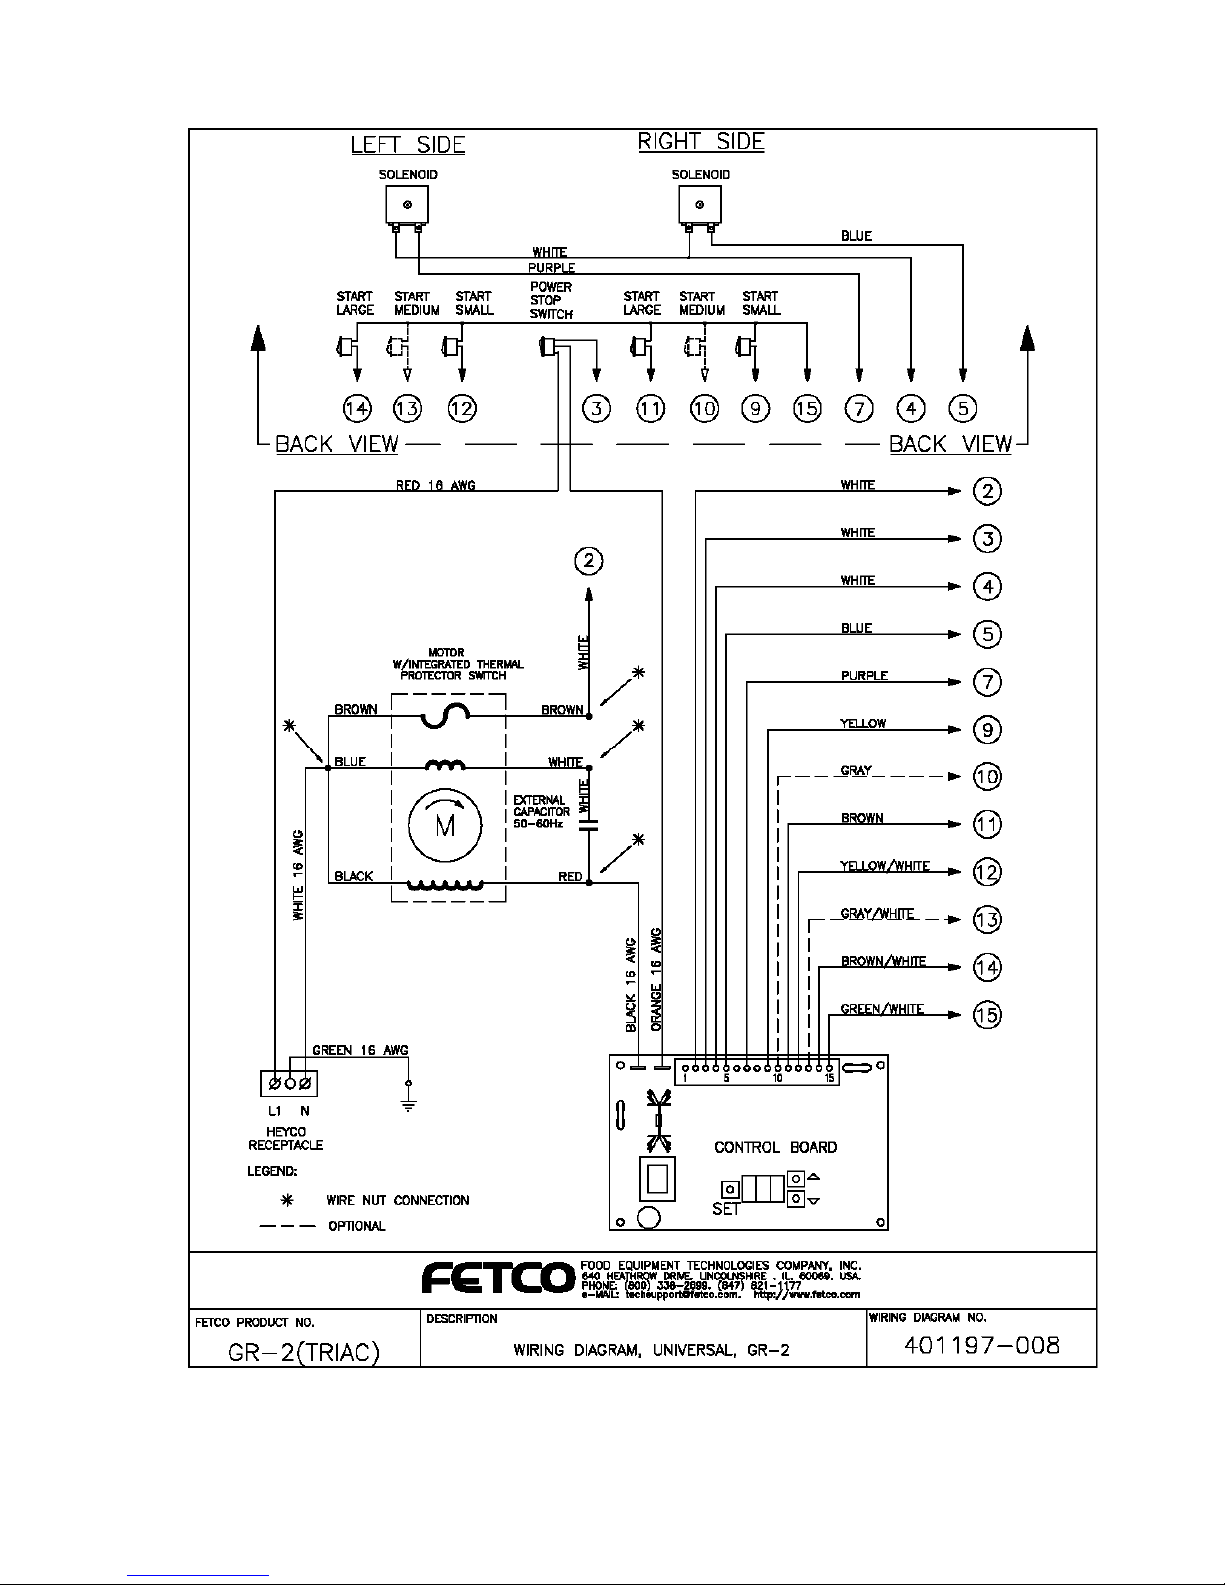
CONTROL BOARD
DLY
MOTOR DELAY
This sets the time that the motor
continues to run after the hopper
doors close on GR-2 series
grinders. This delay ensures
that all beans have passed
through the grind chamber,
preventing cross contamination
of different coffees.
Default setting: 8 sec.
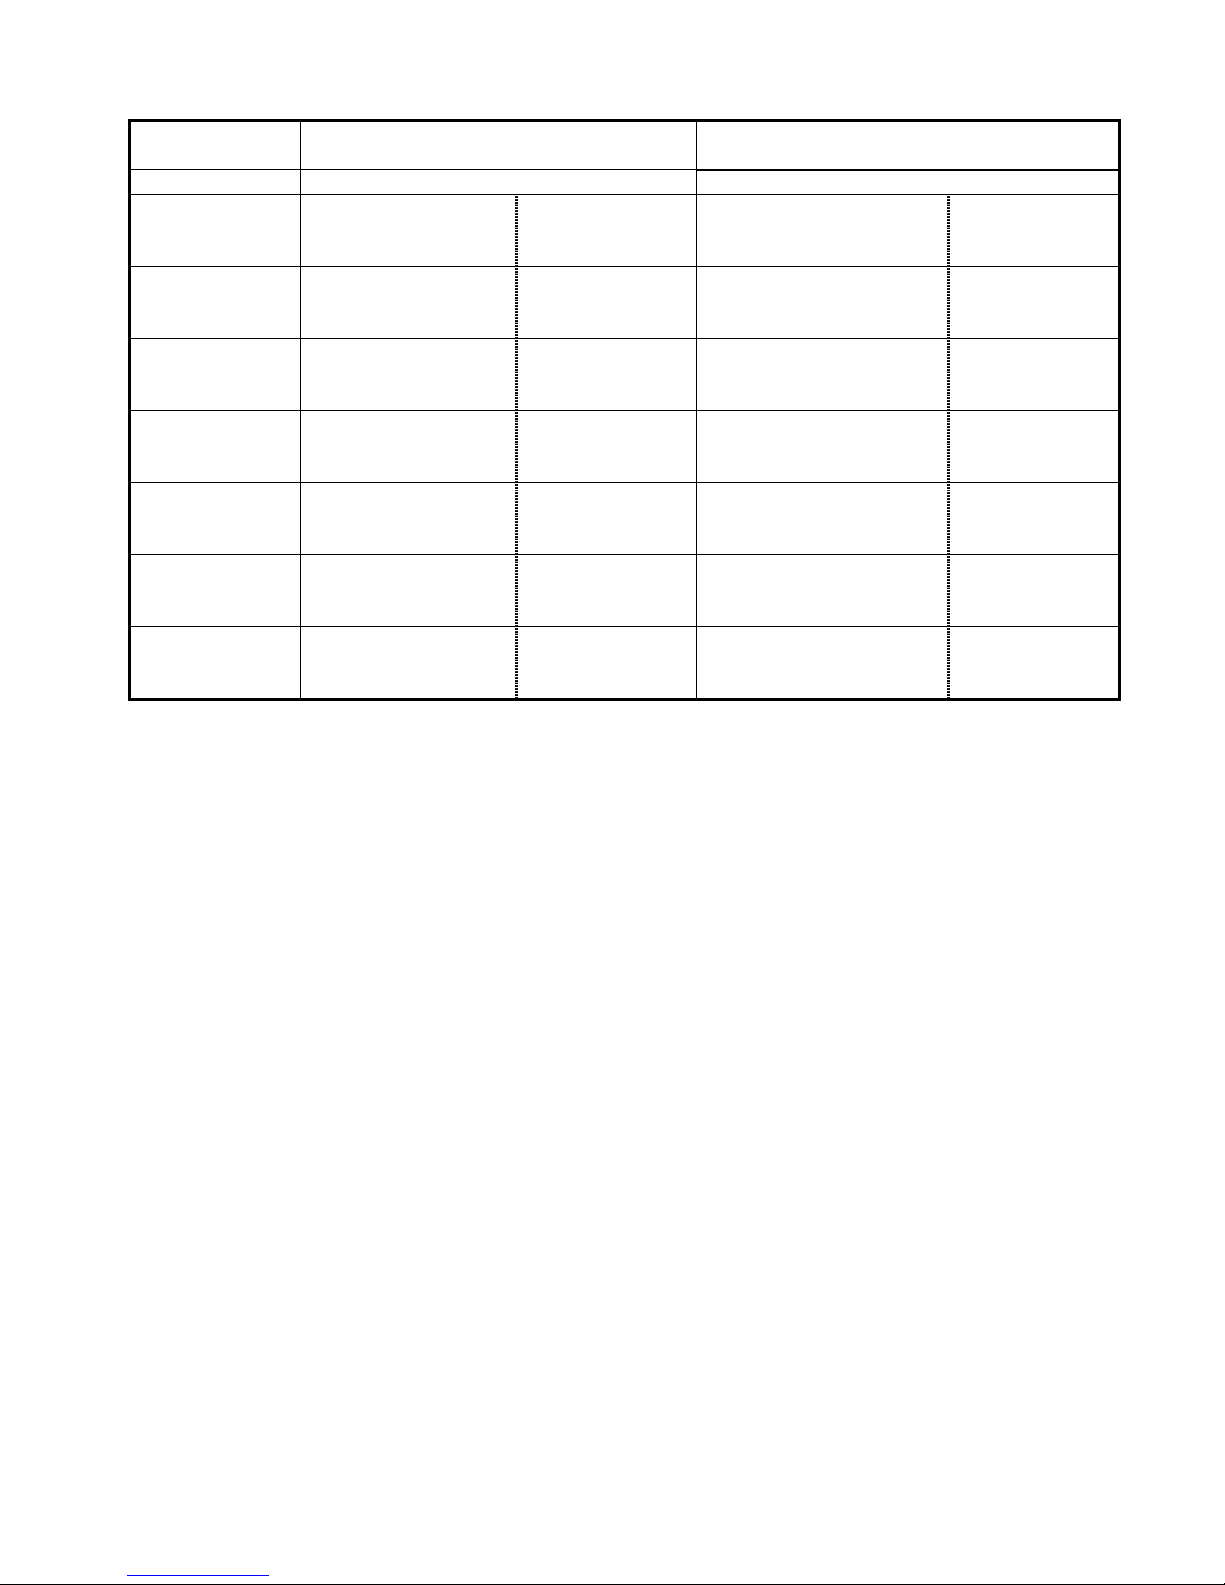
SWITCH DESIGNATIONS
Model GR- 1.2 1.3 2.2 2.3
Left Small LH1 LH1 LH1 LH1
Left Med. LH2 LH2
Left Large LH3 LH3 LH3 LH3
Right Small RH1 RH1
Right Med. RH2
Right Large RH3 RH3
DEFAULT SETTINGS
Small – LH1/RH1 = 7 sec.
Med. – LH2/RH2 = 13.5 sec.
Large – LH3/RH3 = 20.0 sec.