Fiberme FAG410X Instruction Manual

FIBERME Communications LLC.
Configuring FAG410X with FreePBX

P a g e 1
Table of Contents
OVERVIEW..................................................................................................................... 3
CONNECT FreePBX TO FAG410X USING PEER SIP TRUNK .................................... 4
Create IVR On FreePBX............................................................................................................................................4
Create Peer SIP TRUNK On FreePBX.........................................................................................................5
Configure Outbound Rule On FreePBX ..................................................................................................................5
Configure Inbound Rule On FreePBX .....................................................................................................................6
Connect FAG410X with FreePBX............................................................................................................................7
Configure FXO Port on FAG410X.................................................................................................................8
Create Port Group on FAG410X...................................................................................................................9
REGISTER FAG410X ON FreePBX AS AN EXTENSION.................................................10
Create SIP Extension on FreePBX ....................................................................................................................... 10
Configure FAG410X SIP Account as a Registered Extension on FreePBX................................................... 10
FAG410X CALL Routing ............................................................................................. 12
Configure IP to Tel on FAG410X .......................................................................................................................... 12
Configure TEL to IP on FAG410X...............................................................................................................13

P a g e 2
Table of Figures
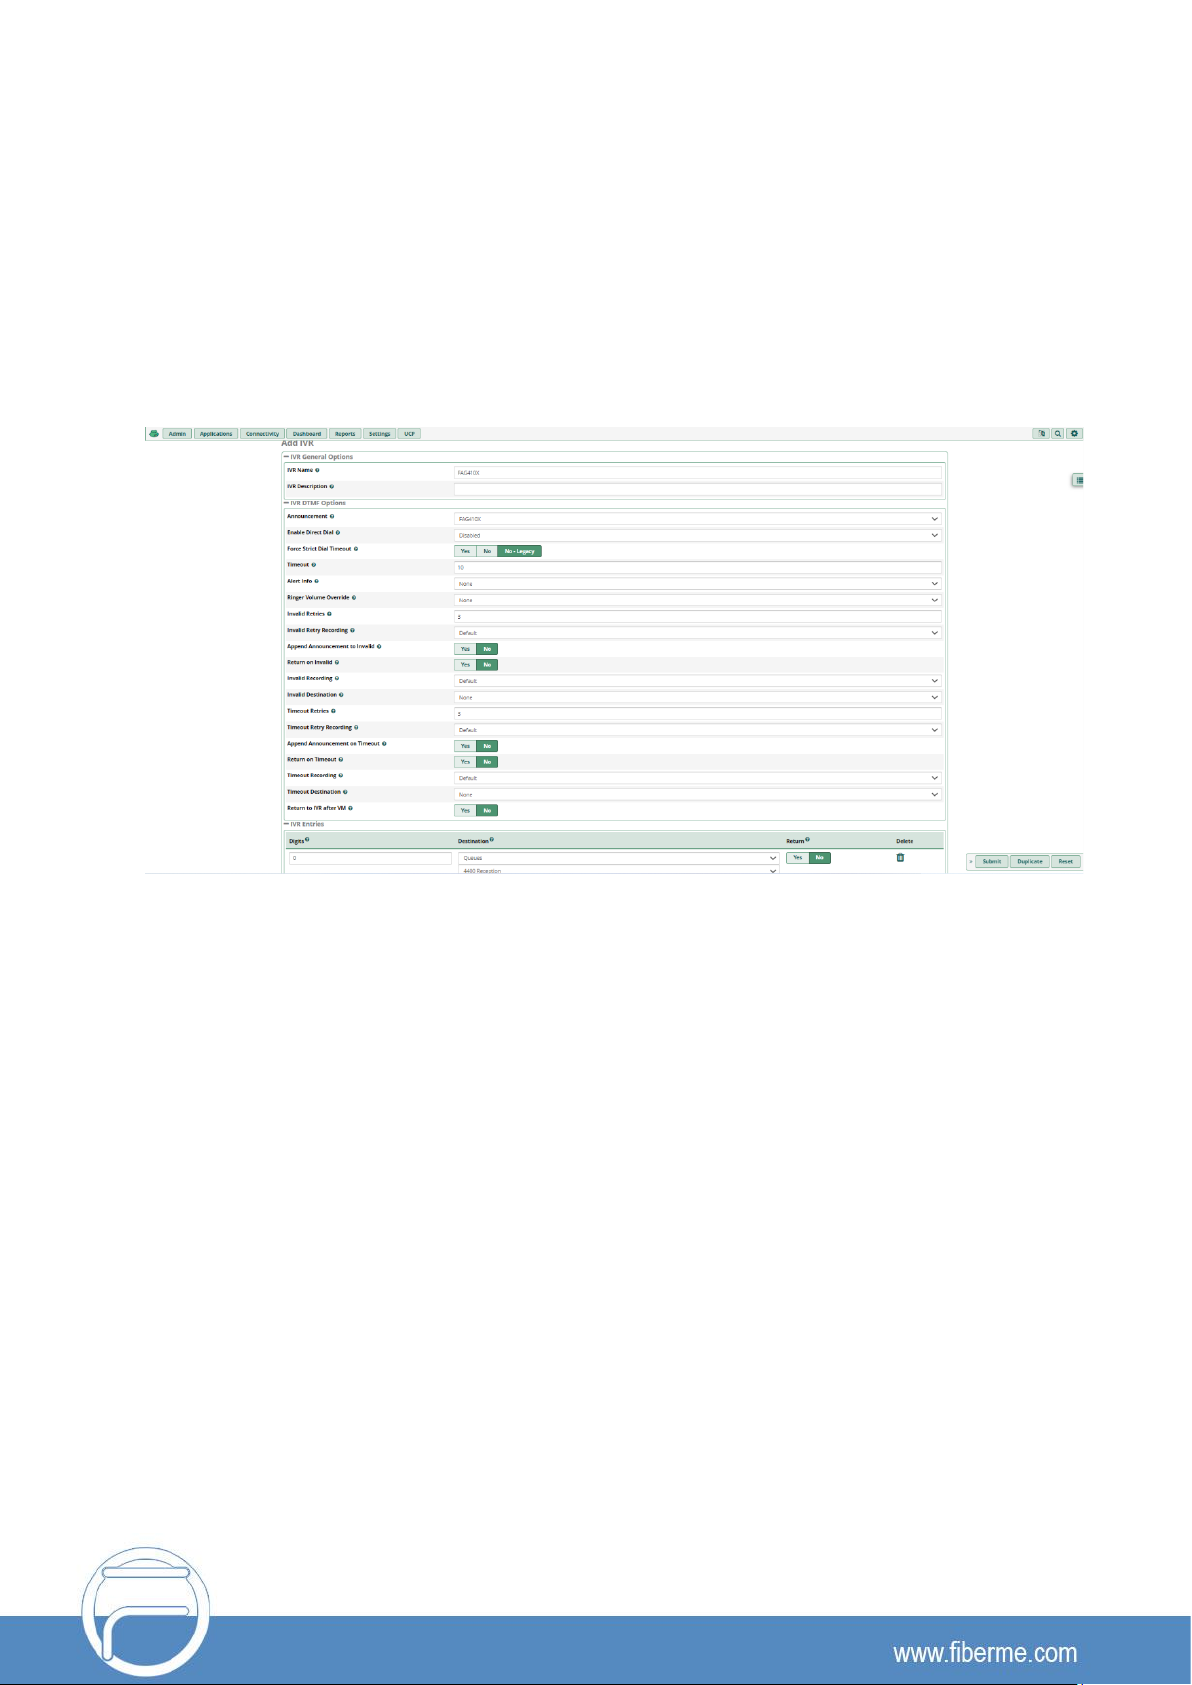
Figure 1: Create IVR on FreePBX..............................................................................................................................4
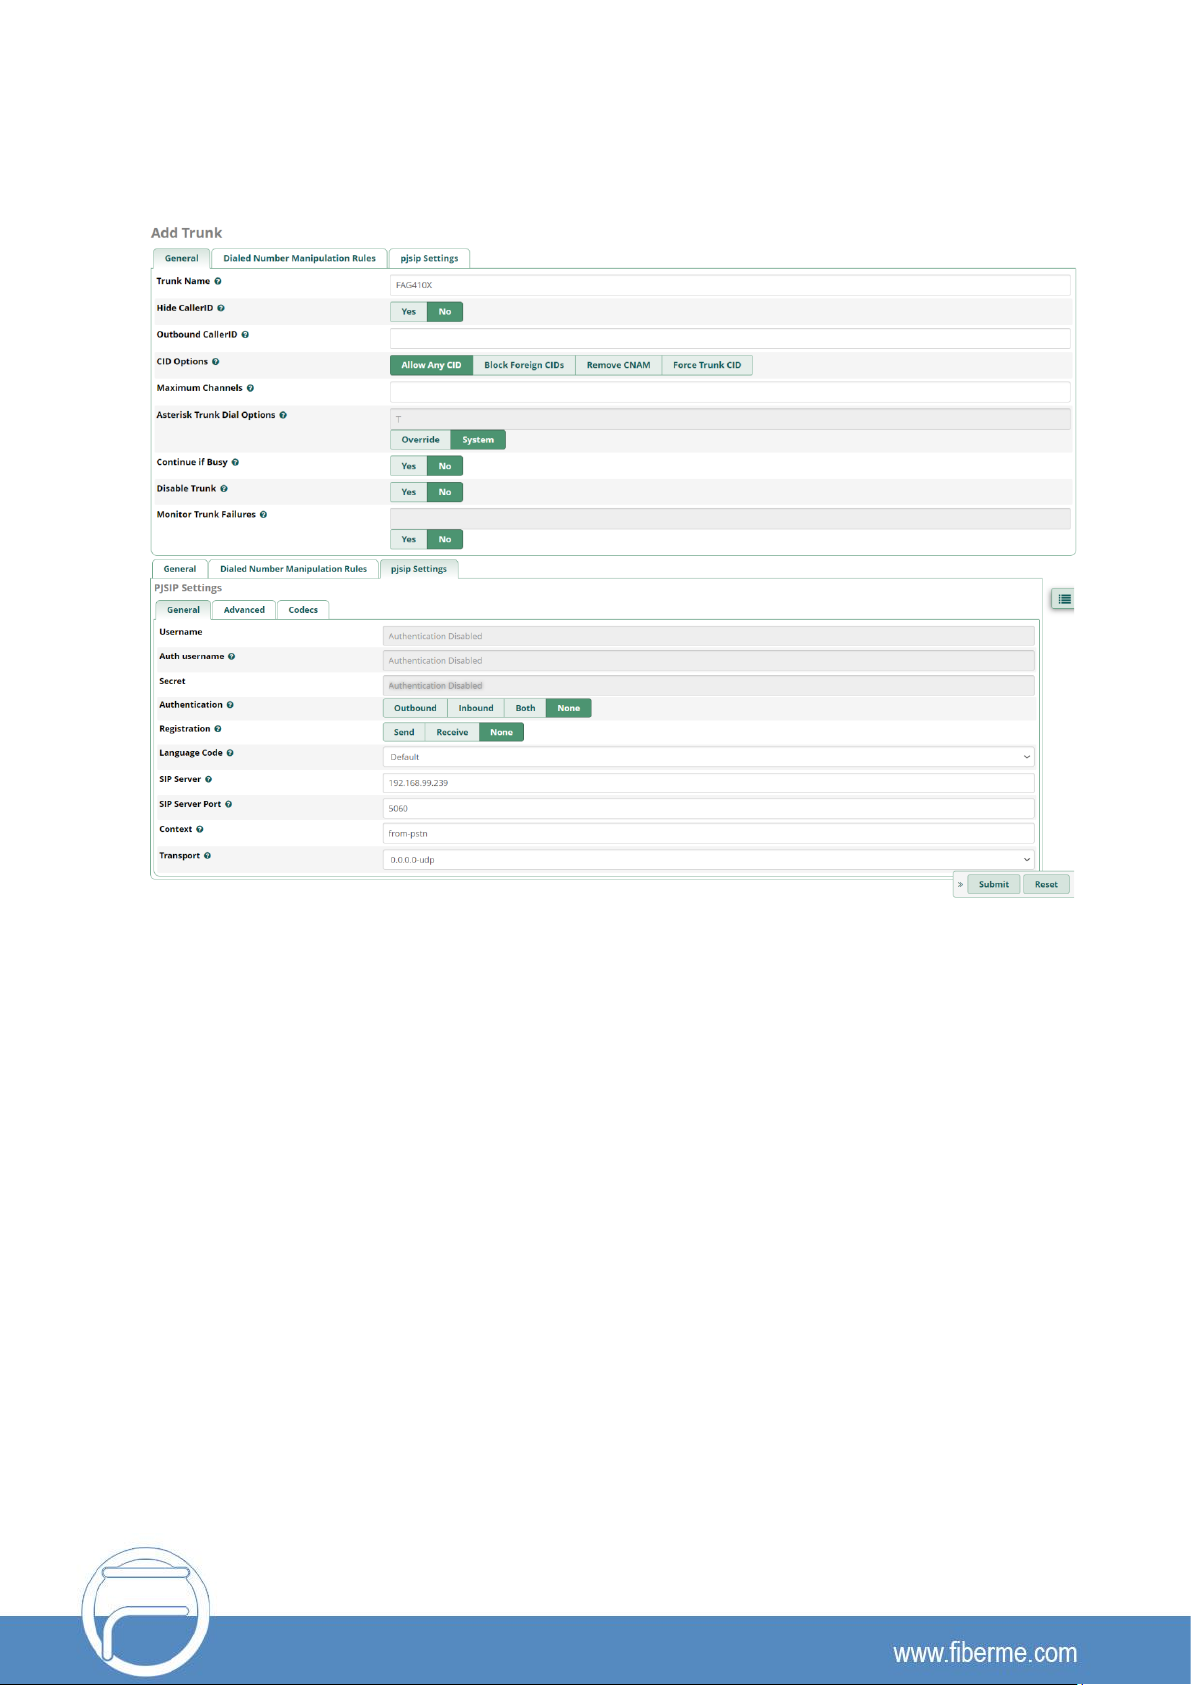
Figure 2: Create Peer SIP Trunk on FreePBX..........................................................................................................5
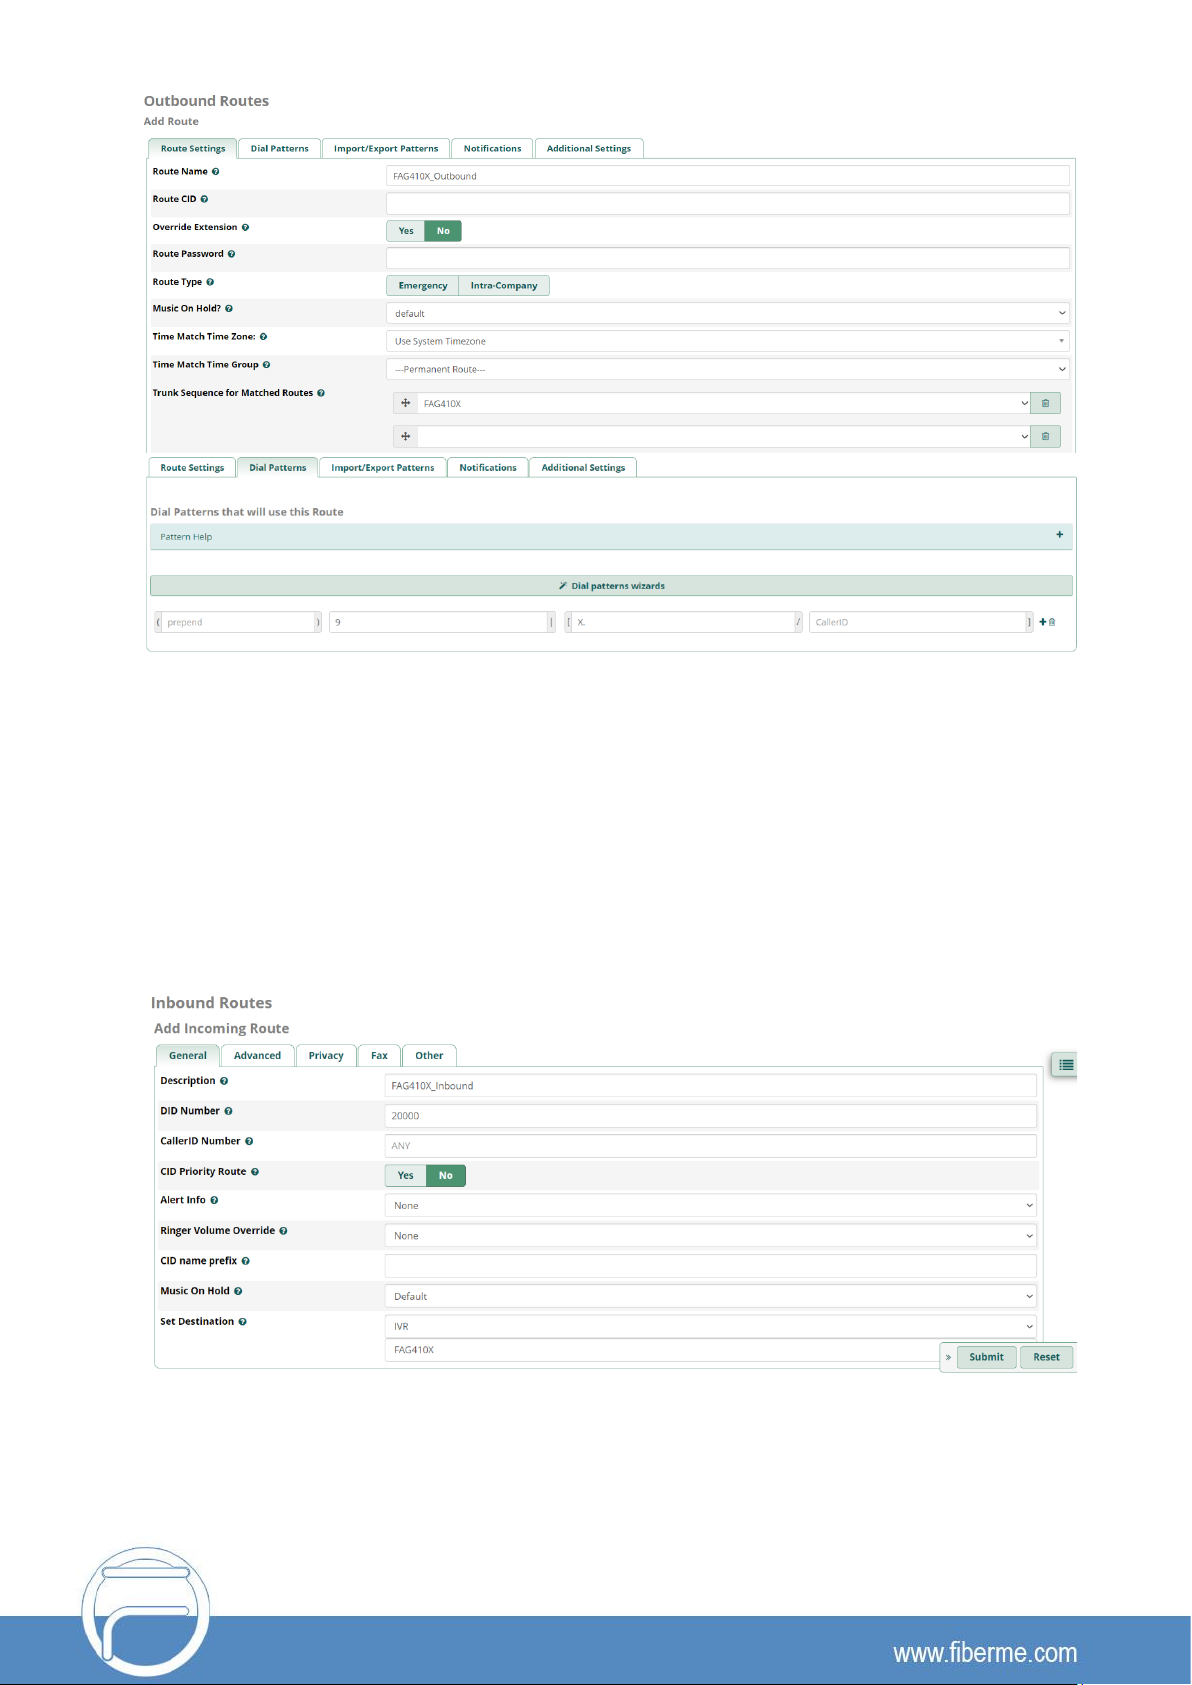
Figure 3: Configure Outbound Rule on FreePBX.....................................................................................................6
Figure 4: Configure Inbound Rule on FreePBX........................................................................................................6
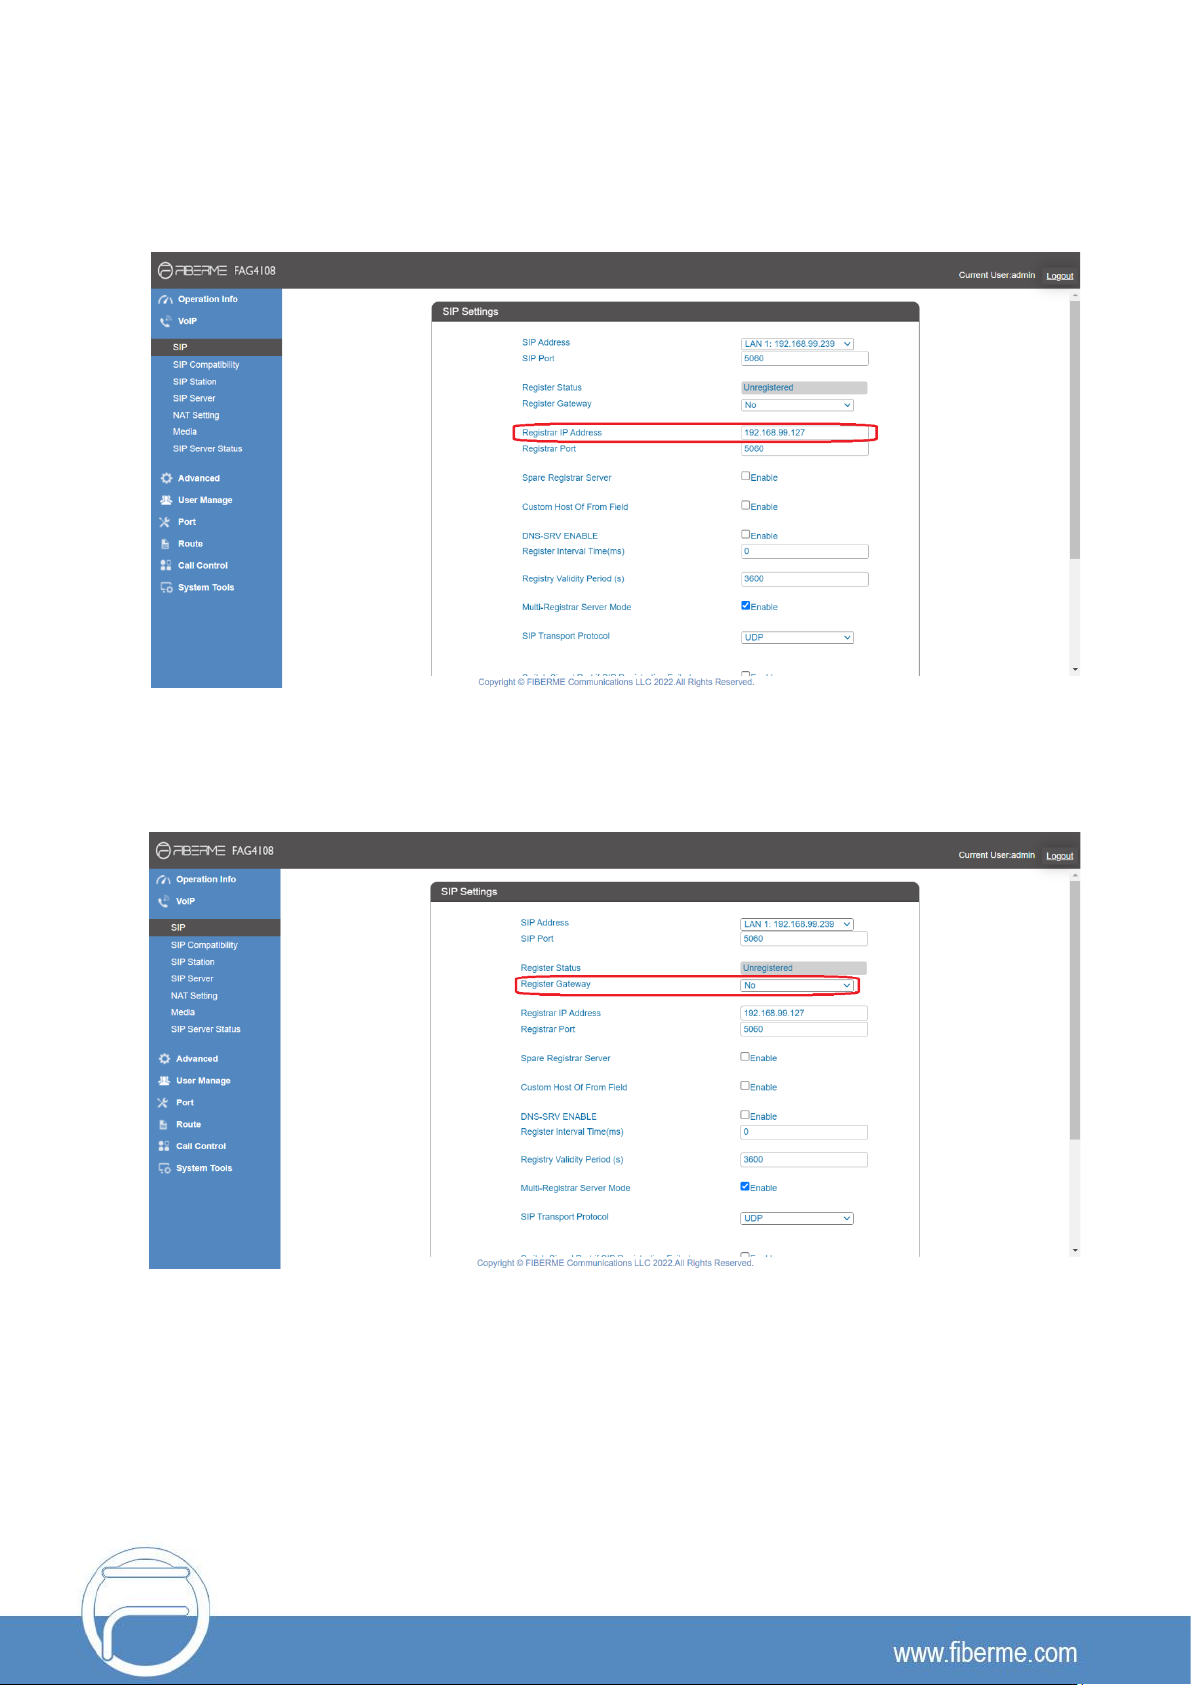
Figure 5: Connect FAG410X with FreePBX: Registrar IP Address.......................................................................7
Figure 6: Connect FAG410X with FreePBX: Register Gateway............................................................................8
Figure 7: Configure FXO Port on FAG410X: Modify Port.......................................................................................8
Figure 8: Configure FXO Port on FAG410X: Port Configurations .........................................................................8
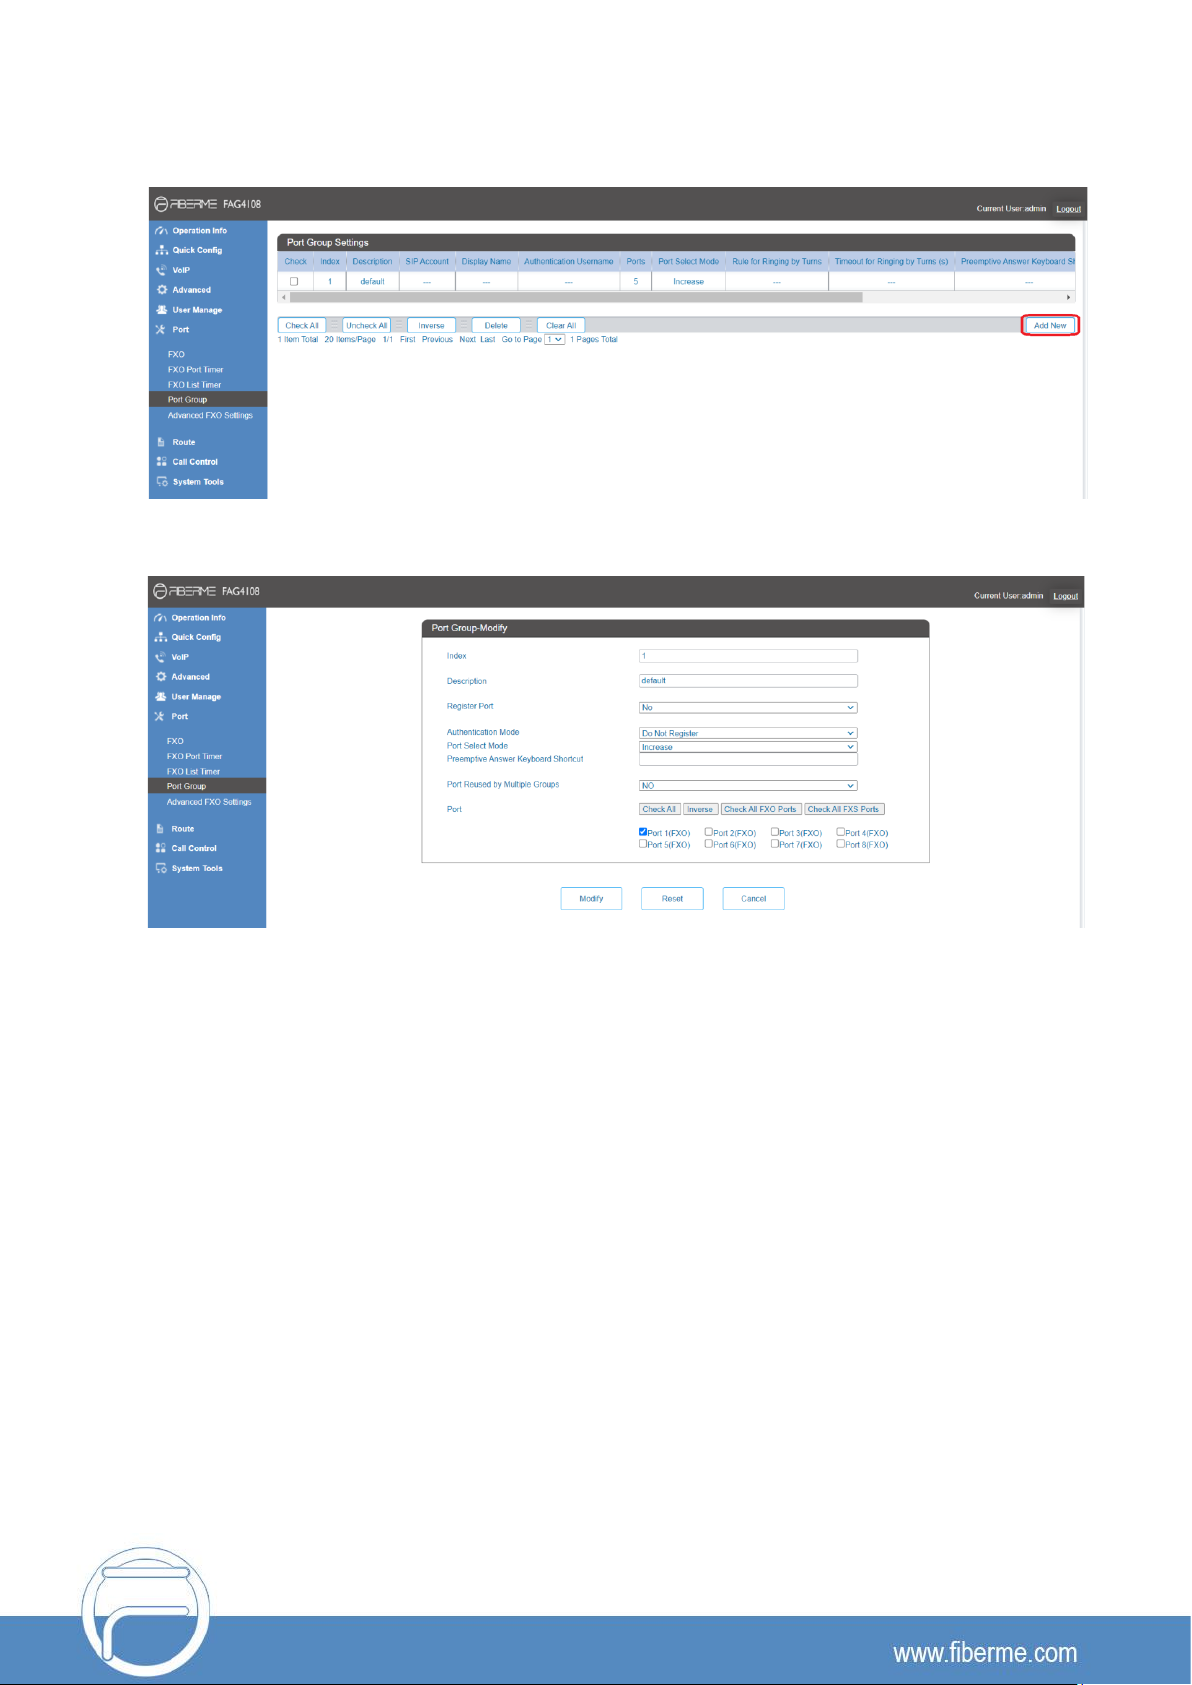
Figure 9: Create Port Group on FAG410X: Add New..............................................................................................9
Figure 10: Create Port Group on FAG410X: Group Configurations......................................................................9
Figure 11: Create SIP Extension on FreePBX..........................................................................................................10
Figure 12: FAG410X SIP Account Settings ..............................................................................................................10
Figure 13: FAG410X Registrar IP Address...............................................................................................................11
Figure 14: FreePBX - SIP Extension Status .............................................................................................................11
Figure 15: FAG410X –IP to TEL................................................................................................................................12
Figure 16: IP to TEL Settings......................................................................................................................................12
Figure 17: FAG410X –TEL to IP................................................................................................................................13
Figure 18: TEL to IP Settings......................................................................................................................................13

P a g e 3
OVERVIEW
This document describes basic configuration to interconnect FreePBX and FAG410X. In this document, we
are using FAG4108 as an example. The following methodology can be used for the FAG4104 as well. This
is typically applied to the scenario where users would like to add a FAG410X not only as a remote extension
but also as an external PSTN trunk.
There are two ways to set up the FreePBX with the FAG410X.
•
Method 1: Configure FAG410X as a SIP Peer Trunk.
•
Method 2: Register FAG410X on FreePBX directly as an extension.

P a g e 4
CONNECT FreePBX TO FAG410X USING PEER SIP TRUNK
Create IVR On FreePBX
On the FreePBX web GUI, create an IVR extension under Applications ->IVR ->Add IVR.
In IVR settings, if "Direct Dial" is enabled, the calls dialing into the FreePBX IVR will be able
to reach the
internal extensions registered to
FreePBX
. Also, you can assign the "IVR Entries"
to different destinations.
Figure 1: Create IVR on FreePBX

P a g e 5
Create Peer SIP TRUNK On FreePBX
On the FreePBX web GUI, create a peer SIP trunk under
Connectivity ->Trunks ->Add SIP (Chan_pjsip)
Trunk.
In this example, the FAG4108 IP address is 192.168.99.239.
Figure 2: Create Peer SIP Trunk on FreePBX
Configure Outbound Rule on FreePBX
On FreePBX web GUI, go to
Connectivity ->Outbound Routes ->Add Outbound Route
to create a new
outbound rule. This would allow the extension on FreePBX to reach numbers in PSTN network via the peer SIP
trunk we just configured.

P a g e 6
Figure 3: Configure Outbound Rule on FreePBX
In this example prefix "9", 9 is the first dialing digit and it will be stripped off when the callgoes out.
Configure Inbound Rule on FreePBX
On FreePBX web GUI, go to Connectivity ->Inbound Routes ->Add Inbound Routeto create a new
inbound rule. In this example, we set the DID Number as 20000, which will be used in the FAG410X call
forward setting.
Figure 4: Configure Inbound Rule on FreePBX
The default destination is configured to IVR. Ensure to select the proper IVR.

P a g e 7
Connect FAG410X with FreePBX
1.
On the FAG410X web GUI, go to the VoIP->SIP page and enterthe IP address of the FreePBX that
you are peering with.
Figure 5: Connect FAG410X with FreePBX: Registrar IP Address
2.
Please make sure the Register Gateway option under VoIP-> SIP is set to No. In the following
example, FreePBX Server has IP address 192.168.99.127.
Figure 6: Connect FAG410X with FreePBX: Register Gateway

P a g e 8
Configure FXO Port on FAG410X
1. Connect the PSTN line to the FAG410X FXO port.
2. On the FAG410X web GUI, go to the Port->FXO page and press Modify on the FXO port you will
use.
Figure 7: Configure FXO Port on FAG410X: Modify Port
3. Enter the SIP Account Number 20000 to be matched with the DID number we configured in FreePBX
Inbound Route.
Figure 8: Configure FXO Port on FAG410X: Port Configurations

P a g e 9
Create Port Group on FAG410X
1. On the FAG410X web GUI, go to the Port->Port Group page and press “Add New”.
Figure 9: Create Port Group on FAG410X: Add New
2. Select the FXO port you will use.
Figure 10: Create Port Group on FAG410X: Group Configurations

P a g e 10
REGISTER FAG410X ON FreePBX AS AN EXTENSION
Create SIP Extension on FreePBX
To manually create new SIP user, go to FreePBX web GUI Applications ->Extensions ->Add New SIP
[chan_pjsip] Extension. A new dialog window will show for users to fill in the extension information.
Figure 11: Create SIP Extension on FreePBX
Configure FAG410X SIP Account as a Registered Extension on FreePBX
Under FAG410X web GUI->VoIP->SIP, please set Register Gateway to Yes, then enter SIP Extension
information created earlier inFreePBX.Inthisexample, extension 1002 is usedin ordertoregisterFAG410X
as an extension user on FreePBX.
Figure 12: FAG410X SIP Account Settings

P a g e 11
Under FAG410X web GUI, VoIP->SIP, please fill in FreePBX information as explained in method 1.
Figure 13: FAG410X Registrar IP Address
We can check FreePBX SIP Extension Status to see if FAG410X has been successfully registered as
an extension device. go to Admin ->Asterisk-Cli, In CLI Command write “pjsip list contacts” and press
Send Command. “Avail” under Status means that the extension is registered successfully as below
screenshot.
Figure 14: FreePBX - SIP Extension Status
Now FAG410X is registeredat FreePBX as an extension device. Please refer to method 1 in the previous
section to configure FXO Port settings on FAG410X.

P a g e 12
FAG410X CALL Routing
Configure IP to Tel on FAG410X
1. On the FAG410X web GUI, go to the Route-> IP→TEL page, Press “Add New”.
Figure 15: FAG410X –IP to TEL
2. Enter the FreePBX Server IP address in “Source IP”and select the Port Group you will use from “Call
Destination”.
Figure 16: IP to TEL Settings

P a g e 13
Configure TEL to IP on FAG410X
1. On the FAG410X web GUI, go to the Route-> TEL→IP page, Press “Add New”.
Figure 17: FAG410X –TEL to IP
2. Select the Port Group you will use from “Source Port Group” and enter the FreePBX Server IP address
in “Destination Address”.
Figure 18: TEL to IP Settings
Other manuals for FAG410X
4
Table of contents
Other Fiberme Gateway manuals