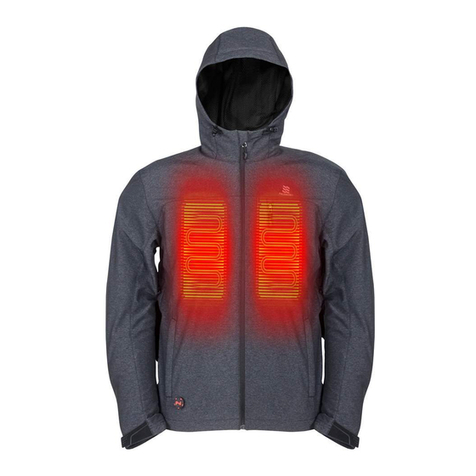
Fieldsheer MOBILE WARMING DUAL POWER User manual

DUAL POWER HEATED GEAR
ÉQUIPEMENT CHAUFFANT DOUBLE ALIMENTATION
EQUIPO TÉRMICO DUAL POWER
USER MANUAL
MANUEL D'UTILISATION
MANUAL DE INSTRUCCIONES
HEATED GEAR
®

fieldsheer.com
1
®
INTRODUCTION
Thank you for purchasing our Dual Power Heated gear. Your
garment is designed to deliver heat on demand at the touch of
a button.
To ensure optimal performance of your Heated gear,
please carefully read through this user manual prior to using
the garment.
Stay up to date with the latest product information by register-
ing your garment at fieldsheer.com/product-registration. You
can also find other great Fieldsheer products at fieldsheer.com.
Read
registration card Scan
registration card Register
your product

2
®
TECHNOLOGY
Reflect Heating
Heating L ayer
Proprietary Fieldsheer® powered by Mobile Warming®
technology is specially engineered for cold weather conditions.
Mobile Warming®’s comprehensive heating technology keeps
you warm and comfortable in all weather conditions. Our exclu-
sive heating technology utilizes ultra-fine fiber elements
powered by lightweight, rechargeable, Lithium-Ion batteries.
As heat builds, Mobile Warming® technology reflects and
directs heat back towards the body ensuring that you stay
warm. The combination of unique materials, construction
techniques, and innovative design results in the most
advanced heated gear available.

fieldsheer.com
TABLE OF CONTENTS
Garment Care
Battery use and Maintenance
Battery Power Quick Start Guide
Vehicle Power Quick Start Guide
Warranty and Legal
4
20
37
21-24
38-40
25-26
41-42
27-30
43-46
32-34
48-50
5-7
7-9
10-13
15-17
Entretien du vêtement
Utilisation et entretien des batteries
Guide de démarrage rapide sur l'alimentation par batterie
Guide de démarrage rapide sur l’alimentation à partir d’un véhicule
Garantie et mentions légales
Cuidado de la prenda
Uso de la batería y mantenimiento
Guía de inicio rápido alimentación a batería
Guía de inicio rápido alimentación por vehículo
Garantía y aspectos legales
3
®

GARMENT CARE
Refer to your garment care label for care details
• Disconnect battery pack from the garment(s)
• Machine wash delicate cycle in warm water
• Tumble dry with low heat
• Do not wring • Do not dry clean • Do not Iron
• Do not bleach or use other harsh chemicals
• Recommend hanging up if storing for extended period of time
40
4
®
Jackets, Vests and Pants
Refer to your garment care label for care details
• Disconnect battery pack from the garment(s)
• Hand Wash Only
• Do not tumble dry
• Do not wring • Do not dry clean • Do not Iron
• Do not bleach or use other harsh chemicals
• Recommend hanging up if storing for extended period of time
Gloves

fieldsheer.com
BATTERY USE
DC CHARGING BATTERY
Mobile Warming®'s powerful lithium-ion battery technology was
designed and engineered to provide you with safe and reliable
power, allowing you to be warm and comfortable. Please follow
the instructions below to optimize your lithium-ion battery
5
®
Scan for detailed information
on battery care
• Plug Mobile Warming charger into AC wall socket and connect
your Mobile Warming® battery(s) to AC charger connectors.
• Red light on the AC charger indicates battery is charging.
• Green indicator light on the AC charger indicates battery is fully
charged and ready for use or storage.
• Always charge batteries indoors.
• Always use the compatible Mobile Warming Chargers to
charge
your batteries. Failure to do so could result in product failure,

BATTERY MAINTENANCE
Never dispose of batteries in the garbage. Disposal of
batteries in the garbage is unlawful under state and
federal environmental laws and regulations. Always take
used batteries to your local battery recycling center.
This product contains chemicals known to the state of
California to cause cancer and birth defects or other
reproductive harm
For more information visit www.P65warnings.ca.gov
Do not use battery if you notice a change of shape (lumps),
over-heating when charging or if rust or corrosion on the
battery connectors is found. Use only with the charging
adaptor provided with your product to charge your battery.
IMPORTANT: This product is intended to be used by an adult and
therefore is the sole responsibility of the Purchaser to follow
detailed instructions and warnings. The Purchaser agrees to
indemnify Manufacturer for any unintended use/misuse.
6
®

7
®
fieldsheer.com
BATTERY MAINTENANCE
• Avoid running Lithium-Ion batteries completely dead. This
will
result in performance problems and reduced battery life.
• Lithium-Ion batteries by nature have diminished capacity
output in extremely cold temperatures. We recommend
keeping batteries inside the garment to maximize battery
performance.
• Do not allow Mobile Warming battery(s) to come in contact
with water or liquids. If water or other liquids enter the battery
interior, immediately unplug the battery from the garment.
• Do not use if you feel the battery is compromised.
• Avoid allowing your DC jack ports from being contaminated
with debris that could interfere with operations. Suggest to
BATTERY STORAGE
• Disconnect battery from garment.
• Power off battery(s) if applicable.
• Fully charge battery(s) prior to storage
• Keep battery(s) in cool dry place out of direct sunlight
• Charge every 6 months to maintain battery life. It is important
to keep your battery charged
• Do not store Mobile Warming batteries below - 4℉(- 20 ℃)

8
®
QUICK START GUIDE: BATTERY POWER
BATTERY POWER
1. Fully charge your battery to 100%.
2. Press and hold the power button on
the battery for a few seconds. Once it’s
powered on LED will be White/100% heat.
3. Run wire harness into the right Pocket and plug battery into
the Jacket or Vest wire harness. Wire harness is located on
the right side pocket.
100%
Health
DC or USB Charger
When Connecting the Dual Power Jacket, Vest or
Pant to the included Mobile Warming® Power-
sheer™ battery, please follow below Quick Start
Guide. For More Information, please visit us at
fieldsheer.com or scan below 2D barcode to
quickly access the information.
3S
1 2

12
3S
3
Default setting
warming 2.0Hrs.
9
®
QUICK START GUIDE: BATTERY POWER
4. Now that the battery is connected to jacket or vest, press
and hold the touch control button on for a few seconds. Once
it’s powered on LED will be White/100% heat.
5. After the gear is on, push the control
button to reach your desired settings.
3S
6. To power off gloves and hold the touch
control button until light turns off. If you
plan to not use the gloves for more than a
few days, unplug both batteries from the
gloves

1 2 3 4
4
10
®
QUICK START GUIDE: VEHICLE POWER
VEHICLE POWER
1. Turn off vehicle and remove
key from ignition.
2. Locate and access vehicle’s 12volt battery.
3. Disconnect the vehicles Negative(-) Cable and remove
from battery terminal. Connect the Negative(-) wire from the
supplied Mobile Warming® Power Lead Connector to the
battery terminal and re-connect vehicle’s Negative(-) Cable.
4. Disconnect the vehicles Positive(+) Cable and remove from
battery terminal then connect the Positive(+) wire from the
supplied Mobile Warming® Power Lead Connec tor to the
battery terminal and re-connect vehicle’s Positive(+) Cable.
When Connecting The Dual Power Jacket, Vest or
Pant to the vehicle power, please follow below Quick
Start Guide. For More Information, please visit us at
fieldsheer.com or scan below 2D barcode to quickly
access the information.
L
O
C
K
A
C
C
O
N
S
T
A
R
T

CONNECT JACKET AND PANTS
1
11
®
QUICK START GUIDE: VEHICLE POWER
5. Route Mobile Warming® Power Lead
Connector the right side of vehicle Seat with a
minimum of 2in (5cm) of the Mobile Warming
Power Lead Connector exposed.
6. Start Vehicle and connect Jacket or Vest to
Power Lead Connector. Power Lead is located
in the interior pocket.
L
O
C
K
A
C
C
O
N
S
T
A
R
T
Y-Split
Connector
ASA16U15
Power Lead
Connector

CONNECT GLOVES
CONNECT JACKET AND GLOVES
1 2
12
®
QUICK START GUIDE: VEHICLE POWER
Y-Split
Connector
ACC0271
Power Lead
Connector
Right
Grey/White
Left
Black
CONNECT GLOVES
CONNECT JACKET AND GLOVES
1 2
12
®
QUICK START GUIDE: VEHICLE POWER
Y-Split
Connector
ACC0271
Power Lead
Connector
Right
Grey/White
Left
Black

13
®
QUICK START GUIDE: VEHICLE POWER
12
3S
3
Default setting
warming 2.0Hrs.
7. Now that the power is connected to jacket or vest, press
and hold the touch control button for a few seconds. Once
it’s powered on LED will be Red/100% heat.
8. After the jacket or vest is on, push
the control button to reach your
desired settings.
9.To power off jacket or vest, press and
hold the touch control button until light
turns off. Always remember to discon-
nect the Jacket or Vest from the power
lead harness before leaving vehicle. 12
3S

14
®
BATTERY POWER HEAT RATING
NOTE: Heat and time are estimated and may vary
depending on conditions. Exposing battery to extreme
temperatures may impact these estimates.
Heat Ratings
12v Power Ratings Based on Fully Charged Battery
VEHICLE
POWER
12V 5200mAh
5.0Hrs.
3 Heat Zones
2.5Hrs.
100%
5.0Hrs.
50%
3.5Hrs.
75%
10Hrs.
25%
5 Heat Zones
TOP
HIGH
100%
MIDDLE
50%
75%
LOW
25%
VEHICLE
POWER
3 Heat Zones
TOP
HIGH
100%
MIDDLE
50%
75%
LOW
25%
MW12V52
MW12V52
12V 5200mAh
3 Heat Zones
2.8Hrs.
5.5Hrs.
50%
3.5Hrs.
75%
11Hrs.
25%

fieldsheer.com
LEGAL & WARRANTY
LIMITED ONE YEAR WARRANTY
Fieldsheer Apparel Technologies warrants to the original purchaser
of this Fieldsheer® branded product (the“Product”) that the
construction, electrical heating components and battery of the
Product shall be free from factory defect in materials and
workmanship for a period one (1) year from the date of original
purchase when the Product is purchased from an authorized
reseller and used as recommended by Fieldsheer Apparel
Technologies. During the warranty period, Fieldsheer Apparel
Technologies will, at its option and at no additional charge to you,
repair or replace the Product, or any part of the Product, if it
becomes defective, malfunctions, or otherwise fails to conform with
this Limited One Year Warranty.
15
®
MW12V52
12V 5200mAh
3 Heat Zones
2.5Hrs.
100%
50%
3.5Hrs.
5.5Hrs.
75%
10Hrs.
25%
VEHICLE
POWER
3 Heat Zones
TOP
HIGH
100%
MIDDLE
50%
75%
LOW
25%

LEGAL & WARRANTY
LEGAL
Any damage caused to any Fieldsheer® products by misuse, abuse,
improper care, accident, normal wear and tear, or the natural break-
down of materials over an extended period of time and use are not
covered in this warranty. Any alterations or repairs (attempted or
otherwise) performed on any Fieldsheer® products voids any and
all warranties offered by Fieldsheer® for that particular item.
NOTE: This equipment has been tested and found to comply with
the limits for a Class B digital device, pursuant to part 15 of the FCC
Rules. These limits are designed to provide reasonable protection
against harmful interference in a residential installation. This
equipment generates, uses, and can radiate radio frequency
energy and, if not installed and used in accordance with the
instructions, may cause harmful interference to radio
communications. However, there is no guarantee that interference
will not occur in a particular installation.
If this equipment does cause harmful interference to radio or
television reception, which can be determined by turning the
equipment off and on, the user is encouraged to try to correct the
interference by one or more of the following measures:
16
®
Responsible Party: Tech Gear 5-7 Inc.
LEGAL & WARRANTY
LEGAL
Fieldsheer Apparel Technologies warrants to the original purchaser
of this Fieldsheer® branded product (the“Product”) that the
construction, electrical heating components and battery of the
Product shall be free from factory defect in materials and
workmanship for a period one (1) year from the date of original
purchase when the Product is purchased from an authorized
reseller and used as recommended by Fieldsheer Apparel
Technologies. During the warranty period, Fieldsheer Apparel
Technologies will, at its option and at no additional charge to you,
repair or replace the Product, or any part of the Product, if it
becomes defective, malfunctions, or otherwise fails to conform with
this Limited One Year Warranty.
Any damage caused to any Fieldsheer® products by misuse, abuse,
improper care, accident, normal wear and tear, or the natural break-
down of materials over an extended period of time and use are not
covered in this warranty. Any alterations or repairs (attempted or
otherwise) performed on any Fieldsheer® products voids any and
all warranties offered by Fieldsheer® for that particular item.
NOTE: This equipment has been tested and found to comply with
the limits for a Class B digital device, pursuant to part 15 of the FCC
Rules. These limits are designed to provide reasonable protection
against harmful interference in a residential installation. This
equipment generates, uses, and can radiate radio frequency
energy and, if not installed and used in accordance with the
instructions, may cause harmful interference to radio
communications. However, there is no guarantee that interference
will not occur in a particular installation.
If this equipment does cause harmful interference to radio or
television reception, which can be determined by turning the
equipment off and on, the user is encouraged to try to correct the
interference by one or more of the following measures:
16
®
Responsible Party: Tech Gear 5-7 Inc.

If this equipment does cause harmful interference to radio or
television reception, which can be determined by turning the
equipment off and on, the user is encouraged to try to correct
the interference by one or more of the following measures:
• Reorient or relocate the receiving antenna.
• Increase the separation between the equipment and receiver.
• Connect the equipment into an outlet on a circuit different
from that to which the receiver is connected.
• Consult the dealer or an experienced technician for help.
fieldsheer.com
LEGAL & WARRANTY
CAUTION: To comply with the limits of the Class B digital device,
pursuant to Part 15 of the FCC Rules, this device must be used
with certified peripherals and shielded cables. All peripherals
must be shielded and grounded. Operation with non-certified
peripherals or non-shielded cables may result in interference to
radio or reception.
MODIFICATION: Any changes or modifications of this device
could void the warranty.
Fieldsheer®, Mobile Warming®, Stay Warm, Stay Comfortable,
MW connect™ and its related logos and images are property of
Tech Gear 5.7 Inc and/or its affiliated companies
17
®

Nous vous remercions d'avoir acheté notre équipement
alimenté par batterie. Votre vêtement est conçu pour fournir de
la chaleur à la demande en appuyant sur un bouton.
Pour assurer une performance optimale de votre équipement
chauffant, veuillez lire attentivement ce manuel d'utilisation
avant d'utiliser le vêtement.
18
®
Restez au courant des dernières informations sur les produits
en enregistrant votre vêtement sur fieldsheer.com/prod-
uct-registration. Vous pouvez également trouver d'autres
excellents produits Fieldsheer sur fieldsheer.com.
Lire la carte
d'enregistrement Scanner la carte
d'enregistrement Enregistrez
votre produit
INTRODUCTION

Reflect Heating
Heating L ayer
fieldsheer.com
19
®
La technologie brevetée Fieldsheer® alimentée par Mobile
Warming® est spécialement conçue pour le temps froid. La
technologie de chauffage complète de Mobile Warming® vous
permet de rester au chaud confortablement dans toutes les
conditions météorologiques. Notre technologie de chauffage
exclusive utilise des éléments en fibres ultrafines alimentés par
des batterie légères et rechargeables au lithium-ion. Lorsque la
chaleur s'accumule, la technologie Mobile Warming® réfléchit
et renvoie la chaleur vers le corps, vous assurant ainsi de rester
au chaud. La combinaison de matériaux uniques, de
techniques de construction et d'une conception novatrice
permet d'obtenir le matériel chauffant le plus avancé qui soit.
TECHNOLOGIE
Table of contents
Languages:
Other Fieldsheer Heater manuals
Popular Heater manuals by other brands

Heatlight
Heatlight HLWA15-LV Series instructions
Dru
Dru STONE user manual
Jaga
Jaga BRIZA 12 PLUG & PLAY manual
Dru
Dru COLOURLINE G31 Instructions for installation and operation
Inverter Fusion
Inverter Fusion RAV-SM2000DH FS Installation and owner's manual
Rointe
Rointe Elba PRO 400 instruction & installation guide
