Fienza Tono 444116 User manual
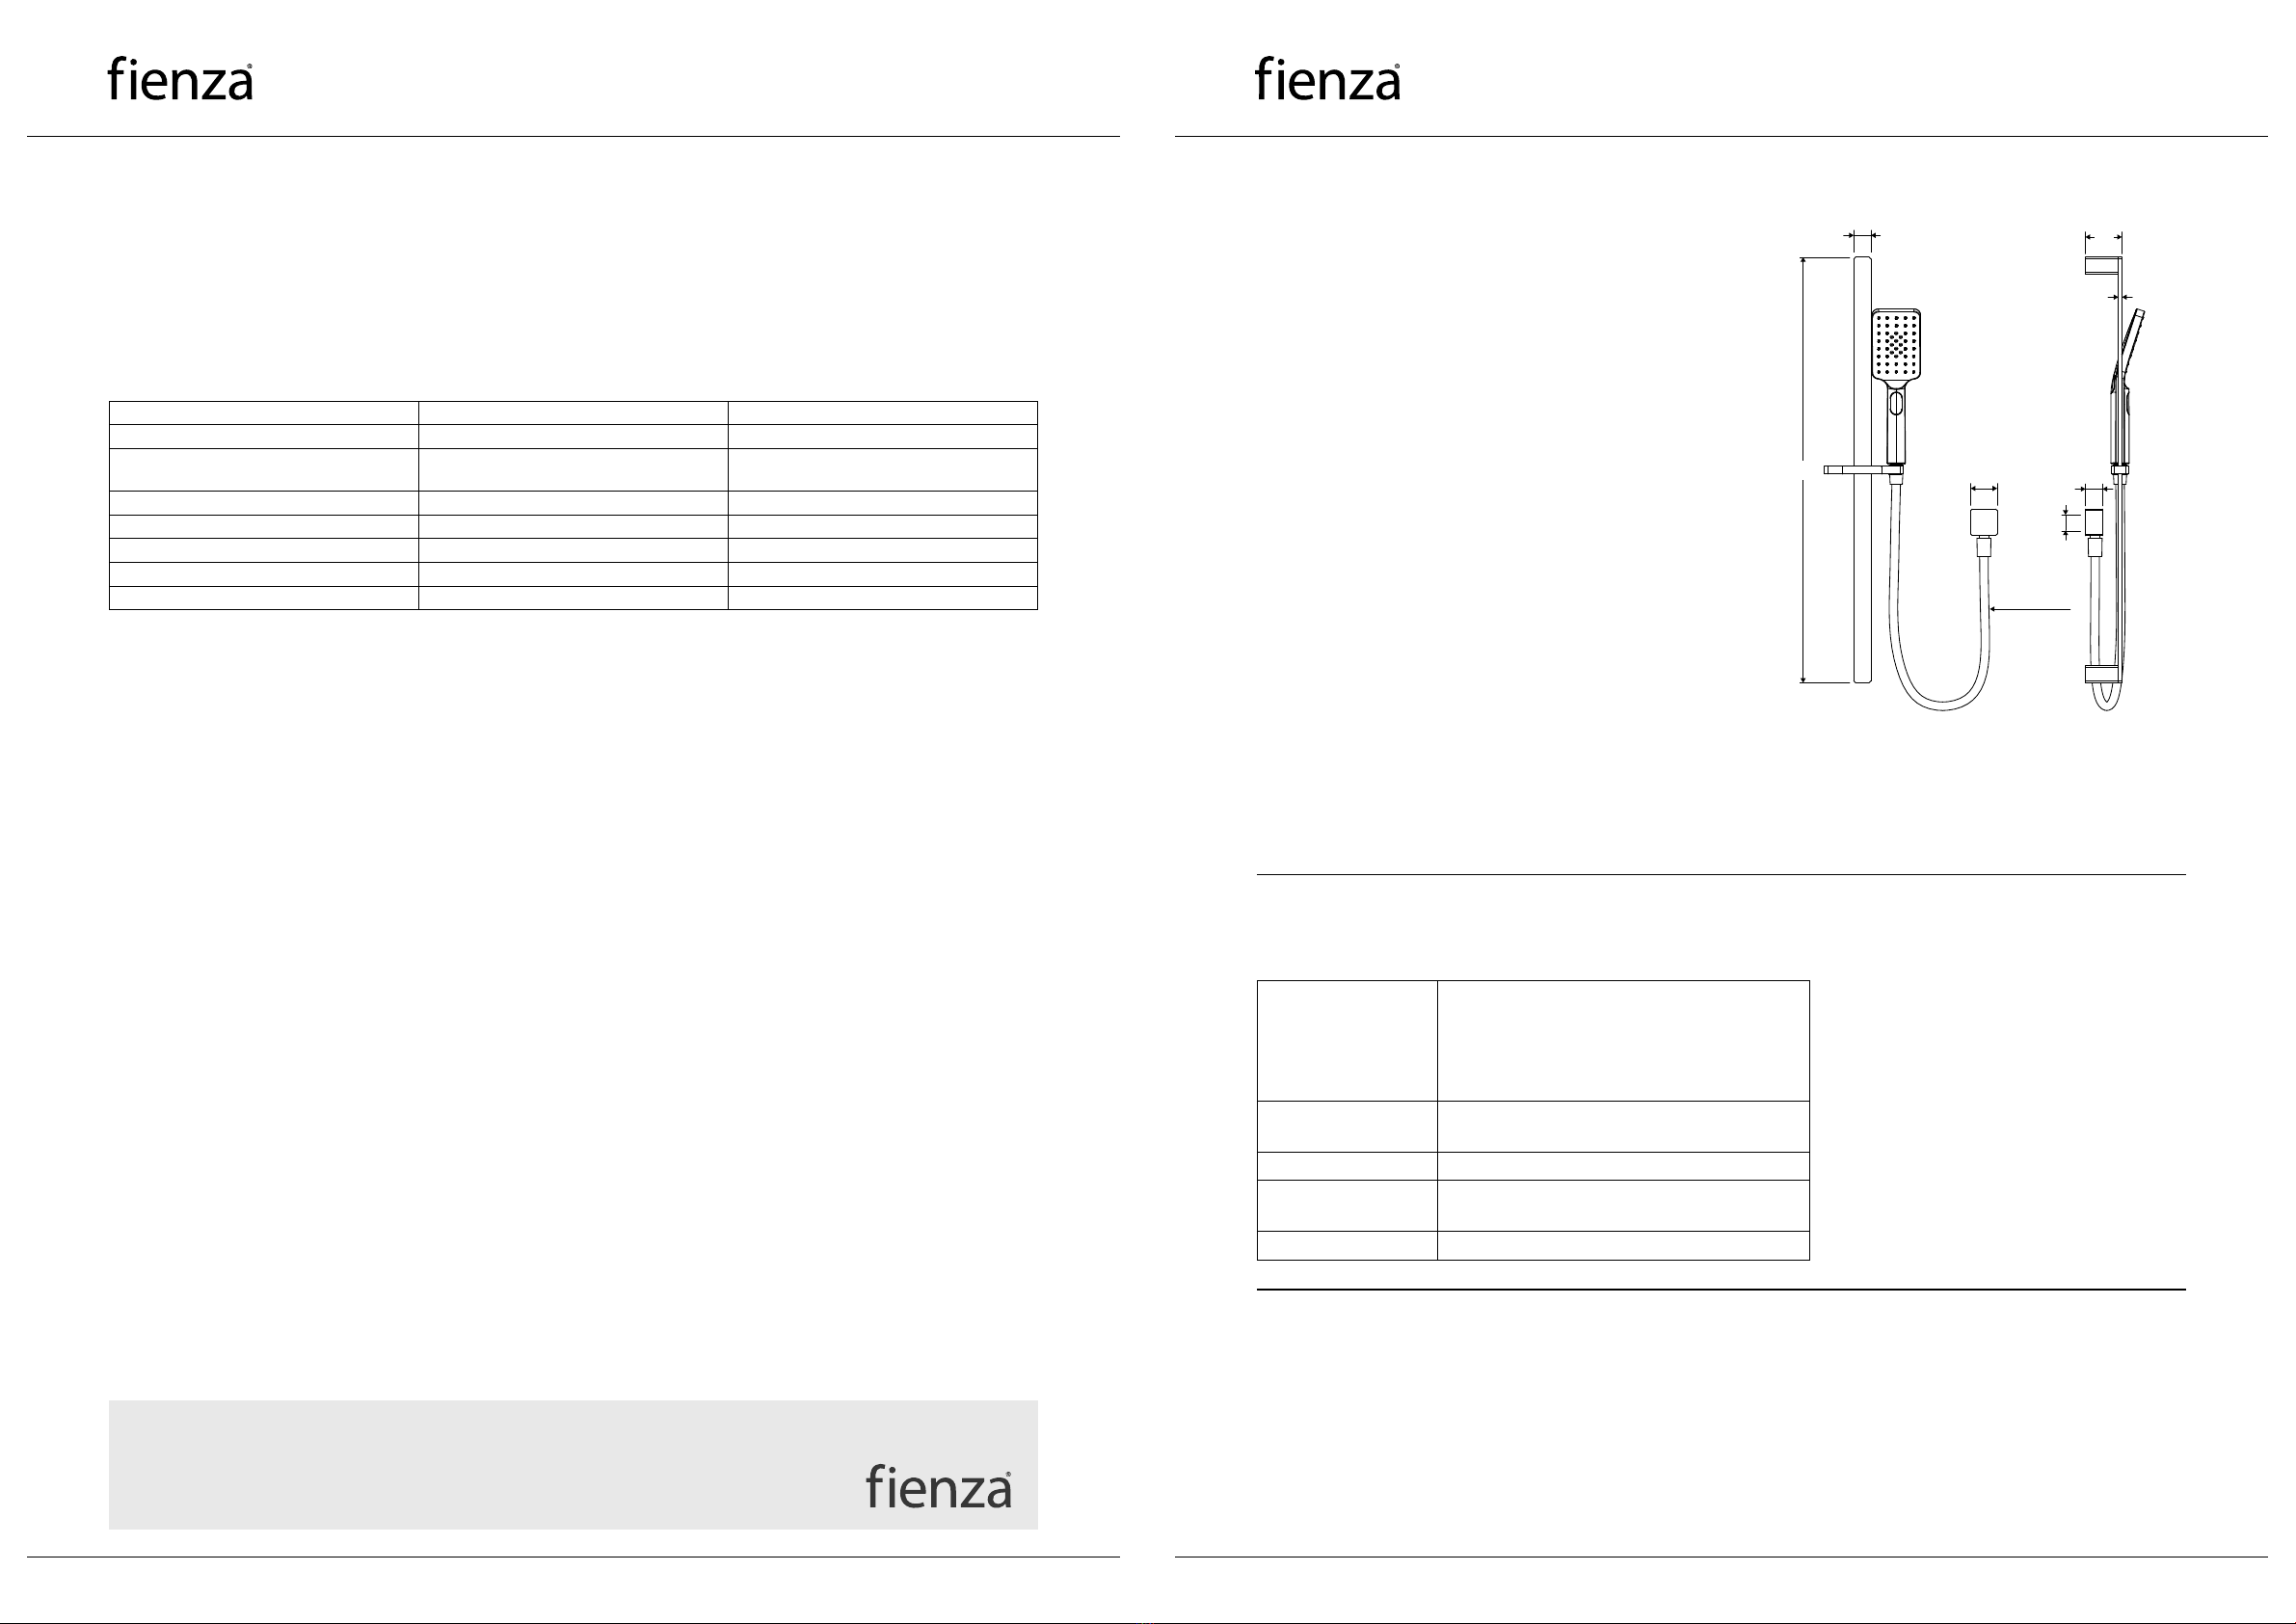
28 60
5.8
43.5
700 28
G1/2
1.5 metre
long hose
IMPORTANT: Please read all of the instructions before installation. Check the product thoroughly for damage. Installation is acceptance
of goods supplied and will void warranty. This product is pre-assembled. Do not disassemble, as this may void the warranty.
Specifications
Please refer to fienza.com.au for the latest product specifications before installing.
Operating Pressure Min: 150 kPa / 1.5 bar
Max: 500 kPa / 5 bar
Optimum: 150 kPa / 1.5 bar - 500 kPa / 5 bar
Installation of pressure limiting valve recommended
if supply exceeds 500kPa
Operating Temperature Hot: Max 80°C
Cold: Min. 5°C
Inlet Connections 1/2” BSPP
Suitable Hot Water Units Storage tank and continuous flow only.
Not suitable for gravity feed.
WELS Rating 3 Star rated, 9L/min
General Information
●This product must be installed by a qualified licensed plumber in accordance with AS/NZS 3500 and all applicable local regulations
and plumbing codes.
●All pipe work must be thoroughly flushed prior to installation.
●Do not remove the ceramic cartridge from the mixer when installing.
●After installation all hoses and connections must be checked for leaks.
●It is the responsibility of the installer to ensure a waterproof seal is achieved between the product and mounting surface.
Tono
R A IL SHOWER
444116
WELS 3 Star rated, 9L/min
Rail:
●Slider to adjust height and angle of hand shower
●Made from solid brass
●1.5 metre stainless steel hose
(PVC on matte black model)
TONO Hand Piece (MSH116):
●Three water-flow settings: normal, massage or combination
●Easy to clean TPR nozzles
●Made from ABS
Warranties
Residential Warranty Periods
Applies to domestic uses and applications of Fienza® products, such as private dwellings and retirement villages.
Commercial Warranty Periods
Applies to commercial uses and applications of Fienza® products, including, but not limited to: commercial food premises such as
restaurants; commercial accommodation such as hotels; hospitals and healthcare facilities; public amenities; and industrial, laboratory and
manufacturing facilities.
Product Component Residential Commercial
Heads & Arms (Structure Only) 15 years replacement parts or product 7 years replacement parts or product
Rails (Structure Only) 15 years replacement parts or product, 1 year
labour on Twin Shower Rails
5 years replacement parts or product, 1 year
labour on Twin Shower Rails
Hand Pieces (Structure Only) 5 years replacement parts or product 1 year replacement parts or product
Flexible Hoses 1 year replacement parts or product 1 year replacement parts or product
Finishes - Chrome 5 years replacement parts or product 5 years replacement parts or product
Finishes - PVD & Electroplated 5 years replacement parts or product 5 years replacement parts or product
Accessories & Spare Parts 1 year replacement parts or product 1 year replacement parts or product
*Excludes parts subject to wear and tear such as rubber seals. Labour is not included unless otherwise specified.
Australian Consumer Law
Our products come with guarantees that cannot be excluded under the Australian Consumer Law. You are entitled to a replacement or
refund for a major failure upon inspection by an authorised representative where a product is found to be defective in construction,
material or assembly. You are also entitled to have the goods repaired or replaced if the goods fail to be of acceptable quality and the
failure does not amount to a major failure, free of charge.
Warranty Conditions
●Installation has been carried out by a licensed plumber in accordance with AS/NZS 3500 and all applicable local regulations and
plumbing codes.
●All maintenance and adjustments to the product after the installation have been carried out by a licensed plumber.
●Cleaning and care instructions detailed in this document have been strictly adhered to.
●Proof of purchase is required for warranty claims.
Warranty Limitations
To the extent permitted under the Trade Practices Act and other relevant legislation, Fienza’s liability is limited to:
●The cost of replacing the goods, or
●The cost of obtaining equivalent goods, or
●The cost of having the goods repaired
●Fienza is not responsible for any lack of operation or performance of goods (or any loss or damage) where goods are used or adapted
for use with other goods not supplied
by Fienza.
●It is the responsibility of the customer and installer before installation to ensure that all components are correct and free of obvious
visible faults.
●Fienza is not responsible for the labour and rectification costs incurred in the above circumstance.
Conditions for On-Site Warranty Service Calls
Fienza will charge a service fee for each visit to an installation by its technician where it is determined that the fault is due to poorly
executed or unlicensed installation work or where the product is not a genuine Fienza product or where the product is outside the
warranty period. This may be paid in advance by credit card over the phone to a Fienza technician attending the site and will be refunded
if the Fienza product is found to be at fault.
For warranty support, please contact Fienza
2 Bailey Court, Brendale QLD 4500 PO Box 5381, Brendale QLD 4500
P07 3490 6700 F07 3490 6719 E[email protected] ABN 76 136 411 311
PLEASE LEAVE THIS MANUAL WITH THE END USER
FIENZA.COM.AU FIENZA.COM.AUItem Code: 444116 | Updated: 21/03/2023 Item Code: 444116 | Updated: 21/03/2023
INS TA LL AT ION GUIDE INS TA LL AT ION GUIDE
Apply thread tape (or similar) to the ½" connection,
then screw the top rail connector to the connection.
Screw the bottom rail connector to a wall stud
making sure it is vertically in line with the top rail
connector. Maximum centre distance between the
top and bottom shower connections is 650mm.
Check the grub screws are wound tight. Push the rail
brackets onto the top and bottom rail connectors
until they are against wall. Secure with grub screws.
1. 2. 3. 4.
5.
Clean filter washer
periodically
Water contains lime which remains on the surface
after the water has evaporated. These lime deposits
can be prevented from forming by wiping
immediately after use.
To clean the chrome-plated surfaces use a soft
cloth, soap and warm water. Never use cleaning
agents that contain a corrosive acid or a scouring
additive.
CLEANING
Do not use any
sharp objects
to clean nozzles
Filter Washer
Ball Joint
Top Rail
Bracket
Bottom Rail
Bracket
Remove the protective cap from the showerhead
ball joint and screw the unit onto the overhead
arm ensuring the filter washer is in place.
This arm is not adjustable.
Make sure a washer is in both ends of the hose.
Screw hose onto lower outlet on rail, attach
handset and place firmly in holder. Tilt and rotate
head to the desired position.
6.
Min 13±2mm
Max
/25mm
Water Inlet
Connector
WATER INLET: RECOMMENDED MINIMUM HEIGHT
OF 1800mm FROM FLOOR LEVEL
Install a ½" male threaded connection at the
recommended height on wall, ensuring that a
minimum of 13±2mm of thread protrudes past
the finished wall.
Correct water proong must be applied.
650mm
Rail Connector
Water Inlet
Connector
Apply thread tape (or similar) to the ½" connection,
then screw the top rail connector to the connection.
Screw the bottom rail connector to a wall stud
making sure it is vertically in line with the top rail
connector. Maximum centre distance between the
top and bottom shower connections is 650mm.
Check the grub screws are wound tight. Push the rail
brackets onto the top and bottom rail connectors
until they are against wall. Secure with grub screws.
1. 2. 3. 4.
5.
Clean filter washer
periodically
Water contains lime which remains on the surface
after the water has evaporated. These lime deposits
can be prevented from forming by wiping
immediately after use.
To clean the chrome-plated surfaces use a soft
cloth, soap and warm water. Never use cleaning
agents that contain a corrosive acid or a scouring
additive.
CLEANING
Do not use any
sharp objects
to clean nozzles
Filter Washer
Ball Joint
Top Rail
Bracket
Bottom Rail
Bracket
Remove the protective cap from the showerhead
ball joint and screw the unit onto the overhead
arm ensuring the filter washer is in place.
This arm is not adjustable.
6.
Min 13±2mm
Max
/25mm
Water Inlet
Connector
WATER INLET: RECOMMENDED MINIMUM HEIGHT
OF 1800mm FROM FLOOR LEVEL
Install a ½" male threaded connection at the
recommended height on wall, ensuring that a
minimum of 13±2mm of thread protrudes past
the finished wall.
Correct water proong must be applied.
650mm
Rail Connector
Water Inlet
Connector
Make sure a washer is in both ends of the hose.
Screw hose onto lower outlet on rail, attach
handset and place firmly in holder. Tilt and rotate
head to the desired position.
650mm
Apply thread tape (or similar) to the ½" connection,
then screw the top rail connector to the connection.
Screw the bottom rail connector to a wall stud
making sure it is vertically in line with the top rail
connector. Maximum centre distance between the
top and bottom shower connections is 650mm.
Check the grub screws are wound tight. Push the rail
brackets onto the top and bottom rail connectors
until they are against wall. Secure with grub screws.
1. 2. 3. 4.
5.
Clean filter washer
periodically
Water contains lime which remains on the surface
after the water has evaporated. These lime deposits
can be prevented from forming by wiping
immediately after use.
To clean the chrome-plated surfaces use a soft
cloth, soap and warm water. Never use cleaning
agents that contain a corrosive acid or a scouring
additive.
CLEANING
Do not use any
sharp objects
to clean nozzles
Filter Washer
Ball Joint
Top Rail
Bracket
Bottom Rail
Bracket
Remove the protective cap from the showerhead
ball joint and screw the unit onto the overhead
arm ensuring the filter washer is in place.
This arm is not adjustable.
6.
Min 13±2mm
Max
/25mm
Water Inlet
Connector
WATER INLET: RECOMMENDED MINIMUM HEIGHT
OF 1800mm FROM FLOOR LEVEL
Install a ½" male threaded connection at the
recommended height on wall, ensuring that a
minimum of 13±2mm of thread protrudes past
the finished wall.
Correct water proong must be applied.
650mm
Rail Connector
Water Inlet
Connector
Make sure a washer is in both ends of the hose.
Screw hose onto lower outlet on rail, attach
handset and place firmly in holder. Tilt and rotate
head to the desired position.
2
13
4
5
6
Installation
IMPORTANT:
●Before commencing installation, turn off the water supply. While not essential, we recommend fitting isolation valves to both the hot
and cold-water supply.
●Some showers may not provide an effective shower when used with gravity fed heated water systems or where pressures are less than
150kPa at the outlet. Additionally, showers with flow rates of less than 9L/min may not allow the following to function correctly:
- Some instantaneous water heaters
- Some tempering valves
- Some thermostatic mixing valves
●Some shower heads only operate correctly when hot and cold water supplies are both mains pressure and may not be suitable for some
instantaneous hot water services.
●When water pressure is in excess of 500kPa a pressure limiting device is required.
1. Recommended minimum height:
1800mm from floor level to top water
inlet position.
Install a ½" male threaded connection
at the appropriate height on wall,
ensuring that a minimum of 13±2mm
of thread protrudes past the finished
wall. Correct water proofing must
be applied.
2. Apply thread tape (or similar) to the
½" connection, then screw the rail
connector to the connection.
3. Screw the rail connector to a wall stud
making sure it is vertically in line with
the top rail connector.
Distance between the top and bottom
shower connections is 650mm.
4. Check the grub screws are wound
tight. Push the rail brackets onto the
top and bottom rail connectors until
they are against wall.
Secure with grub screws.
5. Make sure a washer is in both ends
of the hose. Screw hose onto lower
outlet on rail, attach handset and
place firmly in holder. Tilt and rotate
head to the desired position.
Cleaning & Care
We recommend weekly cleaning with mild soapy water and a microfibre cloth. In highly polluted or coastal locations we recommend
cleaning 2-3 times per week. Please note that colour tapware requires more frequent cleaning than chrome tapware.
●Never use harsh detergents, citrus-based cleaners or abrasive cleaners, as these will
scratch the surface. Use of unsuitable cleaners may damage the surface and will not
be covered by warranty.
●Where your tapware remains dry in use, a non-abrasive soft cloth can be used to
remove surface dust.
●Use of wax-based furniture creams should be avoided as these can result in a build-up
of deposits which can effect the appearance.
●Do not use undue pressure and wipe in one direction only.
1Joint
2Screw
3Body
4Hand Shower
5Outlet
6Hose
FIENZA.COM.AU FIENZA.COM.AUItem Code: 444116 | Updated: 21/03/2023 Item Code: 444116 | Updated: 21/03/2023
INS TA LL AT ION GUIDE INS TA LL AT ION GUIDE
Other Fienza Bathroom Fixture manuals

Popular Bathroom Fixture manuals by other brands

Franke
Franke F5 F5SM2014 Installation and operating instructions

Sanela
Sanela SLZA 32 Instructions for use

Lefroy Brooks
Lefroy Brooks C1-1020 Installation, operating, & maintenance instructions

Kinedo
Kinedo Kinemagic DES1302NG-D installation instructions

BELLOSTA
BELLOSTA ponte vecchio B3-158 Installation instruction

Hewi
Hewi 802.51.23760 SD Installation and operating instructions


