manuals.online logo
Brands
  1. Home
  2. •
  3. Brands
  4. •
  5. Reece
  6. •
  7. Bathroom Fixture
  8. •
  9. Reece POSH A User manual

Reece POSH A User manual

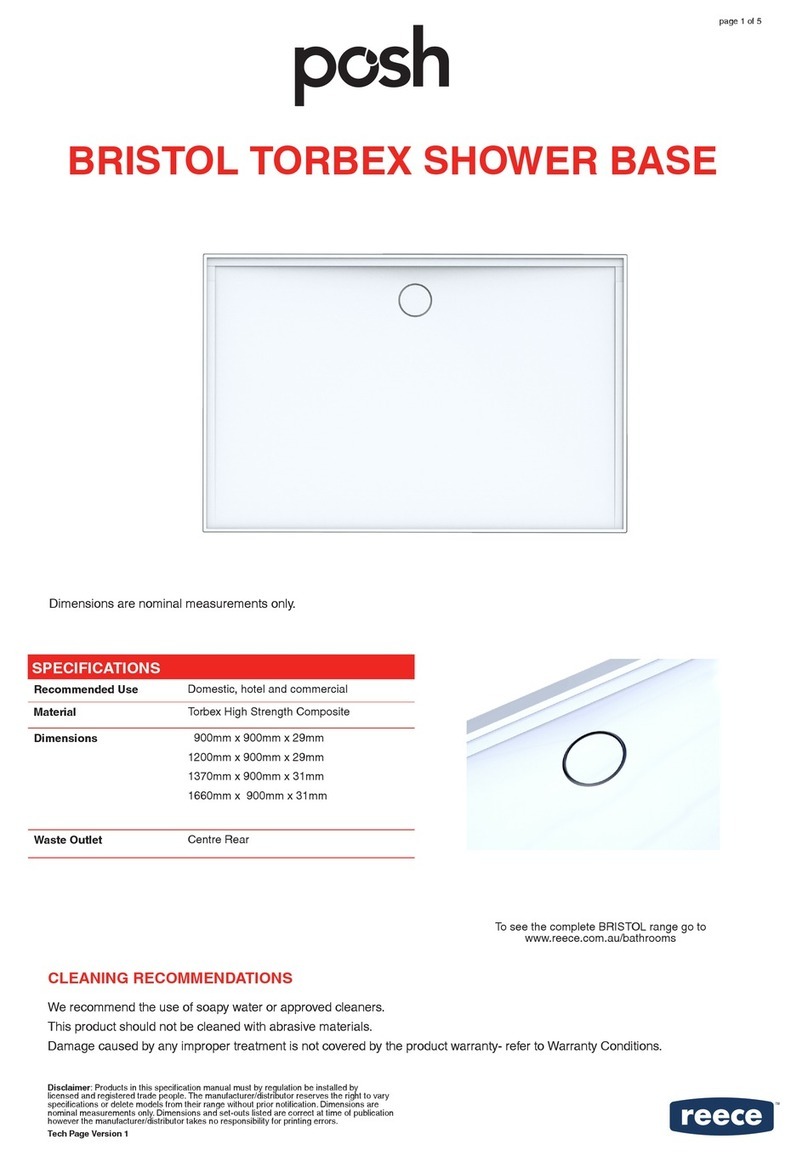
POSH
BRISTOL TORBEX SHOWER BASE
CLEANING RECOMMENDATIONS
Common household cleaning products should be used according to the
manufacturers instructions. Ensure the shower base is cleaned with water
to remove any remaining cleaning product from the base.
This bathroom product should not be cleaned with abrasive materials eg.
steel wool/scourers. Do not use any corrosive or abrasive cleaning agents
containing acids or scouring agents. Bleaches can also discolour products
and therefore should not be used. Damage caused by any improper
treatment is not covered by the product warranty- refer to Warranty
Conditions on the last page.
To see the complete POSH range go to www.reece.com.au/bathrooms
SPECIFICATIONS
Recommended use Domestic, hotel and commercial
Material Torbex high strength composite
Outlet Centre Rear
Waste Dome Cover White - Watermark approved
Base Height 25mm
MODEL A B C D
900 x 900
centre rear
900 900 450 150
900 x 1200
centre rear
1200 900 600 150
1000 x 1000
centre rear
1000 1000 500 150
Disclaimer: Products in this specification manual must by regulation be installed by licensed and registered
trade people. The manufacturer/distributor reserves the right to vary specifications or delete models from
their range without prior notification. Dimensions are nominal measurements only. Dimensions and set-outs
listed are correct at time of publication however the manufacturer/distributor takes no responsibility for
printing errors.
Tech Page Version 1
C
B
A
D
25mm
9mm
POSH
BRISTOL TORBEX SHOWER BASE
INSTALLATION INSTRUCTIONS
Plumbers, please ensure a copy of the installation
instructions is left with the end user for future reference
The shower base should be visually checked for
defects prior to installation. Failure to do so will
void warranty.
Note: Please check minimum/maximum
adjustments of your shower screen before
commencing the installation of base.
The following points should be taken into account
to determine if the installation method used will
be suitable for the screen selected.
•Wall lining thickness
•Check in depth
•Tiled or Acrylic walls
•Front and return tile flange
1. Floorboards or sheet flooring must cover the
entire underside of the Posh Bristol shower
base. Cut a hole through the floor no greater
than 200mm x 200mm. Concrete should
be cut wider at 300mm x 300mm. If you are
doing a renovation, the floorboards must be
checked for durability as rotting may have
occurred and the flooring may need to be
replaced.
2. The Posh Bristol shower base can be
installed on silicone or building adhesive over
the total base area. Lay the base on the floor
and check that it is level on both sides as well
as the front and the rear. This will ensure that
the base drains effectively to the waste outlet.
Note: If your floor is not level, use a cement
based tile adhesive spread over the floor with
a 12mm notched trowel to ensure the base is
fully supported. Cement based tile adhesive
must be left to cure before installing the Posh
Bristol shower base.
3. It is essential to test for water run off to
the waste outlet prior to commencing the
installation of the shower walls. This will
ensure the shower base is draining correctly.
Failure to follow this step will void the
guarantee.
4. It is highly recommended that you cover
and protect the Posh Bristol shower base
throughout installation and until it comes into
service.
5. Finally apply silicone to the bottom edge of
the shower wall to the shower base before
the screen is fitted. You will also require
silicone around the shower base outlet.
CLEANING:
The surface of the Posh Bristol shower base
will resist most surface build up. To preserve the
superior appearance of the shower based it is
best cleaned with a soft cloth with warm soapy
water, or general household detergent.
AVOID ABRASIVES
Please avoid using abrasive cleaning products,
as well as steel wool and abrasive cloths.
1 (Wood Floor) 1 (Concrete Floor)
32
4 5
The Posh Bristol shower base has a 9mm wide tile flange. You are required to
check in the base against the framework, install water resistant plaster- board
directly into the base down past the lip, seal the joint with silicone sealant.
Don’t risk it, use a licensed plumber.™
1. Remove outer tension ring and silicone ring from the assembly.
2. Apply a small amount of silicone onto the top flange and place silicone ring onto the silicone.
3. Place the outlet into the outlet hole, ensuring that the sealing ring is between the outlet and the outlet hole.
4. Apply silicone to the underside of the hole filling the gap between the outlet and the base.
5. Replace the outer tension ring from the underside of the base screwing in a clockwise direction onto the outlet.
6. Tighten the outer tension ring with a spanner, do not over tighten.
7. Attach plumbing connections to the threaded outlet.
8. Check for water tightness, tighten further if necessary.
Silicone Ring
Cover
Outlet
Outer Tension Ring
Apply silicone in this
area to the fill the gap
between the outlet and
the shower base.
Apply a small amount of
silicone on this surface
POSH
BRISTOL TORBEX SHOWER BASE
FITTING INSTRUCTIONS FOR POSH BRISTOL WASTE OUTLETS
REECE PRODUCT QUALITY GUARANTEE
You have purchased a quality product from ReecePty Ltd
ABN84 004 097090 (“Reece”). This product is covered by a 7
year replacement product warranty.
7 YEAR WARRANTY – DOMESTIC USE
This warranty covers faults in the product construction, material
and assembly. Products which are within 7 years from the
date of purchase, found upon inspection by an authorised
Reece representative, to be defective in construction,material
or assembly, will be repaired or exchanged with an equivalent
product free of charge. Replaced items become Reece’s
property.
All replacement products will be available for collection without
chargeto the customer at thenearest Reece branch to the
customer’s location, or elsewhere as agreed between the
customer and Reece.
Labour and Spare Parts
Labour will not be covered for removable items such as door
drip seal. This item is removable for cleaning purposes.
Spare parts which are within 1year from the date of purchase
found upon inspection byan authorised Reece representative
to be defective in construction, material or assembly, willbe
replaced free ofcharge.
Warranty Conditions
This warranty will apply only under all of the following
conditions:
•The item has been installed by a licensed plumber
•The item has been installed for and subjected todomestic
residential use only
•Failure is dueto a fault in themanufacture of the product
•Proof of purchase (including the date of purchase) is pro-
vided
•The installation of theproduct is in accordance with the
instructions provided
•This warrantydoes not cover products purchased as an
ex-display without being fullychecked and tested for sale
by the manufacturer.
•This warranty does not include faults caused by:
•Unsuitable orimproper use
•Incorrect installation or installation not in accordance
with theinstructions provided
•Installation or part installation by the purchaser or any
person other than a LICENSEDPLUMBER
•Normal wear and tear
•Inadequate or complete lack of maintenance
•Chemical, electrochemicalor electrical influences
•Harsh detergents or abrasive cleaners used on product
finishes
1 YEAR WARRANTY – COMMERCIAL USE
‘Commercial’ use is all use other than for normal domestic
residential purposes, including usein non-business places
as in public buildings, schools, sports centres and in
establishments that contain private bathrooms with high
frequency of useby many individuals, such as hotels,motels,
retirement villages and hospitals.
The Commercial warranty covers this product against
manufacturing faults in the construction, materialand assembly
of both the finished products and anyspare parts for a period
of 1 year from the date of purchase. Products and spare
parts which are found upon inspection by an authorised
Reece representative to be defective in construction, material
or assembly willbe repaired or exchanged free of charge.
Replaced items become Reece’s property. The Warranty
Conditions and exclusions which applytothe domestic use
warranty also apply to this commercial warranty.
EXCLUSIONS
To thefullest extent permitted by law, Reece excludes all liability
for damage or injuryto any person, damage to any property,
and any indirect consequential or other loss or damage.
CLAIM PROCEDURE
For all warrantyqueries customers are to contact the branch
wherethe product was purchased. These details can befound
on your purchase invoice.
Our goods come with guarantees that cannot be excluded
under theAustralian Consumer Law. You are entitled to a
replacement or refund for a major failure and for compensation
for any other reasonably foreseeable loss or damage.
You are also entitled to have the goods repaired or replaced
if the goods fail to be of acceptable quality and thefailure
does not amount to a major failure.
Don’t risk it, use a licensed plumber.™
POSH
BRISTOL TORBEX SHOWER BASE

This manual suits for next models

3

Other Reece Bathroom Fixture manuals

Reece METHVEN SATINJET ESCAPE MKII User manual

Reece

Reece METHVEN SATINJET ESCAPE MKII User manual

Reece Posh Maintenance manual

Reece

Reece Posh Maintenance manual

Reece Showerama 610 Single Bowl Quick start guide

Reece

Reece Showerama 610 Single Bowl Quick start guide

Reece METHVEN AURAJET AIO User manual

Reece

Reece METHVEN AURAJET AIO User manual

Reece 1789900 User manual

Reece

Reece 1789900 User manual

Reece Posh Solus Installation guide

Reece

Reece Posh Solus Installation guide

Reece KADO User manual

Reece

Reece KADO User manual

Reece hideaway+ User manual

Reece

Reece hideaway+ User manual

Reece ISSY GLIDE TWIN 750 Quick start guide

Reece

Reece ISSY GLIDE TWIN 750 Quick start guide

Reece posh User manual

Reece

Reece posh User manual

Reece Laufen ILBAGNOALESSI One Drop In Basin 500 User manual

Reece

Reece Laufen ILBAGNOALESSI One Drop In Basin 500 User manual

Reece MILLI EXO TOILET ROLL HOLDER User manual

Reece

Reece MILLI EXO TOILET ROLL HOLDER User manual

Reece Omnivo Neo User manual

Reece

Reece Omnivo Neo User manual

Reece Kado Era User manual

Reece

Reece Kado Era User manual

Reece Lancaster 800 User manual

Reece

Reece Lancaster 800 User manual

Reece Posh Solus Powder Room Vanity Unit User manual

Reece

Reece Posh Solus Powder Room Vanity Unit User manual

Reece 1789884 User manual

Reece

Reece 1789884 User manual

Reece Posh Solus MK3 User manual

Reece

Reece Posh Solus MK3 User manual

Reece AXA Uno User manual

Reece

Reece AXA Uno User manual

Reece Posh Domaine MK2 User manual

Reece

Reece Posh Domaine MK2 User manual

Reece KADO Cirque User manual

Reece

Reece KADO Cirque User manual

Reece KADO Lux Oval User manual

Reece

Reece KADO Lux Oval User manual

Reece Posh Domaine User manual

Reece

Reece Posh Domaine User manual

Reece Alape User manual

Reece

Reece Alape User manual

Popular Bathroom Fixture manuals by other brands

Whale Compact Transom Shower Mk2 installation instructions

Whale

Whale Compact Transom Shower Mk2 installation instructions

Brizo Odin Vessel 65475LF Series manual

Brizo

Brizo Odin Vessel 65475LF Series manual

Toto Traditional TS301F41 Installation and owner's manual

Toto

Toto Traditional TS301F41 Installation and owner's manual

BELLOSTA M-Uno 8901/2/A Installation instruction

BELLOSTA

BELLOSTA M-Uno 8901/2/A Installation instruction

Hans Grohe Raindance Showerpipe 27167000 Instructions for use/assembly instructions

Hans Grohe

Hans Grohe Raindance Showerpipe 27167000 Instructions for use/assembly instructions

Hans Grohe Verso Fox Set 27088000 Instructions for use/assembly instructions

Hans Grohe

Hans Grohe Verso Fox Set 27088000 Instructions for use/assembly instructions

Kallista P21520 installation instructions

Kallista

Kallista P21520 installation instructions

Kallista P21639 installation instructions

Kallista

Kallista P21639 installation instructions

Taurus ALPATEC MSB 2000 manual

Taurus

Taurus ALPATEC MSB 2000 manual

BELLOSTA Via Dei Condotti B3-119/A Installation instruction

BELLOSTA

BELLOSTA Via Dei Condotti B3-119/A Installation instruction

Mirolin BELAIRE BA54L/R Installation instructions and owner's manual

Mirolin

Mirolin BELAIRE BA54L/R Installation instructions and owner's manual

Hans Grohe Metropol C 15728 1 Series Installation/User Instructions/Warranty

Hans Grohe

Hans Grohe Metropol C 15728 1 Series Installation/User Instructions/Warranty

Hans Grohe AXOR Montreux 16570 1 Series Installation/User Instructions/Warranty

Hans Grohe

Hans Grohe AXOR Montreux 16570 1 Series Installation/User Instructions/Warranty

Gessi INCISO 58107 manual

Gessi

Gessi INCISO 58107 manual

KEUCO 04980 000017 Mounting instruction

KEUCO

KEUCO 04980 000017 Mounting instruction

Samo B1650 Assembly instruction

Samo

Samo B1650 Assembly instruction

Franke F3SM1008 Installation and operating instructions

Franke

Franke F3SM1008 Installation and operating instructions

Sanela SLP 02K Instructions for use

Sanela

Sanela SLP 02K Instructions for use

manuals.online logo
manuals.online logoBrands
  • About & Mission
  • Contact us
  • Privacy Policy
  • Terms and Conditions

Copyright 2025 Manuals.Online. All Rights Reserved.