Filterfab Thermal Printing System User manual

Page 1 of Page 18
Thermal Printing System
Installation and Operating Manual

Page 2 of Page 18
Introduction
Congratulations on your purchase of the Thermal Printing System designed
exclusively by Filterfab. If this unit is cared for properly, it should provide you a
trouble free Operation.
Please read the instructions below before use
Installation
Place the machine on a solid base ensuring it is firm and level. Ensure there is at least
a 50cm clearance around the press while in use for proper ventilation.
Electrical Connection
The Machine requires a standard socket with 240/250 volts, single phase 50 hertz
electrical supply
This machine has been electrically checked and tested before use, but check your
local state regulations with your local work cover office, as it may require regular
testing and tagging by a qualified electrician in the future like any other appliance.

Page 3 of Page 18
Safety Read Carefully

Page 4 of Page 18
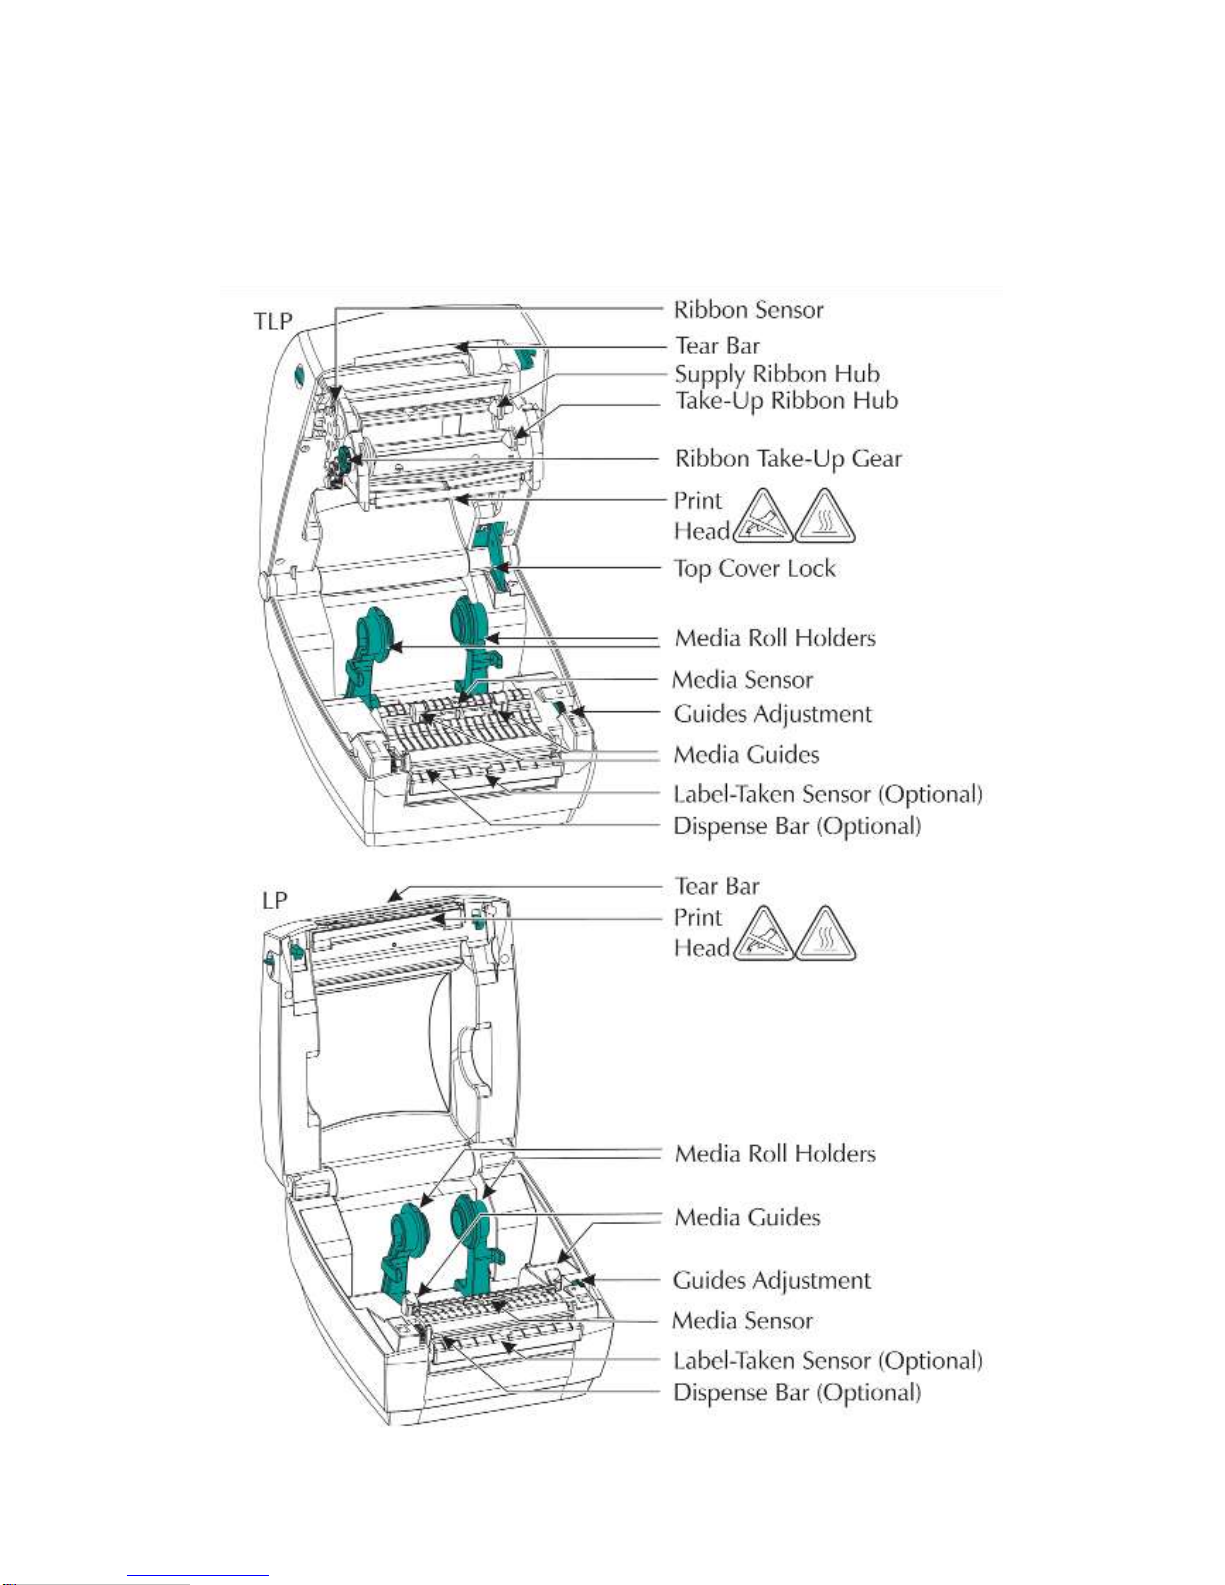
Description of Parts

Page 5 of Page 18
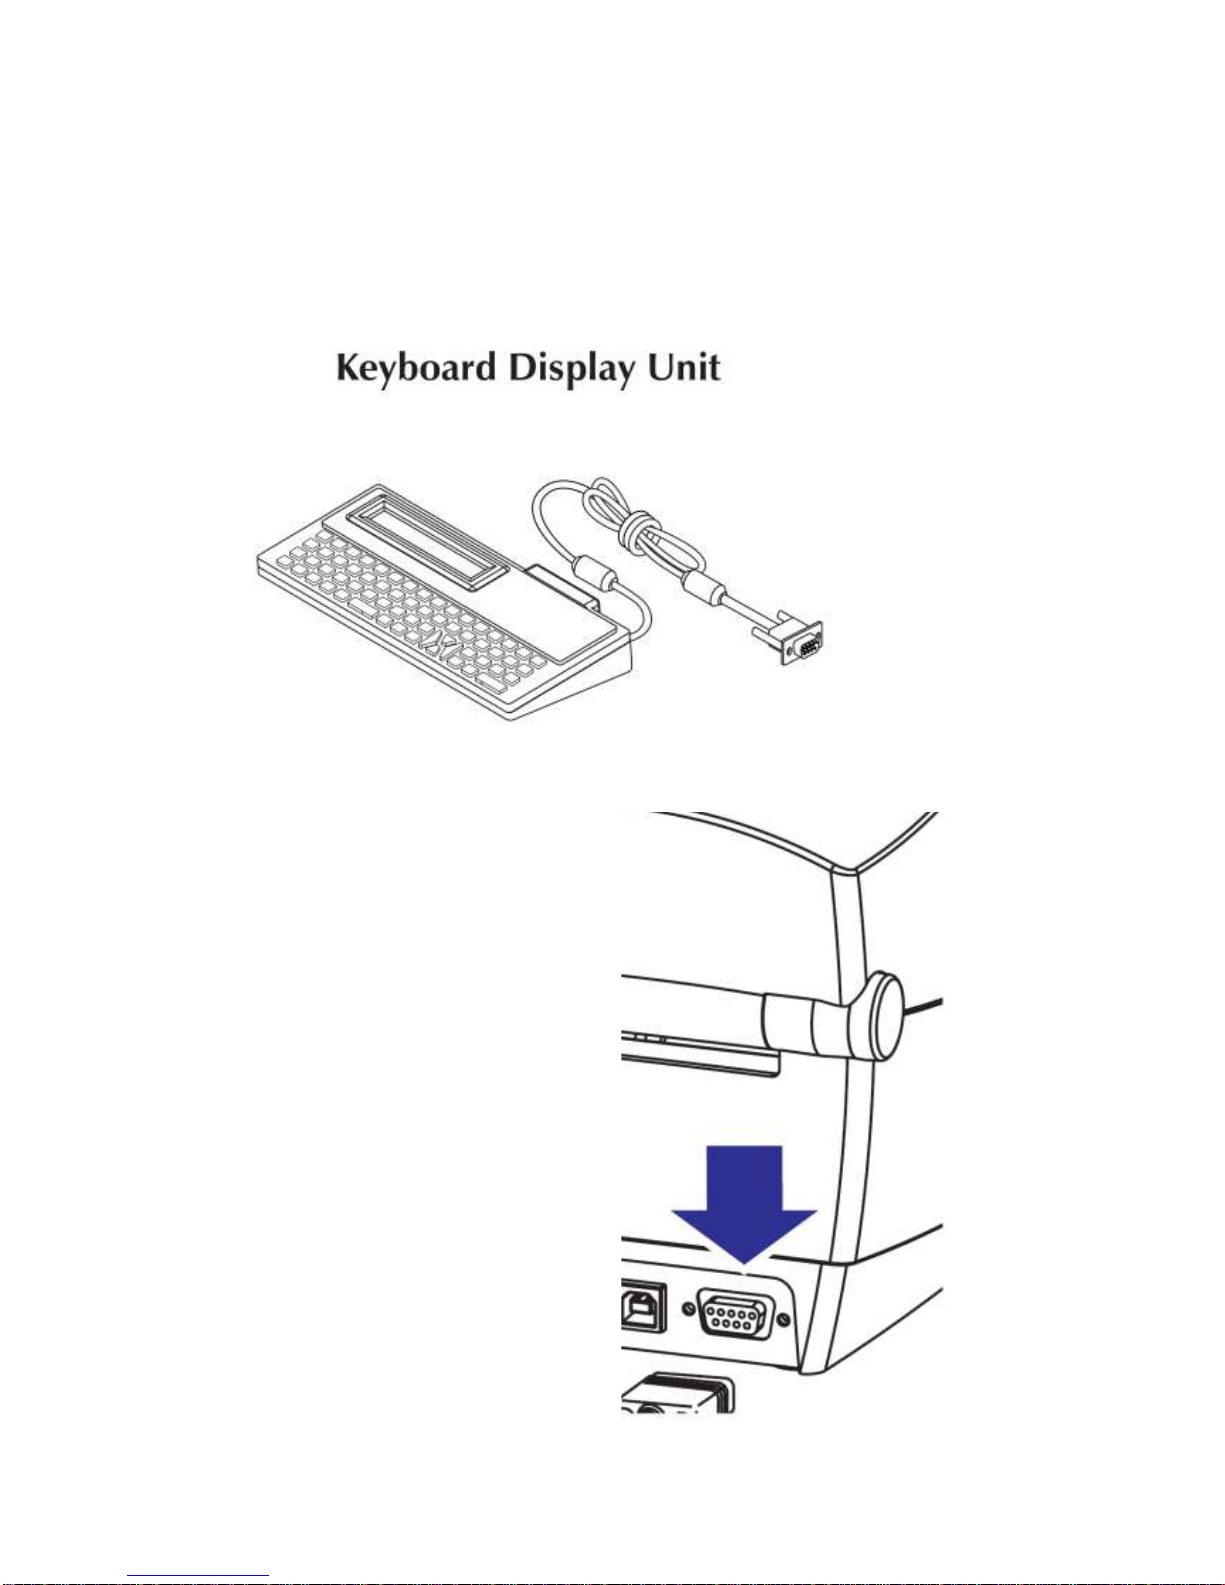
Thermal System Installation Instructions
Plug in Keyboard Display Unit into 9 pin socket on far left back of
printer and tighten 2 screws on plug

Page 6 of Page 18
Ensure Power is off
Plug in Power Cable

Page 7 of Page 18
When your printer is supplied usually Filterfab will have preloaded a
roll of labels and ink ribbon. Please open printer to ensure roll of
labels has not dropped off roll holder in transit. Wind on ink ribbon
about 3 centimetres as described below before using.
Load Labels
Ensure that labels are tight on the roll
Open Printer
Load Labels
Put roll of labels under media
guides. To adjust width move
green wheel. It should be
slightly wider than the labels
and not be pinching the label
roll.

Page 8 of Page 18
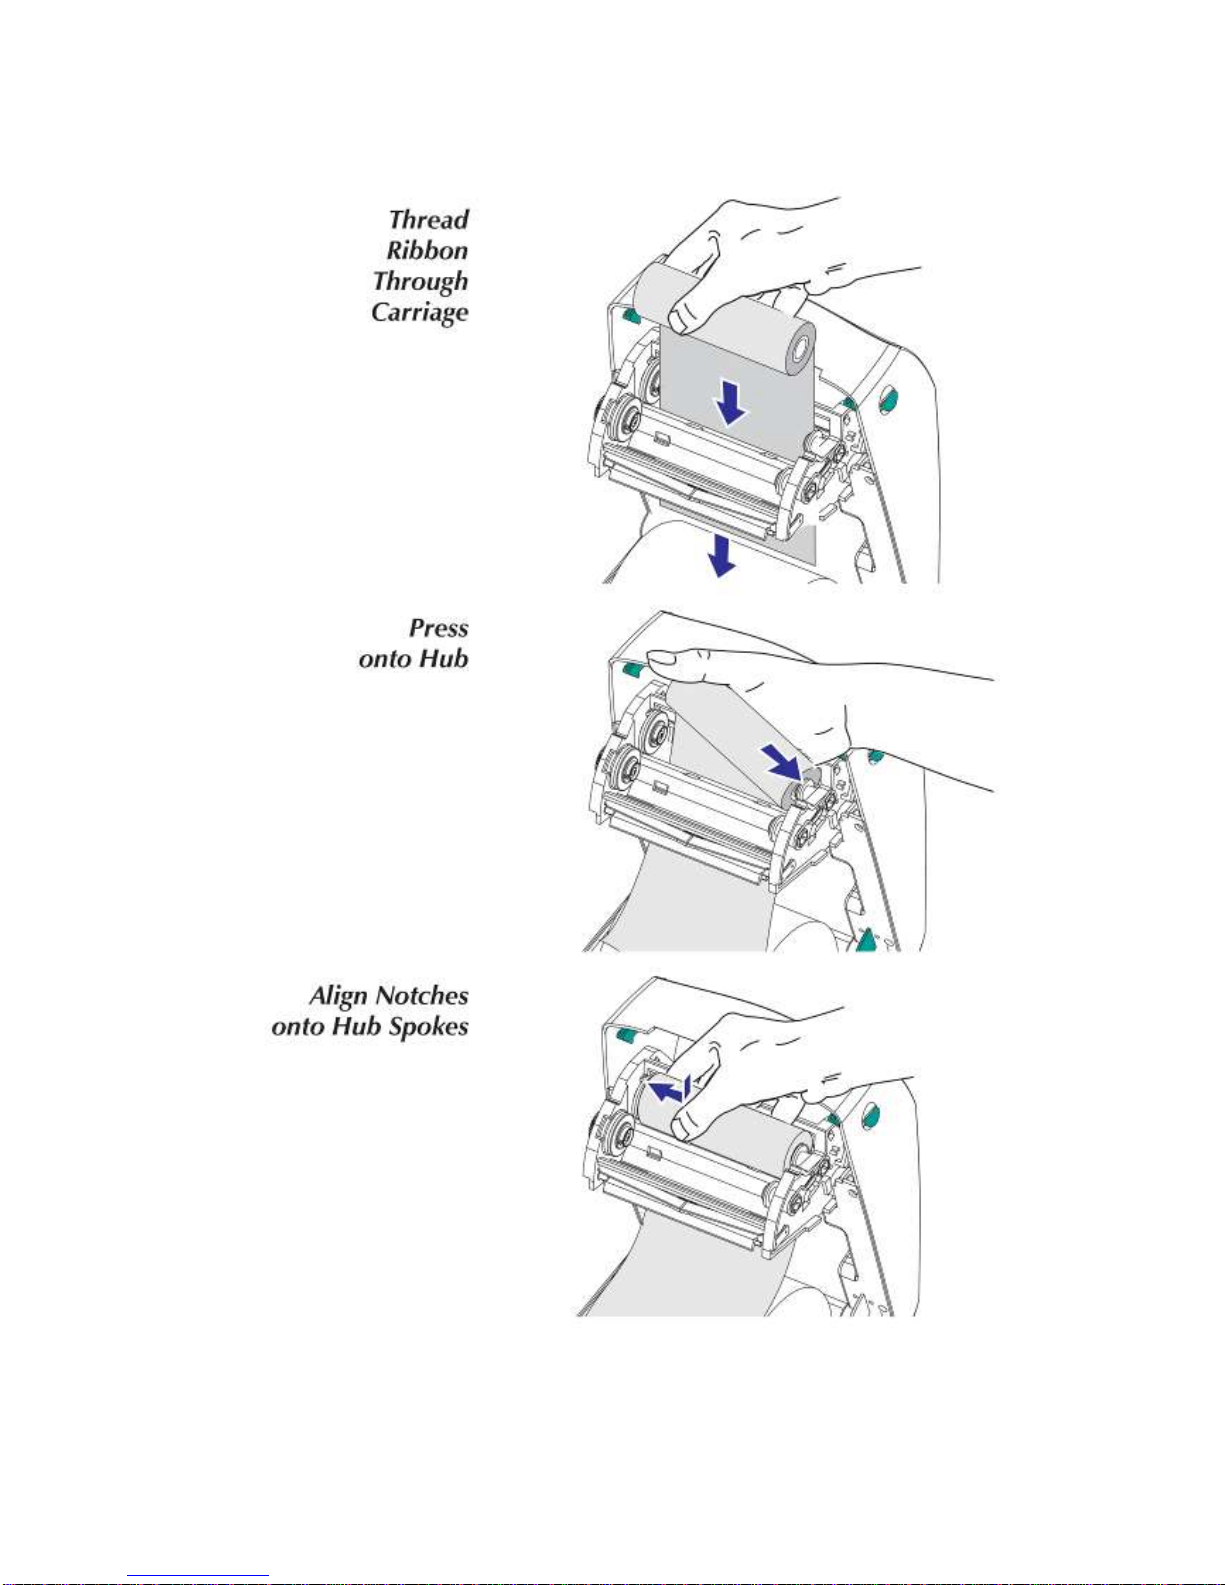
Load Thermal Transfer Ink Ribbon
Put empty roll on front roll as per back roll by pressing spring loaded hub and
aligning notches on cardboard roll with spokes

Page 9 of Page 18

Page 10 of Page 18
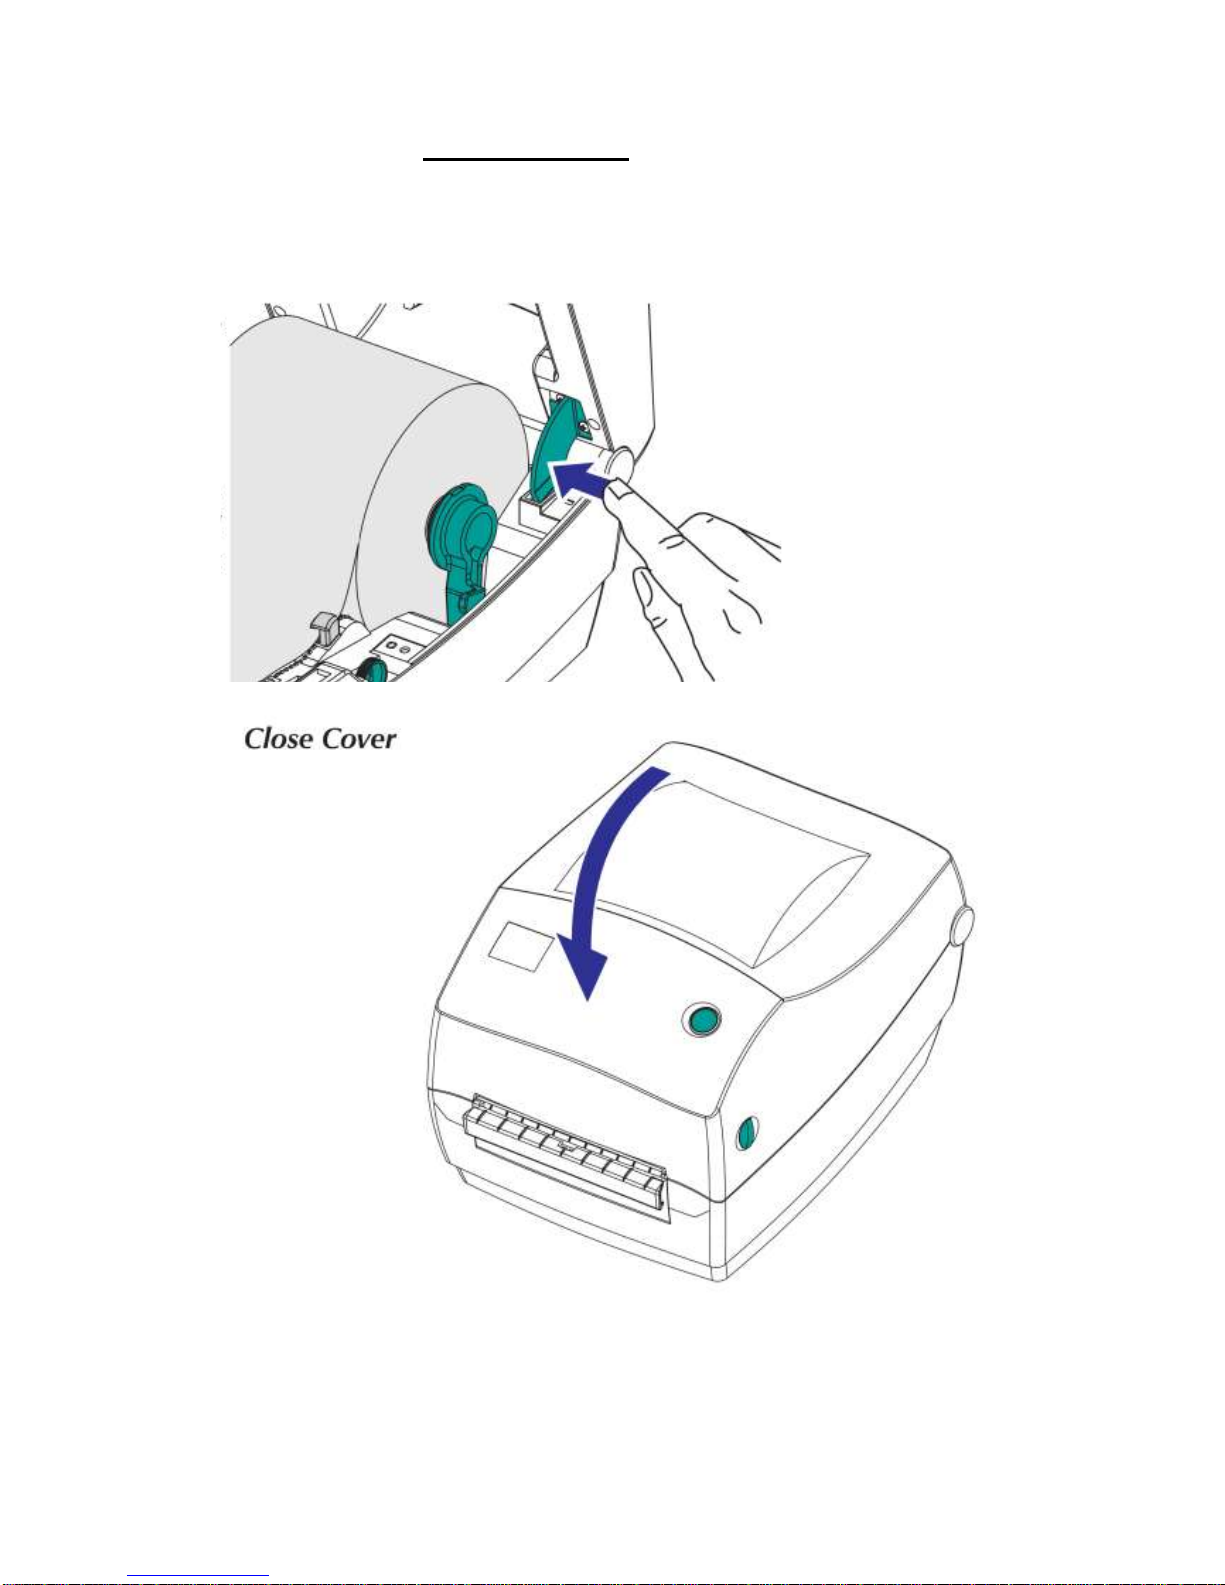
When Closing Printer Do NOT Force Down
Push Top cover lock as in next picture
Release Cover

Page 11 of Page 18
If you have opened the cover for any reason it will usually take the first 5
or 6 labels of printing to realign up
Using the Printer
Turn Power switch on (lower right side towards back.)
The Keyboard should show main menu as in picture below.
By Default
Form 1 is a one line label (12 Characters)
Form 2 is a two line label (12 Characters per line)
Form 3 is a three line label (16 Characters per line)
Form 4 is a one line (11 Characters extra large)
Form 5 is a one line (15 Characters small font)
Form 6 is a two line (15 Characters per line small font) Retrieve a Form:

Page 12 of Page 18
To Retrieve Form
1) Press the FORM key (found in the top right
corner of keyboard). The line in the display
window of keyboard will prompt:
(Enter Form Name)
2) Enter the form number you require (see
previous page) then press Enter
(Type Name) with appear in display window
3) Type in the Data you require then press Enter
4) (Number of labels sets) will appear type in the
number of required labels Press Enter
Your labels will print
(If you are using a form with more than 1 line follow
the prompts in the display window.)
5) If you wish to use the same data (i.e. same
name same amount of labels)
Press Enter on each Line
If you wish to change Data press Exit and the
display window will return to the Main Menu or
press FORM to select another form

Page 13 of Page 18
To tear off label pull upwards as serrated cutting edge is on top side of
opening.
So for example if you want to print 5 two line labels saying Filterfab
Labels
Turn the Printer on
Press the Form Button
Press 2 (for a two line label)
Press Enter Button
The screen will say “ENTER FIRST LINE”
Type “Filterfab”
Press Enter Button
The screen will say “ENTER SECOND LINE”
Type “Labels”
Press Enter Button
The Screen will say “No of Label sets”
Type “5”
Press Enter Button
Labels will Print

Page 14 of Page 18
Troubleshooting
If the thermal ink ribbon breaks or gets snagged open printer cover.
Peel off label and use to attach separated pieces of ink ribbon if
necessary. Wind Ink ribbon on.

Page 15 of Page 18

Page 16 of Page 18

Page 17 of Page 18
Design Changes
With the policy of constant improvement and / or modifications to meet changing
conditions, the right is reserved to change the design and or specifications at any time
without prior notification

Page 18 of Page 18
Guarantee
This Thermal Printer Kit is guaranteed to be free from defects in materials and
workmanship for a period of ONE (1) Year from proven date of installation.
Should in our opinion any part of this unit be defective in materials or workmanship it
will be replaced or repaired free of charge (excluding and travelling / carriage cost
which will be charged at our discretion) provided the unit has been installed and
operated in the correct manner an not subjected to misuse.
A charge will be made for any costs incurred if a reported fault on the unit is found to
be due to incorrect installation, operation and / or incorrect materials being used, as it
is the responsibility of the user to ensure the suitability of the materials operating
though the printer.
Label Reorder Codes
Item
Filterfab Code
2” Thermal Label Roll
5T4612
2” Thermal Label Ink
5T28
4” Thermal Label Roll
5T1482
4” Thermal Label Ink
5T22
Filterfab Contact Details
QLD 07 3205 3844
NSW 02 9667 1483
VIC 03 9848 8199
WA 08 9314 7475
SA 08 8232 2322
NZ 03 379 8131
Email sales@filterfab.com
Other Filterfab Printer manuals