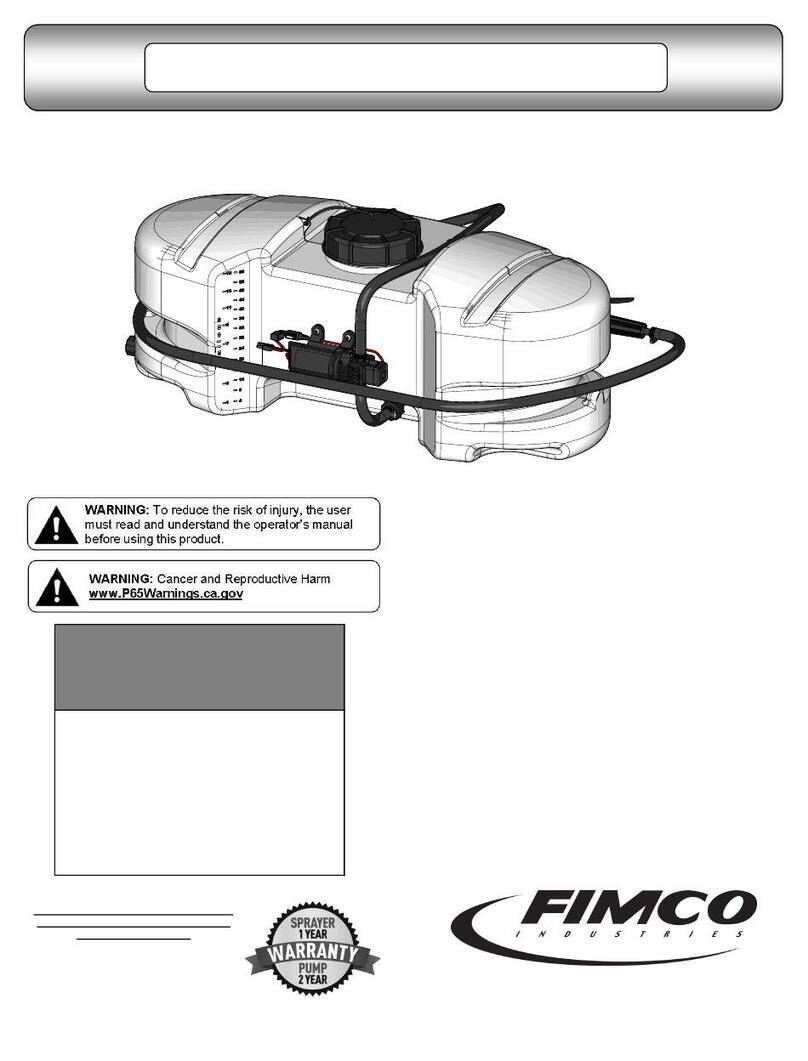
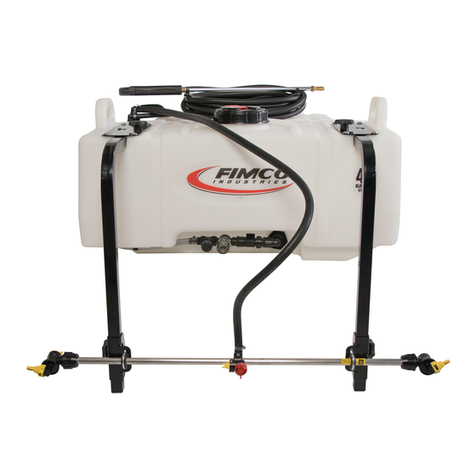
Fimco 150-3PT-5880 User manual

Page 1
OWNER’S MANUAL
Model: 150-3PT-5880 (5301252)
(150 Gallon 3-Point Sprayer w/5880 ‘BoomJet’ [Brass] Nozzle)
www.fimcoindustries.com
1000 FIMCO Lane, P.O. Box 1700, North Sioux City, SD 57049
Toll Free Phone: 800-831-0027 : Toll Free Fax: 800-494-0440
[5004855 (10/22)]
Category I or II
BEFORE RETURNING THIS PRODUCT
FOR ANY REASON, PLEASE CALL
1-800-831-0027
MONDAY-FRIDAY, 8:00 AM TO 5:00 PM CST
If you should have a question or experience a problem with
your Fimco Industries Product: Visit our website @
www.fimcoindustries.com or call the Toll free number above. Our
technical support representatives will be happy to help you.
In most cases a customer service rep. can resolve
the problem over the phone.
To obtain prompt, efficient service, always remember to give the
following information....
• Correct Part Description and/or part number
• Model number and Serial Number
Part descriptions and numbers can be obtained from the
illustrated parts list section(s) of this manual.
General Information
Thank you for purchasing this product. The purpose of this
manual is to assist you in operating and maintaining your
3-Point sprayer.
Retain a copy of your receipt for your unit, as it will be required
to validate any warranty service.
Warranted against manufacturer or workmanship defects from
date of purchase with copy of receipt:
Homeowner Usage: One Year.
Commercial Usage: 90 Days.
WARNING: Cancer and Reproducve Harm.
www.P65Warnings.ca.gov
WARNING: To reduce the risk of injury, the
user must read and understand the operator’s
manual before using this product.

Page 2
Contents
Technical Specs...................................................................... 2Directo Valve Exploded View/Parts List.............................7
Sprayer Assembly Instrucons .............................................. 3Sprayer Exploded View ......................................................8
Sprayer Info and Operaon................................................... 4Sprayer Parts List................................................................9
Calibraon ............................................................................. 5BoomJet Exploded View and Parts List ..............................9
BoomJet 5880 Info and Rate Chart ....................................... 5Sprayer Dimensions .........................................................10
Maintenance, Tank Care and Winter Storage ....................... 6Troubleshoong...............................................................11
Pressure Relief Valve Exploded View/Parts List .................... 7Warranty ..........................................................................12
Model: 150-3PT-5880 (5301252)
(150 Gallon 3-Point Sprayer w/5880 ‘BoomJet’ [Brass] Nozzle)
Technical Specicaons
• 150 Gallon Polyethylene Tank
• Sucon Line Filter
• 5880 ‘BoomJet’ Nozzle
Cauon: When fully lled with water, this sprayer will weigh approx. 1,480 lbs..
Consult the owner’s manual for your vehicle to verify that you are within it’s load carrying capacity.
~~~~~~~~~~~~~~~~~~~~~~~~~~~~~~~~~IMPORTANT~~~~~~~~~~~~~~~~~~~~~~~~~~~~~~~~
Remove tank lid and be sure the tank is clean and free of any foreign material. Rinse tank out of any tank residue
before lling with water to test.
~~~~~~~~~~~~~~~~~~~~~~~~~~~~~~~~~IMPORTANT~~~~~~~~~~~~~~~~~~~~~~~~~~~~~~~~
It is VERY important for you to test your sprayer with plain water before actual spraying is aempted. This will enable
you to check the sprayer for leaks without the possibility of losing any expensive chemicals.
~~~~~~~~~~~~~~~~~~~~~~~~~~~~~~~~~WARNING~~~~~~~~~~~~~~~~~~~~~~~~~~~~~~~~
Read and Understand the Owner’s Manual before using this sprayer. Test and use in accordance to instrucons.
Read and Follow chemical label instrucons and wear protecve gear when lling, using, cleaning and servicing the
sprayer.
Exercise Cauon in vehicle handling when towing/hauling a lled sprayer to avoid loss of control or overturning.
Keep Sprayer and Spray materials away from other people, children and pets.
Do Not Turn on Power to the sprayer, unl ready to spray in order to avoid unintenonal spray release.
Do Not Use on steep slopes. A full sprayer could cause loss of control or overturn sprayer and vehicle.
Always operate up and down a slope, never across the face of a slope.
Keep all movement on slopes slow and gradual. Do not make sudden changes in speed, direcons or turning. Do not start or stop
suddenly when going uphill or downhill.
Stop on level ground, set the parking brake and shut o engine before leaving the operator’s posion for any reason.
Keep all parts in good condion and properly installed. Fix damaged or worn parts immediately.
Cauon should be taken when towing and/or using any sprayer. This sprayer combined with the weight distribuon, turning radius
and speed of vehicle can result in damage to vehicle and/or sprayer or severe injury or death, if not used properly.
Improper use of this sprayer or handling of chemicals could result in serious injury or illness, or could cause damage to the
environment.

Page 3
Pump & Coupler ARE NOT included -for reference ONLY
2. Slide a hose clamp on to
the bypass hose (from the
relief valve), then with a
twisng moon, slip the
bypass hose over the
ng on the boom of
the tank. Slide the hose
clamp to the end of the
hose and secure.
5. The roller pump IS NOT included with the assembly.
Aach the adapter, the torque chain and S-hook to the
pump as needed. It is intended for your pump to be
mounted directly to the tractor PTO. The torque chain
needs to be secured to the tractor to keep your pump
from spinning.
6. Using sealant thread the gauge
into the top of the directo valve
assembly.
7. There is another 3/4”
hose coming o the output
side of the Directo-Valve.
This hose needs to be con-
nected to the ng on the
BoomJet nozzle assembly.
Move the coupling mount
into an upright posion and
fasten with the (2) bolts and
(2) nuts.
3. Using a good quality thread sealant, carefully thread
the 1” ng into the strainer. Find the 1” x 36” pump
feeder hose. Slip a hose clamp onto the ends of the
hose. With a twisng moon, slip the hose all the way
onto the ng and secure with the hose clamp.
1”
3/4”
1. Install the pre-
assembled tee valve sub
-assembly to the 3-point
carrier valve mount and
posion as shown.
Pump IS NOT included -for reference ONLY
4. Using a good quality thread sealant, thread the 1”
ng into the inlet (IN) side of your pump and the 3/4”
ng to the outlet (OUT) side of the pump. With a
twisng moon, aach the other end of the 1” hose to
the 1” ng on the inlet to the pump. Slip a 3/4” hose
clamp onto the 3/4” hose coming o the valve assem-
bly and with a twisng moon, aach hose to the out-
put side of the pump and secure with the hose clamp.
Assembly Procedure
Most of the sprayer has been assembled at the factory.
• Follow the steps on pages 3, 4 & 5 to properly assemble the sprayer.
• Make sure all hose clamps are ght before tesng or spraying for the rst me.
** The Sprayer is now ready to TEST w/plain water before actual use **

Page 4
Operaon Instrucons
Informaon About the Sprayer
Roller pumps are posive displacement pumps, which means that the enre soluon being pumped must go somewhere or the
pump will break. In this roller pumping system, soluon is drawn from the tank and forced to a planned source, such as boom noz-
zles or handgun. The pressure is controlled by a pressure relief valve, which is a spring-loaded device that controls the amount of
uid bypassed (recirculated) to the tank. The gray handle is to be ghtened to increase pressure and loosened to decrease pres-
sure. The ‘directo-valve’ is the on/o control which allows the operator to manually control the soluon going to the boom.
IMPORTANT: Remove tank lid and be sure the tank is clean and free of any foreign material. Rinse tank out of any tank residue
before lling with water to test.
Tesng the Sprayer
Aach the sprayer to the tractor 3 point hitch. Mount the pump to the PTO and ax the torque chain.
NOTE: It is important to test the sprayer with plain water before actual spraying is aempted. This will enable you to familiarize
yourself and check for leaks without the possibility of losing any expensive chemicals.
Fill the tank about 1/2 full with plain water. Before starng, open the sucon line valve (located underneath the carrier frame),
turn the relief valve handle out to lower the line pressure. This will help prime the pump.
CAUTION: Always be sure that the water (or soluon) has reached the pump before starng your sprayer. If the pump is allowed
to run dry, serious damage to the pump will result.
Always have the pressure line open to the ps so that the air which may be trapped in the line will be forced (or purged) out. Start
the tractor PTO. Check the enre system for leaks. Once the pump is primed, the pressure may be increased by turning the handle
of the pressure relief valve in. Keep the pressure line open to the ps when seng the pressure. Set the pressure and then lock the
relief valve handle in place. Shut o the directo-valve and check for leaks again. Pressure will increase when the pressure line valve
is closed and then return to the preset pressure when the valve is opened again.
During the tesng period, be sure to observe the spray paern given by the spray nozzles. If there is any paern distoron, it will
be necessary to remove and clean the aected ps.
Cauon: Never use a metal object or other sharp item for cleaning a nozzle p. It is beer to use a nozzle brush (NOT wire brush)
or compressed air for p cleaning.
Condions of weather and terrain must be considered when seng the sprayer. Do not spray on windy days. Protecve clothing
must be worn in some cases
Be sure to read the chemical label(s) before applicaon!
Operaon
The performance of any agricultural chemical depends upon the proper applicaon.
Always ll the tank with a desired amount of water rst and then add the chemical slowly, mixing as you pour the chemical into
the tank. You may use the handgun to spraying into the soluon in order to mix the chemical and water.
Only ll the tank with what you’re going to spray in a day, never leave chemicals sit in tank.

Page 5
Calibraon
Chemical labels may show applicaon rates in gallons per acre, gallons per 1000 square feet or gallons per 100 square feet. You will
note that the p chart shows gallons per acre. Once you know how much you are going to spray, then determine (from the p
chart) the spraying pressure (PSI), and the spraying speed (MPH).
Determining the proper speed of the pulling vehicle can be done by marking o 100, 200 & 300 feet. The speed chart indicates the
number of seconds it takes to travel the distances. Set the throle and with a running start, travel the distances. Adjust the throle
unl you travel the distances in the number of seconds indicated by the speed chart. Once you have reached the throle seng
needed, mark the throle locaon so you can stop and go again, returning to the same speed.
Add water and proper amount of chemical to the tank and drive to the starng place for spraying
The 5880 BoomJet nozzle is used for spraying areas not easily accessed with a boom
sprayer. Combines (2) o-center ps and (3) VeeJet® nozzles to produce a wide
swath at spray. While not as uniform as a boom sprayer, the BoomJet provides
good distribuon.
The 5880 BoomJet nozzle combines (2) o-center ps and (3) VeeJet nozzles to pro-
duce an overall wide swath at spray. The nozzle assembly provides a good distribu-
on for the wide paern coverage obtained.
Features a 1/4” gauge port and is supplied with (1) addional 1/4” NPT pipe plug
(#CP2812) and (1) blank p (#5138668) for allowing the BoomJet to spray to one side
only.
Using the Boom Nozzles
Four things must be considered before spraying with the boom.
How much chemical must be mixed in the tank.
Rate of spray (gallons per acre to be sprayed).
What pressure (p.s.i.) will be used.
Speed traveled (mph) while spraying.
Refer to the chemical label to determine your chemical mixture
See the p chart to determine the pressure to be used. The chart will also show the speed used when spraying.
Start the pump and open the valve to the boom nozzles.
Check the spray paern. Usually you can see the coverage beer on a solid concrete surface, such as a driveway.
W = Maximum eecve coverage with
OC Tip
OC Tip
VeeJet
Bottom
VeeJet
Top VeeJet
Top
Plug
BoomJet
Nozzle No.
OC
Tips (2)
VeeJet Top
Nozzles (2)
VeeJet Bottom
Nozzle
Liquid
Pressure
(PSI)
Total
Capacity
(GPM)
"W" in
Feet
4
MPH
5
MPH
7.5
MPH
10
MPH
15
MPH
20 2.83 39.5 8.9 7.1 4.7 3.5 2.4
30 3.46 40 10.7 8.6 5.7 4.3 2.9
40 4.00 40.5 12.2 9.8 6.5 4.9 3.3
Gallons Per Acre
5880-3/4-2TOC10
(Fimco #5138475)
OC10
(#5138899)
H1/4U-0508HE
(Fimco #5138691)
H1/4VVL-11004
100 Ft. 200 Ft. 300 Ft.
1.0 68 sec. 136 205
2.0 34 68 102
3.0 23 45 68
4.0 17 34 51
5.0 14 27 41
6.0 11 23 34
7.0 9.7 19 29
8.0 8.5 17 26
9.0 7.6 15 23
10.0 6.8 14 20
Speed Chart
Time Required in seconds
to travel a distance of
Speed in M.P.H.
(Miles Per Hour)

Page 6
Spraying Soluons Other Than Water
Since all the tabulaons are based on spraying water, which weighs 8.34 lbs. per USA gallon, conversion factors must be used when
spraying soluons which are heavier or lighter than water. To determine the proper size nozzle for the soluon to be sprayed, rst
mulply the desired GPM or GPA of soluon by the rate conversion factor. Then use the new converted GPM or GPA rate to select
the proper size nozzle.
Example: Desired applicaon rate is 20 GPA of 28% Nitrogen.
Determine the correct nozzle size as follows:
GPA (Soluon) x Conversion Factor = GPA
20 GPA (28%) x 1.13 + 22.6 GPA (Water)
The applicator should choose a nozzle size that will supply 22.6 GPA of water
at the desired pressure.
Miscellaneous Conversion Factors
One Acre = 43,560 square feet = 0.405 Hectare
One Hectare = 2.471 Acres
One Gallon Per Acre = 9.35 Liters Per Hectare
One Mile = 5,280 Feet = 1,610 Meters = 1.61 Kilometers
One Gallon = 128 Fluid Ounces = 8 Pints = 4 Quarts = 3.79 Liters = 0.83 Imperial Gallons
One Pound Per Square Inch = 0.069 bar. = 6.895 Kilopascals
One Mile Per Hour = 1.609 Kilometers Per Hour
Higher pressure not only increases the ow rate of the nozzle, but it also inuences the droplet size and the rate of orice wear. As
pressure is increased, the droplet size decreases and the rate of orice wear is increased. The values given in the tabulaon secon
of this owners manual indicate the most commonly used pressure ranges for the associated spray ps.
Tank Care & Maintenance
Warning: Do not use the tank as a container for fuel oils, kerosene, gasoline or any other petroleum disllate product. All polyole-
ns are soened and permeated by such products. In an enclosed area the vaporizaon of these materials from the outside
surface of the tank could create a dangerous condion.
The tank should not be used as a pressure vessel nor used with chemicals or soluons having a weight of more than 12 pounds per
gallon.
Store the tank in a dry dark place when not in use. Storage out of sunlight will prolong the life of the tank.
Do not drop, strike or kick the tank, especially at low temperatures. Tanks become brile and are subject to cracking at tempera-
tures below 20° Fahrenheit.
Always ush the tank with water and a neutralizing agent at the end of each use, to prevent contaminaon of soluons.
Maintenance During/Aer Spraying
Periodically close the sucon line valve and check the strainer and clean the screen.
Proper care and maintenance will prolong the life of your sprayer.
Aer use, ll the sprayer tank part way with water. Start the sprayer and allow the clear water to be pumped through the plumbing
system and out through the spray nozzles. Rell the tank about half full with plain water and use FIMCO Tank Neutralizer and
Cleaner and repeat cleaning instrucons above (If no tank cleaner is available, you may substute dish soap for this step, about 1-2
oz. per gallon). But a neutralizer/cleaner should be used to thoroughly clean the system. Flush the enre sprayer with the neutral-
izing/cleaning agent, then ush out one more me with plain water. Follow the chemical manufacturer’s disposal instrucons of all
wash or rinsing water. For the boom (if applicable) remove the ps and screens from the nozzle assemblies. Wash these items out
thoroughly. Blow the orice clean and dry. If the orice remains clogged, clean it with a ne bristle (NOT WIRE) brush or with a
toothpick. Do not damage the orice. Water rinse and dry the ps before storing.
WARNING: Some chemicals will damage the pump valves if allowed to soak untreated for a length of me! ALWAYS ush the
pump as instructed aer each use. DO NOT allow chemicals to sit in the pump for extended mes of idleness. Follow the chemical
manufacturer’s instrucons on disposal of all waste water from the sprayer.
Winter Storage
Drain all water out of your sprayer, paying special aenon to the pump, handgun and valve(s). These items are especially prone to
damage from chemicals and freezing weather.
The sprayer should be winterized before storage by pumping a soluon of automove anfreeze (containing a rust inhibitor)
through the enre plumbing system. This anfreeze soluon should remain in the plumbing system during the winter months.
When spring me comes and you are preparing your sprayer for the spray season, rinse the enre plumbing system out, clearing
the lines of the anfreeze soluon. Proper care and maintenance will prolong the life of your sprayer.
Weight of Solution
Specific
Gravity
Conversion
Factors
7.0 lbs. per gallon .84 .92
8.0 lbs. per gallon .96 .98
8.345 lbs. per gallon
(Water) 1.00 1.00
9.0 lbs. per gallon 1.08 1.04
10.0 lbs. per gallon 1.20 1.10
10.66 lbs. per gallon
(28% Nitrogen)
1.28 1.13
11.0 lbs. per gallon 1.32 1.15
12.0 lbs. per gallon 1.44 1.20
14.0 lbs. per gallon 1.68 1.30

Page 7
Ref. # Fimco # Mfg. Part # Description
1 CP23121-PP CP23121-PP Poly Body (3/4" NPT)
2 CP23128-PP CP23128-PP Poly Body (1/2" NPT)
35102022 F14 Pipe Plug, 1/4" MNPT
4* * CP23126-302SS Retaining Pin
5♦ ♦ CP23125-PP Guide Seat
6* * CP23127-302SS Spring
7* * CP7717-15-EPR O-Ring, EPDM Rubber
8♦ ♦ CP23124-PP Spring Retainer
95110266 CP23123-PP Lock Ring
10 5046270 CP23122-NY Adjusting Cap, Nylon (Gray)
* * Available only in Repair Kit
♦ ♦: Only Available in Complete Assembly
Piston Type Pressure Relief/Regulang Valves
Bypasses excess uid. Adjustable to maintain control of line pressure at any pressure within the valve operang range.
Selected pressure seng rmly held in place by locknut. Extra large passages to handle large ows.
• Polypropylene with stainless steel spring
• Excellent chemical resistance
• EPDM O-Rings
• Fore pressure to 150 p.s.i.
• 1/4” port for pressure gauge
• 3/4” NPT (M) inlet & (F) outlet connecons
Ref. # Fimco # Mfg. Part # Description Qty.
15002476 CP36303-PP Poly Body (AA6B) 1
2♦ ♦ CP36307-PPB Washer 2
3* * CP38726-VI Shut-Off Washer, Viton 1
4♦ ♦ CP36306-302SS Spring 1
5♦ ♦ CP36304-SS Stem 1
6* * CP7717-2/108-VI O-Ring, Viton 1
7* * CP7717-2/209-VI O-Ring, Viton 1
85086043 CP36302-PP Poly Body Insert (Black) 1
95078178 CP36301-NY Handle (Gray) 1
10 5101220 CP36308-SS Groove Pin 1
11 ♦ ♦ CP36309-302SS Retaining Clip 1
12 5102022 F14 Pipe Plug, 1/4" MNPT 1
13 5117281 CP38725-SS
#10-24 x 5/16" Phillips
Truss Head Machine Screw
1
* * Available only in Repair Kit
♦ ♦: Only Available in Complete Assembly
‘Directo Valve’ - Manually Operated Control Valve
• Corrosion Resistant Materials: Weed Parts Polypropylene, 316SS and Polyethylene
• Maximum Pressure = 150 p.s.i.
• Large Capacity - 12.5 G.P.M. @ 5 p.s.i. Pressure Drop
• 3/4” NPT (F) Inlet Connecon
• 1/2” NPT (F) Spray Line Connecon
• 3/4” NPT (F) Connuous By-Pass Connecon
• Valves may be connected w/close nipples for
mulple secon spray control
Fimco # Mfg. Part #
5143316 AA6B
5168718 PK-AB6B-KIT
Description
Directo-Valve (AA6B)
Repair Kit, Items Marked * *

Page 8
Exploded View: 150-3PT-5880 (5301252)
Refer to the parts list next page for part numbers.
Detail B
Detail A
Detail C
See
Detail A
See
Detail B
See
Detail C
Strainer
Detail
* *: Cap ONLY
available in
complete
assembly

Page 9
Parts List: 150-3PT-5880 (5301252)
Item # Mfg. Part # Fimco # Description
1 CP2812 CP2812 1/4" Pipe Plug, Brass
2 H1/4U-0508HE 5138691 VeeJet© Nozzle, Brass
3 CP5856 * * Nozzle Body, Brass
4 12687-50 5116263 Strainer, 50 Mesh
5 H1/4VV-11004 5138722 VeeJet© Nozzle, Brass
6 CP4784-AL 5072106 Tip Gasket, Aluminum
7 OC10 5138899 Off-Center Tip, Brass
8 CP3819 5046062 Cap, Brass
9 CP5539 5138668 Tip Plug, Brass (Blank for OC Tip)
BoomJet®
Boomless Nozzle Detail

Page 10
Dimensions:
49.250” 56.0313”
48.1563”
37.0938”
81.0313”
Strap/Buckle Detail
Strap Aachment to a “Bent” Buckle
The nylon straps are to be inserted in and
out of the slots in the buckle, as shown.
Be sure the straps are snug
before ghtening the hook bolts. In most
cases, it will be necessary to
re-ghten the straps aer lling the tank
with liquid.
Torque Chain
Aachment to a
Roller Pump
Torque chain, ‘S’ hook, nut and bolt are included to secure your pump during
operaon.
1. Aach end of the torque chain over stem of bolt
2. Thread the whiz nut onto the bolt. Hand-ghten.
3. Thread ‘pre-assembly’ into the threaded hole on the underside of the
pump. Tighten suciently
4. Ax the ‘S’ Hook and wrap the chain around the frame or hitch and
‘S-Hook’ it in place. Make sure connecon is very secure! If not secured, it
may result in the pump spinning on PTO sha and damaging some com-
ponents of your sprayer.
*** Insure that this connecon point will not allow the roller pump to spin on
the PTO sha ***

Page 11
Symptom Probable Cause(s) Corrective Action
Leak in suction line Check hose and fittings for leaks and correct
Obstruction in suction line Inspect hose for debris or loose inner liner in hose
Suction strainer clogged Clean strainer
Suction hose sucked to
bottom or side of tank
Cut a notch or "V" in end of suction hose
Air lock in pump Run pump with discharge hose removed to clear air lock
Pump worn Replace or repair pump
Rollers stuck in pump Disassemble pump and inspect rollers
Pump seals worn, leaking air Replace seals
Clogged suction strainer Check strainer and clean it regularly
Kinked or blocked suction hose Inspect suction hose and repair as necessary
Air leak in inlet side plumbing
Check hose and connections for leaks
Use pipe joint sealant and retighten connections
Relief valve setting too low
or weakened spring
Check relief valve and correct setting
Faulty Gauge Replace gauge
Pump seals leak air Replace seals
Nozzle orifices worn Replace nozzles
Pump worn Repair pump
Suction line has air leak Tighten all fittings and hoses between pump and tank
Debris in valve or gauge Remove and clean parts
Kinked or blocked suction hose Remove suction line and clean-check tank and strainer
Air leak in suction hose Tighten all fittings - replace hose if necessary
Suction hose collapsed Replace hose
Pump is sucking air or air has not
been evacuated from strainer
Make sure suction hose is tightly secured. Run pump with
discharge hose removed to remove air lock from pump
Corrosion (rust), scale or residue
Loosen endplate bolts. Squirt oil into ports to help free rotor.
Retighten bolts.
Solid object lodged in pump. Disassemble pump and remove objects
Pump Leaks Worn out seal Replace seal
Loose coupler or damaged shaft Inspect shaft and tighten coupler
Excessive PTO or engine speed Reduce PTO or engine speed
Rotor or internal problem Replace rotor or pump
Partially clogged strainer Clean strainer
Air leak in suction hose Inspect suction hose - replace if necessary
Debris in suction line Clear debris
Hose kinked Straighten or replace hose if necessary
Worn rollers Replace rollers
Strainer clogged Clean strainer
Nozzle size may be too small or
clogged
Clean nozzles - replace nozzles if necessary
Inlet line too small or blocked Clear blockage and if necessary replace hose
By-pass open too much Close slightly
Troubleshooting
Pump Does Not Prime
Loss of Pressure
Pump will not turn
Excessive Vibration or
Noisy Pump
Pump Runs, but Low
Pressure
Pump Pressure Good,
but Low Output
Through Nozzles
Erratic Pressure
Gauge Fluctuates
Excessively

Page 12
Warranty
LIMITED WARRANTY FOR NEW FIMCO, INC.
WHO MAY USE THIS LIMITED WARRANTY. This limited warranty (the “Limited Warranty”) is provided by Fimco, Inc. to the original purchaser
(“you”) of the Equipment (as dened below) from Fimco, Inc. or one of Fimco, Inc.’s authorized dealers. This Limited Warranty does not apply to
any subsequent owner or other transferee of the Equipment. THIS LIMITED WARRANTY GIVES YOU SPECIFIC LEGAL RIGHTS, AND YOU MAY ALSO
HAVE OTHER RIGHTS WHICH VARY FROM STATE TO STATE.
WHAT THIS LIMITED WARRANTY COVERS AND FOR HOW LONG. Fimco, Ind. warrants that any new Equipment will be free from defects in
material and workmanship for a period of one (1) year (homeowner), 90 days (commercial user), aer delivery of the Equipment to you (the
“Warranty Period”). The Warranty Period is not extended if Fimco, Ind. repairs or replaces the Equipment.
WHAT IS NOT COVERED BY THIS LIMITED WARRANTY. This Limited Warranty does not apply to: (1) used Equipment; (2) any Equipment that has
been altered, changed, repaired or treated since its delivery to you, other than by Fimco, Inc. or its authorized dealers; (3) damage or deprecia-
on due to normal wear and tear; (4) defects or damage due to failure to follow Fimco, Inc.’s operator’s manual, specicaons or other wrien
instrucons, or improper storage, operaon, maintenance, applicaon or installaon of parts; (5) defects or damage due to misuse, accident or
neglect, “acts of God” or other events beyond Fimco, Inc.’s reasonable control; (6) accessories, aachments, tools or parts that were not manu-
factured by Fimco, Inc., whether or not sold or operated with the Equipment; or (7) rubber parts, such as res, hoses and grommets.
HOW TO OBTAIN WARRANTY SERVICE. To obtain warranty service under this Limited Warranty, you must (1) provide wrien noce to Fimco,
Inc. of the defect during the Warranty Period and within thirty (30) days aer the defect becomes apparent or the repair becomes necessary, at
the following address: Fimco, Inc., 1000 Fimco Lane, North Sioux City, SD 57049; and (2) make the Equipment available to Fimco, Inc. or an
authorized dealer within a reasonable period of me. For more informaon about this Limited Warranty, please call: 800-831-0027
WHAT REMEDIES ARE AVAILABLE UNDER THIS LIMITED WARRANTY. If the condions set forth above are fullled and the Equipment or any part
thereof is found to be defecve, Fimco, Inc. shall, at its own cost, and at its opon, either repair or replace the defecve Equipment or part.
Fimco, Inc. will pay for shipping and handling fees to return the repaired or replacement Equipment or part to you.
LIMITATION OF IMPLIED WARRANTIES AND OTHER REMEDIES. THE REMEDIES DESCRIBED ABOVE ARE YOUR SOLE AND EXCLUSIVE REMEDIES,
AND FIMCO, INC.’S SOLE LIABILITY, FOR ANY BREACH OF THIS LIMITED WARRANTY. TO THE EXTENT APPLICABLE, ANY IMPLIED WARRANTIES,
INCLUDING, WITHOUT LIMITATION, THE IMPLIED WARRANTIES OF MERCHANTABILITY AND FITNESS FOR A PARTICULAR PURPOSE, SHALL BE LIM-
ITED IN DURATION TO THE WARRANTY PERIOD, AND THE REMEDIES AVAILABLE FOR BREACH THEREOF SHALL BE LIMITED TO THE REMEDIES
AVAILABLE UNDER THIS EXPRESS LIMITED WARRANTY. SOME STATES DO NOT ALLOW LIMITATIONS ON HOW LONG AN IMPLIED WARRANTY
LASTS, SO THE ABOVE LIMITATION MAY NOT APPLY TO YOU. IN NO EVENT SHALL FIMCO, INC.’S LIABILITY UNDER THIS LIMITED WARRANTY EX-
CEED THE ACTUAL AMOUNT PAID BY YOU FOR THE DEFECTIVE EQUIPMENT, NOR SHALL FIMCO, INC. BE LIABLE, UNDER ANY CIRCUMSTANCES,
FOR ANY CONSEQUENTIAL, INCIDENTAL, SPECIAL OR PUNITIVE DAMAGES OR LOSSES, WHETHER DIRECT OR INDIRECT. SOME STATES DO NOT
ALLOW THE EXCLUSION OR LIMITATION OF INCIDENTAL OR CONSEQUENTIAL DAMAGES, SO THE ABOVE LIMITATION OR EXCLUSION MAY NOT
APPLY TO YOU.
This manual suits for next models
1
Table of contents
Other Fimco Paint Sprayer manuals

Fimco
Fimco LSS-280-EH User manual

Fimco
Fimco LG-8-P User manual

Fimco
Fimco 200-3PT-17N User manual

Fimco
Fimco SK-61-12V User manual

Fimco
Fimco LG-45-BL-UTV User manual

Fimco
Fimco ATVBK-3025-QR User manual

Fimco
Fimco 25-2N-TRL-GS User manual

Fimco
Fimco LG-55-3PT-12V User manual

Fimco
Fimco LSS-280 User manual

Fimco
Fimco LG-3025 Parts list manual

Fimco
Fimco 200-3PT-17N-XL User manual

Fimco
Fimco 9-200 User manual

Fimco
Fimco LSS-235-H User manual

Fimco
Fimco 5302886 User manual

Fimco
Fimco 200-3PT-1PC-TSC User manual

Fimco
Fimco BB-302 User manual

Fimco
Fimco ATVBK-700-QR User manual

Fimco
Fimco SK-110-8R User manual

Fimco
Fimco ATVTS-60-12V User manual

Fimco
Fimco LG-4-3-1 User manual