manuals.online logo
Brands
  1. Home
  2. •
  3. Brands
  4. •
  5. Finn
  6. •
  7. Spreader
  8. •
  9. Finn Bark Blower BB1216 Parts list manual

Finn Bark Blower BB1216 Parts list manual

This manual suits for next models

1

Other Finn Spreader manuals

Finn BARK BLOWER BB-1208 Parts list manual

Finn

Finn BARK BLOWER BB-1208 Parts list manual

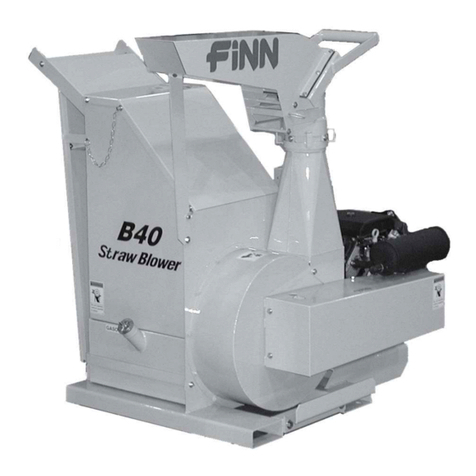
Finn B-40 User manual

Finn

Finn B-40 User manual

Finn B-70 User manual

Finn

Finn B-70 User manual

Popular Spreader manuals by other brands

Sami ST-1000 PTO user manual

Sami

Sami ST-1000 PTO user manual

PEQUEA GT-100 Operator's manual

PEQUEA

PEQUEA GT-100 Operator's manual

Epoke SKE8 instruction manual

Epoke

Epoke SKE8 instruction manual

GEA EL44 Instruction manual and installation instructions

GEA

GEA EL44 Instruction manual and installation instructions

Boss Snowplow TGS 800 owner's manual

Boss Snowplow

Boss Snowplow TGS 800 owner's manual

Fisher EMERSON 168 Series installation guide

Fisher

Fisher EMERSON 168 Series installation guide

Fisher POLY-CASTER 78601 owner's manual

Fisher

Fisher POLY-CASTER 78601 owner's manual

Fayat Group DYNAPAC S100 operation & maintenance

Fayat Group

Fayat Group DYNAPAC S100 operation & maintenance

Art's-Way Manufacturing X700 Operator's manual & parts list

Art's-Way Manufacturing

Art's-Way Manufacturing X700 Operator's manual & parts list

Ferris Pathfinder Series Operator's manual

Ferris

Ferris Pathfinder Series Operator's manual

Herculano H2RS9 instruction manual

Herculano

Herculano H2RS9 instruction manual

TurfEx RS7200 Owner's/operator's manual

TurfEx

TurfEx RS7200 Owner's/operator's manual

Nogueira RoyalFlow-600 instruction manual

Nogueira

Nogueira RoyalFlow-600 instruction manual

APV ES 100 M1 Classic Original operating instructions

APV

APV ES 100 M1 Classic Original operating instructions

BEFCO TURBO-HOP 301-300 Operator's manual

BEFCO

BEFCO TURBO-HOP 301-300 Operator's manual

H&S 5220 Operation manual

H&S

H&S 5220 Operation manual

Turfware TR460 Operation manual

Turfware

Turfware TR460 Operation manual

Anderson Manufacturing SS-2 Assembly & user manual

Anderson Manufacturing

Anderson Manufacturing SS-2 Assembly & user manual

manuals.online logo
manuals.online logoBrands
  • About & Mission
  • Contact us
  • Privacy Policy
  • Terms and Conditions

Copyright 2025 Manuals.Online. All Rights Reserved.

BB1216 - BB1222 MU0518 Rev.A
9281 LeSaint Drive • Fairfield, Ohio 45014
Phone (513) 874-2818 • Fax (513) 874-2914
Sales: 1-800-543-7166
Model BB1216 and BB1222
Operator Instructions and Parts Manual
Model MU Serial No. _____________
Activate
Your Warranty
By Registering
TODAY!!!
FOR OFFICE USE ONLY
DATE UPDATE DESCRIPTION CODE
01/31/17 Initial release; Updated Hydraulic System; Added Manual Canister to Tool Kit list MU0131
05/18/17 Revision A: New toolbox MU0518
What should you do if you need repairs or parts under Warranty?
How to get parts and or repairs done under warranty:
Notify YOUR DEALER immediately when you discover a faulty material, workmanship, or
faulty component. Do not wait weeks or months to get it reported. Be sure to tell the dealer
that this is a failure that occurred under warranty.
NOTE: Warranty work must be done by a Finn Authorized Dealer in order to be covered
by the Finn Warranty Program, unless otherwise approved by the Finn Warranty
Administrator.
Instructions to Dealer on processing warranty work:
Initiating a claim
1. Be sure to have the model, serial number and number of hours on unit.
2. A description of the problem as understood at the time.
3. Call Finn’s Warranty Administrator to secure warranty claim authorization number.
4. Confirm with Warranty Administrator that the unit is eligible for warranty coverage.
5. Any parts needed for the repair work should be placed with the Warranty Administrator
instead of the parts department. These will be shipped to you at no charge pending the
outcome of the investigation.
6. Labor hours must coincide with the published “Labor Schedule” or estimate approved
by the Finn Warranty Administrator.
7. Once work is done, a Finn Warranty Claim Form must be filled out and emailed along
with any related receipts or invoices to the Warranty Administrator. We ask that this is
done ASAP after work is completed.
Faulty or failed parts:
IF Finn wants you to return failed parts, you will receive a return shipping label in the
package with new parts. On that Label will be marked a return authorization number. (Which
is the same number as you claim number.)
Please also mark the outside of the package that you are shipping back (using a marker)
with the claim/return number. THESE PARTS MUST BE RETURNED WITHIN 10 DAYS!
Failure to do so can void warranty coverage.
NOTE: Further information and related forms can be found on the Finn Web site in the
Dealer Portal warranty section.
ACTIVATE YOUR FINN EQUIPMENT WARRANTY
It is the responsibility of the Finn Dealer to register your Finn Equipment shortly after the
equipment start-up and operation overview at which time you will be asked to sign off on
the WARRANTY VALIDATION FORM.
Be sure to confirm with your sales representative that this has been done.
This registration process activates the Finn Limited Warranty.
INDEX
Safety First . . . . . . . . . . . . . . . . . . . . . . . . . . . . . . . . . . . . . . . . . . . . . . . . . . . . . . . . . . . . .1
Safety Summary Section . . . . . . . . . . . . . . . . . . . . . . . . . . . . . . . . . . . . . . . . . . . . . . . 2–4
Safety Decals . . . . . . . . . . . . . . . . . . . . . . . . . . . . . . . . . . . . . . . . . . . . . . . . . . . . . . . . . . .5
Introduction. . . . . . . . . . . . . . . . . . . . . . . . . . . . . . . . . . . . . . . . . . . . . . . . . . . . . . . . . . . . .7
The FINN Bark Blower and Its Function. . . . . . . . . . . . . . . . . . . . . . . . . . . . . . . . . . . . . . .7
How the Bark Blower Works. . . . . . . . . . . . . . . . . . . . . . . . . . . . . . . . . . . . . . . . . . . . . . . .7
Mounting the Bark Blower. . . . . . . . . . . . . . . . . . . . . . . . . . . . . . . . . . . . . . . . . . . . . . . . . .8
Dimensions, Capacities, and Truck Requirements. . . . . . . . . . . . . . . . . . . . . . . . . . . . . . .8
Truck Mounting Calculations. . . . . . . . . . . . . . . . . . . . . . . . . . . . . . . . . . . . . . . . . . . . . . . .9
General Mounting Guidelines. . . . . . . . . . . . . . . . . . . . . . . . . . . . . . . . . . . . . . . . . . . . . . .9
Selecting a Mulching Material. . . . . . . . . . . . . . . . . . . . . . . . . . . . . . . . . . . . . . . . . . . . . .10
Pre-Start Equipment Check . . . . . . . . . . . . . . . . . . . . . . . . . . . . . . . . . . . . . . . . . . . . . . .10
Starting Procedure . . . . . . . . . . . . . . . . . . . . . . . . . . . . . . . . . . . . . . . . . . . . . . . . . . . . . .11
Crew Members and their Duties. . . . . . . . . . . . . . . . . . . . . . . . . . . . . . . . . . . . . . . . . . . .11
The Material Feed System . . . . . . . . . . . . . . . . . . . . . . . . . . . . . . . . . . . . . . . . . . . . .11–14
Subsystem 1: Material Handling Group . . . . . . . . . . . . . . . . . . . . . . . . . . . . . . . . . .12
Subsystem 2: Hydraulic System . . . . . . . . . . . . . . . . . . . . . . . . . . . . . . . . . . . . . . . .12
Description of Valve Sections . . . . . . . . . . . . . . . . . . . . . . . . . . . . . . . . . . . . . . 13–14
A. Hose Reel . . . . . . . . . . . . . . . . . . . . . . . . . . . . . . . . . . . . . . . . . . . . . . . . . . .13
B. Agitator . . . . . . . . . . . . . . . . . . . . . . . . . . . . . . . . . . . . . . . . . . . . . . . . . . . . .13
C. Floor (Drag Conveyor)/Feed Roll . . . . . . . . . . . . . . . . . . . . . . . . . . . . . . . . .13
D. Airlock . . . . . . . . . . . . . . . . . . . . . . . . . . . . . . . . . . . . . . . . . . . . . . . . . . . . . .14
Subsystem 3: Hydraulic Control System. . . . . . . . . . . . . . . . . . . . . . . . . . . . . . . . . .14
Subsystem 4: Radio Remote Transmitter. . . . . . . . . . . . . . . . . . . . . . . . . . . . . . . . .15
Mulching with the Bark Blower . . . . . . . . . . . . . . . . . . . . . . . . . . . . . . . . . . . . . . . . . 15–16
Bark Blower Adjustments . . . . . . . . . . . . . . . . . . . . . . . . . . . . . . . . . . . . . . . . . . . . . 16–17
A. Consistent Hose Shock . . . . . . . . . . . . . . . . . . . . . . . . . . . . . . . . . . . . . . . . . . . .16
B. Excessive Auto-Reversing. . . . . . . . . . . . . . . . . . . . . . . . . . . . . . . . . . . . . . . . . .16
C. Regularly Tripping The Blower Relief . . . . . . . . . . . . . . . . . . . . . . . . . . . . . . . . .17
D. Material Metering Gate . . . . . . . . . . . . . . . . . . . . . . . . . . . . . . . . . . . . . . . . . . . .17
Continued . . .
Clearing a Blockage . . . . . . . . . . . . . . . . . . . . . . . . . . . . . . . . . . . . . . . . . . . . . . . . . . . . .17
Quick Dump Feature. . . . . . . . . . . . . . . . . . . . . . . . . . . . . . . . . . . . . . . . . . . . . . . . . 17–18
Dust Control System. . . . . . . . . . . . . . . . . . . . . . . . . . . . . . . . . . . . . . . . . . . . . . . . . . . . .18
Maintenance . . . . . . . . . . . . . . . . . . . . . . . . . . . . . . . . . . . . . . . . . . . . . . . . . . . . . . . 18–23
Daily - After Every 4 to 8 Hours of Operation . . . . . . . . . . . . . . . . . . . . . . . . . . . . . .19
Weekly - After Every 50 Hours of Operation . . . . . . . . . . . . . . . . . . . . . . . . . . . 19–20
Floor Chain Adjustment - Every 50 Hours. . . . . . . . . . . . . . . . . . . . . . . . . . . . . 20–21
After First 100 Hours of Operation . . . . . . . . . . . . . . . . . . . . . . . . . . . . . . . . . . . . . .21
Winter Shutdown and Storage. . . . . . . . . . . . . . . . . . . . . . . . . . . . . . . . . . . . . . . . . .21
Troubleshooting Chart . . . . . . . . . . . . . . . . . . . . . . . . . . . . . . . . . . . . . . . . . . . . . . . .23
Theory of Operation . . . . . . . . . . . . . . . . . . . . . . . . . . . . . . . . . . . . . . . . . . . . . . . . . . . . .24
Navigating the Bark Blower interface . . . . . . . . . . . . . . . . . . . . . . . . . . . . . . . . . . . . 25–30
Lubrication Chart. . . . . . . . . . . . . . . . . . . . . . . . . . . . . . . . . . . . . . . . . . . . . . . . . . . . 32–33
Parts Manual Section . . . . . . . . . . . . . . . . . . . . . . . . . . . . . . . . . . . . . . . . . . . . . . . . 35–71
Loose Parts . . . . . . . . . . . . . . . . . . . . . . . . . . . . . . . . . . . . . . . . . . . . . . . . . . . . . . . .36
Agitator Assembly. . . . . . . . . . . . . . . . . . . . . . . . . . . . . . . . . . . . . . . . . . . . . . . . . . . .37
Floor and Feed Roll Parts . . . . . . . . . . . . . . . . . . . . . . . . . . . . . . . . . . . . . . . . . 38–39
Airlock Parts . . . . . . . . . . . . . . . . . . . . . . . . . . . . . . . . . . . . . . . . . . . . . . . . . . . . 40–41
Engine and Radiator. . . . . . . . . . . . . . . . . . . . . . . . . . . . . . . . . . . . . . . . . . . . . . 42–43
Engine Sheet Metal . . . . . . . . . . . . . . . . . . . . . . . . . . . . . . . . . . . . . . . . . . . . . . 44–45
Engine Air Intake . . . . . . . . . . . . . . . . . . . . . . . . . . . . . . . . . . . . . . . . . . . . . . . . . . . .46
Blower Drive Assembly. . . . . . . . . . . . . . . . . . . . . . . . . . . . . . . . . . . . . . . . . . . . . . . .47
Blower System . . . . . . . . . . . . . . . . . . . . . . . . . . . . . . . . . . . . . . . . . . . . . . . . . . 48–49
Blower Piping . . . . . . . . . . . . . . . . . . . . . . . . . . . . . . . . . . . . . . . . . . . . . . . . . . . 50–51
Hydraulic System . . . . . . . . . . . . . . . . . . . . . . . . . . . . . . . . . . . . . . . . . . . . . . . . 52–55
Control Box Harness . . . . . . . . . . . . . . . . . . . . . . . . . . . . . . . . . . . . . . . . . . . . . 56–57
Valve Wiring Harness. . . . . . . . . . . . . . . . . . . . . . . . . . . . . . . . . . . . . . . . . . . . . 58–59
Engine Wiring. . . . . . . . . . . . . . . . . . . . . . . . . . . . . . . . . . . . . . . . . . . . . . . . . . . 60–63
Dust Control System . . . . . . . . . . . . . . . . . . . . . . . . . . . . . . . . . . . . . . . . . . . . . 64–65
Hydraulic Hose Reel. . . . . . . . . . . . . . . . . . . . . . . . . . . . . . . . . . . . . . . . . . . . . . 66–67
Decals. . . . . . . . . . . . . . . . . . . . . . . . . . . . . . . . . . . . . . . . . . . . . . . . . . . . . . . . . 68–69
Tarp Assembly . . . . . . . . . . . . . . . . . . . . . . . . . . . . . . . . . . . . . . . . . . . . . . . . . . . . . .70
Tool Kit/Discharge Hose/Recommended Spare Parts . . . . . . . . . . . . . . . . . . . . . . .71
INDEX CONTINUED
1
SAFETY FIRST
With any piece of equipment, new or used, the most
important part of its operation is SAFETY!
FINN Corporation encourages you and your employees
to familiarize yourselves with your new equipment and
stresses safe operation.
The first five pages of this manual are a summary of the
main safety aspects associated with this unit. Be sure
to read and understand completely before operating the
machine.
The symbols below are used throughout
the operation and maintenance sections
of this manual to call attention to safety
procedures.
DANGER
Indicates a hazardous situation which, if not avoid-
ed, will result in death or serious injury.
WARNING
Indicates a hazardous situation which, if not avoid-
ed, could result in death or serious injury.
CAUTION
Indicates a hazardous situation which, if not avoid-
ed, could result in minor or moderate injury.
NOTICE
Indicates practices that are not related to personal injury.
NOTE:
Gives helpful information.
CALIFORNIA
Proposition 65 Warning
The engine exhaust and some of
its constituents are known to the
State of California to cause can-
cer, birth defects, and other repro-
ductive harm.
CALIFORNIA
Proposition 65 Warning
Battery posts, terminals, and
related accessories contain lead
and lead compounds, chemicals
known to the State of California
to cause cancer and reproductive
harm. Wash hands after handling.
2
I. PRE-START EQUIPMENT CHECK (equipment
check is to be made with the engine off):
1. Check hitch and hitch
bolts, safety chains, lights,
brakes, and breakaway
switch. Verify that the hitch
ball or pintle hook is the
correct size for the coupler.
2. Verify that all guards are in place.
3. By carefully looking into the blower hopper and
transition, inspect for and remove any foreign
objects. Follow Occupational Safety and Health
Administration (OSHA) lockout/tagout procedure (29
CFR 1910.147)
4. Inspect all hydraulic hoses and tubes for cracks,
bulges, or damage. If hose is cracked, bulging, or
damaged, replace immediately.
5. Inspect the material discharge hose and connections
for cracks or damage. If cracks or damage is found,
replace affected part immediately.
II. MACHINE OPERATION:
1. Always wear safety gog-
gles when operating
or feeding the machine.
Other safety attire, such
as safety shoes, ear pro-
tection, gloves, hard hats,
dust masks, etc., should
be worn as required
by warning decals on
machine, operator’s manuals, or job site require-
ments. Remove rings, watches, etc. Avoid wearing
loose-fitting clothing that may get caught in rotating
machinery.
2. Do not override or tamper with the safety-shutdown
switches on the folding door or discharge. If switch-
es fail, use OSHA lockout/tagout procedure (29 CFR
1910.147) until switches are repaired or replaced.
3. Donotoperatethemachine
without all guards in place.
4. Never attempt to connect, or disconnect the dis-
charge hose while the engine is running.
5. Make sure that no one
is working in or on the
machine. Make sure the
discharge area is clear of
all persons, animals, etc.
Signal visually or audi-
bly that all is clear before
starting the engine. Keep
unauthorized personnel
away from the machine
and discharge hose at all
times.
6. The driver of the towing vehicle is responsible for
the safety of the operator(s) and feeder(s) of the
machine. Make sure the driver is aware of and
avoids all possible hazards, such as tree limbs, low
power lines, etc.
7. Do not allow anyone to ride on the trailer or any other
part of the blower for any reason.
8. Never operate machine in
an enclosed area without
venting the engine exhaust
of both the equipment and
vehicle on which the equip-
ment is mounted. Deadly
carbon monoxide fumes
can accumulate.
9. Never operate this or any other machinery when
fatigued, tired, under the influence of alcohol, illegal
drugs or medication. You must be in good physical
condition and mentally alert to operate this machine.
BARK BLOWER SAFETY SUMMARY SECTION
It is important that all operators of this machine are familiar with all the safety aspects mentioned
below before operating the machine. Always keep a copy of this manual with the machine. It is the respon-
sibility of the operator of the machine to fully understand this safety section. Remember that YOU are the
key to safety. Good safety practices protect not only you but also the people working with and around you.
Keep in mind that this safety sheet is written for this type of machine only. Practice all other usual and
customary safe working precautions; and above all, remember that safety is up to you.
3
firm control of the hose. Additional personnel to
direct hose may be necessary if working on slopes.
The proper technique for grasping the hose used by
hose-holding personnel is to route and firmly grasp
the hose over the shoulder or under both arms.
Never route/hold the hose so it goes between the
legs. If the hose-holding personnel finds that it is
uncomfortable for him to handle the hose by himself,
additional hose holders should be positioned at the
end of the hose.
12. The blower discharges material at pressures and
velocities that can cause severe bodily injury. Do not
aim discharge at people, animals, etc. Only aim the
discharge at the intended discharge area. Unless
properly protected, do not place hand into the dis-
charge stream.
13. Do not open any doors
or access panels while
machine is in operation.
Severe injury may result
from rotating parts.
14. Do not attempt to pull
anything out of the blower
hopper while machine is
in operation. Shut down
the engine using the OSHA
lockout/tagout procedure
(29 CFR 1910.147) before
removing any foreign
objects. Signal visually, or
audibly that all is clear before operating the machine.
15. When leaving the blower unattended for any reason,
be sure to:
A. Shut off conveyor drive.
B. Shut off vehicle engine and blower engine.
C. Place transmission of the vehicle in
“NEUTRAL” or “PARK”.
D. Set parking brake firmly.
E. Lock ignition and take keys with you.
F. Lock vehicle cab.
G. If on a steep grade, block the wheels.
These actions are recommended to avoid unauthor-
ized use, runaway, vandalism, theft and unexpected
operation when the equipment is restarted.
16. Do not read, eat or otherwise lose or lessen your
attention in any manner while operating the blower.
Operating is a full time job.
17. Be careful in getting on and
off the blower, especially in
wet, icy, snowy or muddy
conditions. Clean mud,
snow or ice from steps, fend-
ers and footwear.
18. All personnel operating and/or around the machine
must be aware that the blower can be controlled via
remote control. For safety reasons and to prevent
accidental starting, always keep the power switch on
the remote receiver in the “OFF” position when the
remote control is not being used.
19. Be careful when operating the tarp near power lines.
Raising the tarp into power lines may cause severe
electrical shock. Always have the tarp either fully
open or retracted when transporting the machine.
20. Turn slowly and travel on rough surfaces and side
slopes carefully, especially with a loaded blower
body.
4
III. MAINTENANCE:
1. Before servicing the
machine, turn off engine and
allow all moving parts to
stop. To prevent accidental
starting, disconnect battery
cables. Tag the engine oper-
ating area to show that the
machine is being serviced.
Use lockout/tagout proce-
dure (OSHA 29 CFR 1910.147).
2. Take extreme care when
adjusting or replacing
knives. Knife edges are
very sharp and can cause
severe bodily injury.
3. Radiator maintenance: Liquid cooling systems build
up pressure as the engine gets hot. Before remov-
ing radiator cap, stop the engine and let the system
cool. Remove radiator cap only after the coolant is
cool. Mulch may accumulate in the radiator fins after
extended usage based upon mulch properties. The
radiator should be inspected prior to daily start-up
and cleaned by pressure washing if obstruction is
present.
4. Battery maintenance: Lead-acid batteries contain
sulfuric acid, which will damage eyes or skin on con-
tact. Always wear a face shield to avoid getting acid
in the eyes. If acid contacts the eyes, flush imme-
diately with clean water and get medical attention.
Wear rubber gloves and protective clothing to keep
acid off skin. Lead-acid batteries produce flammable
and explosive gasses. Keep arcs, sparks, flames,
and lighted tobacco away.
5. Filling of fuel: Never fill the tank with the engine run-
ning, while smoking, or when near an open flame.
Never smoke while handling fuel or working on the
fuel system. The fumes in an empty fuel container
are explosive. Never cut or weld on fuel lines, tanks
or containers. Move at least 10 ft (3 m) away from
fueling point before starting engine. Wipe off any
spilled fuel and let dry before starting engine.
IMPORTANT: Be careful not to allow fuel, lubricant,
hydraulic fluid, or cooling fluids to penetrate into
the ground or be discharged into the water system.
Collect all fluids and dispose of them properly.
6. It is recommended that only authorized, genuine
FINN replacement parts be used on the machine.
7. Do not use either cold start fluid, if engine is
equipped with glow plug type preheater, or other
intake manifold type preheater. It could cause an
explosion or fire and severe injury or death.
8. Diesel fuel or hydraulic fluid
under pressure can pen-
etrate the skin or eyes and
cause injury, blindness, or
death. To check for such
leaks, use a piece of card-
board or wood instead of
your hand. Pressure may
build up in the hydraulic
system; use caution when removing the cap.
9. Some parts and assemblies are quite heavy. Before
attempting to unfasten any heavy part or assembly,
arrange to support it by means of a hoist by blocking,
or by use of an adequate arrangement to prevent it
from falling, tipping, swinging or moving in any man-
ner. Failure to do so could result in component dam-
age, or physical injury to someone.
10. If repairs require use of a torch or electric welder, be
sure that all flammable and combustible materials
are removed. Fuel or oil reservoirs must be emptied,
steam cleaned, and filled with clean water before
any cutting or welding on them is attempted. Do
NOT weld or cut on any tank containing oil, gasoline,
fumes, other flammable material, or any container of
which the previous contents were unknown.
11. Do not pressure wash this unit.
Do not pressure wash around any
control boxes, radio remotes or
control panels. Pressure washing
this unit can cause damage to the
electrical systems and components
and also cause the unit to not function. Pressure
washing injects water into sensitive electrical
components. To clean the unit, use a method that
controls the amount of water that is applied to the
surface of the unit.