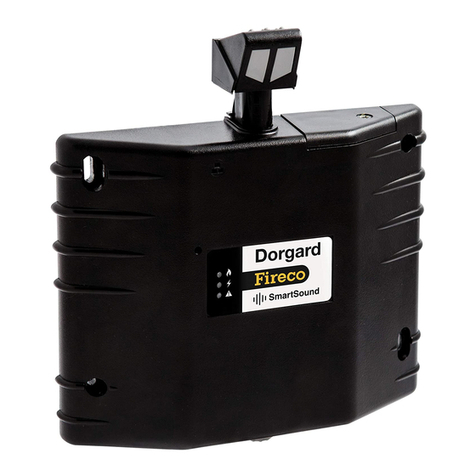
Fireco Dorgard X2 User manual

Fitting and
Operating Guide
Cat A
Cat B

Keep this Guide in a safe place.
1
Contents Page
Introduction and Glossary 2
Contents of the Box and Dorgard X2Labelling 3
BS 7273-4 Categories 4
Prior to Installation 5
Important Information 6
Batteries 7
Linking 8
Linking Dorgard X29
Installation 10
Floorplates, Floorplate Extenders and Dorgard Spacers 11
Standard Floorplate 12
Flat Floorplate 13
Dorgard X2Operation 14
Fire Alarm Test 15
Night-time Release 16
Removing the Link from Dorgard X217
Removing a Link from System X 18
Troubleshooting and FAQs 19
Error Messages, Beeps and Flashes 23
Errors and Codes 26
Installation Log - Location Codes 27
Maintenance Schedule 30
Maintenance Record 31
Commissioning Certificate 32
FCC Approval Information 33
Notes 34
Manufacturer’s Warranty 35
Manufacturer’s Classification:-
As Required By BS EN 1155:1997
ID of Certification Body:- 1121
Registered Address:- Fireco Ltd., 30 New Road, BRIGHTON BN1 1BN, UK
CE mark applied for:- 08
EC Certificate of Conformity Number:- AE0021
Power size:- Minimum 3 to Maximum 7
Made in th UK
3 5 3 to 7 1 1 0

Introduction and Glossary
Dorgard X2is a Battery operated device designed to hold open a fire door safely and legally.
It will automatically release upon receiving a signal from System X. Dorgard X2can be used
to hold the fire door in any position between open or closed and can only be used in
conjunction with System X.
Dorgard X2can be linked to either a Category A Hardwired System X or a Category B
System X transmitter. Once linked, the Dorgard X2will remain and work as a Category A or
Category B fire door retainer.
It is recommended that a fire door is not retained at an angle of less than 65 degrees.
Up to 200 Dorgard X2units can be Linked to any one System X transmitter within range. A
Site Survey must be carried out prior to Installation. Contact your supplier or contact the
Technical Advice line if you have any questions.
Glossary of Terms used in this Guide.
CIE - Fire Alarm Control Indicator Equipment.
MAC address - Media Access Control address. Every Dorgard X2and System X
transmitter have individual MAC addresses which allows each unit to be controlled
individually and helps prevent cross chatter.
Fail-to-safe - The activation of the Dorgard to release its door and not allow the Plunger to
remain in the down position and therefore hold open its door.
Link - The association between a Dorgard X2and its System X transmitter. Without a Link
the Dorgard X2will Fail-to-Safe and not operate as a hold open device.
LCD - Liquid Crystal Display. The screen which displays the System X’s functions, Clock
etc.
LED - Light Emitting Diode. On the top of the Dorgard is a Tri-Colour LED which
illuminates Red, Green. The LED flashes according to the Dorgard X2’s status.
Staged Fire Alarm - A fire alarm system which does not activate the sounders until the
‘second stage’. A ‘first stage’ allows time to check for false alarms etc., prior to a full
evacuation.
Call-in - The System X transmitter continuously talks to all Linked Dorgard X2units. This
Call-in is used as a status check and if Call-ins are missed the Linked Dorgard X2will
fail-to-safe.
Door Warping - Where a fire door loses shape and will therefore not create a tight seal
against the door jamb when closed.
2

Contents of the Box and Dorgard X2Labelling
3
The Dorgard X2box contains:
1 x Dorgard X2unit.
1 x User Guide.
1 x Fitting Template.
4 x Stainless Steel Dorgard Fitting Screws.
4 x Black Floorplate Fitting Screws.
4 x Rawl Plugs.
1 x Small Plastic Screwdriver.
1 x Standard Floorplate.
1 x Flat Floorplate.
2 x Duracell Procell LR14 C-size Batteries.
1 x Location Code Sticker.
2 x Fire Door Sticker.
Tools and Equipment Required:
• Pozidrive No. 2 Screw driver.
• Electric Drill.
• Drill bits: 2 and 6mm diameter.
• Stud and cable detector.
• Marker pen.
Please check that you have all of the contents listed below.

BS 7273-4 Categories
BS 7273-4 concerns the interface (Critical Signal Path) between fire detection and fire
alarm systems with forms of door hardware including devices to hold open self-closing fire
doors. The Critical Signal Path is the connection between the Fire alarm Control and
Indicating Equipment (CIE) and the door hardware. If the connection is compromised, the
door hardware must fail-to-safe. It is important to note that for acoustically actuated
systems, fire alarm sounder circuits are not deemed to be part of the Critical Signal Path.
There are three categories of actuation:
Category A
Dorgard X2must release and not hold open its door (fail-to-safe) within 120 seconds if any
of 12 specified faults or disablements occur on the connected CIE. Acoustic actuation is
not permitted for this category. Dorgard X2 installed and Linked to Hardwired System X
complies with this part of the standard.
Category B
Dorgard X2 must fail-to-safe within 120 minutes if critical path or wiring faults occur or if
there is power loss to release mechanism, System X will fail-to-safe if there is a loss of
power to the control unit. Acoustic actuation is acceptable for this category. Dorgard X2
installed with acoustically activated System X complies with this part of the standard.
Category C
As category B, but interface via another system. Critical Signal Path terminates at other
system (Dorgard). Acoustically activated Dorgard meets the requirements of category C.
A combination of categories can be used throughout a building according to the specific
needs of the areas in question on a risk assessed basis.
4

Prior to Installation
5
Ensure:
1. That a suitable Automatic Fire Detection alarm system is installed.
2. A System X Site Survey has been completed.
3. System X transmitters have been installed according to the results of the Site Survey.
4. The fire door is self-closing i.e. has a door closer fitted.
5. The fire door closes tightly against the door jamb.
6. You have determined the closing force of the door.
7. Where Dorgard X2is to be fitted, the floor and door surfaces are smooth and flat.
8. There is clearance under the fire door for fitting of the Floorplate, i.e. 5mm.
9. The fire alarm system is working correctly, i.e. the CIE is not in fault state and the
sounders work when activated.
10. Dorgard X2forms part of your Fire Risk Assessment (as required by the Fire
Precautions [Workplace] Regulations 1997, also required by the Regulatory Reform (Fire
Safety) Order 2006).
Note. Dorgard X2will hold a door open once linked to its corresponding System
X transmitter.

Dorgard X2must only be used for the purpose
for which it is designed. It is not suitable for
external use. Read this Guide and follow the
instructions carefully. Keep this Guide in a safe
place e.g. in your Fire Risk Assessment file, for
future reference.
BS EN1155:1997 states that a door must not be
retained at an open angle of less than 65
degrees. It is recommended that the Floorplate
be installed to comply with this standard.
Dorgard X2, when installed correctly with the
System X transmitter, complies with either
category A or B of BS 7273-4. Category of
Dorgard X2 depends on the System X it is
Linked to.
6
Important Information

Batteries - use 2 x C Size LR14
Batteries - Alkaline only, do not use
rechargeable Batteries.
The 2 x C Size Procell Alkaline Batteries supplied should last
for at least 12 months. Dorgard X2continually checks the
battery life to ensure safe operation.
1. Open Battery Compartment using a screwdriver.
2. Insert the Batteries into the Battery Compartment (+)
positive side facing up. Inserting the Batteries the wrong
way may cause damage.
3. When closing the Battery Compartment take care not to
over tighten the Screw.
4. The Dorgard X2will beep and the LED Green will flash after
Battery installation.
After installing a set of new Batteries the Dorgard X2unit will
fail-to-safe within 60 seconds if it has no association with the
System X transmitter. See Linking Dorgard X2 on Page 8.
When the Batteries in the Dorgard X2unit require changing,
new Batteries must be installed. The Dorgard X2 monitors the
Battery level and if lower or equal level Batteries are installed
the unit will fail-to-safe.
Note. Dorgard X2will retain settings when Batteries
are removed or replaced.
CAUTION.
DO NOT OPEN BATTERY LIFT WITH POWER
SCREWDRIVER FASTER THAN 650 REV/MIN.
7

Linking
8
Dorgard X2is controlled by the System X transmitter and therefore requires Linking to it to
work.
System X transmits on a frequency of 2.4 GHz, channel hopping on 16 separate channels
which ensures zero interference with other products. System X will not transmit on a
channel where there is excessive noise or interference.
Each Dorgard X2and System X has an individual MAC addresses ensuring direct
association with each product. It also means that Dorgard X2will only communicate to the
specific System X it is Linked to, i.e. if a different System X transmitter in another building
enters self-test mode, only its Linked Dorgard X2units will respond.
Note. It is recommended the Dorgard X2units are Linked after installation of
the System X transmitter.
It is suggested that the Links are set with all units in close proximity of the
System X transmitter, prior to fitting to its door.

Linking Dorgard X2
1. Ensure installed System X is not in an error state and the
CIE is not in a fire or fault state.
2. Ensure the Batteries are installed into the Dorgard X2unit.
3. On System X press and hold Button 1 LINK until the LCD
reads ‘LINK’. System X is now accepting Link data to the
Dorgard X2 unit.
4. Using the supplied plastic Screwdriver gently press the
Link Button on the front of the Dorgard X2 unit. Hold this
Button down until the LED located on top of the Dorgard
X2 unit lights red and the Dorgard X2beeps a long tone.
This resets the Dorgard X2and erases all associations with
other System X transmitters.
5. After the motor of the Dorgard X2has driven and the reset
beep has stopped, hold the Link Button on the front of the
Dorgard X2down again until the LED located on top of the
Dorgard X2 unit lights green. The Dorgard X2is now
searching for a TX to Link to.
6. When Dorgard X2has successfully Linked to the System X
transmitter its motor will drive, allowing the Plunger to be
held down. System X’s LCD will also display the Dorgard
X2’s Location Code, its signal strength, battery level and
software version. The Dorgard X2Location code should be
noted in the Installation Log at the rear of this Guide and
on the supplied sticker which should be attached to the
top of the Dorgard X2 and in this User Guide.
Note: the first Linked unit will be given the Location
code 000, the second Linked unit will be Location
code 001 etc.
7. If more Dorgard X2units are to be added to the system,
once powered up, press the Link Button on the front of the
Dorgard X2one at a time, waiting for confirmation on the
System X LCD between units.
8. When finished, press Button 1 LINK on the System X to
return to displaying the Clock.
Note. A maximum of 200 Dorgard X2units can be
linked to any one System X transmitter.
9

10
Installation
Note. Dorgard X2will not operate until the Batteries
have been inserted and it has been Linked to a
System X transmitter.
1. Ensure the Batteries are installed and the Dorgard X2is
Linked to the designated System X transmitter.
2. Close the fire door. Place the Template provided against
the door on the side that shuts against the door frame.
Ensure the Template matches your view of the door.
3. Please make allowance for differing floor surfaces.
4. Make pilot holes or mark the position for the holes
through the Template.
5. Using 2 of the 4 stainless steel Screws supplied, fix
Dorgard X2to the fire door at points A and B of the fitting
Template. This will allow Dorgard X2to be moved up and
down slightly for correct positioning. The correct position
is when the Dorgard X2Plunger is fully retracted, the door
can swing free. When the Dorgard X2Plunger is depressed,
contact with the floor or Floorplate holds the door open.
When Dorgard X2is in the correct position fasten down all
4 Screws.
6. Affix a Fire Door Sticker each side of the fire door, at eye
level.
Dorgard Spacers are available to space the Dorgard X2
out from the door front if door features or decoration
prevent use of the Plunger or the Battery Lift.

Floorplates, Floorplate Extenders and Dorgard Spacers
Floorplates
Each Dorgard X2is supplied with two types of Floorplate,
Standard and Flat. It is important a Floorplate is installed as it
can prevents errors, slippage and carpet wear. It may not
always be possible to fit a Floorplate, if so ensure this is
noted in the Commissioning Certificate at the rear of this
Guide.
The Standard Floorplate incorporates a Bumpstop which
allows the Dorgard X2’s Ferrule to locate accurately within
the Floorplates recess.
The Flat Floorplate is to be used where the Bumpstop
presents a tripping hazard, for example where the door opens
up to an empty space.
The Floorplate allows Dorgard X2to withstand the strongest
closing force as defined in BS EN 1155 and it prevents
slippage on smooth surfaces & in other conditions such as
where a wooden floor might deflect as persons walk by.
If the Dorgard X2is being installed to replace a previously
installed Dorgard where an older Floorplate has been fitted, it
is important to replace it with the new one in case of wear
and tear.
Floorplate Extenders
Floorplate extenders are 5mm thick rubber spacers which
offer the Floorplate up to the Dorgard X2’s Ferrule. This is for
situations where the door opens up on an uneven floor or
steps. Multiple Floorplate Extenders may be used for larger
gaps. Contact the Technical Advice line for more information.
Dorgard Spacers
Dorgard Spacers are available for situations where decorative
features on the door prevent the Plunger or Battery Lift from
being accessed easily. Dorgard Spacers are also helpful if the
Dorgard X2is mounted onto a metal kicker plate. Kicker
plates can sometimes cause inconsistencies by blocking
radio signals; spacing the Dorgard X2out from the kicker
plate can help this.
11

Standard Floorplate
12
IMPORTANT: Fit Dorgard X2to a door before fitting
Floorplate.
Warning! Before drilling holes or fastening Screws
into the floor, check the location of water pipes,
electrical cables, gas pipes etc. Failure to do so could
cause disruption to the building’s services and may
result in serious injury or death.
1. Open the fire door to 90 degrees or to the desired open
position greater than 65 degrees. Slide the Floorplate under
the fire door with the Bump Stop part positioned behind
the door and as close to an adjacent wall as possible to
avoid tripping hazards.
2. Depress the Plunger on Dorgard X2so that the Ferrule sits
in the recess of the Floorplate.
3. Slide/swivel the Floorplate so that the Bump Stop comes
into contact with the back of the door, ensure that the
Ferrule is still sitting centrally in the recess of the
Floorplate.
4. Mark the position of the Floorplates holes on to the floor
surface. When fitting to carpeted floors, trim around the
hole position to prevent the carpet pile being pulled by the
spinning drill bit or Screw.
5. Remove the Floorplate.
6. If the floor is concrete, drill 4 x 6mm holes (approximately
40mm deep) at the positions marked and insert the Rawl
Plugs supplied.
7. Position the Floorplate over the Rawl Plugs or marked
points and fasten the Floorplate to the floor using the black
Screws supplied.
8. Open the fire door against the Bump Stop and depress the
Plunger. If you have positioned the Floorplate correctly the
Ferrule should fit neatly into the recess of the Floorplate. If
not go back to step 3 and reposition the Floorplate.
Note. Fitting the Standard Floorplate may inhibit
Dorgard X2‘push away to release’ function. If this
function is required allow space from the back of the
fire door and the front of the Bump Stop, or fit the
Flat Floorplate.

Flat Floorplate
IMPORTANT: Fit Dorgard X2to a door before
fitting the Flat Floorplate.
Warning! Before drilling holes or fastening Screws
into the floor, check the location of water pipes,
electrical cables, gas pipes etc. Failure to do so could
cause disruption to the building’s services and may
result in serious injury or death.
1. Open the fire door to 90 degrees or to the desired open
position greater than 65 degrees. Slide the Flat Floorplate
under the fire door.
2. Depress the Plunger on Dorgard X2so that the Ferrule sits
in the recess of the Flat Floorplate.
3. Slide/swivel the Flat Floorplate ensuring that the Ferrule is
still sitting centrally in the recess of the Flat Floorplate.
4. Mark the position of the Flat Floorplates holes on to the
floor surface. When fitting to carpeted floors, trim around
the hole position to prevent the carpet pile being pulled by
the spinning drill bit or Screw.
5. Remove the Floorplate.
6. If the floor is concrete, drill 4 x 6mm holes (approximately
40mm deep) at the positions marked and insert the Rawl
Plugs supplied.
7. Position the Floorplate over the Rawl Plugs or marked
points and fasten the Floorplate to the floor using the
Black Screws supplied.
8. Open the fire door and depress the Plunger. If you have
positioned the Floorplate correctly the Ferrule should fit
neatly into the recess of the Floorplate. If not go back to
step 3 and reposition the Floorplate.
13

14
Dorgard X2Operation
To hold the door open:
1. Open the door to the required position.
2. Stand sideways to the door.
3. Depress the Plunger down using your foot. Greater foot
pressure may be needed depending upon the force from
the door closer or the type of floor surface.
4. Whilst depressing the Plunger, push/pull the door gently in
the direction of closing.
5. Remove your foot and let go of the door.
To release Dorgard X2, either:
A. Lightly tap the Plunger towards the fire door with your
foot.
or;
B. Push the door in the direction of opening.
Note. If the door has been pushed hard against the
Floorplate Bump Stop or a wall, then Dorgard X2will
only release by method A.

Fire Alarm Test
1. Ensure all Dorgard X2units are holding their
fire doors open.
2. Check that the System X installation is
correct (refer to System X User Guide).
3. Set the CIE into fire alarm condition for a
minimum of 30 seconds.
4. Dorgard X2 will release the fire door in approx.
20 seconds.
5. When Dorgard X2is ready to release the door,
it will sound a ‘Hi Lo’ warning tone repeated
8 times before releasing the door.
Note. Although System X conducts a self
test with Dorgard X2every 7 days, weekly
bell tests are highly recommended. This
will ensure that System X is responding
to your fire alarm.
15

16
Night-time Release
Dorgard X2can be used to hold a fire door open
24 hours a day. It is recommended however,
that fire doors are closed at night as the chance
of a fire spreading undetected is greater than
during daylight hours.
To ensure that fire doors are closed at night,
Dorgard X2can be set to release at a pre-set
time and then will not operate as a hold open
device until it receives a signal to do so. The
time of this signal can also be pre-set.
The System X transmitter is used to set the
Night-time Release function. Refer to the
System X User Guide.

Removing the Link from Dorgard X2
1. Ensure the Dorgard X2is powered on with Batteries
installed, and its Plunger down.
2. Using the plastic Screwdriver gently press the Link Button
on the front of the Dorgard X2unit. Hold this Button down
until the LED located on top of the Dorgard X2 unit lights
red and the Dorgard X2motor drives, followed by a long
beep. The Dorgard X2will fail-to-safe.
3. The association between Dorgard X2 and the System X
transmitter is now erased.
17

Removing a Link from the System X transmitter
There are two methods of removing the Link between the
System X and its Dorgard X2; individually or all at once.
Individually removing a Link:
1. On the System X transmitter, press Button 1 LINK and
Button 3 SCROLL together for 5 seconds to enter erase
mode. ‘IND’ is displayed on the LCD.
2. Use Button 3 SCROLL to choose the Dorgard X2 to be
removed.
3. Hold Button 6 RELEASE ON/OFF for 3 seconds, until the
LCD will display ‘DONE’.
4. When finished the LCD will return to displaying the Clock.
Repeat this process to remove more Links.
Removing all Links:
1. On the System X transmitter, press Button 1 LINK and
Button 3 SCROLL together for 5 seconds to enter erase
mode. ‘IND’ is displayed on the LCD.
2. Use Button 1 LINK, the LCD displays ‘ALL’.
3. Hold Button 6 RELEASE ON/OFF until the LCD displays
‘DONE’.
4. When finished the LCD will return to displaying the Clock.
Repeat this process to remove more Links.
Note. If, for example, Location code 005 is deleted, its
position is not replaced by 006. If another Dorgard X2
is Linked to the System X transmitter it will be
allocated the first free space, i.e. will become DG 005.
Removing the Link will remove the association of the
Dorgard X2from the list the System X will
communicate to, but the Dorgard X2will still be
Linked to that System X until it is re-Linked to
another System X transmitter.
18

Troubleshooting and FAQs
19
Why is Dorgard X2not releasing to the Fire Alarm?
• Quick Range Test the system. Refer to the System X User Guide
• Have some Dorgard X2unit released and not others? If so conduct a Full Range Test (see
the System X User Guide)
• Have the Dorgard X2units been Linked to the System X transmitter?
• Has the System X been installed correctly? Does the LCD display ‘FIRE’ when the fire
alarm is sounding?
• Check fire alarm sounds for at least 30 seconds
• Check fire door is free to close unhindered
• Check that the Plunger has a minimum of 10mm of down travel before the Ferrule
contacts the floor or Floorplate
• If category B System X is installed, check the fire alarm is louder than 80 decibels where
the System X transmitter is situated. If so adjust the sensitivity of the System X
transmitter (see System X User Guide)
• Has the System X been installed on a staged fire alarm system?. Check installation of the
System X transmitter
Table of contents
Other Fireco Door Opening System manuals
