Firenzo Royale User manual

Please read this booklet and keep for future reference for the safe installation
and operation of your:
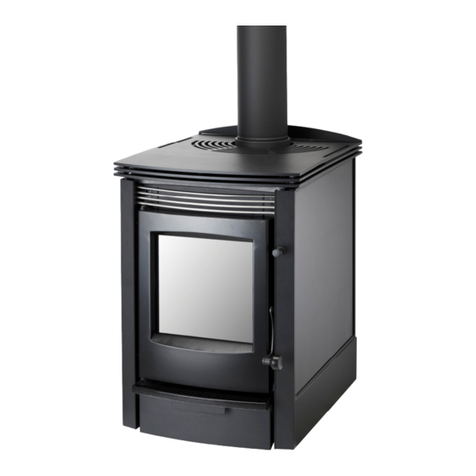
ROYALE
Freestanding Clean Air Woodburner
All installations must be in accordance with these instructions. Consult with the
building authority having jurisdiction to determine the need for a permit prior to
commencing the installation. Failure to follow these instructions may also void
your home insurance and warranty.
Please leave this manual with the owner when installation is
complete.
Please complete and return your warranty registration card which is enclosed.
Please leave these instructions with owner when installation is complete.

Royale Guide Version 16/05/2013
2
INDEX
Page
3 1. Warnings
4 2. Installation Responsibilities
5 3. Installation Clearances
6 4. Assembly Instructions
7 5. Flue Installation
8 Minimum Height of Flue System Exit
9 6. Operating Instructions
11 7. Door Glass
12 8. Maintenance
13 9. Safety
13 10. Warranty
Manufactured by:
Distributed by:
FIRENZO AUSTRALIA PTY
PO Box 4431, Dandenong South, Victoria 3164
Email: firen[email protected].au

Royale Guide Version 16/05/2013
3
1. WARNINGS
THIS APPLIANCE SHOULD BE MAINTAINED AND OPERATED AT ALL
TIMES IN ACCORDANCE WITH THESE INSTRUCTIONS.
The Royale is tested to Australian and N.Z. Standards AS/NZS 2918:2001.
INCORRECT INSTALLATION OF THIS APPLIANCE MAY RESULT IN
OVERHEATING OF HEAT SENSITIVE MATERIALS AND POSSIBLE FIRE.
FOR YOUR SAFETY FOLLOW THE INSTALLATION INSTRUCTIONS
CAREFULLY.
Do NOT connect the heater to a chimney serving another appliance.
The exterior of this appliance will reach extremely high temperatures and will
burn if touched. Ensure that children or other vulnerable people or pets are
prevented from touching an operating appliance by using a fire guard or fire
screen.
Keep ALL heat-sensitive/combustible materials at least 600mm away from the
front of the heater. This includes clothing, furniture, wood, newspaper, plastic,
matches, etc.
Do not use flammable liquids or aerosols in the vicinity of this appliance when it
is operating.
Use caution when reloading with fuel. Do NOT attempt to load fuel into the
heater when the fire inside the stove is at or near its peak.
Do NOT burn large quantities of paper or combustible material that would
create an extremely hot/quick fire.
Do NOT burn highly coloured paper or brochures (junk mail).
Dry, seasoned wood should be used at all times with a moisture content of less
than 25% dry weight.
Do NOT use chemically treated timber or driftwood as fuel. The combustion of
this material will void the warranty and greatly reduce the lifespan of the fire.
The chemicals and/or salt content of this wood will cause rapid deterioration of
the heater and emits harmful gases.

Royale Guide Version 16/05/2013
4
2. INSTALLATION RESPONSIBILITIES
WARNING: THE APPLIANCE AND FLUE SYSTEM SHALL BE INSTALLED
IN ACCORDANCE WITH AS/NZ 2918:2001 AND THE APPROPRIATE
REQUIREMENTS OF THE RELEVANT BUILDING CODE OR CODES.
DO NOT MODIFY THE APPLIANCE. ANY MODIFICATION OF THE
APPLIANCE THAT HAS NOT BEEN APPROVED IN WRITING BY THE
TESTING AUTHORITY IS CONSIDERED TO BE IN BREACH OF THE
APPROVAL GRANTED FOR COMPLIANCE WITH AS/NZS 4012 & 4013.
CAUTION: MIXING OF APPLIANCE OR FLUE-SYSTEM COMPONENTS
FROM DIFFERENT SOURCES OR MODIFYING THE DIMENSIONAL
SPECIFICATION OF COMPONENTS MAY RESULT IN HAZARDOUS
CONDITIONS.
Strict adherence to these instructions will meet these standards. Any variation
from these installation instructions or any doubt about them must be checked
against the requirements of the Australian and New Zealand Standards.
Any unfavourable outcomes that arise from tampering with the appliance will
void any warranty claims.

Royale Guide Version 16/05/2013
5
3. INSTALLATION CLEARANCES
Firebox Size: Height 300mm
Width 440mm
Depth 370mm
Flue Size: 150mm
Heating Area: Up to 250 sqm
(for fully insulated homes)
CLEARANCES
A B C D E F G H J K L M N O
WITH FLUE
SHIELD
100 200 300 110 50 200 520 330 810 930 1200 1030 730 500
NO FLUE SHIELD
300 200 300 110 100 400 520 400 810 1130 1280 1090 730 500

Royale Guide Version 16/05/2013
6
4. ASSEMBLY INSTRUCTIONS
1. Remove all packaging and timber.
2. Remove slotted steel top plates from rear of heater and
carefully set aside, taking care not to scratch or damage the paint
finishes.
3. Swing open the firebox door; lift and set aside taking care not to
scratch or damage the paint finishes.
4. Remove granite ash lip and support from inside the firebox.
5. Place unit on floor protector – (see clearances as shown on
page 5).
6. Secure both fire and floor protector to floor by using appropriate
seismic restraint fastenings through the holes provided in the base
plate of the heater.
7. Assemble and fit flue as per instructions (page 7).
8. If you are fitting a flue pipe shield (see clearances on page 5),
the minimum requirement is for a single skin, semi-circular,
stainless steel flue shield with a reflective inner surface 1200mm
high. This should be installed so that the bottom edge of the flue
shield is at the same level as the top of the flue spigot and spaced
off the flue pipe by approximately 35mm.
9. Open the woodbox door and place the ash shelf support over
the two screws and tighten.
10. Place the granite ash lip on the support and over the locating
stud and replace firebox door.
11. Sit the top plate on supports above the firebox.
12. Fit door knob with spacer as per drawing
shown herewith.

Royale Guide Version 16/05/2013
7
5. FREESTANDING FLUE SYSTEM
INSTALLATION INSTRUCTIONS
1. Position heater on floor protector ensuring all heater
clearances are correct as per clearances on page 5.
2. Once the location is confirmed, the appliance and floor
protector shall be fixed to the floor itself (refer to
page 6 & 7).
3. Extend a plumb line from the centre of the fire flue pipe
spigot to the ceiling. Mark position on ceiling and roof.
4. Trim hole and nog as required ensuring that a 25mm
safe clearance between combustible materials and flue
components is maintained. Fix with non combustible
spacers and screws or clouts on all four sides.
5. Cut and frame (when required) an opening in the roof,
position the outer casing through the roof until it is flush
with the under side of the ceiling, making sure as with
the ceiling there is a 25mm safe clearance between
non-combustible materials and the flue components.
Fix as in step 4.
6. Fix appropriate flashing around outer casing to the
roof to ensure a weatherproof seal.
7. Assemble flue pipe sections ensuring all seams are in
line, the assembly is straight and crimped. Ends are
pointing downwards. Fix each joint with three stainless
rivets or self-tapping screws.
8. Place ceiling plate with folded edges upwards over
heater spigot.
9. Position the flue pipe into the heater spigot. The flue
pipe can either lowered from the top as a single unit or
fed up from the room a length at a time, ensuring that
all joints are fixed properly.
10. Slide the inner casing into place, between the outer casing
and the flue pipe.
11. The flue pipe must extend 200mm above the outer casing.
Note: Extra lengths of flue pipe, inner and outer casing
may be required to achieve the minimum clearance from
the roof.
12. Slide top spreader over flue pipe down into outer and inner
casing and tighten.
13. Slide cowl over flue pipe until it rests on spreader. Secure
with rivets or self-tapping screws.
14. Fit rainhat. Do not fasten as it must be removable for flue
pipe cleaning.
15. Fix ceiling plate to ceiling maintaining an even gap all
around flue pipe.
Note: Ensure ceiling plate is spaced off from the ceiling with
ceramic spacers supplied.
CAUTION: Mixing of appliance or flue system components from different sources or
modifying the
dimensional specifications of components may result in hazardous conditions. Where
such action is
considered the manufacturer should be consulted in the first instance.
WARNING: The appliance and flue system shall be installed in accordance with AS/NZS
2918:2001 and
the appropriate requirements of the relevant building code or codes.
Royale Guide Version 16/05/2013
8

Royale Guide Version 16/05/2013
9
6. OPERATING INSTRUCTIONS
ING INSTRUCTIONS
PLEASE READ THIS BOOK FULLY AND KEEP IN A SAFE PLACE.
This appliance has TWO air controls:
1. MAIN AIR CONTROL - Located at the top right side of the door the Main
Air control controls the running temperature of the fire during normal
use. Adjusting the Main Air Control knob in small increments will
determine the level of heat output the operator is comfortable with.
2. AIR BOOSTER - Located front and centre of the fire under the granite
ash lip the Air Booster provides quick and efficient ignition and
combustion at the start of the fire process and at reloading.
FIRST BURN
On the INITIAL LIGHTING only, the high temperature paint finishes used on
your heater will give off smoke and odour for several hours. As this is a
temporary condition, open doors, windows, etc. to give adequate ventilation
until passed.
1. Pull Main Air Control knob out fully for high (this is the small knob to the
right of the door) AIR CONTROL KNOB OUT = HIGH. AIR CONTROL KNOB
IN = LOW
Fully open the Booster Air Supply located front and centre of the fire under
the granite ash lip. Slide to the LEFT = OPEN slide to the RIGHT = CLOSED
2. Prepare fire by placing crumpled paper in middle of firebox. Do not use a
grate, or elevate fire. Build fire directly on floor of firebox.
3. Arrange dry kindling in “tepee” style with larger pieces standing up on each
side. Ignite paper leaving door ajar until kindling is alight.
4. A vigorous fire is required; reload with larger wood when vigorous flaming
of the kindling is achieved and embers begin to appear. Load the larger logs
length ways front of fire to back of fire.
5. Open door carefully and place small pieces, then larger logs on top always
maintaining a vigorous fire. Do not overload and smother the flames.
6. Close the door and leave Main Air and Booster Air controls on ‘HIGH’ until
the fire is burning well and a good ember bed has formed.
7. When a good fire is established close the Booster Air Control. Then
adjust the Main Air control to a position that suits the operator’s comfort, adjust
the Main Air Control in small increments to reach the desirable temperature.
DO NOT IMMEDIATELY SHUT THE HEATER TO ‘LO’. Remember to close
the air control gradually to your desired level of heat output. It is better to take
3-4 adjustments to get to the low setting (extended burn).
Always ensure a good burn is established otherwise the fire will
smoulder and smoke will build up which could result in a flash back or
back fire where the smokes ignites.
RELOADING

Royale Guide Version 16/05/2013
10
WARNING: IT IS NECESSARY TO MOVE BOTH THE MAIN AIR CONTROL
TO ‘HI’ AND THE BOOSTER TO ‘OPEN’ BEFORE OPENING THE DOOR.
Never open the door when a vigorous fire is in progress. Wait until the flames
have subsided and the fire is stable. Reload with dry logs.
Leave the air control on the ‘Hi’ position until the flames begin to subside. This
shows that the initial wood gases have been driven off and the heater will be
able to maintain an even burning rate. Close the Booster Air Supply when the
fire is burning well and a good ember bed has formed.
Normally a light load of fuel will stabilize quickly but a full load will take longer.
When a good fire is established adjust the Main Air control to a position that
suits the operator’s comfort, adjust the Main Air Control in small increments to
reach the desirable temperature.
RE-LOADING AFTER AN EXTENDED BURN TIME
WARNING: IT IS NECESSARY TO MOVE BOTH THE MAIN AIR CONTROL
TO ‘HI’ AND THE BOOSTER TO ‘OPEN’ BEFORE OPENING THE DOOR.
At the end of an extended burn, when the fire is almost extinguished and has
very few embers it is imperative that the fire is built up again and a good flame
re-established. Re-establish the fire by adding a few small split logs and
adjusting the Main Air and Booster Air Supply controls to ‘Hi’ and ‘OPEN’.
Allow the firebox temperature to build up before adding the balance of the fuel.
Close the Booster Air control when the fire is well established. When a good
fire is established adjust the Main Air control to a position that suits the
operator’s comfort, adjust the Main Air Control in small increments to reach the
desirable temperature.
The addition of large quantities of cold fuel to a low fire will reduce the firebox
temperature dramatically and this may result in ‘losing’ the fire.
Always ensure a good burn is established otherwise the fire will
smoulder and smoke will build up which could result in a flash back or
back fire where the smokes ignites.
FUEL
Please also read “WARNINGS” on page 3.
Dry, seasoned wood should be used at all times with a moisture content of less
than 25% dry weight. Use only wood that has been air dried in a sheltered, well
ventilated stack, preferably for at least 12 months.
Do NOT burn wood treated with preservatives or impregnated with chemicals
or glue; chipboard, particle board or laminated board; wood that has been
painted, stained or oiled.
Do NOT burn plastic, household refuse or driftwood such actions will void the
warranty and reduce the appliance’s life span.
The heat output level on the heater is controlled not only by the Air Control but
also by the type and quantity of fuel in the firebox. Using the proper fuel means
the appliance will run correctly GOOD FUEL IN = GOOD HEAT OUT

Royale Guide Version 16/05/2013
11
A fully loaded firebox set to ‘High’ will produce far more heat than an almost
empty heater set at the same position. Remember, you only get out of any
heater what you put into it. The better the fuel, the better the heater.
STORAGE OF FUEL
WARNING: DO NOT STORE FUEL WITHIN HEATER INSTALLATION
CLEARANCES.
Use only wood that has been air dried in a sheltered well ventilated stack,
preferably for at least 12 months. Drying wood gives off a lot of water. To
prevent rot and speed drying, you should provide good air circulation around
the woodpile. Use a few boards to keep your wood level and off the ground.
Cover wood so it is waterproof but make sure you let the sides breathe. Open-
sided sheds offer an ideal way to store wood and keep it dry.
FLAMMABLE LIQUIDS
WARNING: DO NOT USE FLAMMABLE LIQUIDS E.G. GASOLINE-TYPE
FUEL, KEROSENE, CHARCOAL LIGHTER FUEL, ETC OR AEROSOLS TO
START OR REKINDLE THE FIRE.
CLEANING THE ASHES FROM THE FIRE
A LAYER OF ASH AT LEAST 25MM DEEP SHOULD ALWAYS BE LEFT IN
THE BOTTOM OF THE HEATER TO PROTECT THE REFRACTORY
LININGS (BRICKS) ON THE BASE OF THE FIREBOX.
Disposal of Ashes
Warning: Ashes can stay hot for five days or more
Shovel Ashes into a metal container with a tight fitting lid. The closed
container of ashes should be placed on a non-combustible floor or on the
ground, well away from all combustible materials, pending final disposal. If the
ashes are disposed of by burial in soil or otherwise locally dispersed, they
should be retained in the closed container until all cinders have thoroughly
cooled.
Do not remove hot ashes by vacuum cleaner
7. DOOR GLASS
CAUTION: THIS APPLIANCE MUST NOT BE OPERATED WITH A
CRACKED OR BROKEN GLASS
The Royale is equipped with a self-cleaning glass air wash system. A well
burning fire will clean the window.
Oven cleaner can be used for removal of heavy build-up.
Do NOT clean glass while hot.

Royale Guide Version 16/05/2013
12
If a replacement of glass is required, only Firenzo Robax high heat and impact
resistant ceramic glass is able to be used. Insulating material for the glass and
all seals should be replaced at this time also.
NEVER place glass directly against the door. Without the insulation seal tape
in place, the glass is likely to shatter. Your Firenzo agent will be able to supply
any spare parts.
8. MAINTENANCE
SECONDARY CHAMBER
The baffles (horizontal bricks in the ceiling of firebox) are critical to the heaters
performance. They should be checked annually during flue cleaning and
replaced if signs of deterioration are evident.
FLUE
Creosote is caused by burning wet fuel, leaving particles and condensation to
build up on the inside of any closed solid fuel heater. Creosote and soot left to
build up can cause decreased heat performance and flue fires. Your heating
retailer or local reputable chimney sweep will be able to assist with flue
cleaning. Before commencing the flue clean it is best to remove the baffles to
avoid breakages.
DOOR HANDLE AND HINGES
Light lubrication is recommended once a year before the first autumn burn.
Use a little GRAPHITE grease, available from any garage or engineering
outlet. Take care not to over wind the nut on handle as this will strip the spindle
thread.
STAINLESS RAILS
Use a clean damp cloth when the heater is cool, if cleaning is required.
PAINTWORK
If any scratches or surface marks have appeared on the firebox (under the
steel top plate), use ‘Stovebright’ satin black or a Hi Temp satin black paint to
retouch, taking note of the manufacturer’s instructions for spraying. Never
spray a hot fire.
Powder coated finishes use a special heat resistant material and are
susceptible to scratches. Do not use abrasive cleaners. To clean powder
coated finishes use only a clean damp cloth and allow to dry. Do not clean
when the fire is in use.
STEEL TOP
We do NOT recommend using the STEEL TOP of the fire for cooking on as the
paint may become discoloured and Hewitsons Ltd accept no responsibility
should this occur. The top plate can be removed to allow cooking on the steel
fins of the firebox.
Note: The top plate surface is a powder coated finish and is NOT designed as
a direct cooking medium.

Royale Guide Version 16/05/2013
13
9. SAFETY
All surfaces on the Royale will get hot and cause burning if touched by
bare hands. We recommend using a fireguard.
The heat from inserts will effectively dry laundry and other wet articles,
however such materials should be kept well clear of the heater to prevent
accidental fires.
The flue should be cleaned regularly to avoid flue fires. Remove any
combustible items from near the heater and flue.
10. WARRANTY
Firenzo woodfires are fully guaranteed against defects in materials and
workmanship for a period of TEN YEARS from date of purchase for the steel
firebox, top castings, cast door and insert fascias. All other parts eg. metal
doors, kiln bricks, door glass, seals, air supply components, paint finishes,
wetbacks etc. are covered for ONE year.
Subject to the following conditions:
a) Provided the terms of payment are promptly complied with Firenzo
Australia Pty undertakes with the original purchaser to remedy with reasonable
despatch any defects for poor performance of the heater due to faulty
workmanship or materials and or circumstances which would render the heater
parts or accessories unfit for normal use, provided that the heater has been
installed, inspected, operated and maintained with the manufacturer’s
instructions and the terms of this warranty.
b) Firenzo Australia Pty will provide free labour and replacement of any parts
covered by this warranty or the entire heater at its option after receiving a fully
completed Firenzo Australia Pty warranty claim form (available from stockists
nationwide). Firenzo Australia Pty must be satisfied that the heater in question
was properly installed and that the heater is defective and they have been
given the opportunity to rectify the defect.
c) The purchaser will be responsible for paying any service call fees or
transport charges on and damages and loss incurred in connection with the
transportation of the heater parts or accessories to and from Firenzo Australia
Pty or its accredited agents.
d) This warranty does not apply and Firenzo Australia Pty shall have no
obligation in respect to any heater part or accessory which has:
1. Been subject to misuse, neglect, or accident in transit, storage or
use.
2. Not been inspected for proper installation.
3. Not been operated or maintained in accordance with the
manufacturers printed instructions.

Royale Guide Version 16/05/2013
14
4. Been damaged through water, including any surface rust which may
occur in transit or storage and excluding such damage caused by
leakage if so proven to be faulty materials or workmanship on behalf of
Firenzo Australia Pty.
5. Been damaged due to normal wear and tear.
e) This warranty is expressly in lieu of all other warranties, expressed or
implied including the warranties of merchantability and fitness for a particular
purpose other than the warranties conferred by Firenzo Australia Pty, who
neither assumes nor authorises anyone else to assume their liability in
connection with the sale of the stove or any other parts or accessories
therefore.
i) Any claim under this warranty should be submitted first to the dealer from
whom the stove was purchased. In such cases where the dealer cannot be
located, the fully completed warranty claim form should be mailed to Firenzo
Australia Pty.
j) Notwithstanding the warranty and undertakings above, Firenzo Australia Pty
shall not be liable in any way whatsoever for consequential loss of any kind.
Please complete for your future reference:
Serial No: ___________________________
Model:______________________________
Date of Purchase______________________
Purchased from:_______________________
Table of contents
Other Firenzo Wood Stove manuals

Firenzo
Firenzo CONTESSA User manual

Firenzo
Firenzo Viking Ru Dry User manual

Firenzo
Firenzo BRONTE TOP OUTLET RU User manual

Firenzo
Firenzo HASTINGS 4.8KW Guide

Firenzo
Firenzo CONTESSA Guide

Firenzo
Firenzo Lady Kitchener Guide

Firenzo
Firenzo Viking RU WET User manual

Firenzo
Firenzo KOMPACT User manual

Firenzo
Firenzo Contessa AG DRY User manual

Firenzo
Firenzo CONTESSA Owner's manual
Popular Wood Stove manuals by other brands

RAIS
RAIS attika NEXO 100 GAS installation guide

WoodPro
WoodPro WS-TS-1500 owner's manual

Contura
Contura C 586W installation instructions

Palazzetti
Palazzetti EVA GENERAL INFORMATION - WARNINGS - INSTALLATION - MAINTENANCE

Lopi
Lopi 1250 Republic owner's manual

Panadero
Panadero CAPRI 3V Usage and maintenance instructions