FKI Unitoaster UT 280 User manual

Instructions for use
Unitoaster
Model:
UT280/400
UT280V/400V
UT280EV/400EV
UT280V BB/400V BB
Type code: SCT-06
Version 2.2 –September 2021

2
Contents
1 Introduction............................................................................................................................................... 3
General .............................................................................................................................................. 3
Appliance description .................................................................................................................. 3
Manufacturer............................................................................................................................... 3
Appliance label............................................................................................................................. 4
Technical specifications and power consumption....................................................................... 4
Modification................................................................................................................................. 5
2 Safety......................................................................................................................................................... 5
Personal safety equipment................................................................................................................ 6
Potential hazards............................................................................................................................... 6
Who may use the Appliance.............................................................................................................. 6
Transport/installation/fixation.......................................................................................................... 7
Transport ..................................................................................................................................... 7
Installation ................................................................................................................................... 7
Fixation ........................................................................................................................................ 8
Operation........................................................................................................................................... 8
Cleaning/maintenance ...................................................................................................................... 8
Servicing............................................................................................................................................. 9
3 Operation................................................................................................................................................... 9
Before first use .................................................................................................................................. 9
Operation........................................................................................................................................... 9
Repairs and spare parts................................................................................................................... 11
Specifications for spare parts .......................................................................................................... 11
Spare parts diagrams ................................................................................................................. 11
Electrical diagrams..................................................................................................................... 17
4 Cleaning ................................................................................................................................................... 23
General ............................................................................................................................................ 23
Daily cleaning................................................................................................................................... 23
5 Disposal.................................................................................................................................................... 23
Packaging......................................................................................................................................... 23
When the Appliance is no longer required...................................................................................... 23
6 EU DECLARATION OF CONFORMITY........................................................................................................ 24

3
1Introduction
Original user instructions
These instructions are FKI Fast Food Teknik's original instructions for Unitoaster.
The purpose of these instructions
These instructions are intended to ensure the correct installation, use, handling and maintenance of
Unitoaster. Hereinafter referred to as “the Appliance”.
Important! Read these instructions carefully before use and keep them safe for later use.
Storage of these instructions
You must retain these instructions and make sure that they are easily accessible to users and service techni-
cians.
Understanding these instructions
It is the responsibility of the Appliance's owner to ensure that anyone who will be operating, servicing,
maintaining or repairing the Appliance has read these instructions and, by way of minimum, the sections
that are of relevance to the work they will perform.
Anyone who will be operating, servicing, maintaining or repairing the appliance, is required to look up any
relevant information in these instructions.
General
Appliance description
The Appliance is front operated and is designed for tabletop use at an appropriate working height.
Manufacturer
FKI Fast Food Teknik a/s
Byghøjvej 5, Verninge
DK-5690 Tommerup
www.fki.dk
4
Appliance label
1.1.3.1 Type designation SCT-06
Technical specifications and power consumption
1.1.4.1 Dimensions and weight
Model designation
Width x depth x height
Weight in kg
UT280
410 x 510 x 420 mm
15
UT280V
410 x 510 x 420 mm
15
UT280EV
410 x 510 x 420 mm
15
UT280V BB
410 x 510 x 420 mm
15
UT400
530 x 510 x 420 mm
18
UT400V
530 x 510 x 420 mm
19
UT400EV
530 x 510 x 420 mm
19
UT400V BB
530 x 510 x 420 mm
19
UT400 w. feed system
530 x 710 x 525 mm
25

5
1.1.4.2 Power
Connection voltage: 230 V AC
Connection frequency: 50/60 Hz
Model designation
Current consumption [Amp.]
Power [kW]
UT280
9.5 A
2.2 kW
UT280 ECO
9.5 A
2.2 kW
UT280V
9.5 A
2.2 kW
UT280V ECO
9.5 A
2.2 kW
UT280V BB
9.5 A
2.2 kW
UT400
9.5 A
2.2 kW
UT400 ECO
9.5 A
2.2 kW
UT400V
9.5 A
2.2 kW
UT400V ECO
9.5 A
2.2 kW
UT400V BB
9.5 A
2.2 kW
UT400 w. feed system
9.5 A
2.2 kW
Noise
Ambient noise from the Appliance:
Measured noise level: < 65 dB(A)
1.1.4.3 Intended use
The appliance should only be used for food preparation.
Modification
The appliance must never be modified or serviced by unauthorised persons. In the event of non-compli-
ance, FKI Fast Food Teknik a/s waivers any and all liability.
2Safety
General
Read these safety instructions before using the appliance. Keep them near to the appliance for later refer-
ence. These instructions and the appliance itself are provided with important safety information that must
always be read and observed at all times. FKI Fast Food Teknik a/s disclaims any and all liability for non-
compliance with these safety instructions, for inappropriate use of the appliance or the use of incorrect set-
tings.

6
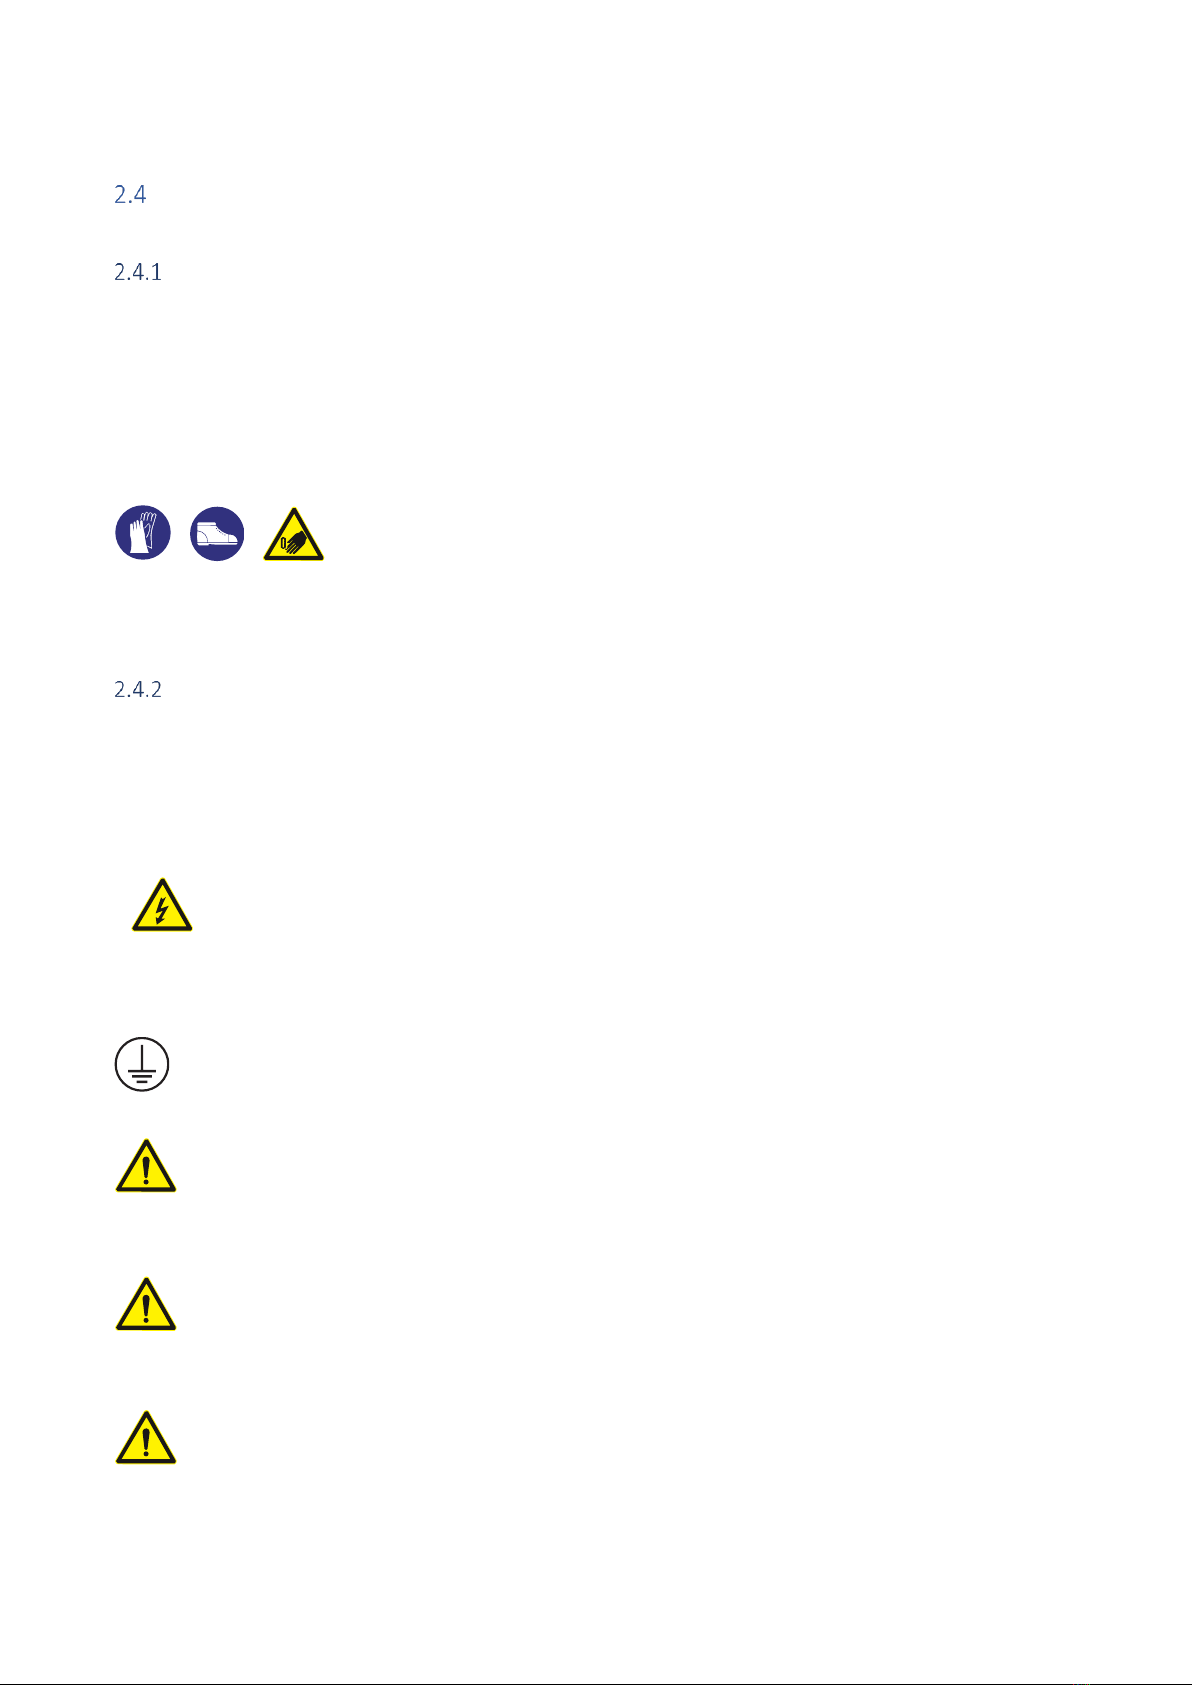
Personal safety equipment
We recommend that gloves are worn when working with the Appliance. When cleaning
the Appliance, gloves and safety glasses should be worn as the surfaces of the Appliance
are very hot.
Potential hazards
When the Appliance is in use, the user should be aware that the Appliance is hot. Do not touch
the hot surfaces or conveyor that pulls the bread through the Appliance unless wearing protective
gloves. Therefore, be careful not to touch them while operating the Appliance.
During operation, only buttons on the front may be touched. When cooking on the Appliance, put
the food on/remove from the surfaces using a specially designed tool to avoid contact with the
hot surfaces of the Appliance.
Who may use the Appliance
This Appliance is not intended for use by children! Neither should it be used by persons with reduced
physical or mental capacity, or who lack appropriate experience and knowledge unless they have
been trained or instructed in the use of the Appliance by someone with responsibility for their safety.
7
Transport/installation/fixation
Transport
The Appliance is delivered secured to a transport pallet and should only be transported in the same way if
moved.
WARNING: Do not move the Appliance during operation.
Moving and setting up the Appliance must be performed by two or more peo-
ple!
RISK of injury!
Wear protective gloves and safety footwear during unpacking and installation.
Cut hazard.
Installation
Place the Appliance on a suitable table top or similar at an appropriate working height. The Appliance is op-
erated from the front. The Appliance has adjustable legs and is intended for placement on a table or coun-
ter.
Connection of the Appliance should be carried out by an authorised electrician. The Appli-
ance is equipped with a grounded 1-pole plug (L+N+G). Make sure that the installation has
been carried out correctly with a sufficient fuse size, protection against fault current and
grounding.
WARNING: The Appliance must be earthed in accordance with national safety standards for elec-
trical equipment as failure to do so can cause electric shock and serious injury.
The Appliance must be acclimatised to ambient temperature before use. It should therefore not
be started up until eight hours have elapsed.
The power supply must be able to be disconnected, either by unplugging or by means of a freely
accessible multi-pole switch located before the power outlet in accordance with applicable elec-
tricity regulations. The Appliance must be grounded in accordance with national safety standards
for electrical appliances.
Do not use extension cords or multi-socket outlets. After installation is completed there must be
no direct access to the electrical components. Never touch the Appliance if you are wet or have
bare feet. Do not use this Appliance if the power cord or plug is damaged, if the Appliance is not
working properly, if it is damaged or if it has been dropped on the floor.

8
Any replacement of the power cord must be performed by an authorised technician to avoid the
risk of personal injury –RISK of electric shock. Only use oil-resistant cables!
Fixation
The Appliance does not need to be secured. It is equipped with adjustable legs to ensure stable
and easy installation.
Operation
The Appliance must be supervised during use and must be switched off at its main switch if left.
The Appliance is intended for food preparation only. Do not apply liquids or other substances that
have an ignition point below 300°C.
Cleaning/maintenance
CLEANING AND MAINTENANCE WARNING: Do not use products that contain acid as they may
damage the surface of the Appliance.
It is important to empty the Appliance’s waste tray/reflector panel of bread crumbs to prevent them from
burning onto the surface.
Daily cleaning should be done after the Appliance has cooled down. Empty breadcrumbs from the waste
tray and wash with a damp cloth. Clean the Appliance externally by wiping down with a damp cloth.
Thoroughly clean the Appliance once a day, wiping down all external surfaces with a damp cloth.
Never clean the Appliance when at temperatures above 50°C.
Never use steam/foam cleaners due to RISK of electric shock.

9
Servicing
The Appliance must always be switched off and disconnected from the power source before com-
mencing repairs. Repairs to the Appliance must only be performed by authorised personnel.
3Operation
Before first use
Before start-up, remove all packaging and protective plastic from the Appliance and dispose of it
in accordance with currently applicable regulations (see section 5.1). Carefully read section2
about safety before connecting the Appliance.
Before start-up, clean the Appliance as shown in section 4.
Operation
Switch the Appliance on by rotating the main breaker switch on the front of the Appliance to ON position.
A yellow light indicates that the Appliance is turned on (only EV model).
The Appliance may be equipped with a variable conveyor speed (V model) that can be adjusted with a ro-
tary knob.
The Appliance has a “power saving” function that can be activated with the button switch. This function
disconnects the conveyor and the two rear heating elements to save power consumption when the Appli-
ance is not in use.
Place the bread on the conveyor for automatic transportation through the Appliance and out into the bread
tray.
Switch
Breaker switch
Regulator

10
ECO-Variable model:
The Appliance is available in an energy-friendly variant (EV) where conveyor and heating elements are
started/stopped automatically using a touch-free sensor.
This variant starts when bread is placed on the conveyor and turns off again after about two minutes. A
new two minute period activates whenever bread is placed on the conveyor. If bread is continually added,
the Appliance will continue to operate until the final slice has been conveyed through the Appliance.

11
Repairs and spare parts
Repairs should only be carried out by authorised service personnel with knowledge of electrical equipment.
Specifications for spare parts
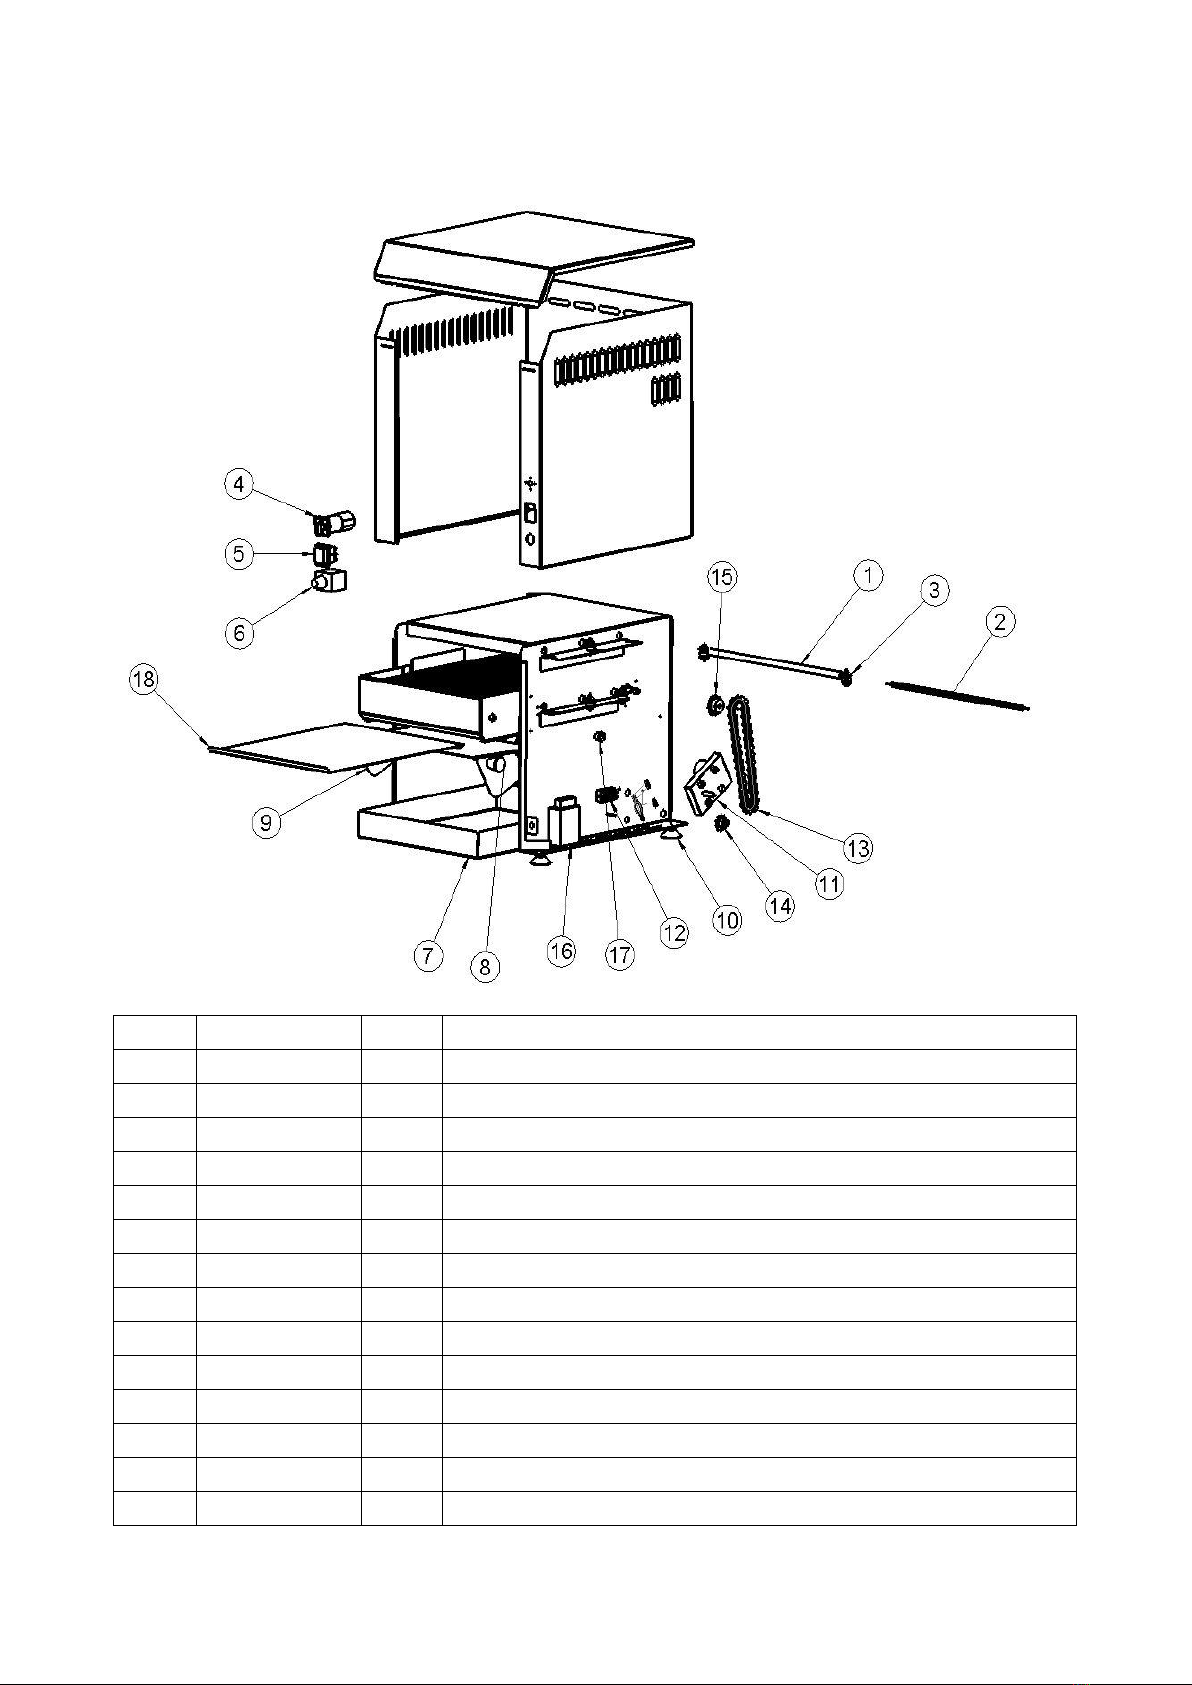
Spare parts diagrams
UT280/400
Pos.
Part no.
Pcs.
Description
1
83-08595
1
Quartz tube UT 280 –Ø11 x 320 mm
1
83-08883
1
Quartz tube UT 400 –Ø11 x 440 mm

12
2
83-08654
1
Heat coil 115V –500W
3
83-08596
1
Insulation kit
4
83-41017
1
Breaker switch, rotary
5
83-07908
1
Switch
6
83-06453
1
Dimmer plug, black
7
83-06546
24
Bread drawer UT 280
7
83-06581
1
Bread drawer UT 400
8
83-08652
1
Handle for bread drawer cover
9
83-06526
1
Cover for bread drawer UT 280 (extra equipment)
9
83-06587
1
Cover for bread drawer UT 400 (extra equipment)
10
81-06028
4
Legs black (Bumpers)
11
83-06595
1
Gear drive
12
83-07608
1
Terminal block 3-POLE 6.0mm2
13
83-08078
1
Chain
14
83-08584
1
Cog, bottom z10
15
83-08616
1
Cog, top z13
16
83-08688
4
Bronze bearing
17
83-06523
1
Reflector panel UT280
17
83-06616
1
Reflector panel UT400
13
UT280V/400V
Pos.
Part no.
Pcs.
Description
1
83-08595
1
Quartz tube UT 280 –Ø11 x 320 mm
1
83-08883
1
Quartz tube UT 400 –Ø11 x 440 mm
2
83-08654
1
Heat coil 115V –500W
3
83-08596
1
Insulation kit
4
83-41017
1
Breaker switch, rotary
5
83-07908
1
Switch
6
83-10029
1
Regulator
7
83-06546
24
Bread drawer UT 280
7
83-06581
1
Bread drawer UT 400
8
83-08652
1
Handle for bread drawer cover
9
83-06526
1
Cover for bread drawer UT 280 (extra equipment)
9
83-06587
1
Cover for bread drawer UT 400 (extra equipment)
10
81-06028
4
Legs black(Bumpers)
11
83-10027
1
Gear motor UT-V

14
12
83-07680
1
Terminal block 4-pole
13
83-08078
1
Chain
14
83-08584
1
Cog, bottom z10
15
83-08616
1
Cog, top z13
16
83-10028
1
Power supply 240VAC 12V
17
83-08688
4
Bronze bearing
18
83-06523
1
Reflector panel UT280
18
83-06616
1
Reflector panel UT400

15
UT280EV/400EV
Pos.
Part no.
Pcs.
Description
1
83-08595
1
Quartz tube UT 280 –Ø11 x 320 mm
1
83-08883
1
Quartz tube UT 400 –Ø11 x 440 mm
2
83-08654
1
Heat coil 115V –500W
3
83-08596
1
Insulation kit
4
83-41017
1
Breaker switch, rotary
5
72-03521
1
Cable retainer PG11, steel
6
83-10029
1
Regulator
7
83-06546
24
Bread drawer UT 280
7
83-06581
1
Bread drawer UT 400
8
83-08652
1
Handle for bread drawer cover
9
83-06526
1
Cover for bread drawer UT 280 (extra equipment)

16
9
83-06587
1
Cover for bread drawer UT 400 (extra equipment)
10
81-06028
4
Legs black(Bumpers)
11
83-06595
1
Gear drive
12
83-07608
1
Terminal block 3-POLE 6.0mm2
13
83-08078
1
Chain
14
83-08584
1
Cog, bottom z10
15
83-08616
1
Cog, top z13
16
83-08688
4
Bronze bearing
17
83-06523
1
Reflector panel UT280
17
83-06616
1
Reflector panel UT400
18
88-00231
1
Solid state relay 480V single phase 35A
19
72-00111
1
UT timer control board
20
72-00113
1
UT fiberoptic amplifier
21
72-00114
2
Glass fibre cable with UT (910) sensor
22
72-00112
1
Power supply 240VAC 24V
23
83-10029
1
Power supply 240VAC 12V

17
Electrical diagrams
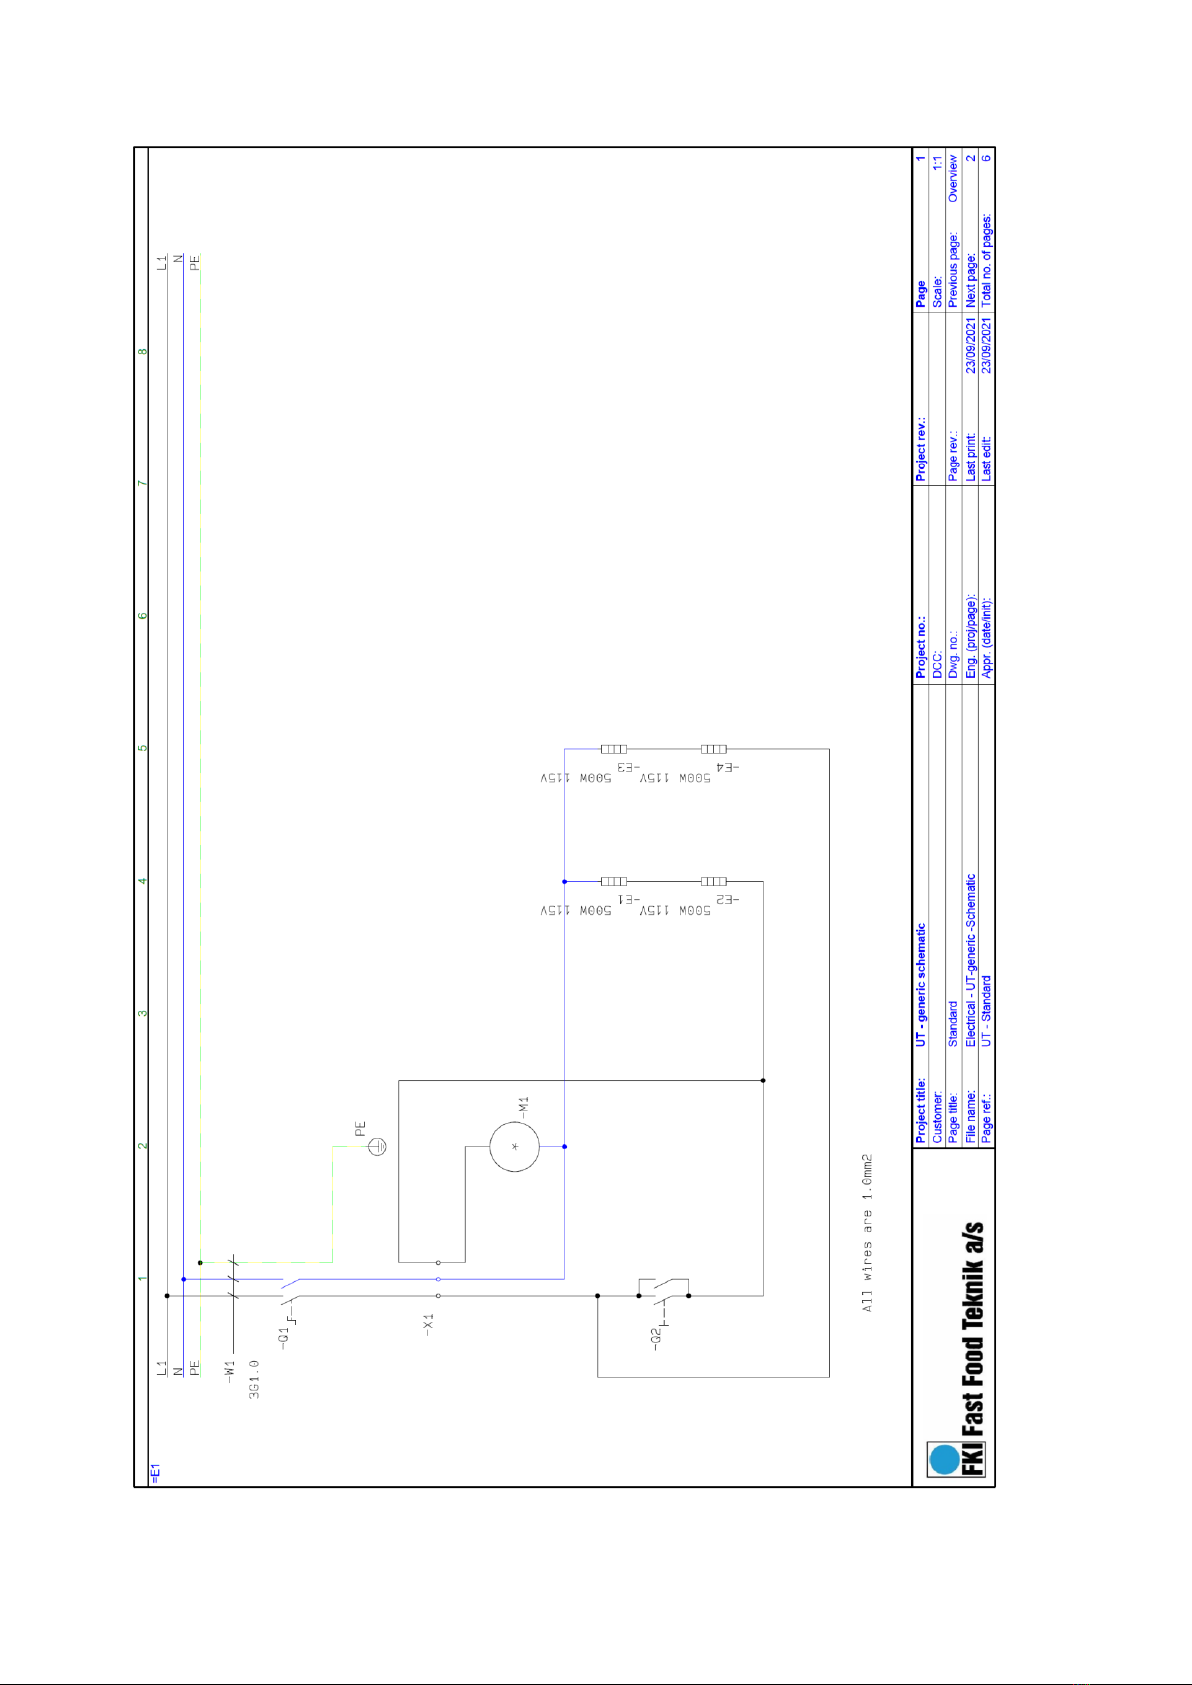
18

19

20
This manual suits for next models
7
Table of contents
Other FKI Toaster manuals


