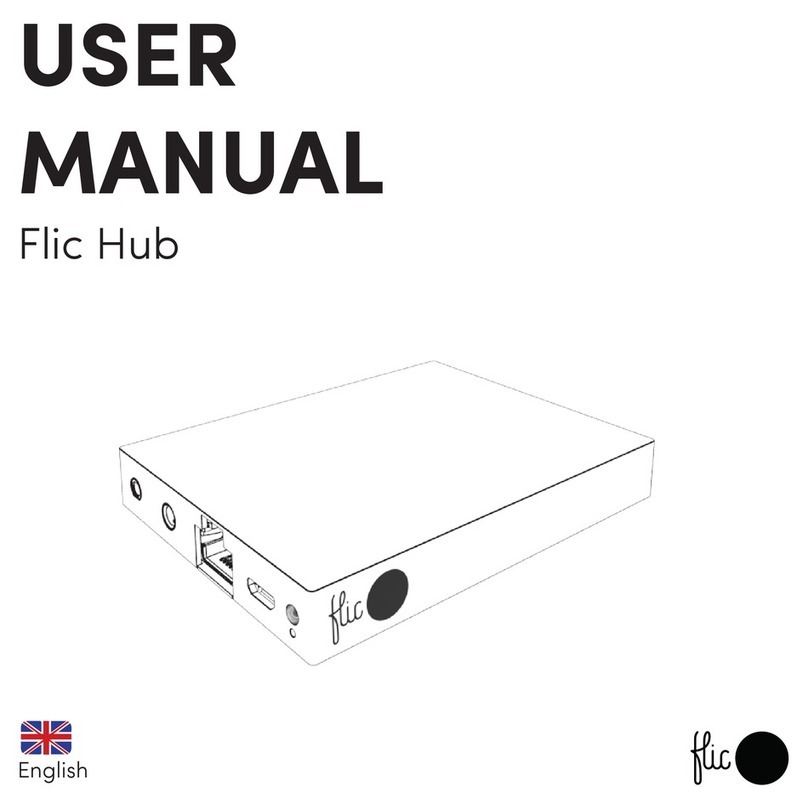
Flic Hub LR User manual

Flic Hub LR

Getting started
To get started make sure that you have:
1. An active internet connection (Ethernet or WiFi)
2. A phone with the Flic App installed
3. A Flic button (”Flic”) within Bluetooth range of the Flic Hub LR (”Flic
Hub”)
The phone is only necessary during the setup process.
Once the setup is complete you no longer need the phone to enjoy Flic!

Power
Connect the Micro USB cable and an external power adapter to the Flic
Hub. The Flic Hub will turn on, indicated by a bright red LED.
After approximately 15 seconds the LED will dim and become
discoverable. Please follow the instructions in the app to complete the
initial setup.
We recommend that you use an adapter with at least 1A output. An
adapter with less than the recommended current rating may result in
unstable behavior.
Micro-USB Type-B
power outlet
LED

Internet connection
To connect the Flic Hub to your WiFi network open the Flic App and follow
the setup steps to get the Flic Hub connected to the internet. Alternatively,
you can simply connect the Flic Hub, via an Ethernet cable.
If the Flic Hub doesn’t have an active internet connection you will not be
able to make use of all the available features.
To check if the internet connection for the Flic Hub is active you should
open the Flic Hub settings page in the app. Look for the network settings
section and press test.
Ethernet port
Dual band WiFi 2.4 GHz / 5.0 GHz 802.11 a/b/g/n/ac

Pairing your Flic
To pair a brand new Flic to the Flic Hub, simply tap the ‘+’ button in the
bottom right corner of the Flic Hub app page. After pressing the Flic the
pairing should take a few seconds.
If you are pairing a Flic that was previously paired then you will need to
remove it from that device first. You can do this by navigating to the app
page of the Flic you want to remove, tapping the gear icon, and selecting
the ‘Remove’ option. Now you are able to pair this button as described
above.

IR accessory setup
Connect your Flic IR Accessory to the Flic Hub via the 2.5mm connector
and place the IR blaster, in the direction of the receiving device(s).
The range of the IR signal is ~10m. For best results ensure a clear line of
sight between the IR blaster and the receiving device.
To setup your first action, simply select the IR blaster action within the Flic
Hub app page. Follow the app instructions to start recording IR signals
from any of your remotes!
Flic IR Accessory port

IR accessory mounting
The Flic IR Accessory uses the same reusable adhesive as Flic.
Once you have all your actions setup you can simply peel the label and
secure the IR blaster in the best location to serve all your devices.
If the adhesive starts to lose its stickiness then you can clean it
1. Remove it from the IR base and rinse with water.
2. Give it a rub and rinse again.
3. Leave it to air-dry and it will return to full stickiness.
Do not apply solvents, chemicals, or abrasive cleaning products as this will
damage the adhesive.

Audio
Connect any speaker to the Flic Hub via the 3.5mm audio jack connector.
This allows for the Flic Hub to play sound as feedback to know that a Flic
has been pressed.
3.5mm audio port

Apple HomeKit requirements
The Flic Hub can be configured to forward push events from Flic to
HomeKit. This is done individually for each Flic. Keep in mind that a Flic
configured for HomeKit can not be combined with any other Flic actions.
To get started make sure that you have:
1. An active internet connection on the Flic Hub.
2. An iOS device with the Flic app installed.
3. An active internet connection on the iOS device.
4. A Flic already paired with the Flic Hub.
5. A HomePod, Apple TV, or iPad set up as a home hub.
If you have not already set up HomeKit on your network, then it is
recommended that you do so before proceeding with Flic. This can be
done using Apple’s Home app.
To control this HomeKit-enabled
accessory, the latest version of iOS
or iPadOS is recommended.

Apple HomeKit setup
It is critical that both the Flic Hub and the iOS device have an active
internet connection during the setup process.
1. Using the Flic app, connect to the Fluc Hub and select the Flic that you
wish to add to HomeKit.
2. In the Flic detail view, there will be a toggle switch called “Add to
HomeKit”. Toggle this switch to the on position.
3. Before the Flic is added, the Flic Hub itself first needs to be paired with
HomeKit. You will be prompted to do so at this point. Follow the in-app
instructions.
4. Once paired, please continue the setup using Apple’s Home app.
Note: The HomeKit setup process is only necessary the very first time you
add a Flic. For any additional Flic that you wish to add, moving the toggle
switch to the on-position will automatically share it with HomeKit.
To control this HomeKit-enabled
accessory, the latest version of iOS
or iPadOS is recommended.

Factory reset
If, for any reason, you must perform a factory reset you need to press the
pinhole button for between 10-15 seconds. By pushing the button, all your
account settings will be lost and the Flic Hub will return to default.
If you remove the Flic Hub from your account and reconnect to it then you
will be prompted to use the Factory Password when pairing. This can be
found on the label on the underside of your Flic Hub.
If during the initial setup you assign your own password and forget this
then you must perform a factory reset to gain access again.
pinhole

Problems
If you have any issues setting up or using the Flic products that are not
answered here, please read FAQ’s at https://start.flic.io/faq
Compliance
Shortcut Labs declaration of conformity is available at https://flic.io/doc
For full compliance, list visit https://flic.io/compliance
Flic 2 is certified as FCC, IC, CE, AUS, R-NZ and WEEE, RoHS, REACH
compliant.
The Flic Hub LR is certified as FCC, IC, CE, AUS, R-NZ and WEEE, RoHS,
REACH compliant.

Safety usage guidelines
The Flic Hub and Flic are not toys. They contain small parts and
accessories that present a choking hazard. As such they are not suitable
for children or pets.
General
- Do not attempt to service the product.
- Do not use the product in temperatures below -20°C or above +54 °C.
- Clean with a damp cloth only. Do not submerge and do not use
chemical or abrasive cleaning products.
Flic specific
- Battery life will be shortened with heavy usage and/or use in extreme
conditions.
- Flic is not waterproof. Do not submerge or attempt to use underwater as
this will result in irreversible damage that is outside the scope of the
Shortcut Labs AB warranty.

Warranty
Shortcut Labs AB warrants that your Flic hardware product (“the product”)
will be free from defects in materials and workmanship for a period of 24
months from the date of delivery to the original retail purchaser
(“the warranty period”).
If a defect in the product arises within the warranty period, Shortcut Labs
will, at its sole option and subject to applicable laws:
(1) repair or replace it with a new or refurbished product or component;
or
(2) refund the original purchase price upon return of the defective
product.
This warranty does not apply to products you purchase from unauthorized
resellers, or where the instructions for use and activation of the product
are not complied with or where the product is damaged as a result of
abuse, accident, modification, moisture or other causes beyond our
reasonable control.
Note: Battery usage is regarded as normal wear and tear and is therefore
not covered by the 24 month warranty.
For detailed warranty information visit:
https://flic.io/documents/warranty-policy

Notice
Federal Communications Commission Interference Statement
This equipment has been tested and found to comply with the limits for a Class B digital device, pursuant to part 15 of the FCC Rules. These limits are
designed to provide reasonable protection against harmful interference in a residential installation. This equipment generates, uses and can radiate
radio frequency energy and, if not installed and used in accordance with the instructions, may cause harmful interference to radio communications.
However, there is no guarantee that interference will not occur in a particular installation. If this equipment does cause harmful interference to radio
or television reception, which can be determined by turning the equipment o and on, the user is encouraged to try to correct the interference by one
or more of the following measures:
-Reorient or relocate the receiving antenna.
-Increase the separation between the equipment and receiver.
-Connect the equipment into an outlet on a circuit dierent from that to which the receiver is connected.
-Consult the dealer or an experienced radio/ TV technician for help.
Caution
Any changes or modifications not expressly approved by the grantee of this device could void the user's authority to operate the equipment. This
device complies with Part 15 of the FCC Rules. Operation is subject to the following two conditions:
(1) this device may not cause harmful interference, and
(2) this device must accept any interference received, including interference that may cause undesired operation.
Radio Frequency (RF) Exposure Warning
This equipment must be installed and operated in accordance with provided instructions and the antenna(s) used for this transmitter must be
installed to provide a separation distance of at least 20cm from all persons and must not be co-located or operating in conjunction with any other
antenna or transmitter. End-users and installers must be provided with antenna installation instructions and transmitter operating conditions for
satisfying RF exposure compliance.
Canada, Industry Canada (IC) Notices
This device complies with Industry Canada’s license-exempt RSSs. Operation is subject to the following two conditions:
(1) this device may not cause interference; and
(2) this device must accept any interference, including interference that may cause undesired operation of the device.
Canada, avis d'Industry Canada (IC)
Le présent appareil est conforme aux CNR d'Industrie Canada applicables aux appareils radio exempts de licence. L'exploitation est autorisée aux
deux conditions suivantes:
(1) l'appareil ne doit pas produire de brouillage, et
(2) l'utilisateur de l'appareil doit accepter tout brouillage radioélectrique subi, même si le brouillage est susceptible d'en compromettre le
fonctionnement.
Radio Frequency (RF) Exposure Information
The radiated output power of the Wireless Device is below the Industry Canada (IC) radio frequency exposure limits. The Wireless Device should be
used in such a manner that the potential for human contact during normal operation is minimized.
This device has also been evaluated and shown compliant with the IC RF Exposure limits under mobile exposure conditions (antennas are greater
than 20cm from a person's body).
Informations concernant l'exposition aux fréquences radio (RF)
La puissance de sortie émise par l’appareil de sans fil est inférieure à la limite d'exposition aux fréquences radio d'Industry Canada (IC). Utilisez
l’appareil de sans fil de façon à minimiser les contacts humains lors du fonctionnement normal.
Ce périphérique a également été évalué et démontré conforme aux limites d'exposition aux RF d'IC dans des conditions d'exposition à des appareils
mobiles (antennes sont supérieures à 20 cm à partir du corps d'une personne).

Join us!
https://community.flic.io/
Share your ideas with other Flic users and keep up to date with the
latest news and happenings from the Flic team.
Shortcut Labs AB, Drottning Kristinas Väg 41, 11428, Stockholm, Sweden
Table of contents
Other Flic Switch manuals
Popular Switch manuals by other brands

HP
HP HP 2530 Manual supplement

NXP Semiconductors
NXP Semiconductors PBLS4004D Product data sheet

Kessel
Kessel Aqatronic K Installation, operation and maintenance instructions

H3C
H3C S9500 Series Command manual

Opencockpits
Opencockpits B737 Installation & user manual

Static Power
Static Power iMax G user manual