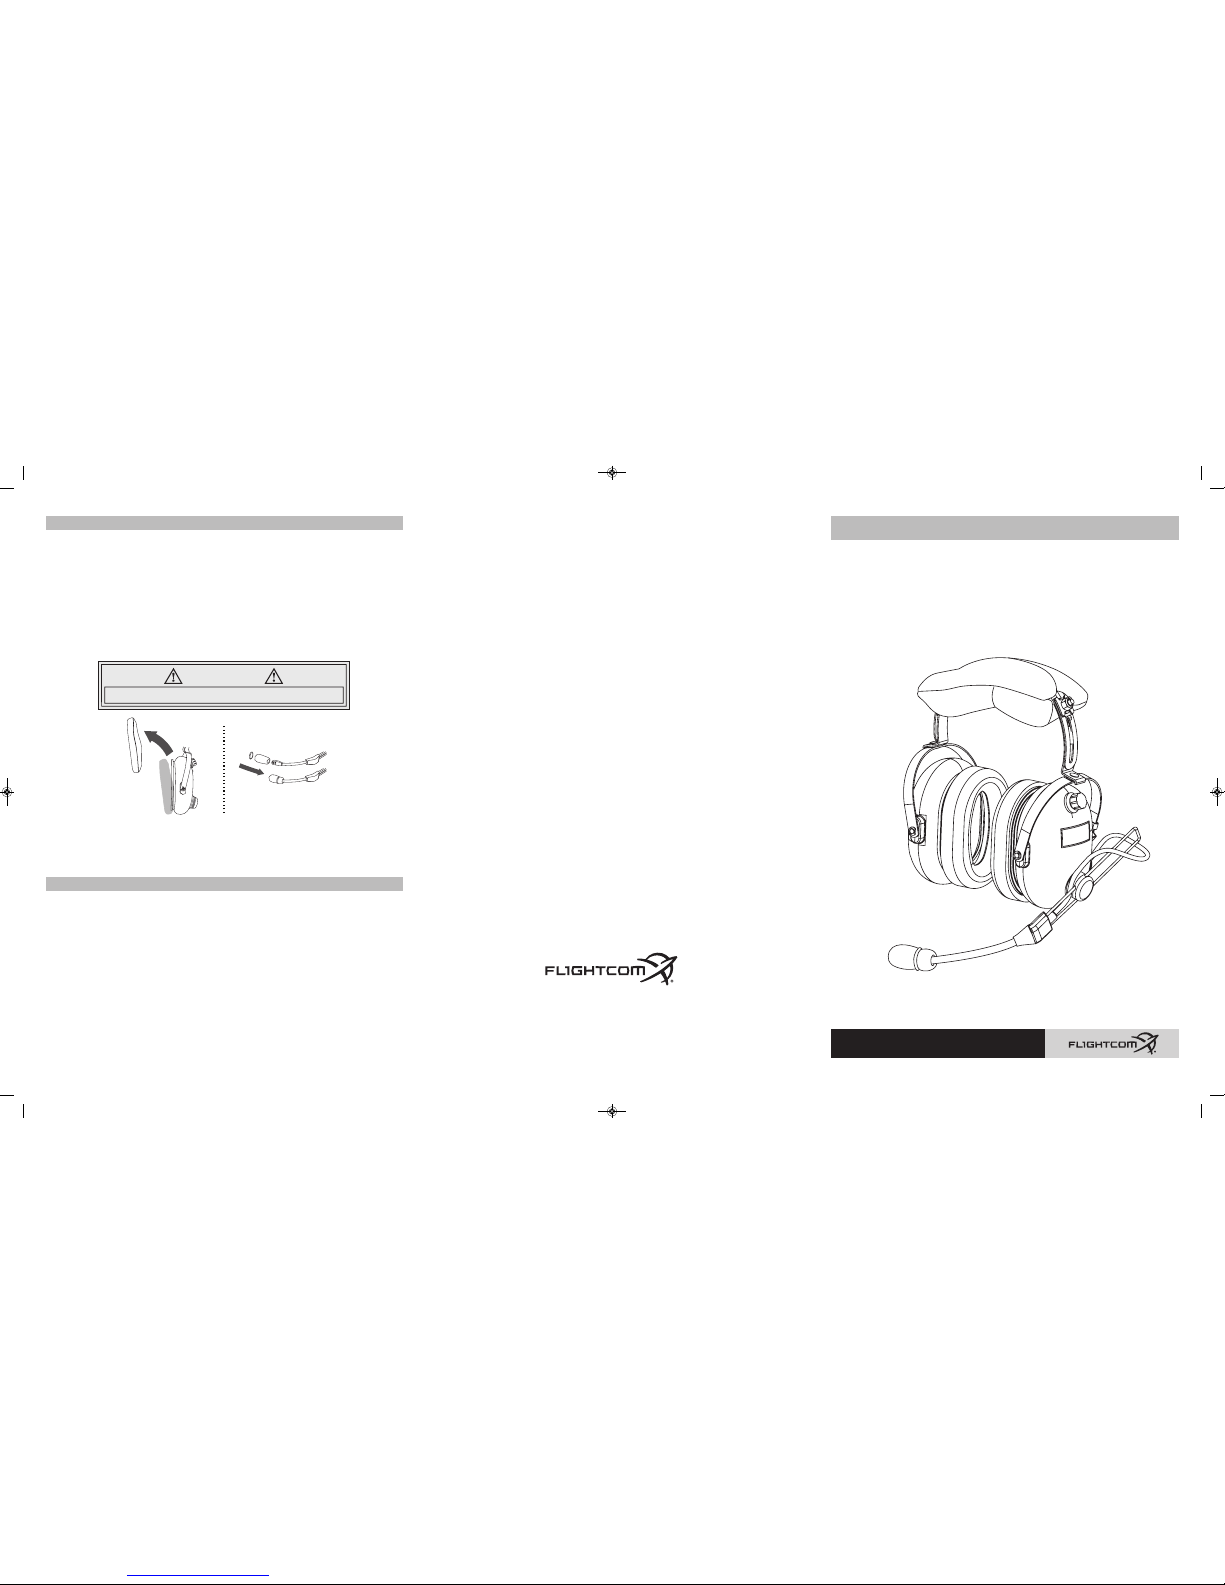
Adjustable
headband
Adjustable
Boom
Volume control
,&.$&(/(05
Place mic no more than 1/8" from
lips. Placement of mic is critical for
proper operation of intercom and
radio communication.
#;"
• Insert the headset plug into your aircraft comm panel jack.
• Volume controls are located on each ear dome. Adjust to the desired volume level on each dome.
15( the ear dome volume control does not affect the volume of auxiliary listening or
cellphone devices.
• Reduce volume on aircraft interphone system before engaging the ANR circuit. Aircraft interphone
volume can be adjusted to a comfortable level after the ANR circuit has been activated.
The battery box uses two AA batteries to supply power to the headset's ANR circuit. The battery
box also contains additional ports for cellphone and auxiliary listening devices.
18(30
To turn the ANR power on, depress the “power” button located on the top of the battery box for two
to three seconds. The ANR power will be active immediately, while simultaneously checking the
battery voltage. The battery check first illuminates the bottom yellow LED and then gradually builds
through the green LEDs. The number of green LEDs lit will be proportionate to the remaining battery
life. Four lit LEDs indicate full battery voltage capacity. As the battery voltage decreases, so does
the number of LEDs lit. If the yellow LED is continuously illuminated, the batteries will need to be
replaced. If the batteries are not replaced, the unit will automatically shut off when voltage has
dropped below 1.2V. The ANR function, cell phone and auxillary jacks will no longer work.
18(3))
To turn the ANR power off, depress the “power” button located on the top of the battery box for two
to three seconds. Three quick flashes of the yellow LED will illuminate until the power is shut off.
Once the ANR power is off, the unit will continue to monitor for low battery voltage and will illuminate
the yellow LED if the battery voltage falls below 1.6 volts.
(2.$&,0*5+($55(3,(4
To install or replace the AA batteries, open the battery box door by pushing down on the battery
release, located next to the belt clip. While pushing down on the battery release, simultaneously
slide the battery compartment door toward you. The compartment door stops halfway and is not
intended to be removed. Do not attempt to remove the door completely from the unit. Place the
AA batteries in the box and slide the unit's door away from you until the door snaps into place.
Battery life is dependent on the ambient noise in the aircraft, but it should provide an average of
50 hours continuous use for standard alkaline-zinc batteries.
69,.,$3:06',1$&-
The full stereo auxiliary-in audio jack is enabled when ANR power is activated. Follow “Power
On/Power Off” instructions in this manual to turn on system power.
An auxiliary audio jack interface cable is provided with your headset. Plug the cable into the “AUX”
battery box jack and connect the plug to your playback device. Please note the volume control on
the headset does not affect any auxiliary device. Volume must be set to the appropriate level on the
device.
(..2+10(05(3)$&($&-
The cellphone interface jack is enabled when the system power is activated. Follow “Power
On/Power Off” instructions in this manual to turn on system power.
A 6' standard 2.5 mm, 3-conductor audio cable is provided with your headset. Please note that if
your cellphone is not equipped with a standard 2.5 mm, 3-conductor headset jack, you will need to
purchase an adapter. You may need to check with the original cellphone manufacturer or wireless
system provider for the appropriate adapter.
To activate your cellphone, plug the cable into the “CELL” battery box jack and plug the other end
of the cable into the headset jack on your cellphone. Please note the volume control on the headset
does not affect the cellphone. Volume must be set to the appropriate level on the device.
63(18(3:45(/™
To conserve battery life, the V90 ANR will automatically shut off the system power if no audio signal is
sensed by the headset for a period of 15 minutes or the headset is stored in a quiet location for more
than 15 minutes. To turn the system power back on, depress the “power” button located on the top of
the battery box for two to three seconds after which ANR power will be turned on, accompanied by a
simultaneous battery check.
8,5&+
The battery box DIP switches enable or
disable the following features:
Position 1: AUX Enable
Position 2: CELL Enable
Position 3: AUX Mute on CELL enable
Position 4: Auto Power Off (Sure Power System)
$65,10
Bias voltage supplied to
the microphone must come
from voltage and resistance
ranges specified above.
Voltages supplied in excess
of those stated in the
specifications can cause
microphone failure and
void warranty. The mic
audio signal is present
between the ring and
barrel of the mic plug; tip is
reserved for transmit keyline.
All battery box features are enabled at the factory. To disable any of the factory default settings,
open the battery compartment door by pushing down on the battery release located next to the belt
clip. While pushing down on the battery release, simultaneously slide the unit's battery compart-
ment door toward you. Remove the AA batteries and set aside. A descriptive DIP switch label is
visible once the batteries have been removed.
Using a small screwdriver or slender tool, gently pull the edge of the label toward you until you can
see the DIP switches. To enable a feature, using your tool, push the switch into the “up” position.
Push the switch in the “down” position to disable the feature. Once you have completed enabling or
disabling the feature, push the label back into its original position and place the AA batteries in the
box. Slide the unit's door until it snaps into place.
$65,10 Leaving the batteries installed in the battery box when the headset is not in use for
extended periods may result in battery leakage and non-warranty damage to the headset.
Flightcom suggests using only high quality batteries for longer life and reduced risk of leakage.
Stereo/Mono Switch