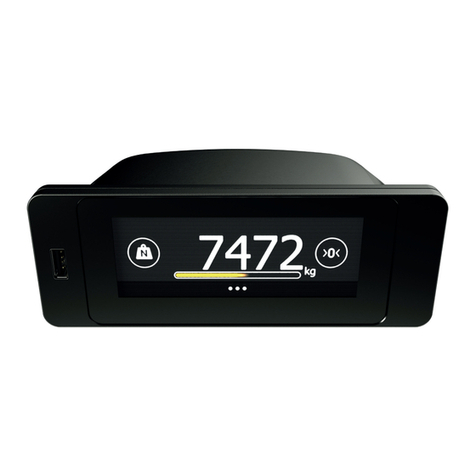
Flintec FT-111 Series User manual

FT-111 User Manual
FT-111
Weighing Indicator
User Manual
Flintec
www.flintec .com

FT-111, User Manual Rev. 2.0.0, June 2022 Page 2of 137
Table of Contents
1Safety Instructions.........................................................................................................5
2Introduction.....................................................................................................................6
2.1 Overview.................................................................................................................................................................................6
2.2 Specifications.........................................................................................................................................................................6
2.3 Housing..................................................................................................................................................................................10
2.4 Mounting kits.......................................................................................................................................................................10
3The Front View and Key Functions........................................................................12
3.1 Display...................................................................................................................................................................................12
3.2 Keypad...................................................................................................................................................................................14
4Installation......................................................................................................................15
4.1 Recommendations ............................................................................................................................................................15
4.1.1 Environment........................................................................................................................................................................15
4.1.2 Mechanical Installation Recommendations..............................................................................................................15
4.1.3 Cabling Recommendations.............................................................................................................................................15
4.1.4 Electrical Connection Recommendations ..................................................................................................................16
4.2 Installation Steps................................................................................................................................................................17
Step 1: Preliminary Preparations ................................................................................................................................ 17
Step 2: Mechanical Installation ................................................................................................................................... 17
Step 3: Open the Housing / Close the housing.......................................................................................................19
Step 4a: Analogue Load Cell Connection.................................................................................................................19
Step 4b: Digital Load Cell Connection (Only FT-111 D) ..........................................................................................20
Step 5: RS 232C Serial Ports......................................................................................................................................... 21
Step 6: RS 485 Serial Port.............................................................................................................................................22
Step 7: Ethernet TCP/IP.................................................................................................................................................22
Step 8: USB Port...............................................................................................................................................................23
Step 9: Alibi Memory (option......................................................................................................................................24
Step 10: Optional Board Installation...........................................................................................................................24
Step 11: Power Source Connection and Grounding................................................................................................24
Step 12: Scale Setup and Calibration ...........................................................................................................................25
Step 13: Use..........................................................................................................................................................................25
4.3 Installation of Optional Boards.....................................................................................................................................26
4.4 Cleaning................................................................................................................................................................................ 27
4.5 Disposal................................................................................................................................................................................ 27
5FT-111 Functions..........................................................................................................28
5.1 Basic Functions..................................................................................................................................................................28
5.2 Advanced Functions.........................................................................................................................................................29
5.3 Backup and Restore (with SD card)..............................................................................................................................31
5.4 Setup, Backup and Restore via Indface2x Software..............................................................................................32
5.5 Firmware Upgrade............................................................................................................................................................32
5.6 Copying the weighing-related data from SD card to a PC..................................................................................32
6Digital Inputs and Outputs.......................................................................................33
6.1 Digital inputs.......................................................................................................................................................................34
6.2 Digital outputs....................................................................................................................................................................34
7RS232 and RS485 Data Outputs...........................................................................39
7.1 Continuous Data Output.................................................................................................................................................39
7.2 Fast Continuous Data Output.......................................................................................................................................40
7.3 Print Mode...........................................................................................................................................................................40

FT-111, User Manual Rev. 2.0.0, June 2022 Page 3of 137
7.4 EPL Format..........................................................................................................................................................................42
7.5 BSI Data Structure for Dialog with PC........................................................................................................................42
7.6 Fieldbus Interface..............................................................................................................................................................42
8Programming and Calibration...............................................................................43
8.1 Alphanumeric Entry for Headers and Footers.........................................................................................................43
8.2 Entering to the Programming and Calibration........................................................................................................44
8.3 Quick Access Parameter Blocks used frequently....................................................................................................44
8.4 Exit from Programming..................................................................................................................................................44
8.5 Programming and Parameters....................................................................................................................................45
[1-- INTERFACE] Interface Block ...........................................................................................................................46
[2-- CONFIGURATIO] Configuration Block..............................................................................................................56
[3-- APPLICATION] Application Block..................................................................................................................58
[5-- SCALE] Scale Block............................................................................................................................................61
[6-- CALB / ADJUST] Calibration and Adjustment Block...................................................................................64
[8-- METROLOGY] Metrology Block ...................................................................................................................65
[9-- DIAGNOSTIC] Diagnostic Block.....................................................................................................................66
8.6 Calibration ...........................................................................................................................................................................68
8.6.1 Linearity Correction..........................................................................................................................................................68
8.6.2 Zero and Span Adjustments..........................................................................................................................................69
8.6.3 eCal Electronic Calibration.............................................................................................................................................70
8.6.4 Gravity adjustment............................................................................................................................................................71
8.6.5 Calibration coefficients.....................................................................................................................................................71
9Digital Load Cells (DLC).............................................................................................72
9.1 Addressing of Digital Load cells.................................................................................................................................... 72
10 Sealing of Approved Scale.......................................................................................75
11 Optional Boards...........................................................................................................76
11.1 Digital Inputs and Outputs.............................................................................................................................................76
11.2 Alibi Memory .......................................................................................................................................................................77
11.2.1 Installation of Alibi SD card.............................................................................................................................................77
11.2.2 Activating Alibi Memory..................................................................................................................................................78
11.2.3 How is the Data Recorded into the Alibi Memory?................................................................................................78
11.2.4 Recall Data from Alibi Memory....................................................................................................................................78
11.3 Installation of SD Card.....................................................................................................................................................80
11.4 BSI Protocol to Interface with PC and PLC.................................................................................................................81
11.4.1 BSI-Base Commands.......................................................................................................................................................82
11.5 Continuous Data Formats..............................................................................................................................................88
11.6 Analogue Output................................................................................................................................................................91
11.6.1 Analogue Output Connection.........................................................................................................................................91
11.7 Modbus RTU .......................................................................................................................................................................93
11.7.1 Modbus RTU Data Structure .........................................................................................................................................93
11.8 Ethernet TCP/IP.................................................................................................................................................................99
11.8.1 Ethernet Parameters .......................................................................................................................................................99
11.8.2 Modbus TCP Data Structure........................................................................................................................................100
11.9 Profibus DP ........................................................................................................................................................................101
11.9.1 Electrical Connection.......................................................................................................................................................101
11.9.2 Data Format.....................................................................................................................................................................102
11.9.3 GSD Configuration..........................................................................................................................................................102
11.9.4 Profibus DP Data Structure .........................................................................................................................................102
11.10 Profinet...............................................................................................................................................................................103
11.10.1Electrical Connection......................................................................................................................................................104
11.10.2 Data Format...............................................................................................................................................................104
11.10.3 Profinet Parameters ................................................................................................................................................105
11.10.4 GSDML Configuration..............................................................................................................................................105

FT-111, User Manual Rev. 2.0.0, June 2022 Page 4of 137
11.10.5 Profinet Data Structure...........................................................................................................................................106
11.11 EtherNet/IP .......................................................................................................................................................................107
11.11.1 Electrical Connection......................................................................................................................................................108
11.11.2 Data Format .....................................................................................................................................................................109
11.11.3 EtherNet/IP Parameters...............................................................................................................................................109
11.11.4EDS Configuration...........................................................................................................................................................109
11.11.5 EtherNet/IP Data Structure..........................................................................................................................................110
11.12 EtherCAT..............................................................................................................................................................................111
11.12.1 Electrical Connection.......................................................................................................................................................112
11.12.2Data Format ......................................................................................................................................................................112
11.12.3ESI Configuration..............................................................................................................................................................113
11.12.4EtherCAT Data Structure...............................................................................................................................................113
11.13 CC-Link.................................................................................................................................................................................114
11.13.1 Electrical Connection.......................................................................................................................................................114
11.13.2Data Format......................................................................................................................................................................115
11.13.3CC-Link Configuration.....................................................................................................................................................115
11.13.4CC-Link Data Structure...................................................................................................................................................115
11.14 Powerlink............................................................................................................................................................................116
11.14.1Electrical Connection.......................................................................................................................................................117
11.14.2Data Format......................................................................................................................................................................117
11.14.3XDD Configuration...........................................................................................................................................................118
11.14.4 Powerlink Data Structure........................................................................................................................................118
12 Appendix 1 Data Structure Profibus, Profinet, EtherNET/IP, EtherCAT,
CC-Link, Powerlink..............................................................................................................119
13 Appendix 2: Data Structure CANopen............................................................126
14 Error Codes..................................................................................................................135

FT-111, User Manual Rev. 2.0.0, June 2022 Page 5of 137
Disclaimer
All rights reserved.
No part of this publication may be reproduced, stored in a retrieval system, or transmitted in any form or by
any means, mechanical, photocopying, recording, or otherwise, without the prior written permission of
Flintec.
No patent liability is assumed with respect to the use of the information contained herein. While every
precaution has been taken in the preparation of this book,Flintec assumes no responsibility for errors or
omissions. Neither is any liability assumed for damages resulting from the use of the information contained
herein.
The information herein is believed to be both accurate and reliable. Flintec, however, would be obliged to be
informed if any errors occur. Flintec cannot accept any liability for direct or indirect damages resulting from
the use of this manual.
Flintec reserves the right to revise this manual and alter its content without notification at any time.
Neither Flintec nor its affiliates shall be liable to the purchaser of this product or third parties for damages,
losses, costs, or expenses incurred by purchaser or third parties because of: accident, misuse, or abuse of this
product or unauthorized modifications, repairs,or alterations to this product, or failure to strictly comply with
Flintec operating and maintenance instructions.
Flintec shall not be liable against any damages or problemsarising from the use of any options or any
consumable products other than those designated as Original Flintec Products.
NOTICE: The contents of this manual are subject to change without notice.
1SAFETY INSTRUCTIONS
CAUTION: READ this manual BEFORE operating or servicing this equipment. FOLLOW
these instructions carefully. SAVE this manual for future reference. DO NOT allow
untrained personnel to operate, clean, inspect, maintain, service, or tamper with this
equipment. ALWAYS DISCONNECT this equipment from the power source before
cleaning or performing maintenance.
CALL Flintec for parts, information, and service.
WARNING: Only permit qualified personnel to service this equipment. Exercise care
when making checks, tests and adjustments that must be made with power on. Failing
to observe these precautions can result in bodily harm.
WARNING: For continued protection against shock hazard connect to properly
grounded outlet only. Do not remove the ground prong.
WARNING: Disconnect all power to this unit before removing the fuse or servicing.
WARNING: Before connecting/disconnecting any internal electronic components or
interconnecting wiring between electronic equipment always remove power and wait at
least thirty (30) seconds before any connections or disconnections are made. Failure to
observe these precautions could result in damage to or destruction of the equipment or
bodily harm.
CAUTION: Observe precautions for handling electrostatic sensitive devices.

FT-111, User Manual Rev. 2.0.0, June 2022 Page 6of 137
2INTRODUCTION
2.1 OVERVIEW
FT-111 Weighing Terminal is an economical and powerful state-of-the-art measuring instrument. It is ideal for
industrial weighing applications like basic weighing, labelling, system control with digital outputs, fieldbus
interfacing, etc. Its set values memory with 500 items record size which each item has 5 pieces limit values
gives big advantage in operation.
Digital inputs and outputs of the instrument can be programmed as a Remote IO on the fieldbus. This feature
The scales equipped with FT-111 weighing terminal can be used in all kinds of industrial areas up to harsh,
wet, and hygienic environments with its fast and efficient cleaning that was designed and built according to
the international guidelines.
2.2 SPECIFICATIONS
Analogue Load cell
A/D converter type
24 bit Delta-Sigma ratio metric with integral analogue and digital filters
Conversion rate
Up to 800 measurement values per second
Input sensitivity
0,4 μV/e approved, 0.05 μV/e non approved.
Analogue input range
-5 mV to +19 mV
Internal resolution
up to 16 000 000
Excitation
5 VDC max. 125 mA
Number of load cells
Up to 8 load cells 350 Ωor 25 load cells 1100 Ω.
Connection
4- or 6-wire technique.
Home cable length: maximum 1000 m/mm² for 6-wire connection between
FT-111 and junction box.
Scale
Range
Single range, up to 3 x multi-intervals, up to 3 x multi ranges.
Display resolution
Approval, up to 10 000 division at usage in trade, according to EN45501 and
OIML R76. Up to 999 999 division at industrial usage.
Platform
Every kind of platform which is equipped with strain gage-based load cells.
Calibration and Functions
Calibration
Calibration with test weights,
eCal electronic calibration without test weights,
Temporary zero calibration,
Zero adjustment, Gain adjustment,
Coefficient entry.
Digital filter
5 steps programmable adaptive filter
Average filter
Programmable dynamic filter
Weighing functions
Taring, zeroing, auto zero tracking, motion detection, auto zero at power up,
tare status saves at power off, increased resolution, automatic tare and clear,
temporary gross indication, unit change.

FT-111, User Manual Rev. 2.0.0, June 2022 Page 7of 137
Standard applications
Labelling with barcode, free set points, functional digital outputs, livestock
weighing, Remote IO of PLC or HMI, fieldbus interface.
Memory
Application memories
Set Memory to save limit values at your industrial weighing.
Memory size is 500 item records.
Alibi memory (optional)
99 999 records
Communication
Connectable with
PC, PLC, Printer, Remote display, EPL printer etc.
RS 232
Port
2 pieces opto-isolated, 3 wire.
Baud rate
1200 to 57600 programmable
Data
Length 7 or 8 bits; parity even, odd or none
RS 485
Baud rate
1200 to 57600 programmable
Data
Length 7 or 8 bits; parity even, odd or none
Stations
Up to 31 stations
Ethernet TCP/IP
Transmission
rate
10 / 100 Mbit/s, Full duplex
TCP/IP settings
Manual IP assign over EtherX PC Software or by keys in programming mode.
Connection
method
Server or Client
Installation
Switched Ethernet transmission with shielded twisted pair cables and RJ-45.
Isolation
Galvanically isolated bus electronics
Response speed
Max. 4 ms response delay after read/write commands
USB
Connection
Standard USB Mini-B cable
Response speed
Max. 4 ms response delay after read/write commands
Digital Inputs and Outputs (optional)
Digital Inputs
Opto-isolated 4 digital input, 12 to 28 VDC, 10mA
Digital Outputs
5 free relay contact, 250 VAC or 30 VDC, 0.2A
Analogue Output (optional)
Voltage output
0-5 VDC, 0-10 VDC
Current output
4-20mA, 0-20mA
Resolution
60 000 steps between minimum and maximum output.
Max. cable length
300 meters
Max. load resistance
(current output)
500 Ω
Min load resistance
(voltage output)
10 kΩ
Profibus DPV1 (optional)
Data rate
Up to 12000 kbit/s with automatic baud rate detection
GSD file
Generic GSD-file provided

FT-111, User Manual Rev. 2.0.0, June 2022 Page 8of 137
Topology
Depending on physical media
RS-485:segmented line topology without stubs
Installations
Shielded twisted pair cable
Line length depending on physical media and transmission speed
Max. Stations
up to 126 stations per network
Isolation
Galvanically isolated bus electronics
Response speed
Min. 4 ms response delay after read/write commands
Profinet (optional)
Data rate
100 Mbit/s, full duplex
GSDML file
Generic GSDML-file provided
TCP/IP settings
DHCP or manual IP are assigned over EtherX PC Software or by keys in
programming mode. Device identity customization
Topology
Line, Bus, Star or Tree topology depending on physical media
Installation
Switched Ethernet transmission with shielded twisted pair cables and RJ-45
connectors.
Web client
Available
Isolation
Galvanically isolated bus electronics
Response speed
Min. 4 ms response delay after read/write commands
EtherNet/IP (optional)
Data rate
10 Mbit/s or 100 Mbit/s, full duplex
EDS file
Generic EDS-file provided
DLR (Device Level Ring)
Available
TCP/IP settings
DHCP or manual IP assign over EtherX PC Software or by keys in programming
mode.
Device identity customization
Topology
Line, Bus, Star or Tree topology depending on physical media
Installation
Switched Ethernet transmission with shielded twisted pair cables and RJ-45
connectors.
Web client
Available
Isolation
Galvanically isolated bus electronics
Response speed
Up to 4 ms. response delay after read/write commands.
EtherCAT (optional)
Data rate
100 Mbit/s, full duplex
ESI file
Generic ESI-file provided
Topology
Line, Tree, Star or Daisy-chain topology depending on physical media
Installation
Switched Ethernet transmission with shielded twisted pair cables and RJ-45
connectors.
Isolation
Galvanically isolated bus electronics
Response speed
Up to 4 ms. response delay after read/write commands.

FT-111, User Manual Rev. 2.0.0, June 2022 Page 9of 137
CC-Link (optional)
Data rate
156 kbit/s 10 Mbit/s (selectable)
Topology
Line with Trunkline, Branch structure and Termination at both Ends.
Installation
3 wires shielded twisted pair cable.
Max. Stations
Up to 64 stations per network
Isolation
Galvanically isolated bus electronics
Response speed
Up to 4 ms. response delay after read/write commands
Powerlink (optional)
Compatibility
Supports Ethernet POWERLINK V2.0 Communication Profile Specification
version 1.2.0
Data rate
100 Mbit/s, half duplex
XDD file
XDD-file provided
Ring redundancy
Available
Topology
100% free choice of star, tree, ring or daisy chain
Installation
Switched Ethernet transmission with shielded twisted pair cables and RJ-45
connectors.
Isolation
Galvanically isolated bus electronics
Response speed
Min. 4 ms response delay after read/write commands
Power Consumption
100 240 VAC, 50 60 Hz max. 25 mA + max. 50 mA for fieldbus interfacing
OR 12 28 VDC 250 mA + max. 500 mA for fieldbus interfacing
Environment and Enclosure:
Operation temp. range
Approved scales -10 °C to +40 °C
Industrial usage -15 °C to +55 °C
Humidity
Approved scales 80% RH max, non-condensing
Industrial usage 90% RH max, non-condensing
Enclosure
Stainless steel
Protection
IP67
Sizes ( W x H x D )
Wall type
: 260 x 200 x 64 mm (
Weight
2,3 kg ( 5,07 lb )
Packing sizes
Weight packed
3,2 kg ( 7,05 lb )

FT-111, User Manual Rev. 2.0.0, June 2022 Page 10 of 137
2.3 HOUSING
2.4 MOUNTING KITS
Wall mounting kit
This kit can be used to install the weighing terminal on to the desk or to the wall. Its mounting dimensions
and adjustment angles are shown below.
Mounting part
Side view
Rear part of indicator

FT-111, User Manual Rev. 2.0.0, June 2022 Page 11 of 137
2D Wall mounting kit
This kit can be used to install the weighing terminal on to the wall. 2D wall mounting kit provides to adjust the
angles of the terminal at two directions. Its mounting dimensions and adjustment angles are shown below.
Mounting part
Side view
Top view
Column mounting kit
This kit can be used to install the weighing terminal on to the column of the platform. Its mounting
dimensions and adjustment angles are shown below.
Mounting part
Side view

FT-111, User Manual Rev. 2.0.0, June 2022 Page 12 of 137
3THE FRONT VIEW AND KEY FUNCTIONS
Figure 3.1 Front view of FT-111
3.1 DISPLAY
The bright and wide-angle LCD display of the FT-111 is shown below.
2
4
5
10
9
1
7
13
12
11
6
8
3
14

FT-111, User Manual Rev. 2.0.0, June 2022 Page 13 of 137
The meanings of the announcement symbols on the display are:
1
6-digit 22 mm height big weighing display with sign
2
16-digit 8 mm height alphanumeric information display
3
High resolution digit separator.
4
Announces the indicated value is the net weight.
5
Announces the indicated value is the gross weight.
6
Bar graph
7
Indicates the range of the scale at multi range and multi-interval
operations.
8
g, oz, kg, t, lb units are located on the right of the display.
9
Announces the activated inputs and outputs.
10
Announces the instrument is at repair status or call service.
11
Announces the weight value is in the centre of zero range.
12
Announces the weighing is not stable. After stabilization of the
weighing, this symbol disappears.
13
Announces the keys are locked.
14
Announces the battery charging level.

FT-111, User Manual Rev. 2.0.0, June 2022 Page 14 of 137
3.2 KEYPAD
The keys and the key functions of FT-111 in usage are:
On: Press the key to switch on the weighing terminal.
Off: Press the key more than 2 seconds to switch off the instrument.
Page 28
Date & Time: This key used to indicate date and time on the alphanumeric
display.
Page 30,
57
Temp. Gross in Net: This key is used to indicate the Gross weight temporarily in
net mode.
SET value entry: Press this key to enter set points.
Page 33,
59
Print: By pressing this key weight data transferred to a printer or to PC.
Page 29,
40
Navigation keys: Date, G/N, SP and Print keyshave navigation functions in the
set point memory and in the programming.
The meanings of the symbols on keys at usage are;
Page 43
Return.
Increase the blanking digit or next step.
Decrease the blanking digit or previous step Change the item or enter
into parameter.
Save the data after entry.
Go to the next parameter.
Unit change key: This key is used to change unit. The unit change is available
between kg and lb, and between g and oz.
Esc: The second function of this key is escape. Pressthe key to escape from any
entry or step in operation.
Page 29,
62
High resolution key: This key is used to indicate 10 times higher resolution of
the weight value.
Memory: The second function of the key is memory transactions. Press for
more than 2 seconds to enter memory. Or press this key to load any item from
memory in Set point entry step.
Page 29,
61, 38
Tare: Press this key for taring the scale.
Key lock: This key is used to lock/unlock the keys.
Page 29,
56, 30,
58
Zeroing: If
key to compensate zero drift.
Page 28,
62
Clear: Clears the tare and indication returns to the gross value.
Plus/Minus: This key is used to set negative set point value.
Page 29,
38
Enter: Save the data and go to the next step.
Print: By pressing this key the weight data is transferred to a printer or to a PC.
Page 43,
40

FT-111, User Manual Rev. 2.0.0, June 2022 Page 15 of 137
4INSTALLATION
PRECAUTION: Read this section carefully before installation of the instrument. Applying the
recommendations in this section will increase your system reliability and its long-term performance.
4.1 RECOMMENDATIONS
4.1.1 Environment
The weighing terminal should be placed in an area which is clean, not getting direct sun light if possible,
having a temperature between -15 ºC and +55 ºC and humidity not exceeding 80% non-condensing. All
external cables should be installed safely to avoid mechanical damages.
This instrument is very low-level signal measuring instrument. To avoid electrical noise, it should be
separated from equipment that produce electrical noise. The instrument body must be connected to the
good ground against the electromagnetic disturbances. Load cell cable must be separated from other cables
especially from power cables if possible. If there are electrical noise-generating equipment such as heavy
load switches, motor control equipment, inductive loads etc., please pay attention against the EMC
interference and take all the prevention. Connect parallel reverse diodes to the DC inductive loads like relays,
solenoids etc. to minimize voltage peaks on the DC power lines.
4.1.2 Mechanical Installation Recommendations
You may install your weighing indicator on a column, on a table or on a wall. Take care of the housing
drawings and dimensions given in this manual to design your weighing scale or weighing station
mechanically.
4.1.3 Cabling Recommendations
All cables coming to the instrument must be of high quality and shielded. Distance from load cell cables,
interface cables and DC power supply cables to power line cables must be minimum 50 cm. The separate
cable tray usage for these low signal level cables is strongly recommended.
For cable connections of different thicknesses, as seen in Figure 4.1 there are 3 interlocking gaskets with
different diameters, indicated as B, C, and D, inside the glands used in the FT-111 weighing terminal.
Depending on the thickness of the cable, remove the gaskets B and C respectively, pass the cable through the
gland and tighten it. In this way, wires ranging in thickness from 4 to 8 mm can be easily connected to the
terminal using the same gland with the appropriate sealing combination.
To maintain the immunity of the device against electromagnetic interference, the cable shields should be
connected to the grounding pins inside the device, shown in Figure 4.2.
Figure 4.1- Seal combination and mounting of gland assembly
Figure 4.2 - Ground pins in FT-111 for cable shield grounding
E
C
D
A

FT-111, User Manual Rev. 2.0.0, June 2022 Page 16 of 137
Warning: Incorrectly closed back cover and poorly tightened glands may be unwanted results with loss of IP
4.1.4 Electrical Connection Recommendations
1. Always remember that FT-111 terminal is very low voltage measuring instrument used in the
industrial environment. Your proper installation increases the reliability and performance of the
instrument.
2. Only a trained person should interface the instrument due of the 230 VAC voltage in the instrument
and against malfunction at installation.
3. If the energy condition of your plant is not good enough, prepare a special power line.
4. The quality of your plant grounding will provide weighing accuracy and the safety of FT-111. If
grounding of your plant is not good enough, prepare a special power line and grounding.
5. Power off the instrument before connecting or disconnecting any peripheral instrument.
6. The shielded cable and ground connection of the shield will increase the immunity of FT-111 against
electrical disturbances. Shields of cables should be connected to the grounding pins in
FT-111.
7. All required electrical connections should be done as described in the installation section, page 17.
If you need to service the terminal, turn the power off and wait at least 30 seconds before opening
housing.
Location of the Peripheral Connections
The electrical terminals of the main board are shown in the 2 pictures below.
Figure 4.3 FT-111 main board
Load Cell
RS232-2 RS485
INT2 INT3
RS232-1
INT1
Power
230 VAC
Mini
USB
Calib.
DIP switch
Connectors of
optional board
Alibi
(Option)
J14, automatic
switch on.
(If short circuit)
Modbus
Ethernet
TCP/IP

FT-111, User Manual Rev. 2.0.0, June 2022 Page 17 of 137
Figure 4.4 FT-111D main board
4.2 INSTALLATION STEPS
Follow the steps below carefully to install the instrument.
Step 1: Preliminary Preparations
Before starting the installation,
1. Select the weighing terminal location. Refer to recommendations in the previous section.
2. Prepare the Protective Earth (PE) cable to grounding the FT-111 housing. The protective earth should
be as good as possible for scale reliability.
3. Prepare the required power source near the weighing terminal.
4. Prepare the cabling tray, pipe etc. from platform to the weighing terminal.
Step 2: Mechanical Installation
Be sure that the mechanical installation of the instrument is done properly for long time operation life and
suitable for the electrical installation as descripted below. Installations of the desk type and wall type
If you use the weighing terminal on a desk without additional mechanical hardware, place the instrument on
the desk. Go to the next step.
Digital
Load Cell
RS232-2 RS485
INT2 INT3
RS232-1
INT1
Power
230 VAC
Mini
USB
Calib.
DIP switch
Connectors of
optional board
Alibi
(Option)
J14, automatic
switch on.
(If short circuit)
Modbus
Ethernet
TCP/IP

FT-111, User Manual Rev. 2.0.0, June 2022 Page 18 of 137
Wall mounting
Dismounting the wall mounting kit before installation and follow the steps below.
Install the wall
mounting part of the
kit to the wall with 3
screws.
Install the holder of the
kit to the rear the
instrument with 4 pcs M5
x 15 mm screws.
Reassemble the wall
mounting kit as seen in
the picture.
Adjust the angle of
weighing terminal.
Wall mounting with 2D kit
Install the mounting kit to the
wall with 4 pcs screws.
Install the mounting kit to the
rear of the instrument with 4 pcs
M5 x 15 mm screws.
direction and angle.
Column mounting
Dismount the column mounting kit before installation and follow the steps below.
Install the small part of the kit
to the column.
Assemble the kit as seen in the
picture.
Install the weighing terminal to
the kit with 4 pcs M5 x 15 mm
screws.
65°
110°
120°
60°

FT-111, User Manual Rev. 2.0.0, June 2022 Page 19 of 137
Step 3: Open the Housing / Close the housing
Be sure that the mechanical installation of the instruments is done properly, and environment is convenient
to open the housing.
Open the housing from its rear. The rear part of the housing will be hanged to two stainless steel wires
connected to body.
Warning:
Incorrectly closed cover and poorly tightened glands may be unwanted result with loss of IP rating
and safety. Close the cover's bolts with minimum 1.5 Nm torque.
Step 4a: Analogue Load Cell Connection
To avoid damages, the load cell wiring should be made carefully before energizing the instrument. Load cell
connection detail is shown in Figure 4.6. In 4-wire installations the sense and excitation pins with the same
polarity should be short circuited at the connector side. If you have junction box in your system, use 6 wire
cable between FT-111 and the junction box, and short circuit these pins at junction box for better
performance.
Figure 4.5- Analogue load cell terminal
Figure 4.6 Analogue load cell and junction box connection
4 wire load cell connection
6 wire load cell connection
Junction box connection
Wiring between instrument and
junction box will be 6 wire.

FT-111, User Manual Rev. 2.0.0, June 2022 Page 20 of 137
Warning:Always connect Sense pins to Excitation pins for 4 wire connection. Non-connected sense pins may
cause the wrong Excitation voltage measurement and create an accuracy and instability problem.
Warning:Connect the load cell cable shield to the housing (recommended to increase the EMC immunity
against disturbances) or shield pin of the load cell connector.
Step 4b: Digital Load Cell Connection (Only FT-111 D)
The digital load cell wiring should be made carefully before energizing to avoid FT-111D and load cells from
damages. The instrument cable between the instrument, LPK24 Lightning protection kit and junction box
must be shielded and convenient for high speed RS485 interface. The wire diameter of the instrument cable
should be selected for maximum 0,5 volt drop between Junction box and LPK24 lightening protection kit.
Pin number (J2)
Definition
Description
1
A
+ RS485 for DLC interfacing
2
B
-RS485 for DLC interfacing
3
Gnd
Ground
4
Pin
Power input (from LPK24)
5
Pout
Power output (to load cells via LPK24)
6
PE
Protective Earth
Table 4.1
Imported Note:
Since the supply voltage of the digital load cell is isolated, its Ground (0 VDC) should NOT be connected to
another ground or PE-Protective Earth!!!
Figure 4.7 FT-111D, LPK24 and DLC connection with junction box
Figure 4.8 FT-111D, LPK24 and DLC connection without junction box
Other manuals for FT-111 Series
1
Table of contents
Other Flintec Measuring Instrument manuals
Popular Measuring Instrument manuals by other brands

Pintek
Pintek hvp-40 instruction manual

Metabo
Metabo Elektra Beckum RF 480 operating instructions

Morskate
Morskate DH 010 FPM Installation and operating instructions
Onicon
Onicon System-10 BTU Meter installation guide
OWL
OWL WaveSource Series Operation guide

Magnescale
Magnescale DK812S Series instruction manual
