koban KTO AT-8 User manual

KTO AT-8 Tacómetro digital
Digital tachometer
www.grupotemper.com

KTO AT-8
Tacómetro digital
2
Manual de instrucciones | www.grupotemper.com
Índice
Introducción 3
Panel frontal 3
Accesorios 4
Instrucciones de seguridad 4
Símbolos de seguridad 5
Descripción de la pantalla 5
Descripción de los botones 5
Especificaciones 6
Selección de la rueda intermedia de medición 7
Realización de mediciones 7
Salvado y lectura de datos 8
Instalación y cambio de las pilas 8

KTO AT-8
Tacómetro digital
3
Manual de instrucciones |www.grupotemper.com
Introducción
El KTO AT-8 es un tacómetro digital de contacto con un rendimiento estable
y alta fiabilidad y seguridad gracias a su chip integrado de alto rendimiento.
El medidor es capaz de regitrar velocidades de rotación desde 50RPM a
19999RPM. Su pantalla LCD retroiluminada permite la realización y lectura de
de mediciones incluso en condiciones de baja visibilidad.
Panel frontal
1. Rueda intermedia de 6 pulgadas.
2. Punta de contacto cóncava
3. Punta de contacto convexa
4. Barra alargadora
5. Rueda intermedia de 0.1m
6. Rodamiento de medición
7. Tecla de selección de modo
8. Tecla de medición
9. Tecla de salvado
de datos
10. Tecla de retención de datos
y retroiluminación
11. Tecla avance
12. Pantalla LCD
13. Tecla de encendido
14. Tecla de máximos y mínimos
15. Tecla de lectura de datos
guardados
16. Tecla de retroceso

KTO AT-8
Tacómetro digital
4
Manual de instrucciones | www.grupotemper.com
Accesorios
1KTO AT-8 1
2Manual 1
3Ruedas intermedias 2
4Puntas de contacto 2
5Barra alargadora 1
6Pilas1.5V AAA 4
Inspección del embalaje
Cuando reciba su tacómetro, compruebe el medidor y sus accesorios. Si
observa que falta o está dañado algún componente, por favor, acuda a su
proveedor para obtener los elementos que galten o reemplazar el medidor
por uno nuevo.
Instrucciones de seguridad
Ambiente de funcionamiento:
• Altura <2000 m
• Humedad relativa 80%HR
• Temperatura de funcionamiento: 0 - 40°C
Precaución
• Para evitar dañar el tacómetro o afectar a la precisión del mismo no abra el
mismo.
• No use el tacómetro en lugares con altas temperaturas y humedad o cerca
de materiales explosivos o inflamables.
• Almacenaje y mantenimiento: no use alcohol u otros disolventes para
limpiar el tacómetro. Si no lo va a usar durante un periodo prolongado,
quite las pilas y pongalo en un lugar seco y limpio.

KTO AT-8
Tacómetro digital
5
Manual de instrucciones |www.grupotemper.com
Símbolos de seguridad
Información importante de seguridad
No reciclar
Aviso de pila sin carga
Este medidor cumple con lo estándares de la UE.
Descripción de la pantalla
1. Señal
2. Tamaño de la rueda intermedia
3. Batería baja
4. Modo medición de máximos
5. Velocidad de rotación
6. Modo medición de mínimos
7. Estado de memoria
8. Número de posición de memoria
9. Valor medio de mediciones
10. Unidad de medición de la velocidad de rotación
11. Modo de medición de la velocidad
Descripción de los botones
1.Tecla de encendido/apagado
Función: apagado y encendido del tacómetro.
Funcionamiento: utilice esta tecla para encender y apagar el tacómetro.
2.Tecla de máximos y mínimos
Función: selección de visualización de mediciones máximas, mínimas y
promedio.
Funcionamiento: si la pantalla muestra el símbolo MAX, la medición
muestra el valor máximo. Si muestra el símbolo MIN, la medición muestra
el valor mínimo . Si muestra el símbolo AVG, la medición muestra el valor
promedio.
3.Tecla de selección de modo
Función: seleccionba el modo de medición.
Funcionamiento: seleccione el modo de medición, de 0 a 5 según el caso.
7
1
2
3
5
8
9
4
6
11
10
CONTECTNON
PERIMETER:
AVG
MEM
MAX MIN
m min
/
RPM
6"12"
0.1m
m/sec ft min/ft sec/in min/

KTO AT-8
Tacómetro digital
6
Manual de instrucciones | www.grupotemper.com
4.Tecla de medición
Función: activa la medición.
Funcionamiento: cuando encienda el tacómetro pulse la tecla de medición
de acuerdo con las instrucciones de funcionamiento.
5.Tecla de salvado
Función: almacena la velocidad actual de rotación en la memoria.
Funcionamiento: cuando desee guarda los datos de una medición,
presione esta tecla junto con la tecla de avance o retroceso para guardar
los datos en la posición de memoria especificada.
6.Tecla de lectura
Función: permite leer los datos salvados en cada posición de memoria.
Funcionamiento: cuando desee leer los datos salvados en memoria
presione esta tecla junto con la de avance o retroceso hasta llegar a la
posición de memoria correspondiente.
7.Tecla de retroiluminación y retención de datos
Función: enciende o apaga la retroiluminación de la pantalla. Activa o
desactiva la retención de datos.
Funcionamiento: pulse esta tecla para retener o liberar los datos de las
mediciones en la pantalla. Manténgala presionada más de 2 segundos
para encender o apagar la retroiluminación.
8.Tecla de avance
Función: permite avanzar por las posiciones de memoria.
9.Tecla de retroceso
Función: permite retroceder por las posiciones de memoria.
Especificaciones
Especificaciones generales
1.Pantalla de 5 dígitos con un máximo de 19999 recuentos.
2.Por debajo de 50RPM la pantalla mostrará 0.
3.Modo de medición: 0--5.
4.Cuando la tensión de las pilas sea menor de 4.5V la pantalla mostrará el
símbolo .
5.Dimensiones: 155mm x 60mm x 27mm
6.Peso: 120g
7.Alimentación: 4 × 1.5V AAA
8.Auto apagado: 30 segundos.

KTO AT-8
Tacómetro digital
7
Manual de instrucciones |www.grupotemper.com
Especificaciones técnicas
Alcance de medición Resolution Precisión
50-99.99RPM 0.01RPM
±(0.03%±2d)100-9999.9RPM 0.1RPM
10000-99999 1RPM
Selección de la rueda intermedia de medición
Para entrar en el modo de selección
de la rueda intermedia, mantenga
presionada la tecla MODE al encender
el tacómetro. La rueda seleccionada
por defecto es la 0.1m. Ahora ya
puede seleccionar entre las medidas
6”, 12”or 0.1m de las rueda mediante
las teclas de avance y retroceso. Para
salir de la selección presione la tecla
MIN/MAX
Nota
Seleccione la medidad 0.1m para medir m/min and m/seg, selecciones 6”o
12”para medir ft/min, ft/seg y in/min.
Realización de mediciones
Precaución
Para evitar daños personales o en el tacómetro, mantengase a una
distancia segura de elementos que giren a gran velocidad.
Medición de la velocidad de rotación
1.Coloque la barra largadora y la punta de contacto en el tacómetro.
2.Encienda el equipo que va a medir y espere a que la velocidad de rotación
se estabilice.
3.Encienda el tacómetro, introduzca el modo de medición, acerque el
tacómetro gradualmente al objeto rotatorio hasta que la punta de
contacto toque suavemente el objeto. Pulse la tecla de medición y lea el
valor medido en la pantalla.

KTO AT-8
Tacómetro digital
8
Manual de instrucciones | www.grupotemper.com
Precaución
Cuando vaya a medir objetos que roten a una velocidad mayor de
10000RPM no utilice la barra alargadora ya que el movimiento pendular
debido a la alta velocidad de rotación puede afectar a la precisión de las
mediciones.
Medición de velocidad
1.Encienda el tacómetro y entre en el modo de medición de velocidad.
Selecciones m/min, m/sec, ft/min, ft/sec or in/min mediante la
tecla MODE, la pantalla mostrará el tamaño de la rueda intermedia
seleccionada.
2.Coloque la rueda intermedia seleccionada.
3.Encienda el equipo que va a medir y espere a que la velocidad de rotación
se estabilice. Acerque la rueda intermedia gradualmente a la correa hasta
que haga contacto y lea los valores medidos en la pantalla.
Salvado y lectura de datos
Salvado de datos
Pulse la tecla MEM mientras no esté en el modo de retención. Seleccione la
posición de memoria deseada con las teclas de avance y retroceso. Si pulsa la
tecla de retroiluminación la velocidad de rotación parpadeará en la pantalla y
ya podrá ser guardada. Salga de este modo presionando la tecla READ.
Lectura de datos guardados
Pulse la tecla READ cuando no esté en el modo de retención. Seleccione la
posición de memoria deseada con las teclas de avance y retroceso hasta
llegar a la posición de memoria deseada. Salga de este modo mediante la
tecla MEM.
Instalación y cambio de las pilas
Cambie las pilas cuando aparezca el símbolo en la pantalla. El tacómetro
utiliza cuatro pilas 1.5V AAA.
Para cambiarlas abra la tapa de las mismas de acuerdo a la ilustración de la
cubierta. Vuelva a colocar la tapa y atorníllela con firmeza antes de volver a
utilizar el instrumento.

9
Instructions manual |www.grupotemper.com
KTO AT-8
Digital tachometer
Contents
Overview 10
Panel diagram 10
Accesories 11
Safety instructions 11
Safety symbols 12
LCD symbols description 12
Key description 12
Technical parameters 13
Measurement idler wheel selection 14
Measuring operation instructions 15
Data storage and reading operation 16
Battery installation or replacement 16

10
Instructions manual | www.grupotemper.com
KTO AT-8
Digital tachometer
Overview
The KTO AT-8 is a contact-type digital tachometer with stable performance,
high reliability and high safety performance. The core component of the
meter is a compact high-speed integrated chip. The meter will display
rotation speeds from 50RPM---19999RPM. The LCD is backlit to allow making
and reading measurements in low light conditions.
Panel Diagram (see front view)
1. 6 in. idler wheel
2. Concave touch tip
3. Protruding touch tip
4. Lengthening bar
5. 0.1m idler wheel
6. Measurement bearing
7. Mode switch key
8. Measurement key
9. Data storage key
10. Backlight and HOLD
composite key
11. Plus key
12. LCD
13. Power switch key
14. Maximum and minimum key
15. Data storage read key
16. Minus key

11
Instructions manual |www.grupotemper.com
KTO AT-8
Digital tachometer
Accesories
1KTO AT-8 bare machine 1
2Operation Manual 1
3Measurement idler wheels 2
4Measurement touch tips 2
5Lengthening bar 1
61.5V AAA battery 4
OOBA (Out of box audit)
When you get a new tachometer, check the meter and its accessories. If
something is damaged or missing, please contact the store where you
bought the meter to obtain missing items or to replace the meter.
Safety instructions
Operating environment:
• Elevation <2000 m
• Relative humidity (RH) 80%RH
• Operating temperature: 0 - 40°C
Warning
• To avoid damaging the meter or affecting measurement accuracy, do not
open the meter.
• Do not use the meter in the places with high temperature and high
humidity, or near flammable and explosive materials.
• Storage and maintenance: Do not use alcohol or other solvents to clean the
meter. If it is not used for long time, please remove batteries and put the
meter in a dry and clean environment.

12
Instructions manual | www.grupotemper.com
KTO AT-8
Digital tachometer
Safety Symbols
Important safety information
Do not recycle
Low battery warning
The meter complies with CE safety standard
LCD symbols description
1. Signal symbol
2. Idler wheel size symbol
3. Low battery symbol
4. Maximum measurement mode
5. Rotation speed reading
6. Minimum measurement mode
7. Storage state
8. Storage number
9. Average measurement value
10. Rotation speed unit symbol
11. Speed measurement mode display
Key description
1.Switch key
Function: On/Off operation.
Operation: When the meter is OFF, lightly touch switch key to turn on
the meter. When the meter is ON, lightly touch switch key to turn off the
meter.
2.Maximum and minimum key
Function: Switch maximum, minimum and average display value.
Operation: When the LCD display is MAX, current measurement is at
maximum. When the LCD display is MIN, current measurement is at
minimum. When the LCD display is AVG, current measurement is average
value.
3.Mode switch key
Function: Switch measurement mode.
Operation: To operate mode switch key, select measurement mode from 0
to 5, as appropriate for conditions.
7
1
2
3
5
8
9
4
6
11
10
CONTECTNON
PERIMETER:
AVG
MEM
MAX MIN
m min
/
RPM
6"12"
0.1m
m/sec ft min/ft sec/in min/

13
Instructions manual |www.grupotemper.com
KTO AT-8
Digital tachometer
4.Measurement key
Function: Switch measurement key.
Operation: When turning on the meter, press the measurement key to
measure according to operating instructions.
5.Storage key
Function: Store current rotation speed value.
Operation: When you want to store the current rotation speed value, press
the storage key together with other keys, and you can store the current
value to the specified storage number.
6.Read key
Function: Read the rotation speed value under the stored number.
Operation: When you want to store the rotation speed value under a
storage number, press the read key together with other keys, and you can
read the rotation speed value under the stored number.
7.Backlight and HOLD key
Function: Turn on and off backlight.
Operation: Quickly press backlight and HOLD keys to turn on/off HOLD
function. Press more than 2 sec to turn on/off backlight function.
8.Plus key
Function: Add storage number when reading or storing.
Operation: When entering storage state, use plus key to add the current
storage number.
9.Minus key
Function: Subtract storage number when reading or storing.
Operation: When entering storage state, use plus key to subtract the
current storage number.
Technical parameters
General specifications
1.Rotation speed display is five-digit LCD number with maximum of 19999.
2.Display 0 below 50 RPM.
3.Measurement mode 0--5.
4.Display voltage lower than 4.5V when batteries are low.
5.Dimension: 155mm x 60mm x 27mm
6.Weight: 120g
7.Power supply: 4 × 1.5V SIZE AAA battery
8.Auto off time is 30 sec.

14
Instructions manual | www.grupotemper.com
KTO AT-8
Digital tachometer
Technical parameter
Measuring scope Resolution Accuracy
50-99.99RPM 0.01RPM
±(0.03%±2d)100-9999.9RPM 0.1RPM
10000-99999 1RPM
Measurement idler wheel selection
Hold the MODE key when turning
on the meter to enter idler wheel
selection mode as shown below.
The default selection is the 0.1m idler
wheel. At this time, you can select 6”,
12”or 0.1m of the wheel by operating
the plus or minus key. After selecting,
lightly press the MIN / MAX key to
enter the normal test mode.
Note
Select 0.1m of wheel for m/min and m/sec measurement, or select 6”or
12”wheel for ft/min, ft/sec and in/min. Otherwise, it will not measure.
Measuring operation instructions
Warning
When measuring, please keep a safe distance from high-speed rotating
objects to avoid machine damage or personal injury.
Rotation speed measurement
1.Install lengthening bar and touch pit to the meter
2.Start the equipment to be measured and wait for rotation speed to
stabilize.
3.Start the tachometer, enter the default speed measurement mode, bring
the meter gradually closer to the rotating object, so that the touch pit can
smoothly contact the object to be measured. Press the measurement key
and read LCD display value.

15
Instructions manual |www.grupotemper.com
KTO AT-8
Digital tachometer
Warning
Due to high lengthening bar pendulum deflection, which will increase
inaccuracy above 10000 RPM, please remove the lengthening bar if object
to be measured rotates at speed greater than 10000 RPM.
Speed measurement
1.Start the tachometer and enter the default speed measurement mode.
Select m/min, m/sec, t/min, ft/sec or in/min mode through operating
MODE key, and the LCD will display the selected idler wheel size.
2.Install the selected idler wheel.
3.Start the equipment to be measured and wait for rotation speed to
stabilize. Bring the idler wheel gradually closer to the belt until it makes
contact with the belt, then read LCD display value.
Data storage and reading operation
Data storage operation
When you want to store rotation speed value, press MEM key in the non-
HOLD state. MEM and default storage number 00 will display on the upper
right corner of LCD. Press plus or minus key to select storage number. At this
time, if you press the backlight key, the rotation speed value will flash.
The current rotation speed value can be stored in the selected storage
number. Exit the storage state by pressing the READ key under the storage
state.
Data reading operation
When you want to read stored values, press READ key in the non-HOLD state.
The default storage number 00 will display on the upper right corner of
LCD. Press plus or minus key to select storage number and read the value in
the current storage number. Exit the storage state by operating MEM key in
the storage state.
Battery installation or replacement
When symbol displays on LCD, it means low batteries. Please change the
batteries at this time. The meter uses four 1.5V AAA batteries. To replace
batteries, open battery cover, remove the old batteries, install new batteries
of the correct size, according to the illustration on the cover. Close the
battery cover after installation, and tighten screw before using the Meter.

16
Instructions manual | www.grupotemper.com
KTO AT-8
Digital tachometer

17
Instructions manual |www.grupotemper.com
KTO AT-8
Digital tachometer

18
Instructions manual | www.grupotemper.com
KTO AT-8
Digital tachometer

TEMPER ENERGY INTERNATIONAL S.L.
garantiza este aparato por 2 años ante
todo defecto de fabricación. Para hacer
válida esta garantía, es imprescindible
presentar con este resguardo el ticket o
factura de compra.
TEMPER ENERGY INTERNATIONAL S.L.
guarantees this device during 2 years
against any manufacturing defect. For
warranty service, you must present this
receipt with the purchase receipt or
invoice.
TEMPER ENERGY INTERNATIONAL
S.L. garantit cet apareil pour le durée
de 2 annèes contre tout défault de
fabrication. Pour le service de garantie,
vous devez présenter ce reçu avec du
ticket de caisse ou la facture.
TEMPER ENERGY INTERNATIONAL S.L.
garantía este aparelho contra defeitos
de fábrica ate 2 anos. Para o serviço
de garantia, você deve apresentar este
recibo com o recibo de compra ou
fatura.
GARANTÍA • WARRANTY
GARANTIE • GARANTIA 2años
years
années
anos
Ref. Art. Nº serie / Serial number
Nombre / Name / Nom / Nombre
Fecha de venta / Date of purchase
Date de vente / Data de venda
Sello establecimiento vendedor / Dealer stamp
Cachet du commercant / Cambo da firma

TEMPER ENERGY INTERNATIONAL S.L.
Polígono industrial de Granda, nave 18
33199 • Granda - Siero • Asturias
Teléfono: (+34) 902 201 292
Fax: (+34) 902 201 303
Email: info@grupotemper.com
Una empresa
del grupo
Table of contents
Languages:
Other koban Measuring Instrument manuals
koban
koban KPA-12 User manual

koban
koban KPAW-01A User manual

koban
koban KPA-01T User manual

koban
koban KPF-BF User manual

koban
koban KPA 02 User manual

koban
koban KP 2102 User manual

koban
koban TRUE RMS 1000A AC WATT User manual

koban
koban KPHA-DUO User manual

koban
koban KPA-20 Assembly instructions
koban
koban KP-05 User manual

koban
koban KLD-01 MINI User manual

koban
koban KTH 6503 User manual

koban
koban KPA-01 MINI User manual

koban
koban KMA 41MF User manual
koban
koban KPA-1000 User manual

koban
koban KPA FLEX-01 User manual
koban
koban KRB-01 User manual

koban
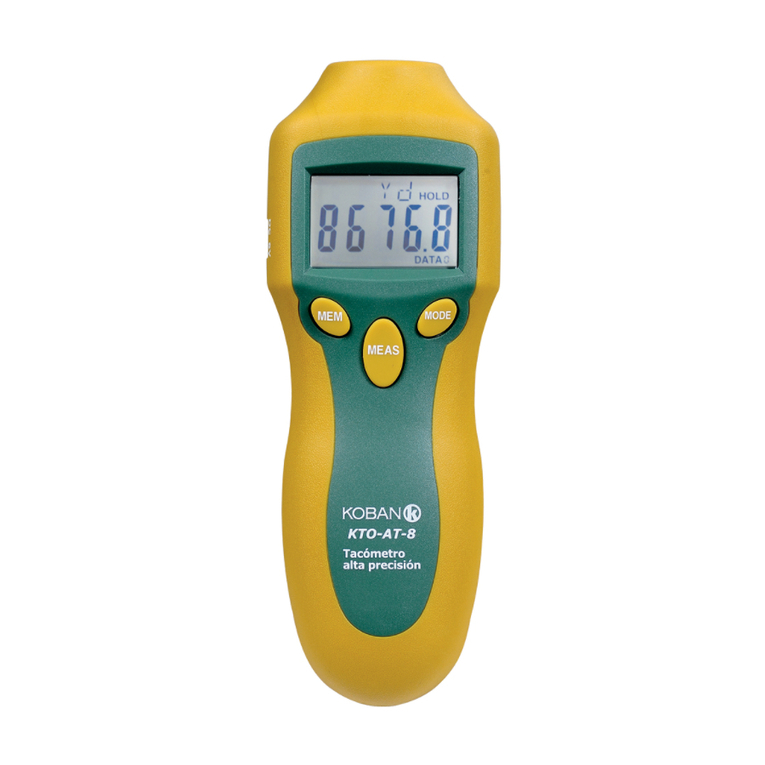
koban KTO-AT-8 User manual
koban
koban KPF-01 User manual
koban
koban KMD 05 User manual