floorex Lightning User manual

LIGHTNING
OPERATIONS AND MAINTENANCE MANUAL
Floorex Products © Page 1


Floorex Products © Page 3
TABLE OF CONTENTS
SECTION I GENERAL DESCRIPTION
SECTION II SPECIFICATIONS
SECTION III SAFETY AND PRECAUTIONS
SECTION IV INSTRUMENTS AND CONTROLS
SECTION V START-UP AND BREAK-IN
SECTION VI MACHINE OPERATION
SECTION VII PREVENTIVE MAINTENANCE
SECTION VIII ENGINE
SECTION IX FRAME AND COWLINGS
SECTION X HYRAULIC DRIVE COMPONENTS
SECTION XI VALVE JOYSTICK ASSEMBLY AND CABLES
SECTION XII STEERING JOYSTICK AND CABLES

Floorex Products © Page 4
OPERATIONS
AND
MAINTENANCE MANUAL
CUSTOMER: ______________________________________
SERIAL NUMBER: ___________________________________
DATE SHIPPED: _____________________________________

Floorex Products © Page 5
SECTION I
GENERAL DESCRIPTION
LIGHTNING STRIPPER
The Lightning is operated by a propane (LPG) powered engince,
driving a tendem hydrostatic pump system, creating a (skid-steer)
zero turn radius drive train.
Suface coverings and coatings are removed by lowered a weighted
blade onto the surface and moving forward under a high torque
drive system. The surface coating is removed by a exible sharpened
blade conforming to the oor surface, with the weight of the machine
holding the blade rmly to the oor. The weight does not allow the
blade to lift or ride over well-adhered sruface coating material, this
lifting off the oor coating.
After layers of carpet or laminated are removed the machine can
be connected to a grinde ror slicer attachment to either clean up
adhesive or remove stubborn coatings.

Floorex Products © Page 6
SECTION II
SPECIFICATIONS
LIGHTNING STRIPPER
Weight 2120 lbs
Removable Weight 516 lbs
Height 51 inches
Width 26 inches
Length 51.5 inches
Engine 25HP Kohler Engine LPG
Max Ground Speed 320 ft per min

Floorex Products © Page 7
SAFETY
LIGHTNING STRIPPER
WARNING
CARBON MONOXIDE
can cause sever nausea, fainting or death.
Do not operate engine in closed or conned
are without proper ventilation.

Floorex Products © Page 8
SECTION III
SAFETY and PRECAUTIONS
LIGHTNING STRIPPER
Before operating the Lightning please read the entire operation and safety manual
with complete undersating of the safety section. If you have any questions on safety
and precauction please call 1-866-636-7763.
There are several advantages to an effective safety program which include: lower
operating costs, lower workman compensations, less work time lost, high employee
morale, and less problems. No one can safely without knowing what precautions to
take to insure personal safety. Operators must know what safety equipment to wear,
which job practices are safe and which are not, and must be aware of what hazards
are possible in the work area. A regular schedule of Prevenative Maintenacne on your
equipment is the best protection against unpleasand surprises that slow production
and sometime result in injuries. Here are a few suggested safety tips.
1. The rst step before any maintenance or inspection takes place should be to
stop the engine and disconnect the battery terminals.
2. Wear proper eye and ear protection and heavy duty work gloves at all times.
3. Practice good Preventative Maintenance.
4. Practice good housekeeping
5. Allow the Lightning to come to a complete stop, turn off engine and chock rear
wheels before performing any maintenance procedures
6. Replace worn parts when necessary.
7. Do not reach into blade or control arm areas which machine is in operation.
8. Do not attempt to open and access door until the machine has come to a
complete stop and the engine and propane is turned off.
9. Be sure all electrical inspecations or changes are done by qualied electrician.
10. Loose surface coating can cause dangerous footing. Always be alert and careful.
11. After replacing parts be sure all tools used are removed from the machine. Be
sure all bolts and nuts are tightened. The loose connection of a rotating part
could cause the part to y off with explove force, causing serious damage to
the equipment and possible injury to the operator.
12. Always lower blade to the ground when the machine is unoccupied by the
operator. Serious bodily injury may result if arms are not in the lowered positions
when not occupied.
13. Never allow unauthorised personnel or the general public into the work area.
14. The work area should be barricaded off to adequately keep all untrained
persons out of the work site. If an unauthorised person enters the work are,
stop the machine immediately and do not restart the machinery until they have
left the work area.

Floorex Products © Page 9
15. Always allow a 200-foot buffer saftey zone around all suface preparation
activity.
16. Always run the Lightning in a well-venitlated area, with an OSHA air
monitoring system in place at all times.
17. Read and obey all safety labels placed on the machinery at all times. If
safety labels have been destroyed or removed, call Flooring on 1800 356
673 for free replacement prior to operating the machinery.
18. The Lightning is not a toy. All operators must be over 18 years of age age
and must have read and reviewed the safety and procedures manyual
before operating the machinery.
19. The Lightning is designed for surface preparation ONLY. It is not intended
for towing, pushing or any other procedure not described in this manual.
20. Propane systems should be checked and documented twice yearly by a
certied propane proffessional for leaks and damaged parts. If a propane
leak is detected leave the machine immediately and seek assistance from
propane proffessional. Do not use or restart machinery until it is determined
safe.
21. Horseplay and or high speed cornering is not allowed with this machine and
could cause rollover resulting in injury or death.
22. No smoking or open ame is allowed while machinery is running or within
50 feet of the machine.
23. Operator must be sober and not under the inuence of drugs or medication
and under full control of all bodily senses while operating this or any
machinery.
24. When transporting the Lightning, it is recommended to use a low bed tilt
trailer. This procedure insures the wheels do not leave a stable surface.
25. All Lightning operators must receive safety training before performing any
functions with the machine.
SECTION III
SAFETY and PRECAUTIONS
LIGHTNING STRIPPER
Floorex Products © Page 10
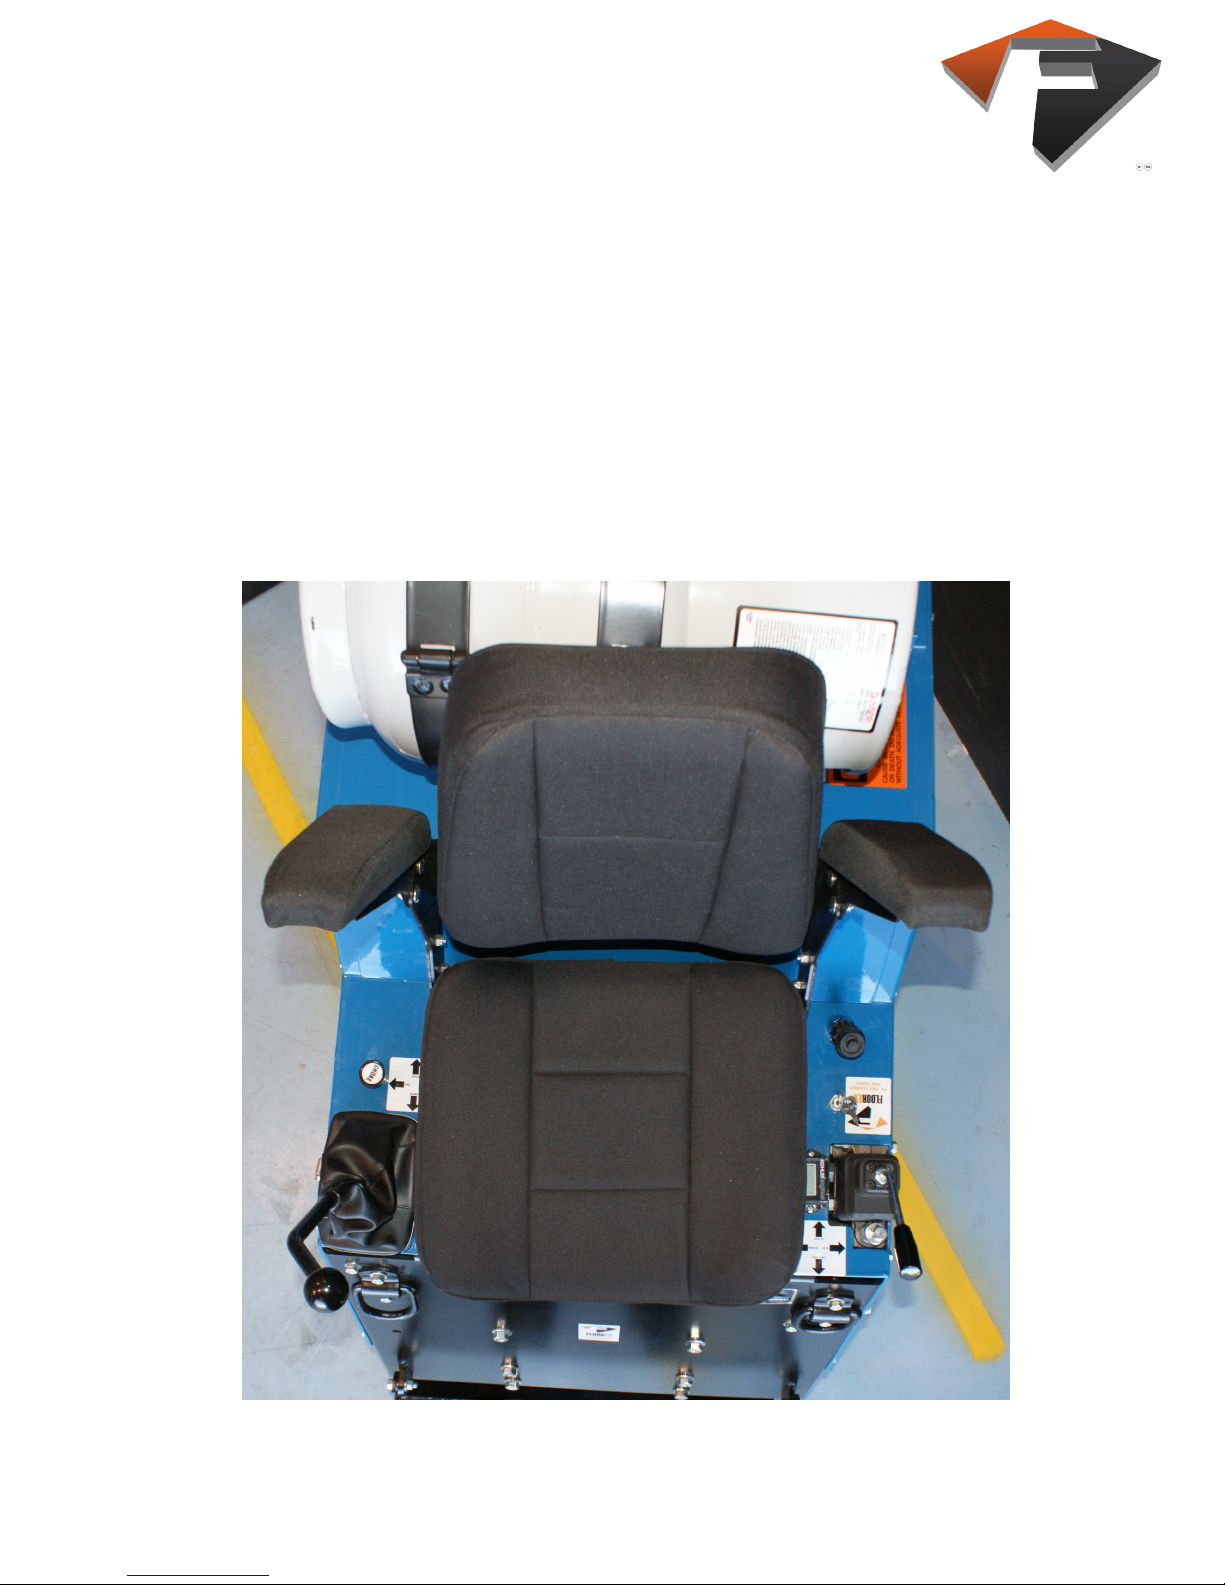
VIEW #1 - Top view of Lightning machine
VIEW #2 - Left side view of Lightning machine
VIEW #3 - Right side view of Lightning machine
VIEW #4 - Front view of Lightning machine
SECTION IV
INSTRUMENTS & CONTROLS
LIGHTNING STRIPPER
VIEW #1 - Top view of Lightning machine
Table of contents


