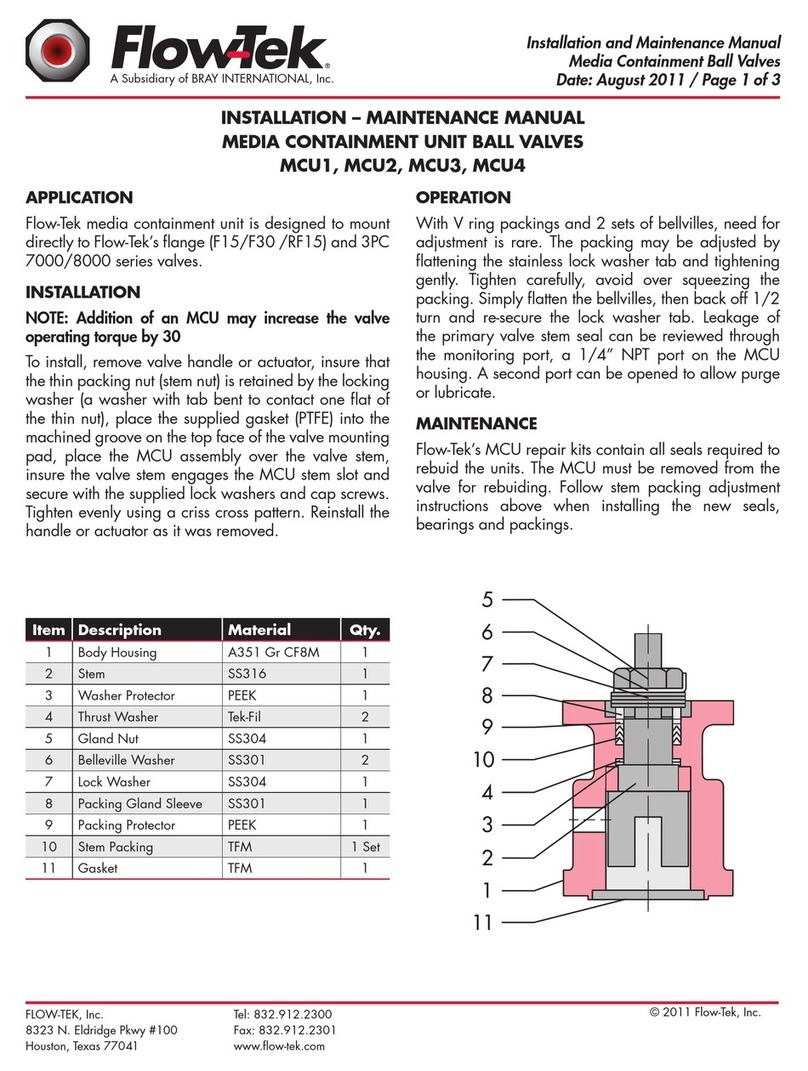
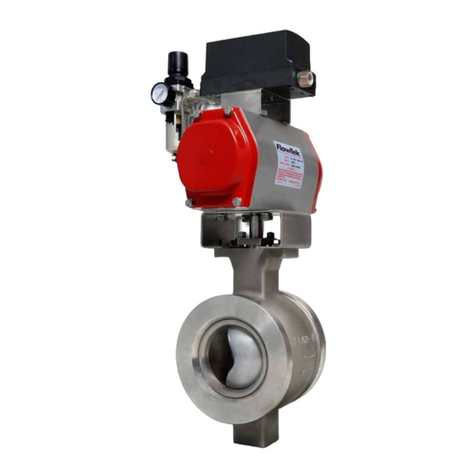
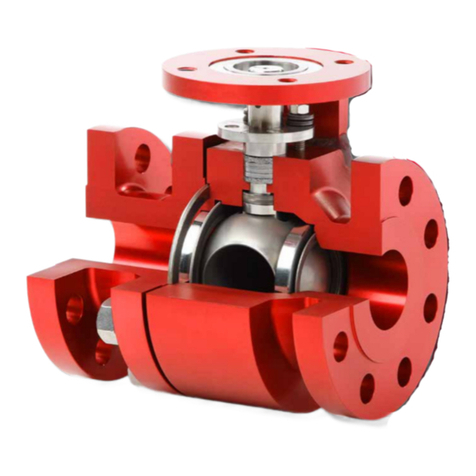
Flow-Tek M4 Series Instruction Manual

INSTALLATION - MAINTENANCE MANUAL
Severe Service Series M4 Ball Valve

Installation and Maintenance Manual
Series M4 - Severe Service Ball Valves
Date: May 2016/ Page 2 of 12
®
Subsidiary of BRAY INTERNATIONAL, Inc.
1. SAFETY INFORMATION - DEFINITION OF TERMS
READ AND FOLLOW THESE INSTRUCTIONS:
!
WARNING Indicates a potentially hazardous situation which, if not avoided, could
result in death or serious injury.
!
CAUTION Indicates a potentially hazardous situation which, if not avoided, may
result in minor or moderate injury.
NOTICE Used without the safety alert symbol indicates a potential situation which
may result in damage to the valve and void of warranty.
Table of Contents
1. Safety Information - Definition of Terms . . . . . . . . . . . . . . . . . . . . . . . . . .2
2. Bill of Materials . . . . . . . . . . . . . . . . . . . . . . . . . . . . . . . . . . . . 3
3. Nameplate Information . . . . . . . . . . . . . . . . . . . . . . . . . . . . . . . . . 4
4. Design . . . . . . . . . . . . . . . . . . . . . . . . . . . . . . . . . . . . . . . . 4
5. Use . . . . . . . . . . . . . . . . . . . . . . . . . . . . . . . . . . . . . . . . . . 4
6. Operation . . . . . . . . . . . . . . . . . . . . . . . . . . . . . . . . . . . . . . . 5
Visual Indicators . . . . . . . . . . . . . . . . . . . . . . . . . . . . . . . . . . . .5
Handle . . . . . . . . . . . . . . . . . . . . . . . . . . . . . . . . . . . . . . . . 6
7. Installation . . . . . . . . . . . . . . . . . . . . . . . . . . . . . . . . . . . . . . .7
Post Weld Heat Treatment (PWHT) . . . . . . . . . . . . . . . . . . . . . . . . . . . .8
Valve Insulation . . . . . . . . . . . . . . . . . . . . . . . . . . . . . . . . . . . . 8
8. Maintenance. . . . . . . . . . . . . . . . . . . . . . . . . . . . . . . . . . . . . .9
Repacking Procedure . . . . . . . . . . . . . . . . . . . . . . . . . . . . . . . . . 10
9. Removing Valve from Service . . . . . . . . . . . . . . . . . . . . . . . . . . . . . 11
10. Handling and Lifting . . . . . . . . . . . . . . . . . . . . . . . . . . . . . . . . . 11
11. Transport and Storage . . . . . . . . . . . . . . . . . . . . . . . . . . . . . . . . 12
Short Term Storage (Up to 3 Months). . . . . . . . . . . . . . . . . . . . . . . . . . 12
Long Term Storage (Over 3 Months) . . . . . . . . . . . . . . . . . . . . . . . . . . 12
JamiesonEquipmentCompany
www.jamiesonequipment.com
tollfree800.875.0280

Installation and Maintenance Manual
Series M4 - Severe Service Ball Valves
Date: May 2016/ Page 3 of 12
®
Subsidiary of BRAY INTERNATIONAL, Inc.
Item # Component Qty.
10 Body 1
20 Bracket 1
40 Ball 1
50 Seat 1
60 Stem 1
70 Pusher Seat 1
80 Transition Sleeve 1
Item # Component Qty.
90 Seat Spring 1
100 Retainer Ring 1
110 Gland Flange 1
120 Gland Follower 1
130 Belleville Spring 2
140 Packing Set 1
150 Metal Anti-Extrusion Ring 1
Item # Component Qty.
160 Stem Bearing 1
170 Stud, Gland 4
180 Nut, Gland 4
190 Roller Pin 2
200 Non-removable Screw
(Hidden from view)
4
2. BILL OF MATERIALS
10
70
190
20
80
100
40
50
60
200
170
180 110
120
140
150
130
160
90
JamiesonEquipmentCompany
www.jamiesonequipment.com
tollfree800.875.0280

Installation and Maintenance Manual
Series M4 - Severe Service Ball Valves
Date: May 2016/ Page 4 of 12
®
Subsidiary of BRAY INTERNATIONAL, Inc.
Nameplate Info Stamp Nameplate Info Stamp Nameplate Info Stamp
MODEL: Valve Series Model BALL: Ball Material MAX P: Maximum Pressure
SIZE: Nominal Pipe Size x Bore SEAT: Seat Material MAX T: Maximum Temperature
B16.34: Pressure Class STEM: Stem Material S/N: Valve Serial Number
BODY: Body Material B/S CTG: Ball/Seat Coating Code P/N: Valve Part Number
3. NAMEPLATE INFORMATION
4. DESIGN
Our Series M4 valve is designed as a “free floating” ball
with uni-directional sealing seat. These valves are typically
used in the power industry. It is important and critical to
install the valve correctly in the pipeline to assure the valve
will isolate the proper side of the piping system.
This product is designed for long life and economic initial
investment. Repair of the valve internals is not recommended
or approved by Flow-Tek.
Low emission, live loaded packing material and energized
gasket rings eliminate atmospheric leaks in the most severe
applications. Outerstem bushingprevents sideloading onstem.
LOW
PRESSURE
SIDE
HIGH
PRESSURE
SIDE
5. USE
The valve should be maintained as part of an overall
preventative maintenance program and in accordance with
Flow-Tek’s recommended pressure, temperature and corrosion
limits to ensure a long service life.
During shipment, storage, and in operation, the valve should
be fully open or fully closed. A valve left in the partially open
position during service will suffer premature wear to the ball
and seat sealing surfaces.
!
WARNING
Before installing this
equipment, confirm
that it is suitable for the
intended service. Refer
to the nameplate for
maximum allowable
service conditions for this
product.
JamiesonEquipmentCompany
www.jamiesonequipment.com
tollfree800.875.0280

Installation and Maintenance Manual
Series M4 - Severe Service Ball Valves
Date: May 2016/ Page 5 of 12
®
Subsidiary of BRAY INTERNATIONAL, Inc.
6. OPERATION
The M4 ball valve is a 1⁄4turn (90°) operation valve. The
valve is opened by a 1⁄4 turn counterclockwise and closed
by a 1⁄4turn clockwise.
Visual Indicators
If valve handle is in-line with pipeline, valve is in the open
position; if handle is perpendicular to pipeline, then valve
is in the closed position.
The scribe line can be used to set operator open/close stops
if the operator cannot be removed from valve. Valve shown
in closed position.
NOTICE
Misalignment will result in high operational torque and
may damage valve stem and seals.
Avoid 180° rotation of the ball and/or stem as this could
cause premature wear to the ball/seat lapping surface
thus reducing effective sealing/isolation which may lead
to void of warranty..
When cycling the valve open or close, make sure that the
valve is fully opened and fully closed to wipe away any
accumulation of debris on the ball and seat sealing surfaces.
This ensures optimal performance and long valve life.
The actuator must not be re-oriented without removal from
the valve. This prevents 180° rotation of the ball and
assures the mate-lapped ball and seat surfaces to match.
Seat leakage may occur when the ball and seat surfaces
are not matched.
Fully Closed Fully Open
JamiesonEquipmentCompany
www.jamiesonequipment.com
tollfree800.875.0280

Installation and Maintenance Manual
Series M4 - Severe Service Ball Valves
Date: May 2016/ Page 6 of 12
®
Subsidiary of BRAY INTERNATIONAL, Inc.
Handle
Lock-out devices may be used in this hole.
Lever can be secured in any of three positions
The stop screw is placed in the threaded hole of the
bracket and tightened.
Place the set screw in the adaptor and adjust so that
when the valve is in closed position, the set screw touches
the stop screw.
Set
Screw
Stop Screw
JamiesonEquipmentCompany
www.jamiesonequipment.com
tollfree800.875.0280

Installation and Maintenance Manual
Series M4 - Severe Service Ball Valves
Date: May 2016/ Page 7 of 12
®
Subsidiary of BRAY INTERNATIONAL, Inc.
7. INSTALLATION
The valve may be oriented in any position on the pipeline.
Before installing the valve, the valve should be placed in
the open position.
NOTICE
Before installing the valve the pipes must be flushed clean
of dirt, burrs, and welding residues, or the seats and ball
surface will be damaged.
Large valves and actuators may need external support to
prevent excess piping loads from affecting valve operation.
1. Clean the pipeline, connecting socket, and the weld
area on the pipe.
NOTICE
Identify the preferred sealing direction of the valve by
positioning the valve in piping where the ‘High Pressure
End’ is positioned toward the highest pressure against
the valve when the valve is closed. Valve should be
installed so that the primary sealing occurs at the low
pressure end.
2. Position valve in piping. Verify that the valve and
actuator/handle orientation is correct.
NOTE: Support or lift as required, using lifting lugs or
nylon straps around the valve body. Do not lift or support
by the actuator alone. Refer to Section 9 – Handling and
Lifting for more information.
3. Secure valve in place.
4. Remove the plastic protective caps from the valve ends.
Do not remove the contraction rings.
Low
Pressure Side High
Pressure Side
JamiesonEquipmentCompany
www.jamiesonequipment.com
tollfree800.875.0280

Installation and Maintenance Manual
Series M4 - Severe Service Ball Valves
Date: May 2016/ Page 8 of 12
®
Subsidiary of BRAY INTERNATIONAL, Inc.
5. Inspect the valve bore and remove any debris.
6. Verify that the ball is in the open position prior to
welding to protect the ball from possible damage.
7. Follow appropriate welding procedure when welding
pipe to the valve ends.
NOTE: Figures used in this document show only SW
end connections; however, BW connections are also
available.
NOTICE
When welding, assure that the temperature of the valve
body does not exceed 1100°F.
Verify packing torque prior to placing valve in service as
packing consolidation is expected.
Post Weld Heat Treatment (PWHT)
Post weld heat treatment shall be performed localized only;
PWHT in a kiln is NOT allowed. After welding the valve in
the pipeline, follow the instructions below for PWHT:
1. Prior to heat treatment, install heating blankets, as
shown, covering the weld areas up to the valve body
socketweld.
!
WARNING
Do not allow valve body temperature to exceed 1100°F
during welding or post weld heat treating. To avoid body
temp exceeding 1100°F, perform PWHT on one end then
normalize to room temperature before proceeding to the
second end. Valve body reaching to higher temperatures
will lead to void of warranty.
2. Stress relieve the welds using appropriate procedures.
Refer to ASME B31.1 Table 132, Postweld Heat
Treatment.
3. Verify operation. After installation of the valve in the
pipeline, cycle the valve to ensure proper operation.
!
WARNING
Do not pressurize the line without an actuation device
properly installed and working on the valve.
Valve Insulation
Valve insulation should not extend above the packing gland.
Refer to the dotted line in the picture below:
Weld Weld
Insulation
Heat Blanket
Insulation
Heat Blanket
JamiesonEquipmentCompany
www.jamiesonequipment.com
tollfree800.875.0280

Installation and Maintenance Manual
Series M4 - Severe Service Ball Valves
Date: May 2016/ Page 9 of 12
®
Subsidiary of BRAY INTERNATIONAL, Inc.
8. MAINTENANCE
!
WARNING
Depressurize the line before loosening any packing
gland nuts.
!
NOTICE
Check packing gland nuts periodically, and re-torque
if necessary.
Open/Close the valve intermittently (at least once a year).
Valves should always be fully opened or fully closed to
wipe away any accumulation on the sealing surfaces.
After installation, verify bolting torque at the following
locations:
1. Gland Flange (or Stem Packing)
2. Valve Operator Mounting (if present)
Table 1 - Packing Torques lbs/in
ASME Class
1700 2500 3100 4500
MAWP (psi): 4250 6250 7750 11250
Valve Bore
0.63 35
42 max
52
63max
65
78 max
94
113 max
1.03 48
58 max
70
85 max
87
105 max
127
152 max
1.56 75
90 max
111
133 max
137
165 max
199
239 max
Check the bolting at these locations periodically. If bolting
torque is lower than the specified values, re-torque bolting
as necessary. Test certification available upon request.
1.
2.
JamiesonEquipmentCompany
www.jamiesonequipment.com
tollfree800.875.0280

Installation and Maintenance Manual
Series M4 - Severe Service Ball Valves
Date: May 2016/ Page 10 of 12
®
Subsidiary of BRAY INTERNATIONAL, Inc.
Repacking Procedure
1. Loosen and remove gland nuts and/or gland studs
holding gland flange in place.
2. Slide the gland flange, live load springs (X2), and the
gland follower upwards.
3. Using a small pick or scribe, carefully remove stem
packing set. Make sure that all of the packing is removed.
Do not remove the metal anti-extrusion ring at the bottom
of the packing box.
4. Clean packing box with an air hose before installing
the new packing set.
NOTICE
Do not scratch the stem or the packing bore in the body.
Scratches could cause a leak.
Before installing the new packing, make sure the packing
box is clean. Use of an air hose to clean debris from
packing box is permitted.
5. When installing the new packing set install the rings
one at a time. Packing set should have an anti-extrusion
ring on each end. Use the gland follower as a packing
tool to stuff each packing ring all the way down against
the previous ring.
6. Slide the gland follower, the live load Belleville springs,
and the gland flange down the stem so that the scribe
lines are matched. If necessary rotate the gland flange
so that the two scribe lines are aligned.
NOTICE
The gland flange must be pulled down evenly to prevent
cocking or side loading, as this could cause damage to
the packing and prevent the valve from operating properly.
Make sure that the gland flange remains perpendicular to
the stem, and the gap around the stem remains concentric
during tightening process.
Refer to Table 1 - Packing Torques.
7. In some cases the studs may unscrew from the body at
the same time the nuts are removed. This is acceptable.
Assure during replacement that studs are reassembled
to the full thread depth.
8. Apply anti-seize to stud threads and bottom face of
hex nuts.
9. Insert studs into threaded holes. Install nuts onto each
stud and torque to specified value. Be sure to torque
in a cross pattern to avoid uneven loading. Packing
assembly torques are given in Table-1.
10. Cycle the valve a few times to ensure proper
re-packing. Verify packing torque after cycling and
re-torque if necessary.
Gland
Nuts
Gland
Studs
Gland
Flange
Gland
Follower
Live Load
Springs
Anti-Extrusion Ring
3X Seal Rings
Anti-Extrusion Ring
Metal Anti-Extrusion Ring
JamiesonEquipmentCompany
www.jamiesonequipment.com
tollfree800.875.0280

Installation and Maintenance Manual
Series M4 - Severe Service Ball Valves
Date: May 2016/ Page 11 of 12
®
Subsidiary of BRAY INTERNATIONAL, Inc.
9. REMOVING VALVE FROM SERVICE
Before the valve is removed from service it should be placed
in the open position to prevent internal damage to valve
components.
Fully Closed Fully Open
!
WARNING
Depressurize the line and close the valve before removing
the valve from the pipeline.
10. HANDLING AND LIFTING
1. The valve should be lifted in such a way that the body
supports the load.
2. The end protector covers should be kept in place on
the end connections during all handling. Remove only
during final installation of the valve.
3. The ball should be fully open during the installation
of the valve. Failure to keep the ball fully open during
installation could cause damage to the valve.
4. Do not leave the valve in the partially open position
for an extended period of time.
5. Do not lift the valve from the actuator, positioner, or limit
switch.
!
CAUTION
The end connection necks are suitable places to attach
lifting slings/straps. Never use hand wheels or other
protruding parts of the gearbox or actuator not designated
for this purpose.
NOTICE
During handling, protect the end connection faces and
fittings against damage from the lifting devices. Failure to
cover faces and fittings could cause damage to the valve.
JamiesonEquipmentCompany
www.jamiesonequipment.com
tollfree800.875.0280

Installation and Maintenance Manual
Series M4 - Severe Service Ball Valves
Date: May 2016/ Page 12 of 12
®
Subsidiary of BRAY INTERNATIONAL, Inc.
11. TRANSPORT AND STORAGE
Transport
Valves will be shipped in wooden crates that are plastic lined.
Upon arrival at the site, valves general condition should be
inspected right away for any potential shipping damage.
Any damage should be reported to Flow-Tek.
Short Term Storage (Up to 3 Months)
1. Ball valves should remain in the original shipping
containers and be placed on pallets of wood or other
suitable materials. End protectors should remain on the
valve ends until the valves are installed to prevent the
entrance of dirt.
2. Valves should be stored in the open position to protect
the ball and seat.
3. Storage of ball valves can be in an open uncovered area
provided provisions are made for inclement weather
such as tarps or sheeting. Valves with actuators shall be
stored under cover until ready for installation.
Long Term Storage (Over 3 Months)
1. Valves should be stored in the open position to protect
the ball and seats.
2. Ball valves should remain in the original shipping
containers and be placed on pallets of wood or other
suitable materials and stored indoors. End protectors
should remain on the valve ends until the valves are
installed to prevent the entrance of dirt
3. The storage environment should be dry and not have
severe swings in temperature and humidity.
Fully Closed Fully Open
JamiesonEquipmentCompany
www.jamiesonequipment.com
tollfree800.875.0280
Table of contents
Other Flow-Tek Control Unit manuals
