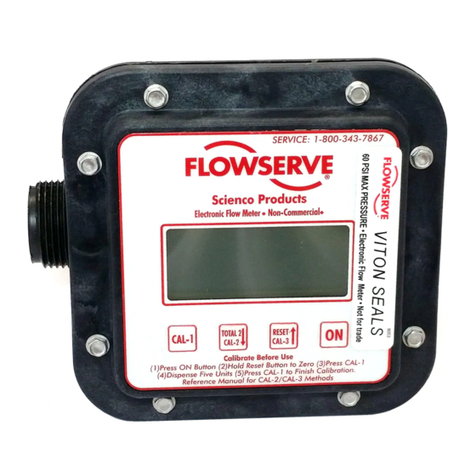
Flowserve SEM-100SS Owner's manual

Experience In Motion
SEM-100SS
Electronic Flow Meter
PUIOM000649-00 (ENGLISH, REV 07-2022)
INSTALLATION OPERATION MAINTENANCE

Flowserve.com 2PUIOM000649-00-UIM (EN/AQ) August 2022
SEM-100SS User Instructions
Contents
1. Introduction and safety .................3
1.1 General .....................................3
1.2 Disclaimer .................................4
1.3 Copyright ..................................4
1.4 Duty conditions.........................5
1.5 Safety ........................................5
2. Transport and storage ...................6
2.1 Consignment receipt and
unpacking..................................6
2.2 Storage .....................................6
2.3 Recycling at end of
product life ................................6
3. Description.....................................7
3.1 General product description ...7
3.2 Operating parameters ..............8
3.3 Available equipment and
accessories ...............................8
3.4 Materials of construction ..........9
4. Installation and operation.............9
4.1 Unpacking the meter .................9
4.2 Installation .................................9
4.3 Calibration and operation ........10
5. Maintenance................................. 10
5.1 Battery removal and
replacement ...........................10
5.2 Meter chamber removal...........10
5.3 Meter assembly procedure......10
6. Parts list and parts diagram....... 11

Flowserve.com 3PUIOM000649-00-UIM (EN/AQ) August 2022
SEM-100SS User Instructions
1. Introduction and safety
1.1 General
These instructions must always be kept close to the
product’s operating location or directly with the product.
Flowserve products are designed, developed and manufactured with
state-of-the-art technologies in modern facilities. The unit is produced
with great care and commitment to continuous quality control, utilizing
sophisticated quality techniques and safety requirements.
Flowserve is committed to continuous quality improvement and
being at service for any further information about the product in its
installation and operation or about its support products, repair and
diagnostic services.
These instructions are intended to facilitate familiarization with the
product and its permitted use. Operating the product in compliance
with these instructions is important to help ensure reliability in service
and avoid risks. The instructions may not take into account local
regulations; ensure such regulations are observed by all, including
those installing the product. Always coordinate repair activity with
operations personnel, and follow all plant safety requirements and
applicable safety and health laws and regulations.
These instructions must be read prior to installing, operating, using
and maintaining the equipment in any region worldwide. The equipment
must not be put into service until all the conditions relating to safety
noted in the instructions have been met.

Flowserve.com 4PUIOM000649-00-UIM (EN/AQ) August 2022
SEM-100SS User Instructions
1.2 Disclaimer
Information in these User Instructions is believed to be reliable. In spite of
all the efforts of Flowserve to provide sound and all necessary information,
the content of this manual may appear insufficient and is not guaranteed by
Flowserve as to its completeness or accuracy.
Flowserve manufactures products to exacting International Quality
Management System Standards as certied and audited by external
Quality Assurance organizations. Genuine parts and accessories have
been designed, tested and incorporated into the products to help ensure
their continued product quality and performance in use. As Flowserve
cannot test parts and accessories sourced from other vendors, the
incorrect incorporation of such parts and accessories may adversely
affect the performance and safety features of the products. The failure to
properly select, install or use authorized Flowserve parts and accessories
is considered to be misuse. Damage or failure caused by misuse is
not covered by the Flowserve warranty. In addition, any modication of
Flowserve products or removal of original components may impair the
safety of these products in their use.
1.3 Copyright
All rights reserved. No part of these instructions may be reproduced, stored
in a retrieval system, or transmitted in any form or by any means without
prior permission of Flowserve.

Flowserve.com 5PUIOM000649-00-UIM (EN/AQ) August 2022
SEM-100SS User Instructions
1.4 Duty conditions
This product has been selected to meet the specications of your purchase
order. The acknowledgement of these conditions has been sent separately
to the Purchaser. A copy should be kept with these instructions.
The product must not be operated beyond the parameters specified for
the application. If there is any doubt as to the suitability of the product for the
application intended, contact Flowserve for advice, quoting the serial number.
1.5 Safety
1.5.1 Summary of safety markings: These User Instructions contain
specic safety markings where non-observance of an instruction would
cause hazards. The specic safety markings are:
This symbol indicates safety instructions where non-compliance would
affect personal safety and could result in loss of life.
1.5.2 Personnel qualication and training: All personnel involved in
the operation, installation, inspection and maintenance of the unit must be
qualied to carry out the work involved. If the personnel in question do not
already possess the necessary knowledge and skill, appropriate training and
instruction must be provided. If required, the operator may commission the
manufacturer/supplier to provide applicable training.
Always coordinate repair activity with operations and health and safety
personnel, and follow all plant safety requirements and applicable safety and
health laws and regulations.
PUMP IS NOT TO BE USED IN POTENTIALLY EXPLOSIVE ATMOSPHERES.

Flowserve.com 6PUIOM000649-00-UIM (EN/AQ) August 2022
SEM-100SS User Instructions
2. Transport and storage
2.1 Consignment receipt and unpacking
Immediately after receipt of the equipment, it must be veried for contents
and inspected for damages in transportation. Any shortage and/or damage
must be reported immediately to distributor/Flowserve Scienco and must
be received within 10 days of receipt of the equipment. Later claims cannot
be accepted.
Check any boxes or wrappings for any accessories or spare parts that
may be packed separately with the equipment.
Each product has a unique serial number. Check that this number corresponds
with that advised, and always quote this number in correspondence as well as
when ordering spare parts or further accessories.
2.2 Storage
Normal packaging is designed to protect the pump and parts during
shipment and storing.
2.3 Recycling at end of product life
At the end of the service life of the product, the relevant materials and parts
should be recycled or disposed of using an environmentally acceptable
method and in accordance with local regulations.
Make sure that hazardous substances are disposed of safely
and that the correct personal protective equipment is used. The
safety specifications must be in accordance with the current local
regulations at all times.

Flowserve.com 7PUIOM000649-00-UIM (EN/AQ) August 2022
SEM-100SS User Instructions
3. Description
3.1 Configurations
The SEM-100SS electronic ow meter employs positive displacement
nutating disk technology to meter liquids of various viscosities with great
accuracy and nominal pressure loss. Stainless steel and plastic construction
make the SEM-100SS an extremely versatile meter, suitable for use with
many chemicals and petroleum products.
The SEM-100SS ow meter features a large LCD display, an anti-glare
screen with back light, large positive touch buttons, and simple one-touch
operation, making the meters easy to read and easy to use in both high
light and low light settings.
The SEM-100SS ow meter is a positive displacement, nutating disk, uid
metering unit. As uid ows through the unit, it causes the nutating disk
to move which in turn causes the rotation of a hermetically sealed magnet
disk. The meter electronic assembly counts the number of revolutions of the
magnet and mathematically determines, based on the calibration number,
the quantity of liquid that has passed through the meter. The self-contained
electronic assembly features a large Liquid Crystal Display (LCD), and
simple four-button operation.

Flowserve.com 8PUIOM000649-00-UIM (EN/AQ) August 2022
SEM-100SS User Instructions
3.2 Operating parameters
• Flows from 7.5 lpm to 110 lpm (2 gpm to 30 gpm)
• Temperatures up to 85°C (185°F)
• Pressures up to 6.9 bar (100 psi)
3.3 Available equipment and accessories
The SEM-100 and SEM-100FT electronic ow meters are available individually
or in packages with the CT6 chemical transfer pump in multiple congurations,
each with varying equipment and accessories, including:
• Standard and special hoses
• Recirculation piping
• Various ttings and adapter
• Brackets
• Dispensing nozzles
• Dip-tubes

Flowserve.com 9PUIOM000649-00-UIM (EN/AQ) August 2022
SEM-100SS User Instructions
3.4 Materials of construction
The SEM-100SS electronic ow meters are resistant to corrosion from
typical ag-chem and light industrial chemicals. Wetted materials include:
• Fluid Housing/Form Cover ------- 316 Stainless Steel
• Meter Chamber ------- Polypropylene Sulde (PPS),
Stainless Steel
• O-rings ------- Viton
• Electronic Housing ------- Nylon
• Screws ------- Stainless Steel
Note: Ensure chemical compatibility between liquid metered and the
meter’s wetted parts before using
Note: Meter should not be used to transfer ammable petroleum products.
DO NOT use with uids that have a ashpoint lower than 37°C (100°F).
Refer to the Scienco Product Reference Manual FPD-1607 to learn
more about the available configurations.
® Viton is a registered trademark of the DuPont Company.

Flowserve.com 10PUIOM000649-00-UIM (EN/AQ) August 2022
SEM-100SS User Instructions
4. Installation and operation
4.1 Unpacking the meter
Unpack the meter, and ensure that meter conguration and materials of
construction are correct for your application.
4.2 Installation
Flow can be metered in either direction through the SEM-100SS ow meter.
Thread the meter inlet into the female discharge port of the pump or line.
Using an elbow or coupling, screw the discharge hose onto the other
port of the meter. Use thread sealant tape or pipe dope to seal thread
connections as necessary.
DO NOT over tighten threaded connections. Breakage can
occur resulting in fluid exposure and leakage.
DO NOT mount meter in a load bearing manner. Excessive
loads can cause breakage, resulting in fluid exposure and leakage.

Flowserve.com 11PUIOM000649-00-UIM (EN/AQ) August 2022
SEM-100SS User Instructions
4.3 Calibration and operation
Wakes up display in Current Total mode. Unit will automatically
shut off after 40 seconds with no input.
Resets Current Total to zero. Also used to activate back light,
enter CAL-3 mode and as the “UP ARROW” during
calibrations.
Press and hold to display “TOTAL-2”. Also used to enter CAL-2
mode, and as the “DOWN ARROW” during calibrations.
Push to enter into the three calibration modes, starting with
CAL-1.
4.3.1 Calibration
The SEM-100SS Flow Meter has three calibration options, CAL-1,
CAL-2, and CAL-3. The ow meter can be calibrated in any unit desired
(i.e. gallons, liters, pounds, acres, pints, etc.). CAL-1 requires pumping
5 units of uid. CAL-2 requires pumping a known quantity of any units;
this quantity is then entered into the electronics. CAL-3 allows calibration
without pumping uid by manually changing the calibration constant.
Before performing meter calibration, turn on the pump and purge
the system of all air. For best results, calibrate at normal dispensing
conditions, i.e. ow rate and pressure.

Flowserve.com 12PUIOM000649-00-UIM (EN/AQ) August 2022
SEM-100SS User Instructions
CAL-1 Calibration:
1. Press “ON” button to wake up meter.
2. Press and hold the “Reset” button to zero (“.00”) the Current
Total screen
3. Press “CAL-1” to enter calibration sequence.
4. Pump process liquid into a calibrated container that holds ve units
(gallons, liters, etc.)
Note: The display will blink as uid is being pumped.
5. Press “CAL-1” to complete the calibration process.
Note: The display will return to the Current Total screen and read
the previous total.
CAL-2 Calibration:
1. Press “ON” button to wake up meter.
2. Press and hold the “Reset” button to zero (“.00”) the Current
Total screen.
3. Press “CAL-1” to enter calibration sequence.
4. Press “CAL-2” to enter the CAL-2 calibration mode.
5. Dispense desired amount.
Note: For greatest accuracy pump a minimum of 9.5 liters (2.5
gallons). The minimum amount required is 1.9 liters (0.5 gallons).
6. Press “CAL-1”.

Flowserve.com 13PUIOM000649-00-UIM (EN/AQ) August 2022
SEM-100SS User Instructions
7. Press “UP” and “DOWN” arrow keys to enter the amount of uid that
was pumped in the desired units.
Note: The display will return to the Current Total screen and read the
previous total.
Note: “Err” will be displayed if too few or too many counts have been
received during the calibration. A volume between 0.5 to 20 units must
be recorded for a valid calibration. If “Err” is displayed, no calibration
change has taken place.
CAL-3 Calibration:
1. Press “CAL-1” to enter calibration mode.
2. Press “CAL-3”. The current CAL-3 number will show.
3. Press the “UP” and “DOWN” arrow keys to adjust to a known
CAL-3 number.
4. Press “CAL-1” to enter the new number and complete the calibration
process.
Note: Use of the CAL-3 function will override any previous calibrations.
Note: A typical “CAL-3” number for water is 600. Recording the
“CAL-3” numbers for specic uids after calibration, and resetting the
meter to those numbers when the uid is pumped again is a convenient
method to quickly and accurately calibrate the meter.

Flowserve.com 14PUIOM000649-00-UIM (EN/AQ) August 2022
SEM-100SS User Instructions
4.3.2 Operation
TO METER FLUID: With the pump and meter properly installed, the meter
will wake up automatically and begin to display the Current Total as uid is
pumped.
TO DISPLAY CURRENT TOTAL: Press “ON” button.
TO RESET CURRENT TOTAL TO ZERO: Press and hold “RESET”
button for 3 seconds while the Current Total is displayed. Current Total will
be reset to “.00”.
TO DISPLAY TOTAL-2: While the Current Total is displayed, press and
hold “TOTAL-2” button. Total units pumped will be displayed as long as
“TOTAL-2” is pressed.
Note: TOTAL-2 cannot be reset to zero.
TO DISPLAY FLOW RATE: With meter on, press and hold the “ON”
button for 2 seconds. The display will read “FX.X”, with the numbers
indicating ow rate in units of volume per minute. To return to the Current
Total screen, press and hold the “ON” button for 2 seconds again.
TO TURN ON BACKLIGHT: With meter on, press the “ON” button, then
press the “RESET / CAL-3” button. The backlight will turn on. To turn off
the backlight press the “ON” button, then press the “RESET / CAL-3”
button again. The backlight will also turn off automatically after 10 seconds
with no input.
SHUT DOWN: The meter will automatically turn off after 40 seconds with
no input.

Flowserve.com 15PUIOM000649-00-UIM (EN/AQ) August 2022
SEM-100SS User Instructions
5. Maintenance
It is the nal operator’s responsibility to ensure that all maintenance
steps are carried out by authorized and qualied personnel who have
adequately familiarized themselves with the subject matter by studying this
manual in detail.
5.1 Battery removal and replacement
If the LCD display becomes dim, the battery should be replaced. The meter
electronics can be removed without exposure to uid inside the meter.
Open valve to relieve system pressure and do not pressurize the
system during this procedure.
5.1.1 Battery removal
To replace battery, remove the 8 screws (DD6P-43A) that hold the electronic
assembly to the meter assembly. Remove the electronic assembly. Remove
and dispose of used batteries.
5.1.2 Battery replacement
Install the new AAA Batteries into the battery holder. Note the polarity
markings on the batteries. The positive end of one battery should face the
red wire and the negative end of the other battery should face the black
wire. Press the “ON” button to check power supply.
Inspect gasket (S10-06SS) for damage. If the gasket (S10-06SS) is
damaged, replace with new. (See section 6: Parts List and Parts Diagram)

Flowserve.com 16PUIOM000649-00-UIM (EN/AQ) August 2022
SEM-100SS User Instructions
Place the gasket and electronic assembly onto the meter assembly.
Reinstall the 8 screws (DD6P-46A) to secure the electronic assembly to the
meter assembly. Tighten the screws to 32-36 inch-pounds in a star pattern
to avoid any leakage.
5.2 Meter Chamber Removal
Exposure to chemicals can cause bodily harm. Before
disassembling, thoroughly flush the meter with water. Always wear
appropriate gloves, eye protection and any other necessary PPE
while working with chemicals.
Ensure that the meter is not under pressure before continuing.
Remove the 8 screws (DD6P-46A) to remove electronic assembly (S10-11B
COMPLETE). Remove the 4 screws (SFM10000-19) that secure the meter
plate (SFM10000-14A) to the uid housing (SFM10000-13A). Remove the
meter plate and O-ring (SFM10000-18). The meter chamber can now be
removed for cleaning or replacement.
5.3 Meter assembly procedure
Ensure that the bottom O-ring (SFM10000-17) is in place. Insert the
meter chamber into the uid housing (SFM10000-13A). Place O-ring
(SFM10000-18) around the bottom of the meter plate (SFM10000-14A)
and place on top of the uid housing (SFM10000-13A). Secure with 4 short
screws (SFM10000-19) torqued to 32-36 inch-pounds. After inspecting for
damage, install the gasket (S10-06SS) and the electronic assembly (S10-
11B COMPLETE) using the 8 long screws (DD6P-46A) torqued to 32-36
inch-pounds.

Flowserve.com 17PUIOM000649-00-UIM (EN/AQ) August 2022
SEM-100SS User Instructions
6. Parts List and Parts Diagram
SEM-100SS Parts List
Qty. Part No. Description
8DD6P-46A SS Phillips Head Screw, 10-24 X .75”
1S10-11B COMPLETE Electronic Assembly
1S10-06SS Meter Gasket
8SFM10000-19 SS Screw, Short
1SFM10000-14A Meter Plate
8NUT-02 10-24 Lock Nut
1SFM10000-10B Magnet Holder
1SFM10000-18 Viton O-Ring
2SFM10000-06 Screws
1SFM10000-05 Mounting Bracket
1SFM10000-07 Washer
1SFM10000-08 Drive Dog Assembly
1SFM10000-02 Top Wobble Housing
1SFM10000-03A Wobble Plate Assembly
8SFM10000-20 Nut
1SFM10000-14A Meter Plate
1SFM10000-13A SEM-100SS 316SS Fluid Housing
Note: All parts are common to the SEM-100 and SEM-100FT except for the fluid housing

Flowserve.com 18PUIOM000649-00-UIM (EN/AQ) August 2022
SEM-100SS User Instructions
S10-11 COMPLETE
SFM10000-19
SFM10000-07
SFM10000-08
SFM10000-02
SFM10000-01
SFM10000-17
STM10000-20
SFM10000-13A
SFM10000-03A
SFM10000-05
SFM10000-06
SFM10000-10B
SFM10000-14A
S10-06SS
8X DD6P-46A
8X NUT-02
SFM10000-18

Flowserve.com 19PUIOM000649-00-UIM (EN/AQ) August 2022
SEM-100SS User Instructions
7. Troubleshooting guide
Problem: Meter reads high or low.
Solution: Check for the following:
• Ensure lines are full and there is no trapped air in the system
before calibrating.
• Pump may be sucking air due to low uid level or bad pump
inlet connection.
• Calibrating at one ow rate and operating at a different rate.
Calibrating with a different uid than what is being pumped.
Problem: Meter ashes “ERR” at the end of calibration.
Solution: Check for the following:
• Meter electronics are not sensing the rotation of the magnet.
During calibration, if the CAL-1 or CAL-2 text does not blink
while uid is being pumped, rotation is not being sensed.
Disassemble meter and clean out or replace the meter
chamber (SEM-10 KIT)
• Volume dispensed during calibration is too small or too large.
The meter must be calibrated with 9.5 liters – 265 liters (2.5
gallons – 70 gallons)

Flowserve.com 20PUIOM000649-00-UIM (EN/AQ) August 2022
SEM-100SS User Instructions
Problem: No liquid will pass through the meter or the meter will
not register ow.
Solution: Foreign material is in the metering cartridge and is obstructing
ow or preventing the nutating disk from moving freely. Remove
the meter cartridge and clean.
Problem: The meter will not power on, or the display is dim.
Solution: Replace the batteries.
Table of contents
Other Flowserve Measuring Instrument manuals
Popular Measuring Instrument manuals by other brands

ADTEK
ADTEK CPM-80 Series Operation manual

Dranetz-BMI
Dranetz-BMI Power Platform PP1 Operator's manual

Keysight Technologies
Keysight Technologies M9393A Startup guide

Teledyne
Teledyne HASTINGS HFM-300 instruction manual

Starrett
Starrett W2900-6ME user guide

LaserLiner
LaserLiner MultiFinder Plus operating instructions