Fluid 9341235252217 Instruction Manual

Fluid Convertible Bike Trailer
Owner’s Instruction & Safety Manual
The Fluid Convertible Bike Trailer is a great way to move one or two children around behind your
bike, and has the added bonus of being a stroller which can be used independently of the bike.
The stroller components can be fitted without the need to turn the stroller/trailer upside down.
This product has been created and independently tested when in stroller configuration to comply
with ‘AS/NZS 2088:2013 Prams and Strollers – Safety requirements’.
This manual covers very important warnings and safety tips to reduce the risk in using this
product, however whilst not exceeding the limits in this manual you should always ride within your
skills and comfort level. Please read the entire manual including the warnings before assembling
and using this product.

1
WARNING TO ASSIST IN AVOIDING INJURY OR DEATH,
PLEASE READ ALL INSTRUCTIONS AND WARNINGS
CAREFULLY BEFORE ASSEMBLY AND USE.
ALWAYS APPLY THE BRAKES WHENEVER IN STROLLER CONFIGURATION
AND STATIONARY.
DO NOT LEAVE CHILDREN UNATTENDED.
SECURE THE CHILD(REN) IN THE HARNESS(ES) AT ALL TIMES.
DO NOT CARRY EXTRA CHILDREN BEYOND THE TWO CAPACITY IN/ON
THIS STROLLER. DO NOT CARRY EXTRA BAGS ON THIS STROLLER.
MAKE SURE CHILDREN ARE CLEAR OF ANY MOVING PARTS IF YOU
ADJUST THE STROLLER.
NOT RECOMMENDED FOR CHILD UNDER 6 MONTHS OLD.
NOT RECOMMENDED FOR CHILD UNDER 18 MONTHS OF AGE IN TRAILER
CONFIGURATION.
WHEN USED IN TRAILER CONFIGURATION CHILDREN SHOULD ALWAYS
WEAR A HELMET.
DO NOT EXCEED THE 40KG MAXIMIMUM LOAD.
DO NOT EXCEED THE 16KM PER HOUR MAXIMUM SPEED. AND ALWAYS
RIDE DEFENSIVELY.
CHECK TYRE PRESSURE BEFORE EACH RIDE, matinain between
25PSI/170kPa and 30PSI/205kPain each tyre.
THE VEHICLE IS DESIGNED FOR USE ON FLAT OR GENTLY SLOPING
SURFACES AND MAY BE UNSTABLE ON HIGHER SLOPING OR UNEVEN
SURFACES, AVOID RIDING OVER CURBS, POTHOLES, OR USING OFF
ROAD, TIPPING OR ROLLING HAZARD MAY OCCUR IF THESE
INSTRUCTIONS ARE IGNORED.
ALWAYS USE THE FLAG SUPPLIED WITH THE TRAILER TO ALLOW OTHERS
TO SEE YOU.
LONGER BRAKING DISTANCES WILL APPLY TO YOUR BIKE WITH THE
TRAILER ATTACHED, practice stopping on first use with the trailer and leave
additional space to slow/stop if required.
IN STROLLER CONFIGURATION CARE SHOULD BE TAKEN ON STAIRS OR
ESCALATORS. IN TRAILER CONFIGURATION NEVER USE ON STAIRS OR
ESCALATORS.
THE STROLLER IS NOT TO BE USED NEAR AN OPEN FIRE OR EXPOSED
FLAME.
THIS STROLLER HAS BEEN SUBMITTED FOR TESTING AS SUPPLIED, DO
NOT MODIFY OR FIT ACCESSORIES TO THIS PRODUCT.
ALWAYS USE LOCK PINS SUPPLIED WITH THIS PRODUCT.
AFTER ACCIDENT OR IF DAMAGE HAS BEEN NOTICED STOP USING
PRODUCT IMMEDIATELY, seek compotent assessment before continueing to
use the product.
ALWAYS APPLY THE BRAKES WHENEVER IN STROLLER CONFIGURATION
AND STATIONARY.
2
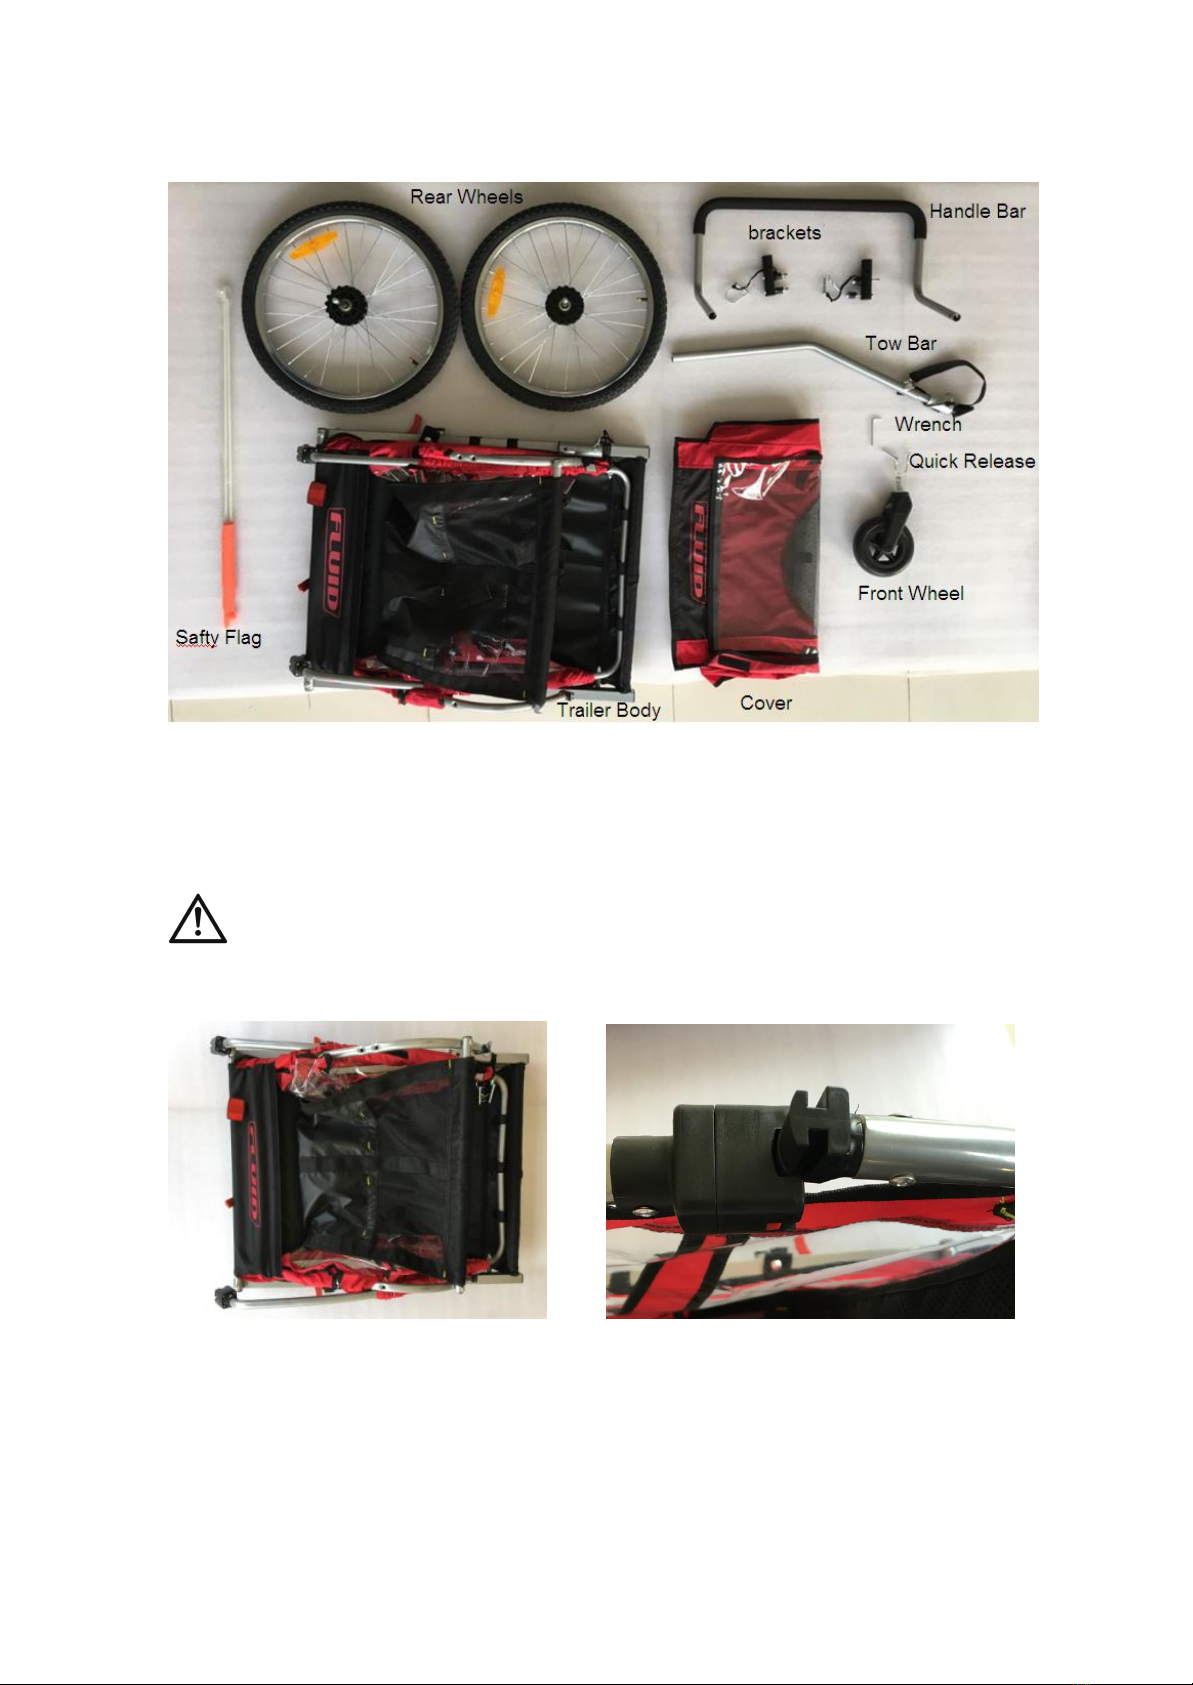
PACKAGE CONTENTS:
Trailer body, cover, 2 rear wheels, 1 front wheel, hand bar, safety flag, parking brake,
brackets and wrench.
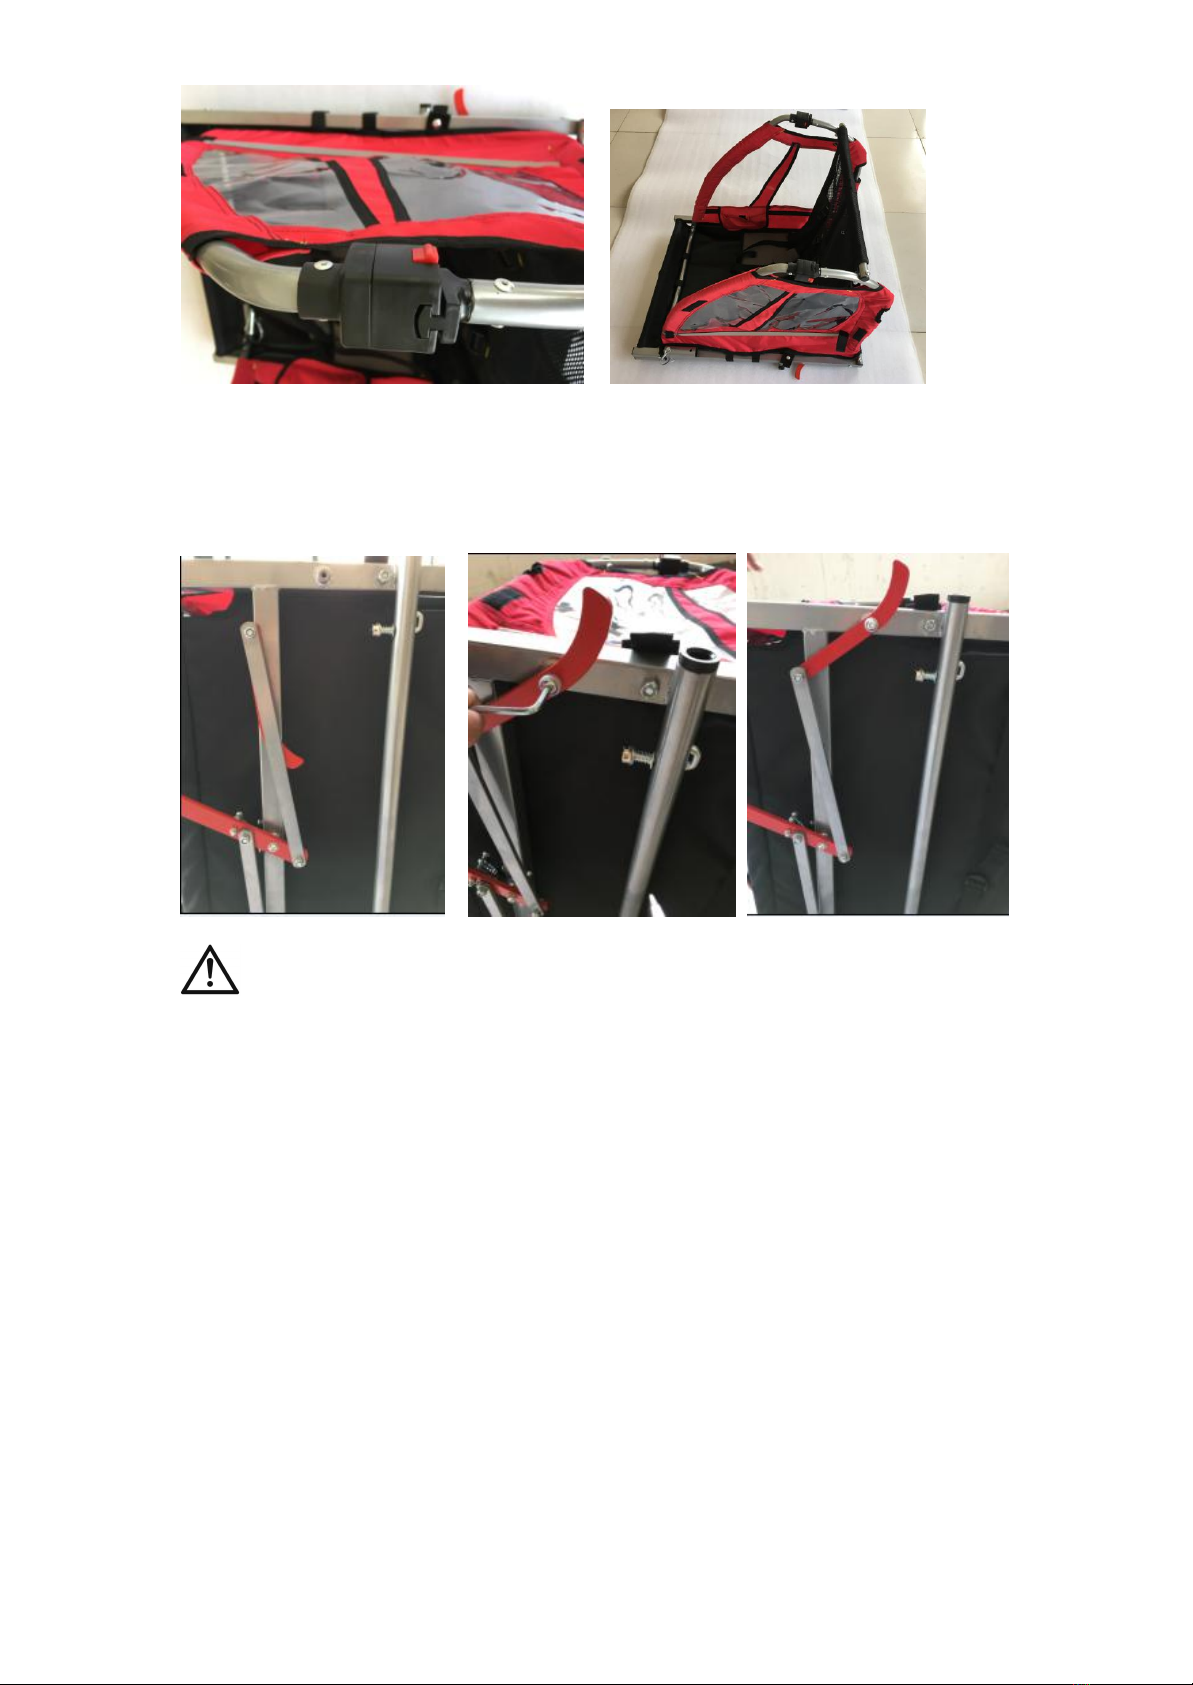
Main frame assembly
Remove trailer and all components from carton. While trailer is still in folded position, lift
both side panels to an upright position. Insert one side plastic panel into another side
plastic panel (Refer to diagram).
WARNING DO NOT REMOVE ANY PANNELING FROM THE
TRAILER BODY it is designed to assist in preventing contact between the child
and moving parts.
3
ASSEMBLE THE BRAKE
The foot brake is pre-assembled in the trailer but you need to adjust the brake by
following the instructions below. Screw the red parts to the hole show in the below
image and lock it.
WARNING
The brakes must always be applied when used in stroller configuration and
the stroller is not moving
When in trailer configuration and attached to a bike, ensure both brakes are
released prior to riding.

4
Installing wheels
Place the wheel hub on the axle by simply pushing in the wheel until it snaps in
place, so the wheel cannot be removed. To remove the wheels, lift back of trailer up
and simply push on the push buttons located on the axle and remove the wheel (See
diagram).
ATTACHING THE TOW BAR – TRAILER END
1) The hitch arm is held in place by a spring pin and a lock pin. Depress the spring pin
and slide the tow bar into the receiver on the left side of the trailer as shown.
2) Once the spring pin locks in place in the hole in the bracket, locate the lock pin,
(tethered on the trailer frame), then insert the pin through the bracket and into the
hole in the tow bar. The pin should go completely through the tow bar and bracket.
3) Once the pin is through, rotate the spring clip up and over until it snaps into place
over the pin head.
4) Give the pin a tug to be sure it is secure.
WARNING Ensure the tow bar is removed before using as a stroller.
ATTACHING THE TOP COVER
Position cover over the top of the trailer so that the roll-up window with bug mesh screen
is positioned over the front of the trailer.
1. 2.
Table of contents
Popular Bicycle Accessories manuals by other brands


Specialized
Specialized Elite CylcoComputer user manual

Sigma
Sigma BC 16.16 manual

Playcore
Playcore Dero Setbacks installation instructions

VDO Cyclecomputing
VDO Cyclecomputing x3dw instruction manual

Cateye
Cateye RAPID X2 manual

buratti meccanica
buratti meccanica Clorofilla Trail Use and maintenance manual


