QuickStart: FLUKE TiSXX
© 2017 The Snell Group / 322 N. Main St. / Suite 8 / Barre, VT 05641 / 800.636.9820 / www.thesnellgroup.com
2
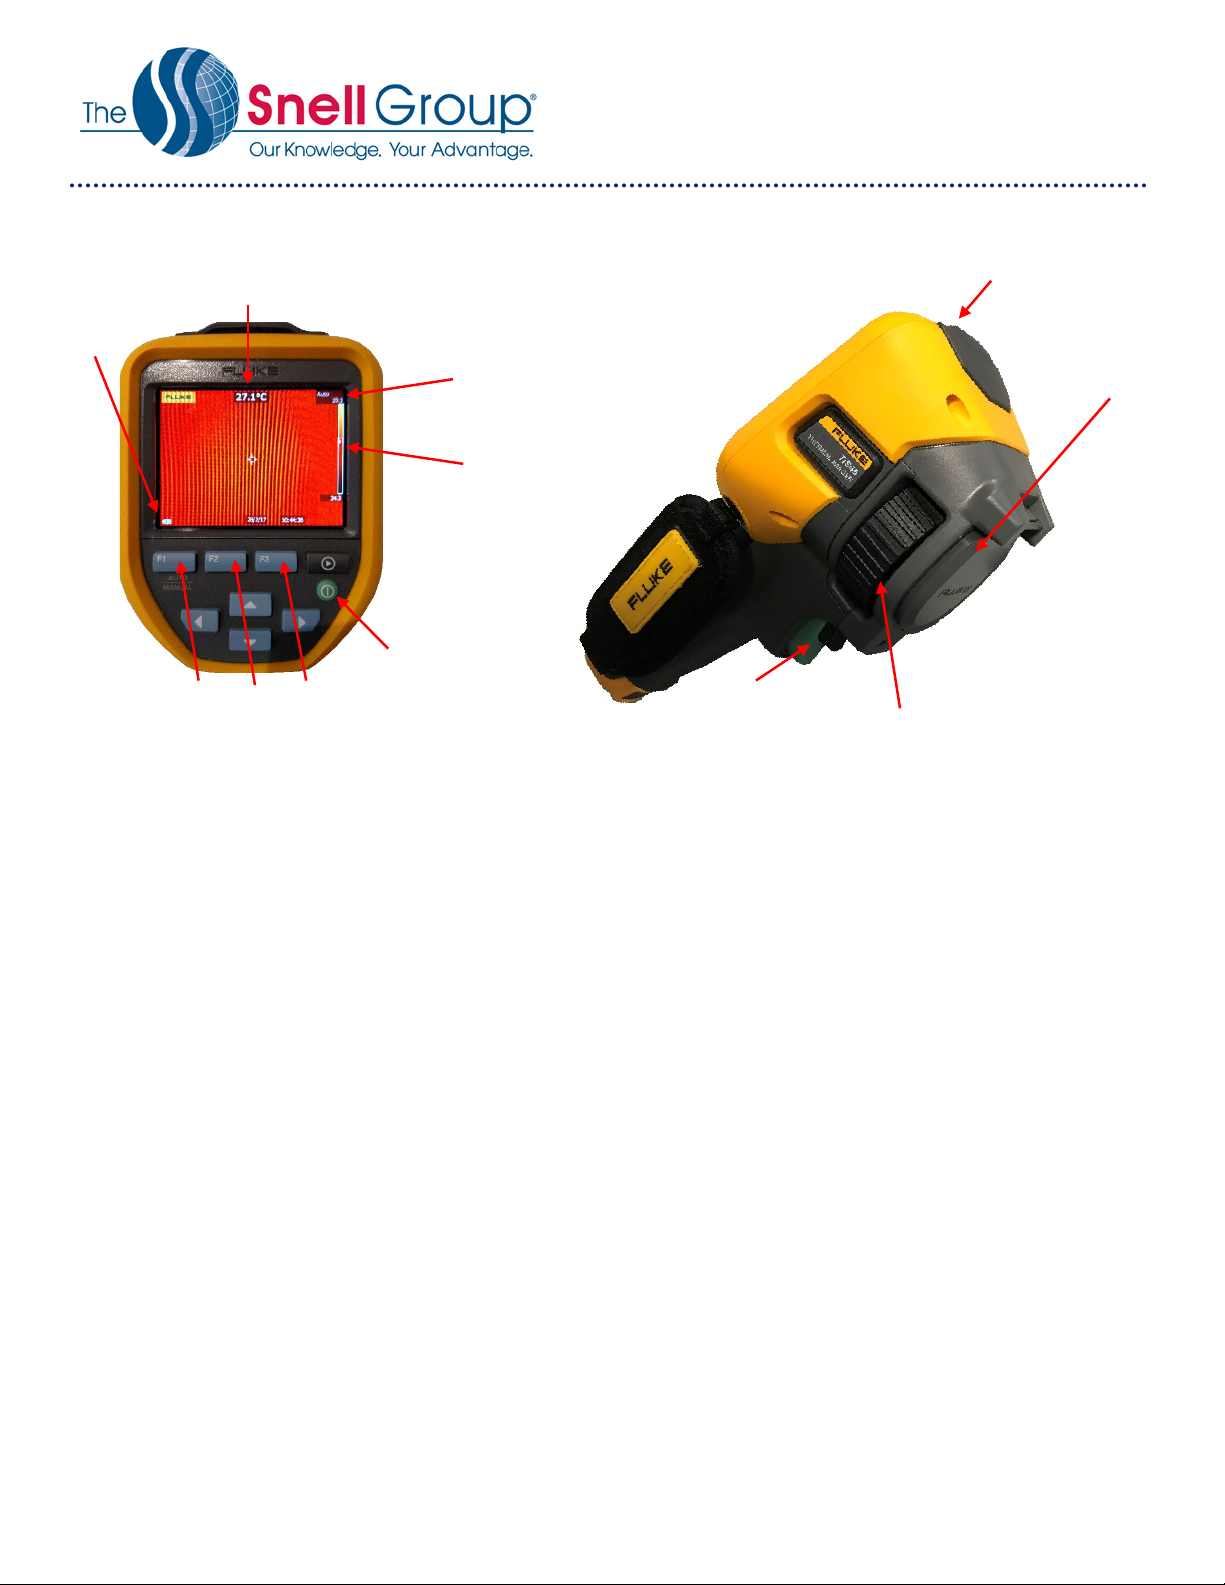
7. PAUSE IMAGE: Live images are paused by depressing the primary (green) trigger once. Once an image has
been paused, the options are given to Save, Edit or Cancel. Selecting cancel returns the imager to live operation.
8. SAVE IMAGE: After depressing the green trigger, Save appears above the F1 button. To save the image,
depress the F1 button.
9. RECALL IMAGE: Depress the memory view button, and using the directional buttons (˄ and ˅) or highlight the
preview image of the desired file to view. Depress F2 to recall the image.
10.PALETTE: From the home screen, depress the F2 button. Then using either the directional arrow buttons, select
Image, then select Palette. Depress F1 or > to enter the palette menu, and then using the up/down directional
arrow buttons scroll through the palette selections. To select a palette, either depress the F1 button (done) or F2
(return to previous menu).
11.EMISSIVITY: From the home screen depress the F2 button, then using the directional arrow buttons, highlight
Measurement. Depress the F1 button (OK), select Measurement. Then using the directional arrow buttons
highlight Emissivity, then Adjust Number. Then use the directional arrows to adjust the number. To select the
emissivity from a table of common materials, depress F2, highlight Measurement, Emissivity, then Select Table.
Use the directional arrows to select the material.
12.BACKGROUND: From the home screen depress the F2 button, then using the directional arrow buttons,
highlight Measurement. Depress the F1 button (OK) Measurement. Then either using the directional arrow
buttons highlight Background. Then with the up/down directional arrow buttons adjust the background correction
factor to the desired level. To save the selection, either depress the F1 or F2 buttons.
13.Transmission: From the home screen depress the F2 button, then using the directional arrow buttons or,
highlight Measurement. Depress the F1 button (OK) to select Measurement. Then using the directional arrow
buttons highlight Transmission. Then with the up/down directional arrow buttons, adjust the transmission
correction factor to the desired level. To save the selection, either depress the F1 or F2 buttons.
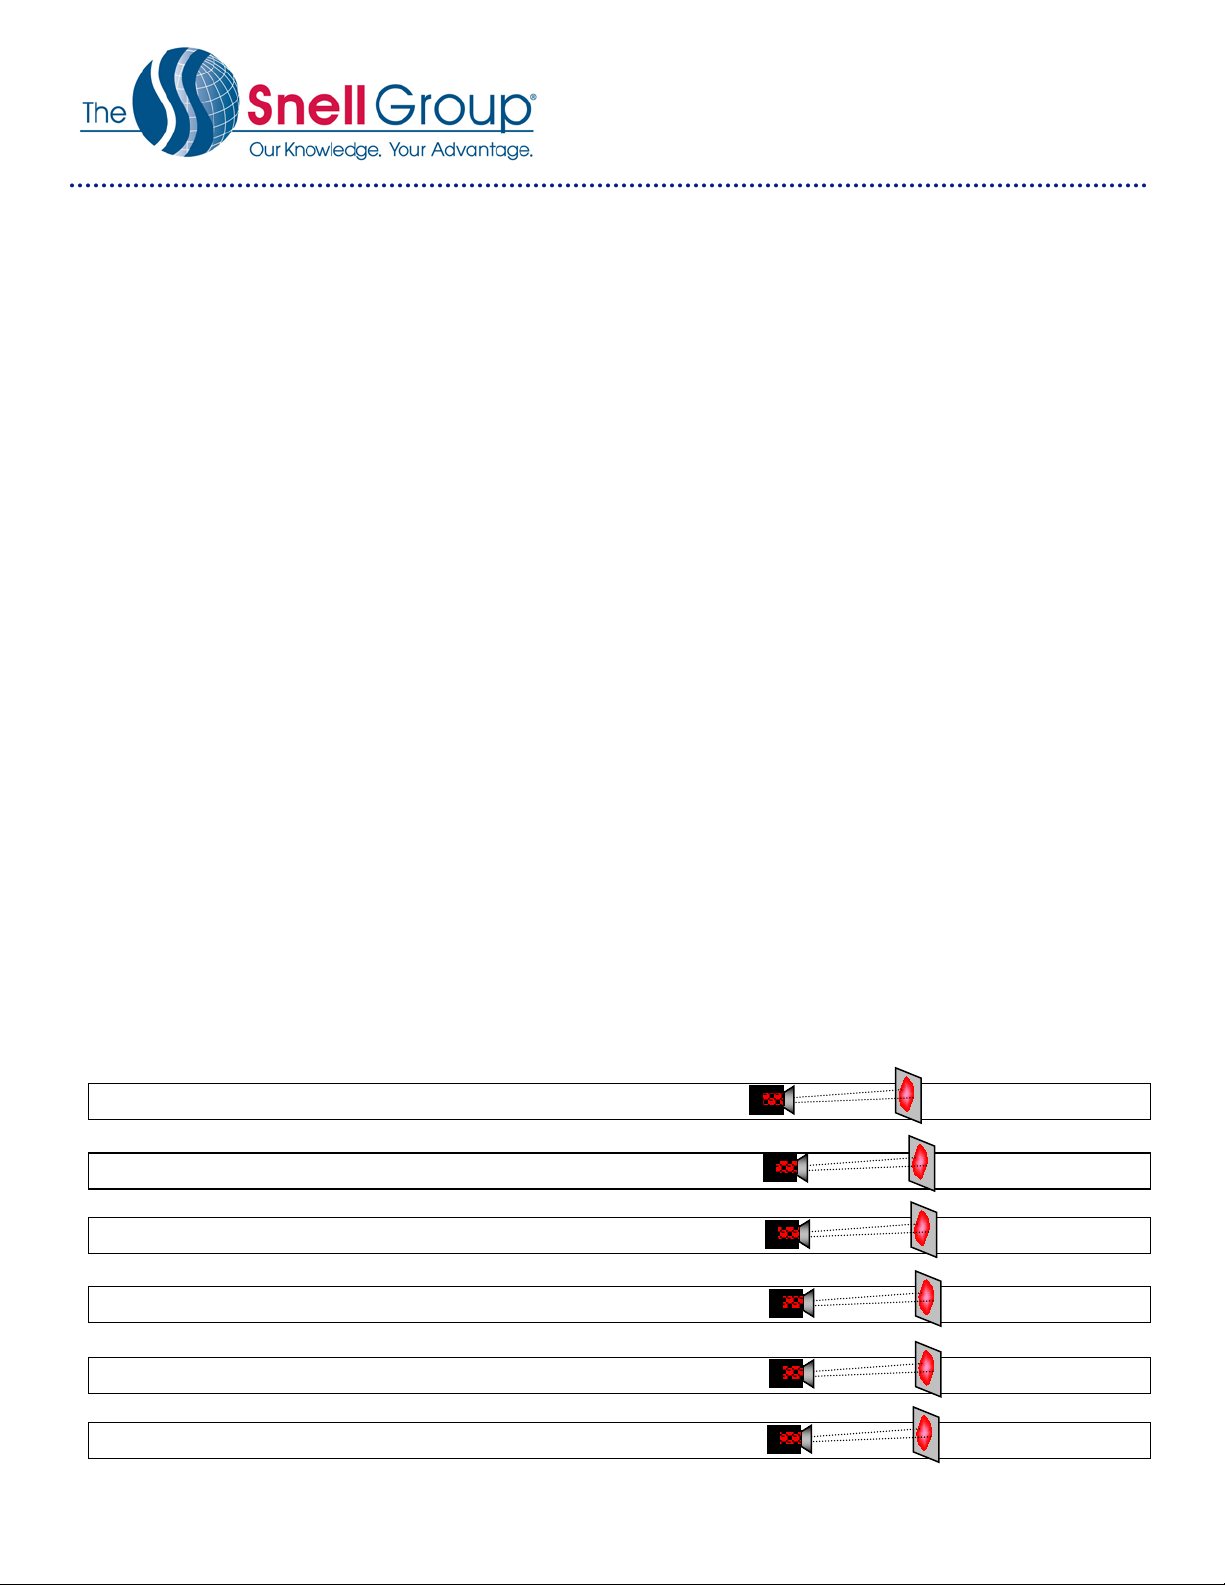
TiS10
TiS20
TiS40/45
TiS50/55
TiS60/65
TiS75
IFOV =7.8 mRad (Theoretical with 80x60 Detector and standard 35.7˚x26.8˚lens)Detect 1in. target @ 11ft.
IFOV =5.2 mRad (Theoretical with 120X90 Detector and standard 35.7˚x26.8˚ lens)Detect 1in. target @ 16ft.
IFOV =3.9 mRad (Theoretical with 160x120 Detector and standard 35.7˚x26.8˚ lens)Detect 1in. target @ 21ft.
IFOV =2.8 mRad (Theoretical with 220x165 Detector and standard 35.7˚x26.8˚ lens)Detect 1in. target @ 30ft.
IFOV =2.4 mRad (Theoretical with 260x195 Detector and standard 35.7˚x26.8˚ lens)Detect 1in. target @ 35ft.
IFOV =2.0 mRad (Theoretical with 320x240 Detector and standard 35.7˚x26.8˚ lens)Detect 1in. target @ 42ft.