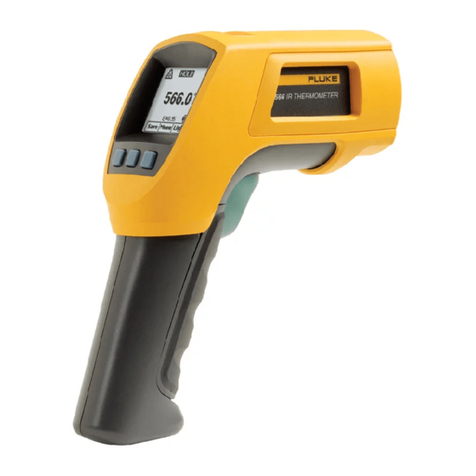
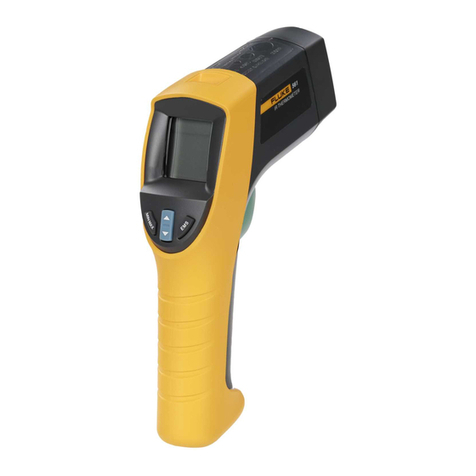
Fluke 61 User manual

Fluke-61
Users Manual
Bedienungshandbuch
Mode d‘emploi
Manual de uso
Manual do Usuário
PN 1645059
Rev.1 7/02
©2001 Fluke Corporation, All rights reserved. Printed in USA
All product names are trademarks of their respective companies
Noncontact Thermometer

Specifications
Temperature range -18 to 275°C (0 to 525°F)
Display Resolution 0.2°C or 0.5°F
Accuracy For targets at:
(assumes ambient operating -1 to 275°C (30 to 525°F) ±2% of reading
temperature of 23°C [73°F]) or ±2°C (±3.5°F), whichever is greater
-18 to -1°C (0 to 30°F) ±3°C (±5°F)
Temperature Coefficient 0.2K per °C or 0.2% per °C, whichever is greater
Repeatability ± 2% of reading, or ± 2°C (±3.5°F)
whichever is greater
Response time 500 mSec, 95% response
Spectral response 7–18 µm
Emissivity pre-set 0.95
Ambient operating range 0 to 50°C (32 to 120°F)
Relative humidity 10–90% RH noncondensing, @ up to 50°C (120°F)
Storage temperature -20° to 60°C (-4° to 140°F) without battery
Weight / Dimensions 227 g (0.5 lb);184 x 45 x 38 mm
(7.25 x 1.75 x 1.5 in) without holster
341 g (0.75lb);190 x 51 x 41 mm
(7.5 x 2.0 x 1.6 in) with holster
Power 9V Alkaline or NiCd battery
Battery life (Alkaline) 12 hrs
Distance to Spot Size 8:1
Specifications subject to change without notice.

• Battery Compartment
• Batteriefach
• Logement des piles
• Compartimento de las pilas
• Compartimento de bateria
•
•
• On Button
• Einschaltknopf
• Bouton Marche
• Botón de encendido
• Gatilho
•
•
HOLD
• Wrist Strap Connection
• Befestigung der Handschlaufe
• Point d’attache de la dragonne
• Correa de mano
• Conexão para alça
•
•
• °C/°F Switch
• °C/°F-Schalter
• Commutateur °C/°F
• Interruptor de °C/°F
• Chave °C/°F
•
•
• Laser
• Láser
•
•
• Battery Cover
• Batterieabdeckung
• Couvercle du lcompartiment pile
• Tapa de las pilas
• Tampa da bateria
•
•
• Serial Number Label
• Laser Warning
Label
• Display
• Anzeige
• Affichage
• Pantalla
• Display
•
•

2
English Warning
Do not point laser directly at eye or indirectly off
reflective surfaces.
Cautions
Use this unit only as specified in this manual or the
protection provided by the unit may be impaired.
All models should be protected from the following,
▲EMF (electro-magnetic fields) from arc welders,
induction heaters
▲Static electricity
▲Thermal shock (caused by large or abrupt ambi-
ent temperature changes—allow 30 minutes for
unit to stabilize before use)
▲Do not leave the unit on or near objects of high
temperature
Introduction
We are confident you will find many uses for your
handheld noncontact thermometer. Compact, rugged,
and easy to use—just aim, press the trigger, and read
surface temperatures in less than a second. You can
safely measure surface temperatures of hot, hazardous,
or hard-to-reach objects without contact.
How it Works
Infrared thermometers measure the surface tempera-
ture of an object. The unit’s optics sense emitted (E),
reflected (R), and transmitted (T) energy, which is
collected and focused onto a detector. The unit’s
electronics translate the information into a temperature
reading which is displayed on the unit. The laser is
used for aiming purposes only.

3
English
How to Operate the Unit
°C/°F and Battery
Open the battery compartment to access the C/F
switch or to insert/remove the battery. To switch
between °C and °F, toggle the switch (A). Insert the
9v battery positive side first into the battery
compartment.
Operating the Unit
To measure a temperature, point unit at object and
press the On Button. Be sure to consider distance-
to-spot size ratio and field of view. If the unit is
equipped with a laser, use the laser only for aiming.
See ‘How to Accurately Measure Temperatures’.
Display
The backlit LCD displays the current temperature in
Celsius or Fahrenheit. The unit will hold the reading
for 7 seconds after the On Button is released; the word
HOLD appears. The presence of the battery icon
indicates a low battery (B).
HOLD
B
CF
9v
Battery
+-
A

4
English How to Accurately Measure
Temperature
Locating a Hot Spot
To find a hot spot aim the thermometer outside the
area of interest, then scan across with an up and
down motion until you locate the hot spot.
Field of View
Make sure that the target is larger than the unit’s spot
size. The smaller the target, the closer you should be
to it. When accuracy is critical, make sure the target
is at least twice as large as the spot size.
Distance & Spot Size
As the distance (D) from the object increases, the
spot size (S) of the area measured by the unit
becomes larger.
Reminders
■Not recommended for use in measuring shiny
or polished metal surfaces (stainless steel,
aluminum, etc.). See Emissivity.
■The unit cannot measure through transparent
surfaces such as glass. It will measure the
surface temperature of the glass instead.
■Steam, dust, smoke, etc., can prevent accurate
measurement by obstructing the unit’s optics.
D8
3"@ 24"
2"@ 16"
1"@ 8"
25 @ 200mm
50 @ 400mm
75 @ 600mm
Yes No

5
English
Emissivity
Most organic materials and painted or oxidized surfaces have an emissivity of
0.95 (pre-set in the unit). Inaccurate readings will result from measuring shiny or
polished metal surfaces. To compensate, cover the surface to be measured with
masking tape or flat black paint. Allow time for the tape to reach the same tempera-
ture as the the material underneath it. Measure the temperature of the tape or paint-
ed surface.
Maintenance
Lens Cleaning: Blow off loose particles using clean compressed air. Gently brush
remaining debris away with a camel's hair brush. Carefully wipe the surface with a
moist cotton swab. The swab may be moistened with water.
NOTE: DO NOT use solvents to clean the plastic lens.
Case Cleaning: Use soap and water on a damp sponge or soft cloth.
NOTE: DO NOT submerge the unit in water.
Troubleshooting
Code Problem Action
– – – (on display) Target temperature Select target within specifications
is over or under range
Battery icon appears Possible low battery Check and/or replace battery
Blank display Possible dead battery Check and/or replace battery
Laser doesn’t work Low or dead battery Replace battery

6
English
LIMITED WARRANTY AND LIMITATION OF LIABILITY
This Fluke product will be free from defects in material and workmanship for one year
from the date of purchase. This warranty does not cover fuses,
disposable batteries, or damage from accident, neglect, misuse, alteration, contamina-
tion, or abnormal conditions of operation or handling. Resellers are not authorized to
extend any other warranty on Fluke’s behalf. To obtain service during the warranty
period, contact your nearest Fluke authorized service center to obtain return autho-
rization information, then send the product to that Service Center with a description of
the problem.
THIS WARRANTY ISYOUR ONLY REMEDY. NO OTHER WARRANTIES, SUCH AS
FITNESS FOR A PARTICULAR PURPOSE, ARE EXPRESSED OR IMPLIED. FLUKE
ISNOT LIABLE FOR ANYSPECIAL,INDIRECT, INCIDENTALORCONSEQUENTIAL
DAMAGES OR LOSSES, ARISING FROM ANY CAUSE OR THEORY. Since some
states or countries do not allow the exclusion or limitation of an implied warranty or of
incidental or consequential damages, this limitation of liability may not apply to you.
Fluke Corporation Fluke Europe B.V.
P.O. Box 9090 P.O. Box 1186
Everett,WA 98206-9090 5602 BD Eindhoven
U.S.A. The Netherlands
11/99
Register your product at: http://www.fluke-warranty.com
CE Certification
This instrument conforms to the following standards:
• EN 61326-1 Electromagnetic Emissions and Susceptibility
• EN 61010-1 General Safety
• EN 60825-1 Laser Safety
Between approximately 250Mhz and 800 Mhz at 3V/m, the instrument may not
meet its stated accuracy.
7
Warnung (bei Geräten mit Laser)
Richten Sie den Laser nicht direkt oder indirekt über
reflektierende Oberflächen auf die Augen.
Vorsichtsmaßnahmen
Alle Modelle müssen vor folgenden Zuständen
geschützt werden:
▲EMF (elektromagnetische Felder) von
Elektroschweißgeräten, Induktionsheizgeräten
▲statischer Elektrizität
▲Thermischer Schock (verursacht durch große oder
plötzliche Temperaturänderungen – Gerät vor
Gebrauch 30 Minuten lang stabilisieren lassen)
▲Gerät nicht auf oder in der Nähe von heißen
Objekten aufbewahren.
Einführung
Wir sind überzeugt, daß Sie für Ihr handgehaltenes
berührungsloses Thermometer zahlreiche
Anwendungen finden werden. Kompakt, robust und
einfach zu bedienen – einfach auf das Ziel richten,
den Knopf drücken, und in weniger als einer Sekunde
können Sie die momentane Oberflächentemperatur
ablesen. So lassen sich die Oberflächentemperaturen
von heißen, gefährlichen oder schwer erreichbaren
Objekten gefahrlos und ohne Berührung bestimmen.
Deutsch

8
Deutsch Funktionsweise
Infrarot-Thermometer messen die Oberflächen-
temperatur eines Objekts (target). Die Optik des
Gerätes erfaßt die emittierte (E), reflektierte (R) und
durchgelassene (T) Wärmestrahlung, die gebündelt
und auf einen Detektor fokussiert wird. Die
Geräteelektronik wandelt diese Information in einen
Temperaturwert um, der auf dem Display angezeigt
wird. Der Laser wird lediglich zum Zielen verwendet.
Bedienung des Gerätes
°C/°F und Batterie
Um zwischen Celsius und Fahrenheit umzuschalten,
müssen Sie das Batteriefach öffnen und mit dem
Schalter (A) C oder F wählen. Die 9-Volt-Batterie
wird wie in der Abbildung dargestellt, ausgetauscht.
Bedienung des Gerätes
Zur Temperaturbestimmung wird das Gerät auf ein
Objekt gerichtet und die Meßtaste gedrückt. Denken
Sie daran, das Verhältnis von Entfernung zu
Punktgröße sowie das Sichtfeld zu berücksichtigen.
Falls das Gerät mit einem Laser ausgerüstet ist,
benutzen Sie den Laser bitte nur zum Zielen. Siehe
Abschnitt „Korrekte Temperaturbestimmung“.
Anzeige
Die LCD-Anzeige zeigt die momentane Temperatur in
Grad Celsius oder Grad Fahrenheit an. Nach Freigabe
der Meßtaste wird der Meßwert weitere 7 Sekunden
lang angezeigt; dabei wird das Wort HOLD angezeigt.
Die Anzeige des Batteriesymbols weist auf einever-
brauchte Batterie hin (B).
CF
9v
Battery
+-
A
Reflected Energy
Transmitted Energy
Emitted Energy
Object
Infrared
Thermometer
HOLD
B

9
Deutsch
Sokönnen Sie präzise die
Temperaturmessen
Lokalisierung einer heißen Stelle
Zur Lokalisierung einer heißen Stelle wird das
Thermometer auf einen Punkt außerhalb des gewün-
schten Bereichs gerichtet und der Bereich dann mit
einer Auf- und Abbewegung abgetastet, bis die heiße
Stelle gefunden ist.
Sichtfeld
Achten Sie darauf, daß das Meßobjekt größer ist als
die Meßfleckgröße des Gerätes. Je kleiner das
Meßobjekt , desto näher müssen Sie an das Objekt
herangehen. Wenn die Meßgenauigkeit von auss-
chlaggebender Bedeutung ist, sollte das Meßobjekt
wenigstens doppelt so groß wie die Meßfleckgröße
sein.
Entfernung und Meßfleckgröße
Mit zunehmender Entfernung (D) vom Objekt nimmt
die Fläche (S) des vom Gerät gemessenen Bereichs
zu.
Hinweise
■Zur Messung von Temperaturen glänzender oder
hochpolierter Metalloberflächen (z.B. Edelstahl,
Aluminium usw.) wird das Gerät nicht empfohlen.
Siehe Abschnitt „Emissionsgrad“.
■Das Gerät kann nicht durch transparente
Oberflächen wie z.B. Glas messen. Statt dessen
mißt es die Oberflächentemperatur des Glases.
■Dampf, Staub, Rauch usw. können die korrekte
Temperaturbestimmung behindern.
D8
3"@ 24"
2"@ 16"
1"@ 8"
25 @ 200mm
50 @ 400mm
75 @ 600mm
Yes No

10
Deutsch
Emissionsgrad
Die meisten organischen Materialien sowie lackierte und oxidierte Oberflächen
besitzen einen Emissionsgrad von 0,95 (im Gerät vorgegeben). Die Bestimmung der
Temperaturen glänzender oder hochpolierter Metalloberflächen ergibt ungenaue
Meßwerte. Zur Kompensierung kann die zu messende Oberfläche mit Klebeband
abgedeckt oder mit mattschwarzer Farbe angestrichen werden. Warten Sie, bis das
Klebeband dieselbe Temperatur wie das unterliegende Material aufweist. Bestimmen
Sie dann die Temperatur des Klebebands oder der angestrichenen Oberfläche.
Wartung
Reinigung der Linse: Blasen Sie lose Teilchen mit reiner Preßluft weg.
Zurückbleibende Verunreinigungen werden dann vorsichtig mit einem weichen
Pinsel entfernt. Wischen Sie die Oberfläche vorsichtig mit einem feuchten
Wattebausch ab. Der Wattebausch kann mit Wasser befeuchtet werden. HINWEIS:
KEINE Lösungsmittel zur Reinigung der Linse verwenden.
Reinigung des Gehäuses: Mit Seifenlösung und Schwamm oder einem weichen
Tuch reinigen. HINWEIS: Das Gerät darf NICHT in Wasser eingetaucht werden.
Fehlersuche und -behebung
Code Störung Vorgehenn
– – – (auf der Anzeige) Zieltemperatur oberhalb Ziel innerhalb des Bereichs
oder unterhalb des wählen
Bereichs
Batteriesymbol Batterie nahezu Batterie prüfen oder
erscheint verbraucht austauschen
Keine Anzeige Batterie entladen Batterie prüfen oder
austauschen
Laser funktioniert nicht Schwache oder entladene Batterie austauschen
Batterie

11
BESCHRÄNKTE GARANTIE UND
HAFTUNGSBEGRENZUNG
Dieses Fluke-Produkt ist ein Jahr ab Kaufdatum frei von Materialund
Fertigungsdefekten. Diese Garantie erstreckt sich nicht auf Sicherungen,
Einwegbatterien oder Schäden durch Unfälle, Nachlässigkeit, Mißbrauch, Änderungen
oder abnormale Betriebsbedingungen bzw. unsachgemäße Handhabung. Die
Verkaufsstellen sind nicht dazu berechtigt, diese Garantie im Namen von Fluke zu
erweitern. Um die Garantieleistung in Anspruch zu nehmen, wenden Sie sich an das
nächstgelegene Fluke-Service-Center, um Informationen zur Rücksendeautorisierung
zu erhalten, und senden Sie das Produkt anschließend mit einer Beschreibung des
Problems an dieses Service-Center.
DIESE GARANTIE IST IHR EINZIGER RECHTSANSPRUCH. KEINE ANDEREN
GARANTIEN,WIE DIE DER ZWECKDIENLICHKEIT FÜR EINEN BESTIMMTEN EIN-
SATZ, WERDEN AUSDRÜCKLICH ERTEILT ODER IMPLIZIERT. FLUKE
ÜBERNIMMT KEINE HAFTUNG FÜR AUS IRGENDWELCHEN GRÜNDEN ODER
RECHTSTHEORIEN ABGELEITETEN SPEZIELLEN, MITTELBAREN, BEGLEIT-
ODER FOLGESCHÄDEN BEZIEHUNGSWEISE VERLUSTE. Da in einigen Ländern
der Ausschluß oder die Begrenzung von Begleit-oder Folgeschäden nicht zulässig ist,
kann es sein, daß die obengenannten Haftungsbegrenzung für Sie nicht zutrifft.
Fluke Corporation Fluke Europe B.V.
P.O. Box 9090 P.O. Box 1186
Everett,WA 98206-9090 5602 BD Eindhoven
USA. Niederlande
11/99
CE=Zertifizierung
Dieses Gerät entspricht den folgenden Normen:
• EN 61326-1 Electromagnetic Emissions and Susceptibility
• EN 61010-1 General Safety
• EN 60825-1 Laser Safety
Between approximately 250Mhz and 800 Mhz at 3V/m, the instrument may not
meet its stated accuracy.
Deutsch

12
Français Avertissement
Ne pointez pas le rayon laser directement dans les
yeux ou indirectement sur des surfaces réfléchissantes.
Précautions
Tous les modèles doivent être protégés contre :
• les champs électromagnétiques des postes de
soudure, les appareils de chauffage par induction
• l’électricité statique
• les chocs thermiques (causés par d’importants
ou de brusques changements de température -
laissez le thermomètre se stabiliser pendant
30 minutes avant de l’utiliser)
• Ne laissez pas le thermomètre sur ou à proximité
d’objets à température élevée.
Introduction
Nous sommes certains que vous trouverez plusieurs
utilisations pour le thermomètre portable sans
contact . Compact, robuste et facile à utiliser - il
suffit de viser, d’appuyer sur la gâchette pour lire la
température courante de surface en moins d’une sec-
onde. Vous pouvez ainsi mesurer en toute sécurité
les températures de surface d’objets les toucher bru-
lants, dangereux ou difficiles d’accès, sans contact.
Principe de fonctionnement
Les thermomètres à infrarouge mesurent la tempéra-
ture de surface d’un objet. L’optique de l’instrument
capte l’énergie émise, réfléchie et transmise ;celle-ci
est recueillie, puis dirigée sur un détecteur.
L’électronique du thermomètre traduit cette informa-
tion et affiche la température. Le rayon laser sert
uniquement à pointer l’objet.
Reflected Energy
Transmitted Energy
Emitted Energy
Object
Infrared
Thermometer

13
Français
Principe de fonctionnement
°C/°F et pile
Pour passer des degrés Celsius aux degrés
Fahrenheit, ouvrez le couvercle du logement des
piles et appuyez sur le bouton (A) pour sélectionner
C ou F. Lorsque cela s’avère nécessaire, remplacez la
pile 9 V comme indiqué sur le schéma.
Utilisation du thermomètre
Pour mesurer une température, pointez l’instrument
sur un objet et appuyez sur Bouton marche. Veillez
tenir compte du champ de visée et du rapport dis-
tance-dimension du spot. Si le thermomètre est
équipé d’un laser, n’utilisez ce dernier que pour point-
er sur l’objet. Voir « Mesure de la température avec
précision.
Affichage
L’écran à cristaux liquides, rétro-éclairé, affiche la
température courante en degrés Celsius ou
Fahrenheit. La température restera affichée pendant 7
secondes après avoir relâché le bouton et le mot
HOLD (maintenir) apparaît. Lorsque l’icône de la pile
apparaît, cela indique un faible niveau de charge de
la pile (B).
CF
9v
Battery
+-
A
HOLD
B

14
Français Comment mesurer précisément la
température
Détermination d’un point chaud
Pour trouver un point chaud, pointez le thermomètre
hors de la zone d’intérêt, puis balayez d’un mouve-
ment de haut en bas jusqu’à localisation du point
chaud.
Champ de visée
Assurez-vous que la cible est plus grande que le spot
mesuré par le thermomètre. Plus la cible est petite,
plus vous devrez vous en rapprocher. Lorsqu’il est
essentiel d’obtenir des mesures précises, veillez à ce
que la cible soit au moins deux fois plus grande que
le spot mesuré.
Distance et taille du spot mesuré
La taille du spot mesuré (S) s’accroît avec la distance
(D) séparant le thermomètre de la cible.
Rappels
• Il est déconseillé d’utiliser ce thermomètre pour
mesurer la température de surfaces métalliques
brillantes ou polies (acier inoxydable, alumini-
um,etc.). Voir Emissivité.
• Le thermomètre ne peut pas mesurer la tempéra-
ture à travers des surfaces transparentes comme
le verre, car il mesure en fait la température de
surface du verre.
• La précision des résultats peut être faussée par la
présence de vapeur, de poussière, de fumée, etc.
D8
3"@ 24"
2"@ 16"
1"@ 8"
25 @ 200mm
50 @ 400mm
75 @ 600mm
Yes No

15
Français
Emissivité
La plupart des matières organiques, ainsi que les surfaces peintes ou oxydées ont
une émissivité de 0,95 (préréglée dans le thermomètre). Des résultats inexacts peu-
vent s’afficher en mesurant la température de surfaces métalliques brillantes ou
polies. Pour corriger cela, couvrez la surface à mesurer à l’aide de ruban adhésif
(résistant à la température mesurée) ou d’une peinture noire mate. Laissez le ruban
adhésif atteindre la mÍme température que le matériau recouvert. Mesurez la tem-
pérature de la surface recouverte.
Entretien
Nettoyage de l’optique : ôtez les particules libres en soufflant de l’air comprimé pro-
pre. Eliminez les débris restants en brossant délicatement à l’aide d’une brosse en
poils de chameau. Essuyez avec précaution la surface à l’aide d’un coton-tige
humide (que vous pouvez humidifier avec de l’eau). REMARQUE : N’utilisez PAS de
solvant pour nettoyer l’optique en plastique.
Nettoyage du boîtier : utilisez une éponge humide ou un linge doux imbibés d’eau
savonneuse. REMARQUE : N’immergez PAS le thermomètre dans l’eau.
Dépannage
Code Problème Action
– – – (sur l’affichage) Température cible hors Sélectionnez une cible
limites conforme aux spécifications
L’icône de la pile Pile faiblement chargée Vérifier et/ou changer la pile
apparaît
Pas d’affichage Pile déchargée Remplacez la pile
Le laser ne Pile faiblement chargée Remplacez la pile
fonctionne pas ou déchargée

16
Français
LIMITES DE GARANTIE ET DE RESPONSABILITE
La société Fluke garantit l’absence de vices de matériaux et de fabrication de ses pro-
duitsdansdes conditionsnormalesd’utilisationetd’entretien pendantunepérioded’un
an prenant effet à la date d’achat. Cette garantie ne s’applique pas aux fusibles, aux
piles jetables ni à tout produit mal utilisé, modifié, contaminé, négligé ou endommagé
paraccidentousoumis àdesconditionsanormalesd’utilisationetde manipulation.Les
distributeurs agréés par Fluke ne sont pas autorisés à appliquer une garantie plus
étendueaunomdeFluke.Pour avoirrecoursauservicedelagarantie,mettez-vousen
rapport avec le centre de service agréé Fluke le plus proche pour recevoir les
références d’autorisation de renvoi, puis envoyez le produit, accompagné d’une
description du problème.
LA PRESENTE GARANTIE EST LE SEUL ET EXCLUSIF RECOURS ETTIENT LIEU
DE TOUTES AUTRES GARANTIES, EXPLICITES OU IMPLICITES, Y COMPRIS
TOUTE GARANTIE IMPLICITE QUANT A L’APTITUDE DU PRODUIT A ETRE COM-
MERCIALISE OU APPLIQUE A UNE FIN OU A UN USAGE DETERMINE.FLUKE NE
POURRA ETRE TENU RESPONSABLE D’AUCUN DOMMAGE PARTICULIER, INDI-
RECT, ACCIDENTEL OU CONSECUTIF, NI D’AUCUNS DEGATS OU PERTES DE
DONNEES, SUR UNE BASE CONTRACTUELLE, EXTRACONTRACTUELLE OU
AUTRE.
Etant donné que certains pays ou états n’admettent pas les limitations d’une condition
de garantie implicite, ou l’exclusion ou la limitation de dégâts accidentels ou consécu-
tifs, il se peut que les limitations et les exclusions de cette garantie ne s’appliquent pas
à chaque acheteur.
Fluke Corporation Fluke Europe B.V.
P.O. Box 9090 P.O. Box 1186
Everett,WA 98206-9090 5602 BD Eindhoven
Etats-Unis Pays-Bas
11/99
Homologation CE
Cet instrument est conforme aux normes suivantes:
• EN 61326-1 Electromagnetic Emissions and Susceptibility
• EN 61010-1 General Safety
• EN 60825-1 Laser Safety
Between approximately 250Mhz and 800 Mhz at 3V/m, the instrument may not
meet its stated accuracy.
17
Español
Advertencia
No apunte el láser directamente hacia los ojos o
indirectamente desde superficies reflejantes.
Precauciones
Todos los modelos deberán protegerse de lo
siguiente,
▲Campos electromagnéticos de soldadoras de
arco, calentadores de inducción
▲Electricidad estática
▲Choque térmico (ocasionado por cambios
abruptos de temperatura ambiente—deje que la
unidad se estabilice por 30 minutos antes de usar)
▲No deje la unidad sobre ni cerca de objetos de
alta temperatura
Introducción
Confiamos en que encontrará muchos usos para su
termómetro portátil sin Contacto.. Compacto,
duradero y fácil de usar —tan sólo hay que apuntar,
oprimir el gatillo y podrá leer las temperaturas reales
de superficie en menos de un segundo. Puede medir
sin peligro alguno la temperatura de la superficie de
objetos calientes, peligrosos o de difícil acceso, sin
tener que tocarlos.
Cómo funciona
Los termómetros de rayos infrarrojos miden la temper-
atura de la superficie de un objeto. El sistema óptico de
la unidad detecta energía emitida, reflejada y transmiti-
da, la cual es captada y enfocada hacia un detector. El
sistema electrónico de la unidad convierte la informa-
ción en una lectura de temperatura, la cual se muestra
en la unidad. El Laser se usa exclusivamente con fines
de señalamiento.
Reflected Energy
Transmitted Energy
Emitted Energy
Object
Infrared
Thermometer

18
Español Como operar la Unidad
°C/°F y pila
Para alternar entre grados centígrados y Fahrenheit,
abra la tapa de las pilas que está en el mango y
empuje el interruptor (A) para seleccionar C o F.
Cuando sea necesario, cambie la pila de 9v como
se indica en el diagrama.con el lado positivo primero
hacia el fondo del compartimiento de la pila.
Funcionamiento de la unidad
Para medir una temperatura, apunte la unidad hacia
un objeto y oprima el Boton. Asegúrese de considerar
la relación distancia-tamaño del área a medir. Si la
unidad está equipada con un láser, úselo exclusiva-
mente para apuntar. Consulte Cómo medir tempera-
turas con precisión.
Pantalla
La pantalla de LCD muestra la temperatura actual en
grados centígrados o en grados Fahrenheit. La
unidad retiene la lectura durante 7 segundos después
de soltar el gatillo; aparece la palabra HOLD (reten-
er). La presencia del icono de pila indica que está
baja la pila (B).
CF
9v
Battery
+-
A
HOLD
B
Other manuals for 61
3
This manual suits for next models
1
Table of contents
Languages:
Other Fluke Thermometer manuals

Fluke
Fluke 68 User manual

Fluke
Fluke 65 User manual

Fluke
Fluke Hart Scientific 1523 Quick start guide

Fluke
Fluke 572 User manual

Fluke
Fluke 62 MAX User manual

Fluke
Fluke Hart Scientific 1523 Quick start guide

Fluke
Fluke 5680 User manual

Fluke
Fluke 566 User manual

Fluke
Fluke 1502A User manual

Fluke
Fluke 62 MAX User manual