Fluo Wave 4G User manual

fluo Wave 4G
User Manual
Kullanım Kılavuzu
Εγχειρίδιο Χρήσης
Tablet / Tableti
Model No. T704010
uo is a registered trademark of M&T S.A.
Copyright © 2015 M&T S.A. All rights reserved.


Keys explained
3EN
Key Function
1) Volume Keys Press or hold to turn the volume up or down.
2) Power Key • Hold to switch audio proles, or to turn on
or o Airplane mode, or to power o.
• Press to switch your device to Sleep mode.
• Press to wake up your device.
3) Headphones
jack
Earphones / headphones port.
4) Reset Press and hold for 6 seconds to reset the
device.
5) Micro USB /
Power jack
• Connect USB cable with charger to charge.
• Connect with PC to charge and transfer
data.

4EN
Open the rear cover
(Hint: be careful not to hurt your ngers!)
Installing the SIM / memory card and battery
Switch o your device before installing or replacing the battery,
SIM, or memory card.
1. Remove the back cover.
2. Hold the SIM card with the cut corner oriented as shown and
slip it into the card holder. Do the same for the second SIM card
if your device supports a second SIM card slot.
3. Insert the memory card into the card slot with the metal con-
tacts facing down until it inserts to the right position.
4. Insert the battery by aligning the gold contacts on the battery
with the gold contacts in the battery compartment. Gently push
down on the battery until it clicks into place.
5. Press the cover gently back into place by ensuring that all
notches on its perimeter click properly into the respective cavities
on the back of the device.

5EN
Inserting SIM card & memory card:
Setting Up Your Device for the First Time
When you rst power on your device or after you reset it to facto-
ry settings the Setup Wizard guides you to setup some essential
settings like system language, access to the internet, basic ac-
counts, date & time, etc.
Getting around your device
Touch Control
You can use nger gestures to control your device. The controls
on your touch-screen change dynamically depending on the tasks
you’re performing.
1. Tap buttons or icons to select items or to open applications.
2. Flick the screen to scroll up, down, left or right.
3. Point, drag and drop to move particular items across the
screen.
4. Double-tap the screen to zoom in/out an image.
NOTE: You can view the device screen in portrait or landscape
orientation simply by holding it upright or turning it on its side.
Not all the screens are viewable in landscape mode.
Home screen
In the Home screen, besides the shortcut icons, you can set your
own wallpaper or add widgets. You can do that from the options
that appear by holding your nger on the screen for 2 seconds.

Getting connected to the internet
Your device’s impressive networking capabilities allow you to ac-
cess the Internet or your corporate network with ease.
You can use default connection settings to connect to the Inter-
net via your mobile network, or Wi-Fi.
8EN
You can remove any of these if you hold and drag them at the
top of the screen.
what they mean:
USB Connected USB debugging connected
Airplane Mode Signal strength
Battery charge Bluetooth icon
Meeting mode Wi-Fi network
Alarm set Earphone
Silent mode Signal searching
New Wi-Fi network detected
New message

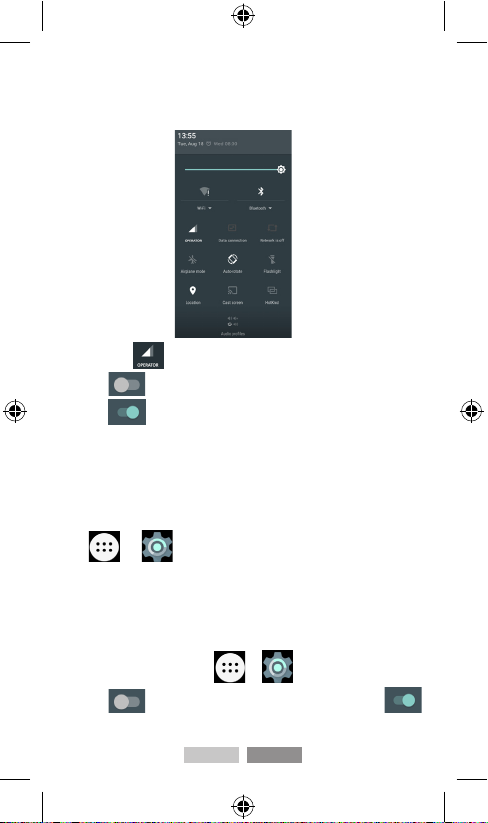
Connecting with data connection
The network connection can be enabled /disabled manually. Just
slide down from the top to bottom 2 times until the “quick set-
tings panel” comes up.
1. Tap once .
2. Click next to Mobile data to turn it on.
3. Click to turn off.
Adding a new network connection
If the networks settings are not pre-configured on your device,
please contact with your provider to get the necessary infor-
mation.
You can view your network settings by pressing Home key >
tap > Settings > More...(WIRELESS & NET-
WORKS) > Cellular networks > Access Point Names.
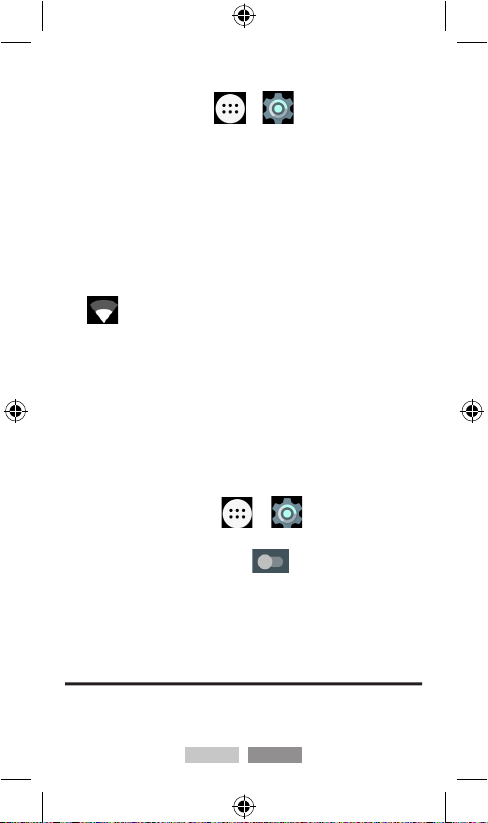
Turning on Wi-Fi
Wi-Fi provides wireless Internet access over distances of up to
about 90 meters.
1. Press Home key > tap > Settings > Wi-Fi.
2. Click next to the Wi-Fi menu to turn it on. Click
to turn off the Wi-Fi function.
9EN

Connecting to a Wi-Fi network
1. Press Home key > tap > Settings > Wi-Fi.
2. When the Wi-Fi is on, the Wi-Fi access points or hotspots that
your device has detected are displayed with their names and
security settings.
3. Tap an access point to connect to it.
NOTE: If security features are implemented, you’ll need to enter
a password.
Checking the Wi-Fi network status
When connected you can check the Wi-Fi network by looking at
the icon in the status bar.
Enabling the Wi-Fi hotspot
You can use the device as a portable WLAN router, to share your
device’s internet connection with one or more PC or other de-
vices.
NOTE:
• When the portable Wi-Fi hotspot function is enabled, you can’t
use your device’s applications to access the internet via Wi-Fi
connection.
• You can configure the Wi-Fi hotspot as follows:
1. Press Home Key > tap > Settings > More...
(WIRELESS & NETWORKS) > Tethering & portable hot-
spot > Wi-Fi hotspot and click next to the Wi-Fi hot-
spot to turn it on. Respectively tap again to turn off.
2. Tap Set up Wi-Fi hotspot to set up & manage your portable
Wi-Fi hotspot. Now you can find the hotspot on other devices
and you connect to it.
Browsing the internet
You can use your device to get on the Internet via a network or
Wi-Fi connection.
10 EN

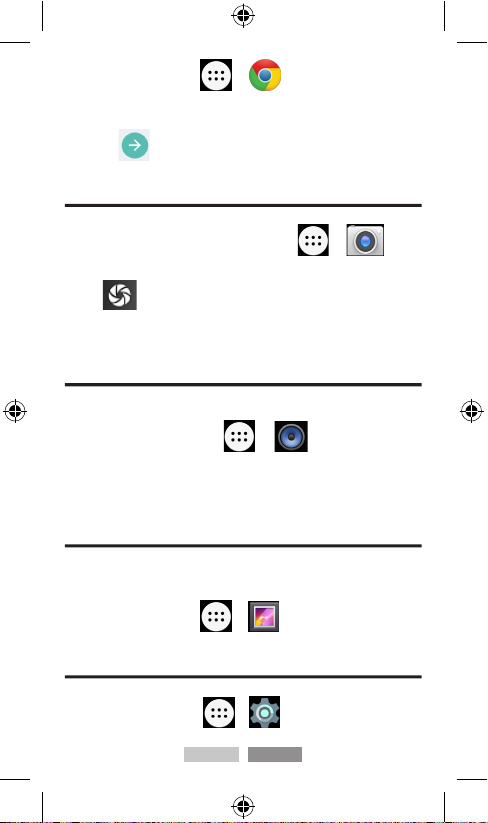
Press Home Key > tap > Chrome.
Tap the address bar to enter the website you want to browse.
Then tap on the touch keyboard.
Taking pictures with your camera
Your device has camera function.
1. Open it by pressing Home Key > tap > Cam-
era.
2. Tap to take a picture.
3. To view it, just tap the picture in the bottom right corner of
the screen.
Playing your music
You can play digital audio files from your device’s memory card
in Music.
1. Press Home Key > tap > Music to open the
Music Screen.
2. Choose music files among the category labels to start playing.
3. Adjust the volume with Volume Keys.
Opening your gallery
You can use Gallery to view pictures and play videos. You can
also do some basic editing, set them as wallpaper or contact
photo and share them with your friends.
Press Home Key > tap > Gallery.
Sorting out your device settings
Setting Date and Time
1. Press Home key > tap > Settings > Date & time.
11 EN

2. Tap Automatic Date & time and select Off if you want to
set the time and date by yourself. Select Use network-provided
time to auto configure the time and date through internet.
3. Set date, time and change the other options.
Display settings
Press Home key > tap > Settings > Display.
You can adjust the display settings as you like:
• Brightness: Adjust brightness of the screen.
• Adaptive Brightness: The device adjust the brightness auto-
matically based on the surrounding brightness.
• When divice is rotated: Rotate the screen display as you
rotate the device or stays in portrait mode.
• Sleep: Set the delay for the screen to automatically turn off.
• Wallpaper: Set the wallpaper of the device.
Audio profiles settings
Press Home Key > tap > Settings > Sound &
notification.
When you choose the General mode, you can adjust the sound
settings, such as ringtones, volume or vibrate.
You can also choose among Silent, Meeting or Outdoor mode.
Language settings
You can change the language of your device system in two sim-
ple steps.
1. Press Home key > tap > Settings > Language
& input > Language.
2. Select a language from the given list.
Bluetooth
Make device discoverable
You must pair your device with a ΒΤ device before you can con-
nect to it. Once you pair your tablet with a device, they stay
paired unless you unpair them.
12 EN

13 EN
1. Press Home key > tap > Settings > Blue-
tooth.
2. Tap near Bluetooth to turn on it.
Scan and pair with bluetooth devices
1. Press Home key > tap > Settings > Blue-
tooth.
2. Tap on the top right corner. Select Refresh.
After scanning, there will be a list of the IDs of all available
Bluetooth devices in range. If the device you want to pair with
isn’t in the list, ensure that the other device is turned on and is
discoverable.
1. Tap the name of an available Bluetooth device to pair with.
2. In the popup “Bluetooth pairing request” dialog, type the ap-
propriate PIN.
To extend battery life, turn Bluetooth power off when not in use.
Security settings
Protect your device from unauthorized use.
Protecting your device with a pattern
Press Home key > tap > Settings > Security >
Screen lock > Pattern.
1. Drag your finger to connect at least four dots, draw the pat-
tern.
2. Touch Continue.
3. Redraw your pattern to confirm.
Unlocking the screen with your pattern
1. Press Power Key to wake up the screen.
2. Draw the pattern you have set to unlock the screen.

14 EN
If you make a mistake, your device will ask you to try again.
Applications
Opening applications
Tap , then select an application icon to launch.
Open recently-used applications
Hold Home Key from any screen. The device will display the
applications you used recently. Tap the application you want to
open or slide if you want to close it.
Press Home Key > tap > Settings > Apps, to see
all the installed applications.
Installing an application
To download and install an application you must use Play Store.
1. Press Home key > tap > Play Store. Play Store
needs a Google account to operate. If you don't have a Google
account or you haven't registered your account in the device,
you will be guided to create or register one before you proceed.
2. You can choose an application by browsing among the availa-
ble application categories or you can tap to search for it by
its name or description.
3. When you choose the application that you want to download,
tap INSTALL > ACCEPT.
Removing an application
1. Press Home key > tap > Settings > Apps.
2. Select the application you want to delete.
3. Tap Uninstall and OK to confirm.
Doing a factory reset
If you want to restore your device software to the state it was
when you first got it out of the box, please follow this procedure:

15 EN
1. Press Home key > tap > Settings > Backup
& reset.
2. Click Factory data reset.
3. Touch Reset tablet.

16 EN
Technical specications
CPU Mediatek MT8735M 4 cores at 1.0GHz
64 bit
Connectivity WIFI 802.11 a/b/g/n, Bluetooth 4.0,
GPS, GSM(2,3,5,8), WCDMA (1,8), FDD-
LTE (1,3,7,20)
Operating System Android 5.1
Screen 7.0 inch WSVGA IPS Screen
Memory RAM 1GB
ROM 8GB
Camera Front camera 1.2 MP, Back camera
3.2 MP
Input / Output 3.5mm minijack stereo headset
Internal speaker
Micro-USB data & charging
Battery Embedded battery Li-Ion 2800mAh
Interface Volume buttons
On/O button
Size 188.94 x 108.12 x 10.02 millimeters

Maintenance and transfer instructions
• Keep the device away from small children and animals.
• Ensure the correct use, protection and disposal of the battery
and the charger of yourdevice.
• Use, store and maintain your device properly. Do not store your
device in dirty, wet, cold or warm places.
• To carry your device securely, use a protective transport ac-
packaging.
battery discharge below 15%.
Security for avoiding common mistakes and use pre-
cautions
• Do not use your device near other electronic / electric devices.
Using your device near in microwaves, heaters or other devices
-
vice start to overheat.
• Protect your hearing. To avoid possible hearing damage, avoid
exposure to loud sounds over a long period.
• Follow safety warnings and obey regulations regarding the use
of mobile devices while operating a vehicle.
• Handle removable cards (like memory cards and SIM cards) with
care. Be careful when you insert or remove the SIM or memory
card. Information and contacts can be easily damaged by bending
or scratching them.
• Comply with safety warnings and regulations regarding the use
of mobile devices in public spaces and restricted areas.
• Do not try to disassemble, modify, or repair your device or any
of its parts and accessories.
• Keep in mind that access to emergency services is not guar-
anteed.
• Do not use batteries, chargers, or accessories that are not manu-
facturer-approved. Wrong type chargers may damage your device.
Also, using other batteries may shortenthe life of yourdevice.
Tips for energy saving
Follow the tips below for a more energy wise use of your device.
Save energy for economy and environmental protection:
17 EN

• Turn o the WiFi, Bluetooth and GPS when not in use.
• Do not adjust the screen brightness high when irrelevant.
• Indicate a short idle time setting before the screen turns o
automatically.
• Avoid keeping the device’s charger plugged in when not in use.
Repair information
Do not try to make any modications or other experiments to
your device because you may void the warranty. Take your de-
vice to an authorized Service Center.
18 EN
Disposal
Mobile device & electrical accessories
Correct Disposal of this product and
its accessories (such as battery,
charger, earphone). This marking in-
dicates that this product should not be
disposed with other household wastes
throughout the EU. To prevent possi-
ble harm to the environment or hu-
man health from uncontrolled waste
disposal, recycle it responsibly to
promote the sustainable reuse of ma-
terial resources. To return your used
device or battery, please use the return and collection systems or
contact the retailer where the product was purchased. They can
take this product for environmental safe recycling.
Warning: Never dispose of batteries, either separately or within
a mobile device, in a re because they may explode

19 EN
DECLARATIONS
Limitation of liability
UNDER NO CIRCUMSTANCES IS THE MANUFACTURER LIA-
BLE FOR ANY OF THE FOLLOWING: (1) THIRD-PARTY CLAIMS
AGAINST YOU FOR DAMAGES; (2) LOSS OF, OR DAMAGE TO,
YOUR RECORDS OR DATA; (3) SPECIAL, INCIDENTAL, OR IN-
DIRECT DAMAGES OR FOR ANY ECONOMIC CONSEQUENTIAL
DAMAGES (INCLUDING LOST PROFITS OR SAVINGS), EVEN IF
MANUFACTURER, ITS SUPPLIERS OR YOUR RESELLER IS IN-
FORMED OF THEIR POSSIBILITY; (4) ANY PERFORMANCE IS-
SUES OR INCOMPATIBILITIES; (5) ACCURACY, TIMELINESS,
VALIDITY, COMPLETENESS OR LEGALITY OF ANY CONTENT OR
SERVICE MADE AVAILABLE THROUGH THIS DEVICE.
Warranty
You can download the warranty terms at the following address
http://www.uo.me/warranty/.
Declaration of Conformity
With this, the MANUFACTURER declares that this product com-
plies with the essential requirements and other relevant provi-
sions of Directive 1999/5/EC.
The declaration of conformity is kept in the oces of the Compa-
ny at the following address:
Manufacturer M&T S.A.
Address 15th km National Road Thessaloniki -
Moudania
City, Country Thessaloniki, Greece
Tel +302310477200
Website www.uo.me
There are no usage restrictions for this device in the countries
for which it is intended.
This equipment complies with the European R & TTE Directive.
You can consult the Declaration of Conformity in http://www.
uo.me/doc/.
TR CY
GR IT

20 TR
Açıklanan tuşlar
Tuş İşlev
1) Ses tuşları Sesi artırıp azaltmak için hafçe dokunun veya
basılı tutunuz.
2) Açma Kapa-
ma Tuşu
• Ses ayarlarını değiştirmek, Uçuş Modunu
açmak-kapatmak ya da cihazı açık kapatmak
için bu tuşa hafçe dokunun.
• Cihazınızı Uyku Moduna sokmak için bu tuşa
hafçe dokunun.
• Cihazınızı uyku modundan çıkarmak için
tekrar hafçe dokunun.
3) Kulaklık
girişi
Kulaklıklar / kulaklık portu.
4) Reset 6 saniye cihazı sıfırlamak için basın ve basılı
tutun.
5) Micro USB /
Güç girişi
• Şarj etmek için şarj cihazı ile USB kablosunu
bağlayın.
• Şarj PC ve veri aktarımı ile bağlayın.
21 TR
Arka kapağı açmak
(Uyarı: Parmaklarınızı acıtmamak için dikkatli olunuz!)
SIM/Hafıza kartı ve bataryayı takmak
Batarya, SIM ya da hafıza kartını takmak ya da değiştirmek için
cihazınızı kapatınız.
1. Arka kapağı çıkarınız.
2. SIM kartın şekilde görülen kesik ucundan tutun ve kart giriş
haznesine kaydırın. Eğer cihazınızın ikinci bir SIM kart giriş kısmı
mevcut ise ikinci SIM kartınız için de aynı işlemi tekrarlayınız.
3. Metal kısmı alta gelecek şekilde hafıza kartını kart uygun po-
zisyonu alacak şekilde kart giriş bölmesine yerleştiriniz.
4. Bataryayı batarya bölümündeki altın rengi kısımlar birbiriyle
eşleşecek şekilde yerleştirin. Batarya uygun kısma yerleşene ka-
dar bataryayı yavaşça itiniz.
5. Cihazın arka kısmındaki tüm bölümlerin uygun bir şekilde yer-
leşip tık sesini çıkarana kadar arka kapağı dikkatli bir şekilde geri
takınız.

SIM kart & Hafıza kartı yerleştirmek:
Cihazınızı ilk kez kurmak
Cihazınızı ilk kez açtığınızda veya fabrika ayarlarına geri
döndürdüğünüzde, Kurulum Sihirbazı sistem dili, internete
erişim, temel hesaplar, tarih&saat gibi bazı temel sistem gerek-
sinimlerinin kurulumu konusunda size rehberlik edecektir.
Cihazınızı tanımak
22 TR
Dokunma kontrolü
Cihazınızı kontrol etmek için parmaklarınızı kullanınız. Dokunma-
tik ekranınızın kontrolü, gerçekleştirmekte olduğunuzun işlemlere
göre dinamik olarak değişiklik gösterecektir.
1. Bir öğre seçmek ve uygulama açmak için butonlara hafçe
dokunun ve yukarı doğru kaydırın.
2. Ekranı yukarı, aşağı, sola ve sağa kaydırmak için ekrana hafçe
dokunun.
3. Çeşitli öğeleri ekrana taşımak için söz konusu öğeyi seçin,
sürükleyin ve bırakın.
4. Bir resme zoom yapmak/zoomu iptal etmek için ekrana iki kez
This manual suits for next models
1
Table of contents
Languages: