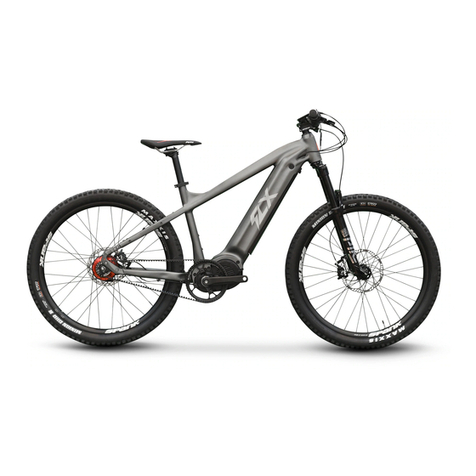
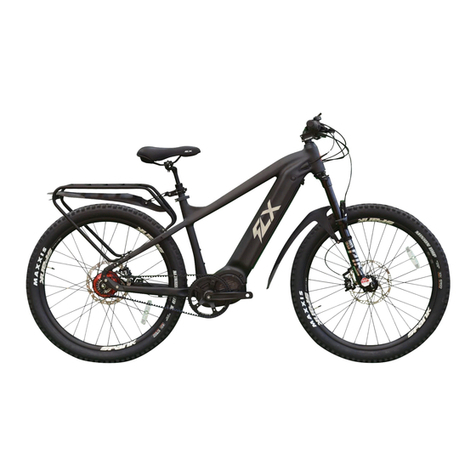
FLX F2 User manual

1 1
FLX.BIKE 1
ROADSTER / TRAIL / ATTACK
www.flx.bike
flx.bike/support
flx user
MANuAl

1
FLX.BIKE
2
DeAr CustoMer
QuiCk stArt GuiDe
CoMpoNeNts
proper use & sAfety iNfo
AsseMbly iNstruCtioNs
teChNiCAl speCs
lCD sCreeN
bAttery CAre
CleANiNG & CAre
useful tips
leGAl reQuireMeNts
leGAl DisClAiMer
leGAl DetAils
terMs & CoNDitioNs
CoNtACt us
1
2
4
7
9
16
19
24
26
27
29
30
31
32
35
tAble of CoNteNts

1 1
FLX.BIKE 1
DeAr CustoMer
In this manual, we’re going to break down the basics to make sure that
your bike remains in top shape and performs to the highest standard.
You’re about to experience the ride of your life. In order to get you out and
having fun as quickly and as safely as possible, please read the chapters:
QuiCk-stArt GuiDe, useful tips, sAfety iNforMAtioN.
We also highly recommend familiarizing yourself with local ebike laws
and the components of your model prior to your rst ride.
Having trouble sleeping? Check out the chapter leGAl reQuireMeNts
and DisClAiMer & DetAils. We promise it will put you right out.
Ready to get started? Let’s ride!
-Team FLX
Welcome to the FLX family! We’re so happy you’re here. We want to congratulate
you on buying an FLX bike - you’ve picked a top-of-the-line model!

1
FLX.BIKE
2
QuiCk stArt GuiDe
1COMPLETELY CHARGE THE BATTERY BEFORE THE FIRST USE
• Insert the charging plug into the charging port on the battery. The light on
the battery will turn red while the battery is charging. This indicator light will
turn green when the battery is fully charged. A full charge will take 5-8 hours
depending on battery type.
2ASSEMBLE THE HANDLE BARS
3ATTACH THE PEDALS
• Note: The left pedal has a reverse thread. To tighten, please turn
counter-clockwise.
4MOUNT THE FRONT WHEEL
x.bike/manual

1 1
FLX.BIKE 3
FLX assumes that all persons involved in
using, repairing, maintaining, cleaning,
or disposing of any FLX product must
have fully read and understood the
content and meaning of these operating
instructions. FLX takes no responsibility
for any injury or damage resulting from
improper use of any FLX product.

1
FLX.BIKE
4
CoMpoNeNts pArt 1
Derailleur/Cassette
Rear Wheel Kickstand
Seat Post
Saddle
PedalCranks
Stem Handlebars
Headset
Front Wheel

1 1
FLX.BIKE 5
CoMpoNeNts pArt 2
Head Tube
Top Tube
Down Tube
Battery
Forks
F. Brake Rotor
F. Drop Out Crankshaft
Motor
Seat Tube
Seat Stay
Chain Stay
R. Brake Rotor
R. Drop Out

1
FLX.BIKE
6
CoMpoNeNts pArt 3
Quick Release
Valve
Rim
Tire
Spoke
Hub
Brake Levers
Shift Levers
Control Pad Throttle
LCD Screen

1 1
FLX.BIKE 7
proper use & sAfety iNfo
Before taking the bike for a ride, ensure that all components are attached properly.
Neglecting to do so may cause issues in the future. Make sure you know about the
local laws regarding electric bicycles in the areas you’re riding in and abide by the
regulations. At FLX, your safety, comfort, and happiness are of great importance to
us and we can’t stress enough how important the use of proper safety equipment is.
Although it may not be required by law, we highly recommend the use of pads and
a helmet. Make sure to wear appropriately bright clothing during the day and use
head and tail lights at night to increase visibility. Please use proper cycling hand
signals and always be cautious when riding - whether you’re in a bike lane or not.
While FLX bikes are built for heavy use, proper care and maintenance should
be performed to maintain optimal performance. For cleaning information see:
CLEANING AND CARE. Most adjustments to your FLX can be performed with
basic tools. Larger issues should be handled by a qualied bike mechanic.

1
FLX.BIKE
8
proper use & sAfety iNfo
x.bike/faq
Important Note: Please make sure to tighten the crank bolts (bolts which attach the
pedal cranks to the motor shaft) after riding the rst 50 miles, and every 100 miles
thereafter. They should be tightened to 40-50NM, failure to maintain this tightening
torque may result in the crank arm falling o during a ride, which could cause a
serious accident.
40 - 50 NM

1 1
FLX.BIKE 9
STEPS
Important notice: Please follow the instructions for assembly in the following pages
carefully and properly. If you are unable or feel insecure about assembling the bike,
please take it to a bike shop for assistance.
1. Wheel assembly
2. Pedals assembly
3. Handlebar assembly
4. Seatpost instructions
5. Before your rst ride
1. 4mm Allen Key (For Handlebars and Optional Rack)
2. 5mm Allen Key (For Stem and Optional Fenders)
3.6mm Allen Key (For Trail/Attack Pedals)
4.8mm Allen Key (For Tightening Crank Bolts)
5.8mm/10mm Wrench (For Optional Roadster Fenders)
6. 15mm Wrench (For Roadster Pedals)
INCLUDED TOOLS
FOR ASSEMBLY:
AsseMbly iNstruCtioNs

1
FLX.BIKE
10
STEP 1 wheels AsseMbly
Locate the wheels in the front
fork and rear dropouts (page 5)
and make sure they are sitting
at on the hub. Use your hand
to turn the quick release lever
clockwise to tighten and assem-
ble your wheels.

1 1
FLX.BIKE 11
STEP 2 left peDAl AsseMbly
To attach the left pedal, please turn counter-clockwise.
Tool used:
15mm Wrench (Roadster) 6mm Allen Key (Trail and Attack)
Insert the pedals carefully into the cranks and turn by hand in the
direction shown. Tighten with the appropriate tool provided.

1
FLX.BIKE
12
STEP 2 riGht peDAl AsseMbly
To attach the right pedal please turn clockwise.
Tool used:
15mm Wrench (Roadster) 6mm Allen Key (Trail and Attack)
Insert the pedals carefully into the cranks and turn by hand in the
direction shown. Tighten with the appropriate tool provided.

1 1
FLX.BIKE 13
Press the handlebar against the stem. Insert and
screw the bolts into the stem plate to assemble the
handlebar, tighten the screws clockwise.
STEP 3 hANDlebAr AsseMbly
Tool used: Allen key 4mm
Insert the tool in the bolt
located as shown in the picture.
LCD

1
FLX.BIKE
14
Minimum seatpost insertion depth is 5”
(12.7cm). Use the seatpost quick release
to tighten the seatpost.
Failure to insert the seat post to the
proper depth could overstress the seat
tube, which could cause the frame to
break and lead to a serious accident. If
the seat post is not tall enough for you,
please purchase an extra long seat post
that can acommodate your height.
STEP 4 seAtpost iNstruCtioNs
Insert the seatpost into the
seat tube and make sure
your seat is in at least to the
minimum insertion depth
which is marked by the
vertical lines.
5” (12.7cm)

1 1
FLX.BIKE 15
Charging port is on the backside of the battery. Lift the rubber
seal and you will see the USB outlet and battery charging port.
STEP 5 before your first riDe
Make sure you charge the battery fully before your rst ride.
!

1
FLX.BIKE
16
teChNiCAl speCs
frAMe
• 19” 6 series aluminum alloy
• Integrated battery housing
• Internal cable routing
• Accessory mounts
bAttery
• 36V 13AH (468WH) / 17AH (612WH)
Lithium ion Panasonic cells
• LED charge indicator
• Lockable
• USB Port
brAkes
• Tektro hydraulic disc
brakes with motor cuto
• 180mm rotors
Motor
• 350W Bafang mid motor
(250w optional)
• Peak power 750W
DisplAy
• Backlit LCD with thumb controls
reAr DerAilleur
• Shimano Alvio 9 speed
tires
• Kenda Koast 27.5 x 1.5 wire bead
Assist
• 9 level pedal assist
• Thumb throttle
CAssette
• Shimano 9 speed 11-34t
wheels
• Samson 27.5” alloy
fork
• Custom aluminum alloy fender eyelets
ChAiN
• KMC 9 speed
ChAiNriNG
• 44t
troADster

1 1
FLX.BIKE 17
teChNiCAl speCs
ttrAil
frAMe
• 19” 6 series aluminum alloy
• Integrated battery housing
• Internal cable routing
• Accessory mounts
bAttery
• 36V 13AH (468WH) / 17AH (612WH)
Lithium ion Panasonic cells
• LED charge indicator
• Lockable
• USB Port
brAkes
• Tektro hydraulic disc
brakes with motor cuto
• 180mm rotors
Motor
• 350W Bafang mid motor
(250w optional)
• Peak power 750W
DisplAy
• Backlit LCD with thumb controls
reAr DerAilleur
• Shimano Alvio 9
speed
tires
• Kenda Nevegal 27.5 x 2.1 wire
bead
Assist
• 9 level pedal assist
• Thumb throttle
CAssette
• Shimano 9 speed 11-34t
wheels
• Samson 27.5” alloy
suspeNsioN
• SR Suntour XCR Oil
Suspension /w Lockout
ChAiN
• KMC 9 speed
ChAiNriNG
• 40t

1
FLX.BIKE
18
teChNiCAl speCs
tAttACk
frAMe
• 19” 6 series aluminum alloy
• Integrated battery housing
• Internal cable routing
• Accessory mounts
bAttery
• 17AH (612WH) Lithium ion
Panasonic cells
• LED charge indicator
• Lockable
• USB Port
brAkes
• Tektro hydraulic disc
brakes with motor cuto
• 180mm rotors
Motor
• 350W Bafang mid motor
(250w optional)
• Peak power 750W
DisplAy
• Backlit LCD with thumb
controls
reAr DerAilleur
• Shimano Alvio 9
speed
tires
• Kenda Nevegal 27.5 x 2.1
wire bead
Assist
• 9 level pedal assist
• Thumb throttle
CAssette
• Shimano 9 speed 11-34t
wheels
• Samson 27.5” alloy suspeNsioN
• Front: SR Suntour Ep ixon Air
Suspension /w Lockout
• Rear: SR Suntour Air Shock /w
Lockout
ChAiN
• KMC 9 speed
ChAiNriNG
• 36t
Table of contents
Other FLX Bicycle manuals
