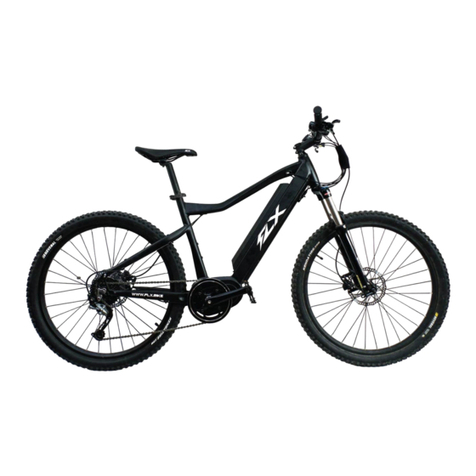
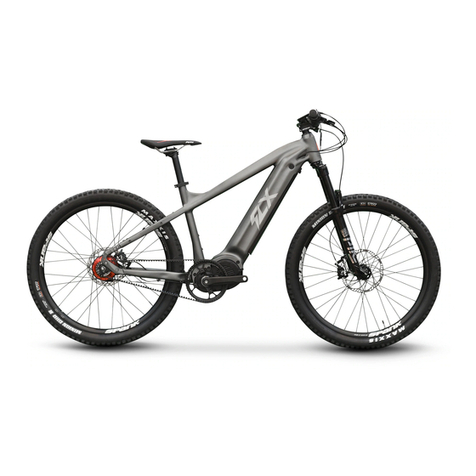
FLX TRAIL F4 User manual

TRAIL F4
USER MANUAL

TRAIL F4 | USER MANUAL | 2
DEAR CUSTOMER
The FLX Shanghai Team inspecting every bike
Welding of the chainstay mounting bosses
Inspecting the welding & quality of the frame
We want to congratulate you on buying the Trail F4 - you’ve picked
our best selling model, designed & developed at our Shanghai
ofce in China!
The Trail has been our best selling model for a couple of years,
and based on our customer feedback that’s because of a reason!
The concept for the Trail F4 is the same – hybrid tires good for
on-road and off-road, lockable front suspension and a powerful
mid-motor. But his time we reconsidered the design, style and
geometry of the model.
The concept became real with the rst aluminium welded
prototype, enabling us to discover technical defects in new Trail
F4 components, for example the battery lock. With the second
prototype we took the bike for a ride to test the geometry, weight,
and other technical parameters.
The nal part of the development is always the most fun, seeing
the bikes actually built. We always make sure to be there and
inspect every bike when the frames are welded, the paint is
sprayed and the bikes are assembled.
After a lot of hard work we nally present:
The Trail F4- The world’s best Trail e-bike.
Trail F4 Bikes are being assembled

TRAIL F4 | USER MANUAL | 3
In this manual, we’re going to break down the basics to make sure
that your bike remains in top shape and performs to the highest
standard.
We highly recommend familiarizing yourself with local ebike laws
and the COMPONENTS, TECHNICAL SPECS, and GEOMETRY of
your model prior to your rst ride.
You’re about to experience the ride of your life. In order to get
you out and having fun as quickly and as safely as possible,
please read the chapters: ASSEMBLY INSTRUCTIONS and
USEFUL TIPS.
To make sure that your bike remains in top shape and performs
to the highest standard please refer to the MAINTENANCE
INSTRUCTIONS chapter, which also includes references to
important component’s manuals.
Having trouble sleeping? Check out the chapter LEGAL
DISCLAIMER.We promise it will put you right out.
Ready to get started? Let’s ride!
-Team FLX
CONTENTS
DEAR CUSTOMER
CONTENTS
COMPONENTS
TECHNICAL SPECS
GEOMETRY
ASSEMBLY INSTRUCTIONS
TOURING PACKAGE INSTRUCTIONS
USEFUL TIPS
MAINTENANCE INSTRUCTIONS
FLX TRAIL F4 FRAME
XCR SUSPENSION FORK
BAFANG LCD SCREEN
TEKTRO AURIGA BRAKES
BAFANG MAX MOTOR
SYR BATTERY
SHIMANO DRIVETRAIN
MAXXIS TIRES
LEGAL DISCLAIMER
APPENDIX B - 2D DRAWING
CONTACT US!
2
3
4
5
6
7
8
9
10
19
20
21
11
12
13
14
15
16
17
18

TRAIL F4 | USER MANUAL | 4
SPEED SENSOR
COMPONENTS
HEADSET
HEAD TUBE
TOP TUBE
DOWN TUBE
FRONT FORK
PAGE 12
SEAT TUBE
SEAT STAY
DROPOUT
DROPOUT HANGER
CHAIN STAY MOTOR BRACKET
THRU-AXLE
DISPLAY
PAGE 13
STEM
HANDLEBARS
FRONT BRAKE LEVER
BRAKE ROTOR
BRAKE CALIPER
PAGE 14
THUMB THROTTLE
CHASSIS
DRIVETRAIN
BATTERY
PAGE 16
MOTOR
PAGE 15
DERAILLEUR
PAGE 17
REAR CASSETE
CHAINRING
SPIDER
CRANK BOLT
CHAIN
CRANK
WHEELS
TIRE PAGE 18
VALVE
FRONT HUB
RIM
SPOKES
WHEELS
Familiarize yourself with the components of your model. This are
technical terminolagy used at the FLX engineering department. `
COCKPIT
SADDLE
SEAT POST
SEAT CLAMP
SPEED SHIFTER
REAR BRAKE LEVER
RACK
REAR FENDER FRONT FENDER
Reector
Kickstand

TRAIL F4 | USER MANUAL | 5
TECHNICAL SPECS
CHASSIS
FRAME
Designed by FLX with Internal Cable Routing
Manufactured by JiuLun, 6061 Aluminium
Alloy Tubes, Smooth Welds
REAR AXLE
M12x148 mm Spacing
Quick Release Thru Axle
New Dropout with Inner Brake Mount
HEADSET
Semi Interagrated, Tapered Design Headset
ZS44/28.6 (1-1/8”) Top Sealed Bearing
ZS56/39.8 (1-1/2”) Bottom Sealed Bearing
FORK
SRSUNTOUR XCR32 Spring Suspension
120 mm of Front Wheel Travel
M15x100mm Thru Axle Spacing
COCKPIT
SEAT
Zoom SP-C261 AL-Alloy, 300mm Seatpost
FLX Branded Velo, VL-1205 Active Saddle
Promax 319Q Ø38.1mm QR Seat Clamp
HANDLES
Zoom Al-Alloy, 780 mm width, Rise Handlebar
Zoom Aluminum, 60 mm Length 15° Stem
Velo Flat Rubber Grips with Lockers
REMOTES
FLX Branded Bafang DP C230 Display
Advanced Pedal Assist mode
Shimano Deore 10 Speed Trigger Shifter
BRAKES
Tektro HD-M745 Auriga Hydraulic Disc Brakes
Three-Finger Levers w/ Adjustable Reach
Quad Piston Calipers with 203 mm Rotors
The bike has high quality components throughout, this list is for
the bike nerds that want to know every technical detail.
DRIVETRAIN
MOTOR
Bafang M600 Max Mid-Mounted Motor
500W Nominal Power/850W Peak Power
120 Nm Torque
BATTERY
48V, 14AH Lithium Ion Cells, 4PIN discharge
(500/650WH) LED Capacity Indicator
Security Key Lock
CRANKSET
Prowheel Bafang Ebike Crankset
170 mm Crank, Bafang 40T Chainring
104 mm BCD Spider
CHAINLINE
Shimano Deore 10-Speed Derailleur
Shimano Deore 11-36T 10-Speed Cassette
KMC, X10e 10-Speed Silver Chain
WHEELS
HUBS
Vuelta M06F M12x148 mm Rear Hub
Vuelta M10R M15x100 mm Front Hub
Shimano Deore HG Standard Freewheel
RIMS
Powerwheel 27.5’” Double Walled Rims
HaiCheng 36 Spoke Holes. AL Eyelets
622 x 25.6 mm Rim Dimensions
SPOKES
Stainless Steel, 13GX266mm Spokes
36 Spokes/ Wheel
Black with Brass External Nipples
TIRES
Maxxis Forekaster, 27.5” x 2.35” Tires
Maxxis 27.5” x 2.35” AV48mm Tube
50-85 PSI, 3.5-5.9 BAR, Schrader Valve

TRAIL F4 | USER MANUAL | 6
GEOMETRY
Seat Tube Length
Seat Tube Angle
Head Tube Length
Head Tube Angle
Stack
Effective Top Tube
Reach
Standover Height
Wheelbase
Chainstay Length
Bottom Bracket Drop
Bottom Bracket Height
OTHER DIMENSIONS
Fork Height
Fork Rake
Seat Post Insert
Seat post diameter
Headset spacer
Stem length
Stem angle
Handlebar Diameter
Handlebar Width
Cranklength
Wheel size
Wheel radius
A.
B.
C.
D.
E.
F.
G.
H.
I.
J.
K.
L.
19 Inches (480 mm)
73.5°
5.1 Inches (130 mm)
69°
26 Inches (667 mm)
23.8 Inches (604mm)
16 1/3 Inches (415 mm)
29 1/2 Inches (750 mm)
44 1/4 Inches (1141 mm)
17 1/3 Inches (455 mm)
2 Inches (47 mm)
12 Inches (305 mm)
516 mm
42 mm
min 100 mm - max 200 mm
31.6 mm
2*10 mm
60 mm
15°
31.8 mm
780 mm
170 mm
27.5*2.35”
357 mm
TRAIL F4 - SIZE L

TRAIL F4 | USER MANUAL | 7
Please follow the instructions for assembly in the following
pages carefully and properly. If you dont feel 100%
condent assembling the bike, please take it to a bike shop
for assistance.
01. CHARGE THE BATTERY BEFORE FIRST USE
Insert the charging plug into the charging port on the
battery. The light on the battery will turn red while the
battery is charging. This indicator light will turn green
when the battery is fully charged. A full charge will take
5-8 hours depending on battery type.
ASSEMBLY INSTRUCTIONS
Charge on Bike Charge the Battery
Position the Wheel Insert the Thru Axle
Position the Handlebar Tighten the Screws
1. 2.
INCLUDED TOOLS FOR ASSEMBLY: M2.5 Hex Key M4 Hex Key T25 Torx Key 15mm Flat Wrench
Tighten the Right Pedal
Insert the Seatpost Tighten the QR
02. MOUNT THE FRONT WHEEL
Insert the wheels in the front fork and make sure the front
rotor is positioned properly between the front brake pads.
Insert the Thru Axles through the routing and tighten it
using the quick release.
03. INSTALL THE HANDLEBARS
Press the handlebar against the stem. Insert and screw
the bolts into the stem plate to assemble the handlebar,
tighten the screws clockwise with the M4 Hex key
04. ATTACH THE PEDALS
Use the 15mm at wrench to attach the pedal by hand in
the directions shown. The left pedal has a reverse thread.
To tighten, please turn counter-clockwise.
05. INSERT THE SEATPOST
Insert the seatpost into the seat tube and make sure your
seat is in at least to the minimum insertion depth which
is marked by the vertical lines. Use the seatclamp’s quick
release to tighten the seatpost.
WARNING: INSERT YOUR SEATPOST PROPERLY
Failure to insert the seat post to the proper depth could
overstress the seat tube, which could cause the frame to
break and lead to a serious accident. If the seat post is
not tall enough for you, please purchase an extra long seat
post that can acommodate your height.
1. 2.
1. 2.
1. 2.
1. 2.
Tighten the Left Pedal

TRAIL F4 | USER MANUAL | 8
TOURING PACKAGE INSTRUCTIONS
The touring package is optional and is not included with
every bike. Please follow the instructions for assembly of
step 5to 9carefully and properly.
05B. INSERT SUSPENSION SEATPOST &COMFORT
SEAT
Same as step 5, but with the seatpost and saddle have
been upgraded to a suspension and comfortable variation.
Warning: Make sure you the suspension seatpost is in at
least to the minimum insertion depth.
06. CHECK THE FUNCTIONALITY OF THE LIGHTS
The headlight, taillight and backlight on the LCD screen
can be activated by pressing the “+” and ‘‘-’’ buttons for 3
seconds, and can be turned off the same.
07. INSTALL THE CARGO RACK
The cargo rack is attached by four bolts, make sure to
tighten them. The rack can bear a weight of max 25 Kg,
enough for your bags, but not for carrying your friend!
08. ATTACH THE FRONT AND REAR FENDERS
Riding can’t stop just because it is raining a little, therefore
these fenders keep you dry when the weather is wet.
Easily installed using the tools provided.
09. INSTALL THE SMARTPHONE MOUNT
The universal mount is easy to install, without any bolts or
tools. Simply wrap the elastic belt around the handlebar
and attach it to the hook.
Warning: We don’t recommend to use your phone while
riding. Use the smartphone responsibly: when you want to
snap a picture of a stunning sunset, need to call for help,
have a at or check an online map.
RACK
REAR FENDER
FRONT FENDER
HEAD LIGHT
TAIL LIGHT
SMARTPHONE MOUNT

TRAIL F4 | USER MANUAL | 9
CLEANING & CARE
The biggest enemy of any bike is rust, so make sure to dry
it off after a wet ride and store it in a dry place.
In general, wiping down your bike after a rough ride with a
damp rag should be enough to keep it looking great, just
make sure to be careful around the electronics.
Cleaning the battery should only be done while the battery
is disconnected and turned off. DO NOT spray the battery
with high-pressured water to prevent damage or possible
short-circuiting.
Warning: BATTERY CARE
It is recommended to remove the battery from the bike
when storing it for a longer period of time ( > 2 weeks).
Store the battery in a cool and dry area away from water
or direct sunlight. The charge left in the battery should
be 50% for long storage times. Lithium-ion batteries
are meant to be recharged with 10%-15% of the charge
remaining to prolong the life of the cells. Only charge the
battery with the supplied charger as others may cause
damage to the battery and increase the possibility of re
or explosion. We recommend placing the battery on a non-
ammable surface and charging it during the day in a dry
space with a smoke/re alarm.
Warning: Based on IATA regulations you are not allowed to
ship Lithium-ion batteries this size by air. Please consult a
land or sea freight agent for transportation of the battery.
REGULAR INSPECTION
USEFUL TIPS
Inspect the bolts on a regular basis, to ensure that they
are tight and all components are secure. This is especially
important if you are riding in demanding conditions. As
with all bikes pay particular attention to the crank bolts, as
they pose the highest risk of loosening.
Regularly check the brake pads, the provided brake
pads should be replaced if they have less than .8mm
of material, been contaminated, or show Cracks/
deformation
MAINTENANCE
Warning: Whenever you service your bike, make sure to
remove the battery rst.
Warning: To replace the brake pads or perform other
maintenance take it to a qualied professional at your
local bike shop.
Warning: Properly inate your tires according to riding
conditions. Under-inated tires are prone to pinch ats,
especially if riding off-road or over sharp edges. If you are
unsure of the proper pressure, read the tire.
Your safety, comfort, and happiness are of great
importance to us and we can’t stress enough how
important the use of proper safety equipment is.
BEFORE RIDING
Before taking the bike for a ride, ensure that all
components are attached properly. Neglecting to do so
may cause issues in the future. Make sure you know
about the local laws regarding electric bicycles in the
areas you’re riding in and abide by the regulations.
RIDING TIPS
Although it may not be required by law, we highly
recommend the use of pads and a helmet. Make sure to
wear appropriately bright clothing during the day and use
head and tail lights at night to increase visibility. Please
use proper cycling hand signals and always be cautious
when riding - whether you’re in a bike lane or not.
The bike has a powerful mid-motor which places more
stress on the gears than a regular bike. Reducing the force
placed on the pedals whilst shifting will prolong the life of
the drivetrain.
Warning: EVERY 100 MILES!
Please make sure to tighten the crank bolts (bolts which
attach the pedal cranks to the motor shaft) after riding
the rst 50 miles, and every 100 miles thereafter.They
should be tightened to 40-50NM, failure to maintain this
tightening torque may result in the crank arm falling off
during a ride, which could cause a serious accident.

TRAIL F4 | USER MANUAL | 10
MAINTENANCE INSTRUCTIONS
While FLX bikes are built for heavy use, proper care and
maintenance should be performed to maintain optimal
performance. Most adjustments can be performed with basic
tools. Larger issues should be handled by a qualied bike
mechanic.
This bike would not have been possible without the technical
support from these amazing brands. For more detailed
information of these parts, please use their original user manual.

TRAIL F4 | USER MANUAL | 11
FLX HELP CENTER
The frame is custom designed by the engineering team at the
FLX Shanghai ofce. It still has the iconic FLX top-tube, but with
a new downtube and motor bracket. The dropouts are also new,
with the disc brake caliper mounted inbetween the chainstay
and seatstay. The rear axle still uses a 12mm Quick Release
with 148mm Boost spacing. The frame is occupied with plenty
of Rear Rack Bosses, Fender Bosses, and Bottle Cage Bosses to
mount any accessory.
For detailed drawings of the frame and dropout parts,
check out APPENDIX A - 2D DRAWING
FLX TRAIL F4
FRAME
Three Dimensional Model Render - Trail F4 Frame
DROPOUT
LEFT DROPOUT
RIGHT DROPOUT
DROPOUT HANGER
QR THRU AXLE
DISC BRAKE
CALIPER MOUNT

TRAIL F4 | USER MANUAL | 12
SRSUNTOUR XCR MANUAL
SRSUNTOUR XCR32
SUSPENSION FORK
The XCR 32 LO R AIR is SR SUNTOUR’s rst offering of an air
sprung fork in the XC category of suspension forks. It features
externally adjustable rebound, and air spring for more precise
set up and a hydraulic lockout that can be used on the y. The
chassis is robust enough to handle XC singletrack and it utilizes
their proven sealed cartridge design that requires minimal
service work.
Find the XCR user manual in the link below for the latest technical
and maintenance information.
REBOUND ADJUSTMENT LEVER
PISTON
CROWN
AIR ADJUSTMENT LEVER

TRAIL F4 | USER MANUAL | 13
LCD SCREEN MANUAL
POWER BUTTON
+ BUTTON
- BUTTON
POWER ASSIST LEVEL
BATTERY INDICATOR
The LCD screen has many functions.The speed is shown in the
middle, the battery level at the top, and the trip distance/ power
assist level at the bottom.
To turn on the LCD, press and hold the “Power Button” for 3
seconds. The level of pedal assist can be adjusted by pressing
the “+” or “-” buttons. The lights can be activated by pressing
and holding the “+” and “-” buttons for 3 seconds simultaniously.
Walk-assist mode can be activated by pressing and holding the
“-” button for 3 seconds.
The LCD has been preprogrammed to comply with your local
speed regulations. For information on how to change this, please
contact us!
BAFANG LCD SCREEN
DISPLAY
LINK WILL BE ADDED IN THE FUTURE!

TRAIL F4 | USER MANUAL | 14
TEKTRO AURIGA MANUAL
TEKTRO AURIGA
The Trail F4 comes with a powerfull 4-piston, low maintenance
hydraulic Tektro HD-M745 Auriga disc brake. The rotor with 203
mm is the largest on the market, for maximum stopping power.
We recommended to bleed the system after a lot of riding when
the brake action starts to feel spongy. If you are not condent
to bleed the brakes yourself, go to a bike mechanic in your
neighbourhood that is qualied to bleed hydraulic brakes.
Please refer to the Tektro Owner’s Manual for details of required
tools, maintenance and setup options.
DISC BRAKES
BRAKE LEVER
MOUNTING ADAPTER
BRAKE ROTOR
BRAKE CABLE
BRAKE CALIPER

TRAIL F4 | USER MANUAL | 15
M600 MAX MOTOR
MOTOR
MOTOR COVER
BAFANG M600 MAX
This 500W, 48V motor from Bafang with a maximum torque of
more than 120 N.m is especially suitable for hill climbing. It uses
torque measurement, pedal-assist speed measurement and
wheel-speed measurement to calculate the amount of assist
needed. For checking cable connections or regular maintenance
there is no need to disassemble the motor. Simply remove the
motor covers and you will be able to see all cables.
If there appears to be an issue with the motor, stop use
immediately and contact us. We will help you solve the problem or
will contact the manufacturer to get you back on road.
MOTOR

TRAIL F4 | USER MANUAL | 16
SYR ‘MUSTANG’
BATTERY
This 650Wh battery from SYR has a voltage of 48V. The battery
can be de-attached via the 2-step lock. 1st turn the key to open
the key lock, 2nd turn the security lock lever, and you will be able
to take off the battery.
If there appears to be an issue with the charger or battery, stop
use immediately and contact us. We will help you solve the
problem quickly or will contact the manufacturer to get you back
on road as soon as possible.
KEY LOCK
BATTERY HOUSING
CABLE ENTRANCE
SECURITY LOCK
MUSTANG MANUAL
DOWNTUBE
LINK WILL BE ADDED IN THE FUTURE!

TRAIL F4 | USER MANUAL | 17
SHIMANO DEORE MANUAL
SHIMANO DEORE
DRIVETRAIN
The updated SHIMANO DEORE M6000 drive system is designed
for aggressive trail riding. The derailleur uses SHIMANO
SHADOW RD PLUS technology for improved chain stability
and retention. The casette has a steel spider and rened tooth
prole for the chain. It delivers precise and consistent shifting
performance across a wide range of MTB conditions. The
Narrow KMC Chain comes with a mud-shedding design.
Shimano has a great customer support, check out their derailleur
user manual for more details.
CASSETTE
CHAINRING
CHAIN
DERAILLEUR

TRAIL F4 | USER MANUAL | 18
MAXXIS FORECASTER
MAXXIS FOREKASTER
TIRES
The tires on your Trail F4 are 27.5’’ and are 2.35’’ wide. With the
Forekaster on your bike, you can forget about the weather and
hit the trails. Mid-height tread blocks are spaced evenly to allow
penetration through loose trail conditions and openly for better
mud-clearing compared to other race tires. When the leaves
start falling and the weather becomes more unpredictable, the
Forekaster is the tire of choice.
Click below to view the specications of the Maxxis Tire or
contact the Maxxis ofce for specic questions.
THREAD BLOCKS
TIRE
SPOKE NIPPLE
RIM
REFLECTOR

TRAIL F4 | USER MANUAL | 19
LEGAL DISCLAIMER
Our extensive quality control means that our products are
thoroughly tested and ultra-reliable by industry standards.
However, that doen’t mean the bikes cannot be broken or will last
forever.
WARRANTY
All new FLX products are warranted against manufacturing
defects in materials and/or workmanship for a period of (1) year
from the date of delivery.
There are a few conditions: The original receipt of purchase
is required, and you are required to complete the standard
procedure for warranty claims that will involve media such as
photos and videos to help our after sales staff establish the fault
with the product.
This warranty does not cover normal wear and tear, improper
maintenance, or damage from abuse, neglect, misuse, or an
accident.
DISCLAIMER
FLX Bike holds no liability whatsoever for any damage -
regardless of what type - or injury to any party involved in
improper use, maintenance, handling, or storage of any FLX
electric bicycle, or any of their components.
Technical details in the text and illustrations of the translation of
these operating instructions are subject to change. For the most
up to date version of this FLX User Manual visit x.bike/manual
or email hello@x.bike.

480
688
440
637
415
42
1124
69°
73.5°
704
584
305
47
45°
220 64
25
37
604
518
10
A
A
C
C
D
D
5
1
2
3
4
9
6
1212
50
44
56
64
99
130
16 16
8
36
8
10
148
148
90
205
164
369
377
7
8
1
12
4X
165
46
84
28 15
10
38
106
164
131
371
7
8
11
14
16
13
12
ITEM NO.
PART NUMBER
DESCRIPTION
QTY.
12
111-1_WELDEDNUT_M3.stp
9
13
111-2_CABLEGUIDES.stp
1
16
111-4_KICKSTAND_BRACKET.stp
1
14
111-3_CABLE_ENTRANCE.stp
4
1
110-1_MOTOR_BRACKET_NEW.stp
1
2
110-2_SEATTUBE.stp
1
3
110-3_TOPTUBE.stp
1
4
110-4_HEADTUBE.stp
1
5
110-5_SYRDOWNTUBE.stp
1
6
110-6_CHAINSTAYS.stp
1
7
110-7_DROPOUT_RIGHT.stp
1
8
110-8_DROPOUT_LEFT.stp
1
9
110-9_SEATSTAYS.stp
1
10
110-10_SEATSTAY_BRIDGE.stp
1
11
110-11_CHAINSTAY_BRIDGE.stp
1
100
110-0_FRAME_ASM.stp
1
110-0 Frame Assembly
Trail F5
Drawn By: T. Grootjans |24-07-2019
Checked By:
A0
Scale 1:1 Sheet 1 of 1
Page Size
Weight:
Model Year 2019
Revision
A
Item No. Title Supplier Supplier Item NO. Quantity
1 Motor Bracket BAFANG FP G520B 1
2 SeatTube MingDa AL-TECH RB-K414 1
3 Toptiube MingDa AL-TECH MT-401 1
4 Headtube 1
5 Downtube SYR SYR-002 1
6 Chainstay MingDa AL-TECH RB-C310 2
7 Right Dropout MingDa AL-TECH F-DZ044 1
8 Left Dropout MingDa AL-TECH F-DZ044 1
9 Seatstay MingDa AL-TECH RB-Y221 2
10 Seatstay Bridge 1
11 Chainstay Bridge 1
12 Mounting Bosses JULN/JUCHI 7
13 Cable Guide JULN/JUCHI 1
14 Cable Entrance JULN/JUCHI 4
15 Fender Mounting Bosses JULN/JUCHI 4
16 Kickstand Bracket 1
APPENDIX A - 2D DRAWING
TRAIL F4
Table of contents
Other FLX Bicycle manuals


