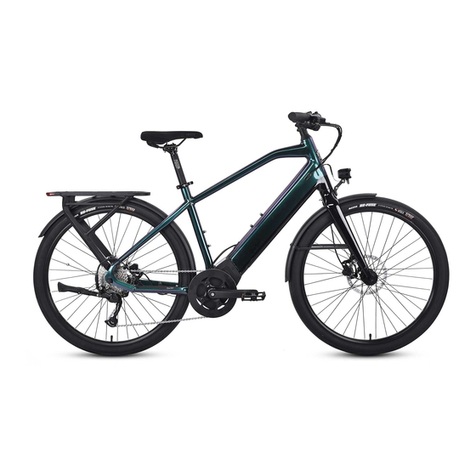
FLX BABYMAKER II User manual

THE
BABYMAKER II
OWNERS MANUAL

Congratulations on the purchase of your new Babymaker II,
and welcome to the team!
This manual is designed to break down the basics and help you make sure
that your eBike remains in top shape. It’s important to have a good understanding
of the basic operation and maintenance in order to keep your bike performing at a
high standard.
Riding a bicycle can be a dangerous activity and it’s your responsibility
to make sure you are riding safely. We recommend familiarizing yourself
with this entire manual as well as your local eBike laws prior to your first
ride.
The latest version of the Owner’s Manual is always available online at:
www.flx.bike/manual
Proper assembly and care are crucial to you having the ride of your life. If
you are unable to complete the assembly or need help with general maintenance,
please reach out to us. You didn’t just purchase a bike- you joined our team, and we
are here to support you whenever you may need it.
CONTENTS
1 Welcome/ Contact Us
2 General Warning
6 Geometry
8 Fit
10 What’s in the Box
12 Assembly Instructions
23 Touring Package Instructions
26 Maintenance Instructions
27 Rear Wheel
28 Brakes
30 Tires
32 Battery Care
35 Service
36 Warranty
38 More Tips
39 eBike Classifications
WELCOME!
Reach us by email:
support@flx.bike
Visit our Shop:
4170 Morena Blvd. Suite D
San Diego, CA 92117
Hours: 10am - 5pm Monday - Friday
Ready to get started? Let’s ride!
- Team FLX
1

GENERAL WARNING
The following manual is for reference only, and is in no way a complete or
comprehensive manual of all aspects of assembling, maintaining or repairing your
bicycle. All assembly and work should be performed by a qualified bicycle
mechanic. FLX Bike will not be held liable for any property damage, injury or
fatalities as a result of improper assembly, maintenance or use of this product. Rid-
ing an eBike, as with any motorized vehicle, involves the risk of property damage and
serious or fatal injury. By choosing to ride an eBike, you assume the responsibility
for that risk, so it’s important that you know and practice responsible riding. Proper
use, care and maintenance of your eBike are essential in reducing the risk of injury.
This manual will include bold warnings concerning potential consequences that can
occur as a result of your failure to properly maintain your eBike or follow safe riding
practices.
Bolded text combined with this alert symbol, will indicate an array of
warnings including but not limited to:
A potentially hazardous situation that could result in injury or death if not
avoided
A potentially hazardous situation that could result in minor/moderate
injury if not avoided
An alert regarding unsafe practices
A situation which could result in serious damage to the eBike or any
action that would void your warranty
It’s nearly impossible to anticipate every condition you may experience while
riding your eBike, therefore this manual does not represent the safe use of your
eBike in every possible scenario. There are risks associated with the use of any eBike
that can’t be predicted or avoided- risks are the sole responsibility of the rider.
2 3
Special Note for Parents:
As a parent/guardian, you are fully responsible for the safety of your minor.
This responsibility includes making sure that the eBike is sized appropriately for the
child, that it is operating correctly, and the conditions are safe. You must also ensure
that you and your child have both learned and understand how to safely operate the
eBike, how to obey local motor vehicle, bicycle and trac laws, as well as common
sense for safe responsible riding. As a parent, it is important that you read through
this manual and familiarize yourself with the warnings and proper operation of this
eBike and review them with your child before allowing them to ride.
Make sure your child wears an approved eBike helmet only when riding
their eBike.
Make sure your child’s eBike is properly sized (adjust the seat so that
both feet can touch the ground). If the eBike doesn’t fit, do not allow your
child to ride it. Riding an improperly fitted bike can result in injury or even
death.
3
Babymaker II • Owners Manual
www.flx.bike
Babymaker II • Owners Manual
www.flx.bike

4
GETTING STARTED
Babymaker II • Owners ManualBabymaker II • Owners Manual

GEOMETRY
6 7
The Babymaker is oered in two dierent frame sizes:
- 19” (49cm) small/medium
- 23” (58cm) medium/large
On the following page, you will find a geometry chart with the measurements
for the most important parts of your Babymaker frame. Measurements are given in
both Standard and Metric units for your convenience.
Please ensure that your eBike is properly sized for you before riding. If
your eBike is too small/too large, you may lose control and fall.
The most important part of fit is ensuring that the seat position can be
adjusted so that the seated riders’ feet can touch the ground. This is
especially important for minors/children.
If your eBike does not fit, please make the appropriate adjustments to
ensure a proper and safe fit before riding.
Babymaker II • Owners ManualBabymaker II • Owners Manual
www.flx.bikewww.flx.bike

FIT
8 9
Correct fit is an essential part of eBike safety, comfort and proper
performance. If you are not able to make the proper adjustments to ensure
proper fit yourself, please seek professional assistance.
Note: This will not apply to step-through models
A properly fitted road bike to be ridden on paved surfaces should have a
minimum stand-over clearance of 1 inch (2.5cm).
Stand-over Height
Diamond Frame eBikes:
Stand-over height is an important
basic element of proper bike fit. It refers
to the distance from the ground, to the
top of the bike frame where your crotch
is when you are straddling the bike.
To check for proper stand-over
height, straddle the bike and bounce on
your heels. If you touch the frame, the
bike is too big for you.
Tip: Be sure to wear the shoes that
you’d wear while riding Figure 1. Stand-over Height
Note: The seat post must be inserted to at least the minimum seat post depth
requirement. If you cannot adjust your seat properly and meet the minimum
seat post depth requirement, you will need to purchase a longer seat post.
If you cannot test this yourself, head to a local bike shop and have a
professional help you set the seat to an optimal riding position.
1. Sit on the seat and place one heel on
a pedal (doesn’t matter which side).
2. Rotate the crank until the pedal with
your heel on it is in the down position
and the crank is arm is parallel to the
seat tube.
3. Your leg should be complete-
ly straight. If it isn’t, your seat height
needs to be adjusted. If you must rock
your hips in order for your heel to touch
the pedal, your seat is too high. If your
leg is bent while your heel is resting on
the pedal, your eat is too low. Figure 2. Seat Adjustment Test
Seat Position
Proper seat adjustment is an important factor when it comes to getting the
best of both comfort and performance out of your eBike. Follow the steps listed
below to check for your correct seat height.
After any saddle adjustments, make sure that the seat adjusting mechanism
is properly tightened before riding. Failure to do so can cause damage to the
seat post and/or can cause you to lose control and fall. When properly
tightened, the seat should not be able to move in any direction. Periodically
check to ensure it is properly tightened.
www.flx.bikewww.flx.bike
Babymaker II • Owners ManualBabymaker II • Owners Manual

WHAT’S IN THE BOX
10
Overview
Knowing your Babymaker inside and out will help you get the most out of it.
We encourage you to familiarize yourself with the components of your bicycle, so
that you know where to start when it comes to assembly and maintenance.
Here’s what’s included in your box:
5. Pedals (x2)
1. Handlebars
4. Bike Frame w/Rear Wheel Attached
7. Charger
6. Seat
3. Tools: Allen Key (x3) & Wrench
2. Reflectors
If for any reason you are missing any parts- please reach out to us at:
support@flx.bike so we can get your missing part to you.
11
1.
3.
4.
5.
6.
7.
7.
Babymaker II • Owners ManualBabymaker II • Owners Manual
www.flx.bikewww.flx.bike
8.
2.
8. Front Wheel

ASSEMBLY
12
2.5mm, 4mm, & 5mm Allen Keys 15mm Wrench
13
Overview
The following section covers the assembly directions for the Babymaker II.
Proper assembly is an essential step in ensuring your safety and proper operation of
the bike. If at any point you do not feel comfortable assembling the bicycle yourself,
please seek professional assistance or reach out to our support team.
You can also find a detailed assembly video on the FLX YouTube channel:.
www.flx.bike/babymakerassembly
If you do not feel that you have the ability or skill to assemble the bike
yourself, please take it into a local bike shop for professional assistance.
Failure to properly assemble your eBike can result in serious injury or
death.
Please read through the entire assembly instructions section before you
begin. Proper assembly is important in order to ensure your safety and
satisfaction while operating your eBike.
STEP 1: Install the Handlebars
1. Using the 4mm Allen wrench, unscrew the 4 bolts holding on the stem plate.
2. Place your handlebars into the groove and replace the stem plate over the top.
Tighten the bolts making sure to leave enough wiggle room to adjust your bars.
3. Once your handlebars are centered and at a comfortable angle for you, tighten
the bolts in a figure 8 pattern until the handlebars are fully secured.
Note: DO NOT depress the brake levers before installing the front wheel.
Figure 1. Stem Plate Bolt Removal Figure 2. Tightening Stem Plate Bolts
Carefully Remove Packaging
Before you begin, be sure to carefully remove all of the foam and protective plastic
from your Babymaker.
i. Use caution when cutting o the zip ties so you do not damage the paint.
iii. Remove the black plastic hub protectors from both sides of the front wheel, as
well as the yellow plastic brake pad spacers. When removing the hub protector, do
not remove the wheel spacers along with them.
Babymaker II • Owners ManualBabymaker II • Owners Manual
www.flx.bikewww.flx.bike
Tools Included:

14 15
STEP 2: Secure the Front Wheel
1. First, locate your thru axle. It will be in the accessories box, or may already be
inserted between the front forks. See figure 3 if you’re unfamiliar with what your
thru axle looks like (we all start somewhere).
Figure 7. Sliding the Caliper onto the Rotor
3. Carefully slide the wheel in-between
the forks, making sure to carefully insert
the rotor in-between the brake caliper.
Caliper
Rotor
Babymaker II • Owners ManualBabymaker II • Owners Manual
www.flx.bikewww.flx.bike
Figure 3. Thru Axle Figure 4. Locating Thru Axle Between Forks
Figure 5. Opening Cam Lock Lever Figure 6. Removing Thru Axle from Forks
4. Once your wheel has been properly placed, it’s time to secure it.
Note: Make sure your wheel spacers are attached to the wheel hub before you
continue to the following steps.
2. If the axle is already installed between the forks— you’ll need to remove it before
you secure the wheel. Remove the thru axle by opening the cam-lock lever and
unscrewing the axle (counter-clockwise) until you are able to slide it out.
Note: Align the arrows on the cam lock lever and the thru axle to unscrew.
Figure 8. Inserting the Thru Axle
5. Grab your thru axle and make sure the
cam-lock is in the open position.
6. Insert the thru axle as far as you can.
You may need to wiggle it around/move
the wheel a bit to get it through.
The steps outlined on the following pages are extremely important!
Riding with an improperly secured wheel can cause serious injury or
death. If you can’t safely complete these steps, please take your eBike
into a bike shop for professional assistance.

Figure 12. Dropping Seat Post into Seat Tube
Note: The seat post must be
inserted to at least 3” in depth
to avoid damage to your frame.
The saddle position must also
remain within the maxium
threshold as marked on the
under side of the saddle.
16 www.x.bike 17www.x.bike
Please seek professional assistance if you are unsure of your ability to
complete these steps properly.
7. Once the axle is fully inserted, begin to
screw it in (clockwise) until it feels tight.
8. Check that your wheel feels secure and
close the cam-lock. If there is no tension
when closing the cam-lock you will need
to tighten your thru axle more.
Figure 9. Closed Cam Lock on Secured Wheel
STEP 3: Attach the Pedals
1. Check the end-cap on both pedals in order to identify the left vs. right pedal.
2. Imagine you are sitting on the bike to correctly determine the left vs. right side of
the bike. Then, grab your wrench, and screw the pedal tightly into the correct crank.
The pedals should thread smoothly and easily if properly aligned.
Note: Please note that the right pedal will tighten clockwise, while the left
pedal will tighten counter-clockwise.
Figure 10. Left Vs. Right Pedal Figure 11. Attaching Pedal to Crank
STEP 4: Install the Seat
1. Loosen the quick release lever on the frame and drop the seat into the opening.
Find a height that works for you and close the quick release.
STEP 5: Connect LCD Display
1. Check to make sure your display is secure. If you are able to rotate it around the
bars— tighten it using your 2.5mm allen key. Do not over tighten the display.
3. Double check that the display cables are connected. If not, connect the cable
attached to the LCD to it’s corresponding cable on the bike. You should hear a click.
Tip: Line up the two arrows to ensure proper connection.
Figure 14. Connecting the LCD cablesFigure 13. Tightening the LDC Display
Babymaker II • Owners ManualBabymaker II • Owners Manual

18 www.x.bike 19www.x.bike
STEP 6: Attach Reflectors & Bell (Optional)
Figure 15. Rear and Front Reectors
1. Grab the front and rear reflectors along
with their mounts. These parts should all
be located in your accessories box.
2. Pair the correct reflector to its own
corresponding mount as shown.
3. Slide the mount downward onto the reflector until it snaps. Attach the rear (red)
reflector around the seat post and the front (white) reflector around the handle-
bars as shown below. Tighten with a phillips head screwdriver.
4. Place the bell around the handlebars either next to the stem as shown below, or
over the grip of the handlebars. Tighten with a phillips head screwdriver.
Note: Do not over-tighten the reflectors or the bell, as this may damage the
mounts. Damage caused by over-tightening is not covered in the warranty.
Figure 16. Attaching Reector to it’s Mount Figure 17. Bell and Reector Setup on Handlebars
STEP 7: Charge Your Battery
Figure 18. Charging Your Battery
1. Connect the charger into the charging
port located on the right side of your
Babymaker.
Note: Allow the battery to fully
charge before riding (about 4-8
hours the first few cycles). After
this, you may charge normally
(about 2 hours).
3. After allowing your bike to fully
charge, test to make sure your LCD smart
display is working. Press and hold the
top button for 3 seconds, or until the
screen lights up.
Repeat this step to turn it o.
Figure 20. Checking the LCD Display
2. Plug your charger into an outlet. The
indicator light will turn on.
Green Light:
Not charging/Fully charged
Red Light:
Charging/Not fully charged
Figure 19. Charging Light
Babymaker II • Owners ManualBabymaker II • Owners Manual

www.x.bike20 21www.x.bike
Babymaker LCD Settings & Functions
Your LCD display is the brain of your bike. It’s important you understand the
functionality and how to properly operate your LCD display before riding.
Default “Home” Screen
1. Press and hold the POWER button for a few seconds until the display turns on.
Your home screen/stats will appear. This will be your mission control.
Note: Toggle the up/down arrow keys to adjust your pedal assist level.
Access Your Ride Data
1. Press the MODE button. A list of settings will appear
• AVmph: Average speed during your most recent trip
• Max Speed: Your highest speed achieved
• Trip Odometer: The number of miles ridden for your most recent trip
2. Press the MODE button a second time to view the rest of your ride data.
• Total Odometer: The total cumulative number of miles ridden on the bike
• Range: N/A (No battery management system on the Babymaker)
Figure 23. Ride Data Screen 1 Figure 24. Ride Data Screen 2
Reset Your Ride Data
1. While in the Ride Data menu, press
and hold the MODE button. A ‘CLEAR
DATA’ window will pop up.
2. Using your up/down arrows, select ei-
ther ‘YES’ or ‘NO’. Press the MODE button
to select. Selecting ‘YES’ will reset your
stats to ‘0’ for the next ride.
Figure 25. Clear Ride Data
Up/Down Arrows
Figure 21. LCD Buttons
Power Button
Mode Button
Battery Life
Figure 22. LCD Home Screen
Pedal Assist Level
Current Speed
Distance Traveled
Babymaker II • Owners ManualBabymaker II • Owners Manual

www.x.bike22 23www.x.bike
The Babymaker | Owners Manual
1. *Begin with your LCD powered o*
2. Power on the LCD and press/hold the
MODE button while the battery icon is
still blinking. This will open your set-
tings menu.
3. Use the up/down arrow keys to scroll
through this list. Press MODE to select.
Access Settings & Information
Figure 26. Settings Menu
To read the full description of each setting function, please visit:
www.flx.bike/manual
Select the Babymaker Display Manual that corresponds with your model, or visit
www.flx.bike/bmlcd for a video tutorial.
‘ADVset’ is password protected. If you need to access this setting for closed
circuit/private track use or to adjust your tire size— please reach out to
support@flx.bike.
DO NOT ‘RESET’ from this menu. Doing so will reset all data for the LCD
including the firmware needed to communicate with your controller &
motor. If you accidentally reset your LCD, please email support@flx.bike.
TOURING PACKAGE
The Touring Package is an optional add-on feature, and therefore will not be
included with every Babymaker eBike.
If you did not purchase the Touring Package, you can still use this section for
information regarding how/where to attach your own gear.
Babymaker II • Owners ManualBabymaker II • Owners Manual

Fenders
Riding can’t stop just because of a little
(or a lot of) rain. These fenders keep you
dry when the weather is wet.
Easily installed using the tools provided.
24 www.x.bike
Cargo Rack
Assemble the Cargo Rack by securing the
four bolts to the bike frame using the
allen key.
The cargo rack can carry up to 25kg,
enough for your bags, but not your
friends.
Headlight
Ride safely at night! Attach the headlight
on the front cockpit of your bike using
the adjustable strap.
Turn it on/o by pressing the button at
the top.
Cell Phone Mount
Install this mount on your handle bars
for hands free safe riding.
Please refer to assembly instructions in
the cell phone holder box.
25www.x.bike
Water Bottle Holder
It’s important to stay hydrated! Easily
attach this water bottle holder to the
seat tube, so you can carry your re-us-
able bottle with you on your ride.
Tail Light
Let people know there is a cyclist on the
road even at night. Attach the tail light to
the rear part of the frame under the seat.
Babymaker II • Owners ManualBabymaker II • Owners Manual
Under no circumstances should you attach a baby carriage, or child
carrier to the cargo rack.

26
MAINTENANCE
2.5mm, 4mm & 5mm Allen Keys 15mm Wrench
Tools Required:
25mm Torx Bit
Reach us by email:
support@flx.bike Visit our Shop:
4170 Morena Blvd. Suite D
San Diego, CA 92117
Hours: 10am - 5pm Monday - Friday
While FLX bikes are built to endure regular use, you will get better performance
and a longer life from your bike if you keep a basic maintenance schedule. Be sure to
read through this instruction manual carefully, and you will be set up for success.
Proper maintenance is crucial for your safety when riding. If you are
unable to perform the general maintenance yourself, please reach out to
a qualified mechanic.
You can find more detailed maintenance videos on the FLX YouTube channel:
www.flx.bike/youtube
Many eBike service and repair tasks require special tools and knowledge.
Do not begin any service on your eBike unless you have learned from
FLX how to properly complete it. We recommend that significant repairs
be done by a qualified eBike mechanic, as improper service can result in
damage to the bike, or an accident which can cause injury or death.
REAR WHEEL
27
Removing the Rear Wheel
Removing the rear wheel is a standard part of regular bike maintenance, and
can be a quick and simple procedure. To make things even easier, we put together a
video tutorial for you, so you can follow along as our technician walks you through
the process forwards and backwards.
You can find that tutorial here:
www.flx.bike/bmrearwheel
If you do not feel confident in your abilities to complete these steps
properly, please take your Babymaker into a local bike shop for
professional assistance. Incorrect removal or assembly can result in
brake failure.
Babymaker II • Owners ManualBabymaker II • Owners Manual
www.flx.bikewww.flx.bike

BRAKES
It’s important that you learn and remember which brake lever controls which
brake (front/rear) in order to ensure your safety.
To check which configuration your eBike is set up with, squeeze one brake lever
and look to see whether the front or rear brake engages. Now to the same with the
other brake lever. Remember this configuration.
While you are testing the brake configuration, make sure that your hands can
comfortably reach and squeeze the levers with no issues. If you experience any
issues or discomfort operating the brakes, please reach out to us before riding.
Disc Brakes
Disc Brakes will be located on a metal disc that is seated within each wheel.
The disc brakes will clamp onto this disc in order to slow your bike to a slow or stop
depending on how much pressure you are applying.
28 29
Riding with worn brake pads, improperly installed brakes, or wheel where
you can visibly see the wear from the brake pads is dangerous and can
result in serious injury or death.
Applying the brakes suddenly or with too much pressure can result
in your wheel locking up. This can cause you to lose control and fall.
Some brakes (like hydraulic disc brakes) are incredibly powerful, so it’s
important that you take extra care when becoming familiar with using
these brakes.
Disc brakes can get extremely hot during and after extended use. Be
careful not to touch a disc brake until it has had plenty of time to
cool. This is especially important to remember if you are performing
maintenance that requires you to remove the front or rear wheel.
Disc rotors have sharp edges, exercise caution when handling them
during maintenance.
Review the brake manufacturer’s user manuals and be sure to properly
care for your brakes. It’s your responsibility to be able to recognize when
your brake pads need to be replaced.
Sudden or excessive application of the front brake may pitch the rider
over the handlebars.
You can find the correct user manual for your brakes on the manufacturers
website, or at: www.flx.bike/manual
WARNING!
Babymaker II • Owners ManualBabymaker II • Owners Manual
www.flx.bikewww.flx.bike
Figure 27. Rotor Figure 28. Handle & Caliper

TIRES
30
Tire Pressure
Tires come available in many dierent sizes and their uses can range from
general-purpose to highly specialized weather/terrain conditions. It’s important that
you know which tires your eBike comes with and understand the limitations and
specifications that they can perform under.
Size, pressure rating and other information can often be found on the sidewall
of the tire. Tire Pressure is the most key piece of information for you to remember.
Inflating a tire beyond the maximum pressure can blow the tire o the rim,
resulting in damage to the bike and potential injury to the rider.
Using a bike specific tire pump with a built-in pressure gauge is highly
recommended. If you do not have access to one, or do not feel comfortable inflating
them yourself- please seek professional assistance from your local bike shop.
High tire pressures work best for smooth, dry pavement rides, while low pres-
sures give the best performance on smooth, slick terrain. However, increasing, or
decreasing tire pressure will have no aect on the terrain that the tire is designed to
handle. A road tire at low pressure still cannot handle terrains such as clay or sand.
If you are unsure, reach out to us, or your local bike shop to determine the
best tire pressure for the kind of riding you will most often do.
Your Babymaker will come standard with 700 x 28C (1 ⅛” wide) road tires. It’s
important that you understand the appropriate conditions and terrain that these
tires can handle in order to ensure safe riding.
31
Tire Valves
Not all bike tube valves are created equal, and it’s your responsibility to make
sure that the bike pump you are using has the appropriate fitting to the valve stems
on your eBike.
The Babymaker will come fitted with a Presta valve. This valve is narrow in
diameter and is exclusive to bike tires. To inflate a valve tube using a Presta headed
bike pump follow these steps:
1. Remove the valve cap
2. Unscrew the valve stem nut counterclockwise, and push down on the valve
stem to free it.
3. Insert the pump head to the valve head and inflate.
4. To let air out- open up the valve stem nut and depress the valve stem.
Note: It is possible to inflate a Presta valve with a dierent pump fitting,
however you will need a Presta adapter.
We recommend carrying a spare inner tube with you when riding your bike, as
patching a tube is an emergency repair. If you do not execute it correctly, or if
you apply multiple patches, it can result in possible tube failure. This could
cause you to lose control and fall. Replace a patched tube immediately.
Be sure to check your tire pressure frequently (at least every week) using
a high quality dial gauge.
Babymaker II • Owners ManualBabymaker II • Owners Manual
www.flx.bikewww.flx.bike

32
BATTERY CARE
It’s important to follow these instructions and safety tips in order to preserve
the longevity of your battery’s life and ensure proper performance.
Fully charge the battery before each ride to make sure it’s ready to go the full
range. This will help reduce the chance of over-discharging the battery.
Based on IATA regulations you are not allowed to ship Lithium-ion batteries
this size by air. Please consult a land or sea freight agent for transportation
of the battery.
If the battery becomes physically damaged, non-functional, has been
dropped, or involved in a crash, or you notice it performing abnormally,
please discontinue use and contact FLX Bike immediately.
Charging your Battery
The charger is rated for 100-240V. Be sure to check the charger, charger
cables, and battery for damage before beginning each charge.
Charging time takes about 2 hours. On rare occasion, it may take longer to al-
low the battery to fully charge, particularly when the bike is new, or has been stored
for a long period of time.
Only charge the battery with the supplied FLX charger as others may
cause damage to the battery or increase the possibility of fire or
explosion.
While the charger is designed to automatically stop charging once the battery is full,
do not leave it plugged in for periods of time greater than 12 hours.
Make sure your charger avoids contact with liquids, dirt, and debris.
33
Again, if you do not feel confident in your abilities to complete all of these
steps properly, please reach out to us, or take your Babymaker into an eBike
shop for professional assistance. Proper maintenance and care is crucial in
order for you to continue enjoying your Babymaker safely.
The charger may get hot while in use, however if it gets too hot to touch or you
notice anything such as a strange smell, or other indications that it may possibly be
overheating, discontinue use immediately and contact FLX Bike.
Do not cover the charger while in use.
Do not open the charger or alter the voltage input.
If there appears to be any issue with the charger or battery, stop riding and
contact us immediately.
Battery Removal
The Babymaker’s battery can be removed through the head-tube for service or
replacement. Should you need to do so, please refer to this video for instructions.
Watch the Battery Removal Tutorial here:
https://www.youtube.com/watch?v=WOeD9qyle-E&t=1s
Babymaker II • Owners ManualBabymaker II • Owners Manual
www.flx.bikewww.flx.bike

Balancing your Battery
When you first receive your bike, it’s important that you follow these steps to
ensure that your battery cells are properly balanced in order to keep them operating
as eciently as possible.
1. For the first initial charge upon receiving your bike (or after long storage times), be
sure to charge the battery for at least 4 hours before riding.
Note: We recommend that you let the battery charge for at least 4 hours for
the first 3 charges to make sure the cells balance properly.
2. After the first 3 rides, you may begin normal charging procedures.
Storing Your Battery
If you plan on storing your bike (or spare battery) for longer than two weeks at
a time, please be sure to follow these guidelines in order to maintain the lifespan of
your battery.
It is recommended that you do not leave the battery at lower than an 80%
charge when storing for long periods of times. If storing for a month or longer, peri-
odically check the battery and be sure to keep the charge up to at least 80%
Store your battery in a cool, dry area away from water and other elements at a
temperature between 50 °F – 77 °F (10 °C - 25°C).
Failure to follow proper battery care practices can result in unnecessary wear
to the components, battery, and/or charger, which could lead to a battery
that under-performs, or becomes non functional. Loss of battery capacity is
not covered by warranty.
34 35
TAKING CARE
Service
Technological advances have made eBikes and their components more
complex, thus it is impossible for this manual to cover all of the information
required to repair/maintain your eBike. It’s important that you have any
repairs or maintenance that is not covered in this manual, done by a qualified
professional in order to reduce the chances of an accident/possible injury.
Lifespan
Like any machine, an eBike and its components will be subject to wear and
tear over time. Dierent parts and materials will have varying life spans, and
when a components lifespan is exceed, it can suddenly fail, resulting in
serious injury or even death for the rider.
Be sure to check your eBike and components thoroughly for signs of
scratches, cracks, fraying or discoloration as any parts with these kinds of
visible distress may be at the end of their lifespan.
Components may be covered for a period of time through the warranty,
however there is no guarantee that a product will last the term of the
warranty. The lifespan of your eBike and its components is related to the
riding you do, and the care that you take.
A crash or heavy impact can put incredible stress on eBike components,
causing them to wear out prematurely. Components that suer from
extreme stress can fail suddenly, causing loss of control, serious injury, or
even death. Be sure to chose the correct bike for your intended purpose.
Babymaker II • Owners ManualBabymaker II • Owners Manual
www.flx.bikewww.flx.bike

36
This warranty is not meant to suggest or imply that the products cannot
be broken or will last forever. It does man that the product is cover subject to the
therms of this warranty. FLX will have no obligation, under this limited warranty, in
the event that the product is damaged or destroyed as a result of any of the follow-
ing events: wear and tear, component use on a non FLX product.
Warranty Information
FLX bike warrants that this product is warranted to the buyer against
manufacturing defects in materials or workmanship for a period of (1) year from the
date of shipment. The original receipt of purchase is required to establish proof of
purchase and must be provided to FLX Bike for any claims. FLX Bike will require
customers to complete a mandatory standard procedure for warranty claims that
will involve media such as photos and videos to help FLX Bike establish the fault
with the product. Only the individual components themselves are covered by the
warranty. The removal, assembly, and tuning requirements of the component is
borne by the customer making the claim. The costs and inconvenience that result
from a loss of use of the product is not covered whilst the warranty procedure takes
place.
The warranty for replacement components will be based on the date of
shipment. Under no circumstance will a replacement component have a warranty
date that is dierent than the original date of delivery. If a replacement is necessary
due to a defect in materials or workmanship, then FLX Bike will replace the
component during the warranty period, once the defective part has been returned
to us. FLX will have no obligation under this limited warranty in the event that the
product is damaged or destroyed as a result of any of the following events:
component use on a non FLX product, damage or destruction by abuse, collision,
theft, improper maintenance, or mishandling of the product, natural forces such as
wind, lightning hail etc., any willful or negligent act, penetration or opening the
product casings in any manner. Replacement will be honored only by FLX. This is
FLX’s exclusive warranty. No party is granted express or implied authority to change
or annul this warranty in any manner. FLX disclaims any liability for special,
incidental or consequential damages.
WARRANTY
37
The warranty applies only to the original buyer of the product and is not
transferable to subsequent owners or any other party. This warranty is void if the
product is subjected to abuse, neglect, improper repair, improper maintenance,
alteration, modification, an accident or other abnormal, excessively improper use at
the sole discretion of FLX.
Warranty Exclusions
This warranty does not cover:
• Damage or failure from abuse, neglect, misuse or accident.
• Damage from stunt riding, ramp jumping, acrobatics, competitive events,
such as bicycle racing, bicycle motocross racing, or similar activities or any
activity that is not consistent with the intended use of the product.
• Damages resulting from improper charging of the battery pack or use of any
charger not supplied by FLX.
• Installation of any parts, accessories, or electrical components not originally
intended for or compatible with the product as sold, or any modification of the
frame or any components originally supplied; tires, brake pads, chains, lights,
motors, batteries, displays, or vehicle controllers that have been opened for
any purpose whatsoever, other than by FLX.
• All warranties are void if the product is used for any purpose other than the
reasonable intended use of the product. Additionally, this warranty does not
cover damage associated with commercial use.
• Aftermarket components or modifications.
• All implied warranties, including the warranties of merchantability and
fitness for a particular purpose, are limited in duration to that of the express
warranties stated above.
Babymaker II • Owners ManualBabymaker II • Owners Manual
www.flx.bikewww.flx.bike
Table of contents
Other FLX Bicycle manuals
