FLX F5 TRAIL User manual
www.x.bike
OWNERS MANUAL
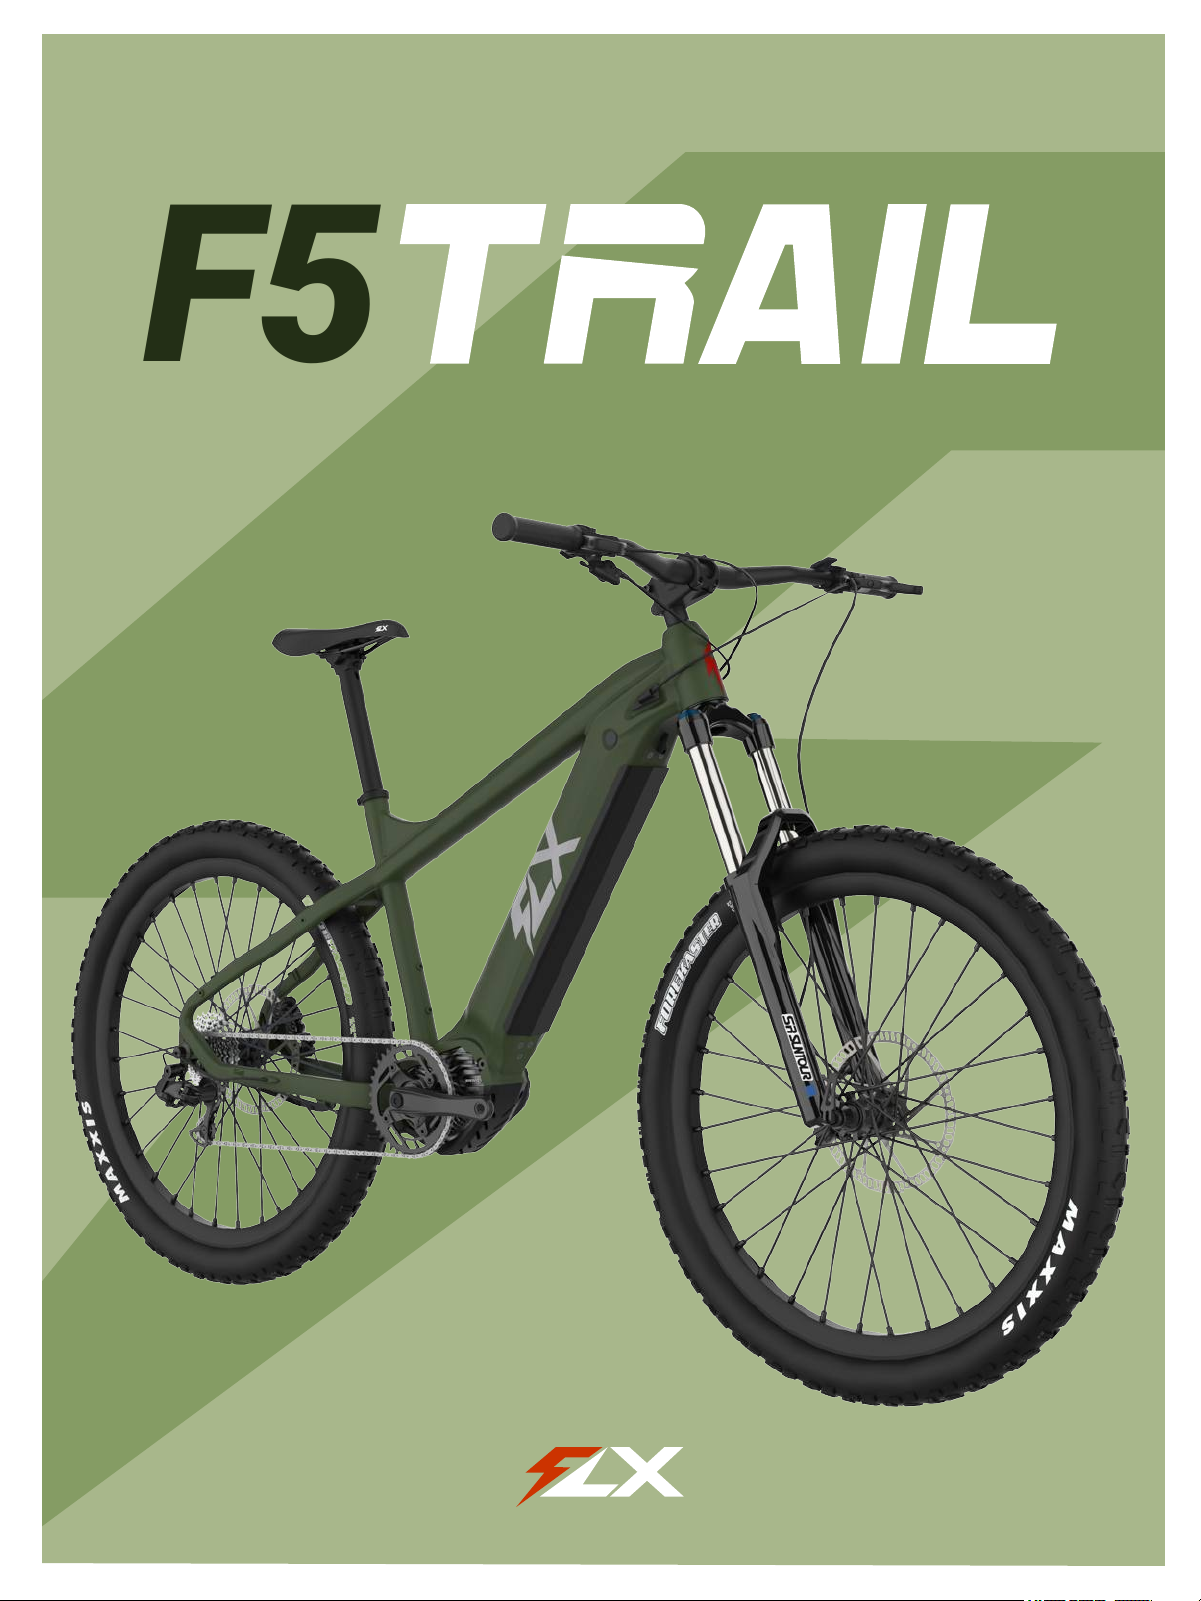
F5

CONTENTS
1 Welcome/ Contact Us
2 General Warning
6 Geometry
8 Fit
10 What’s in the Box
12 Assembly Instructions
19 Maintenance Instructions
20Brakes
22Tires
24BatteryCare
26 Warranty
28 More Tips
29 Service
30 eBike Classications
Reachusbyemail:
support@x.bike
VisitourShop:
4170MorenaBlvd.SuiteD
SanDiego,CA92117
Hours: 10am - 5pm Monday - Friday
Readytogetstarted?Let’sride!
- Team FLX
1
CongratulationsonthepurchaseofyournewF5Trail,
andwelcometotheteam!
Thismanualisdesignedtobreakdownthebasicsandhelpyoumakesure
thatyoureBikeremainsintopshape.It’simportanttohaveagoodunderstandingof
thebasicoperationandmaintenanceinordertokeepyourbikeperformingatahigh
standard.
Riding a bicycle can be a dangerous activity and it’s your responsibility
to make sure you are riding safely. We recommend familiarizing yourself
with this entire manual as well as your local eBike laws prior to your rst
ride.
ThelatestversionoftheOwner’sManualisalwaysavailableonlineat:
www.x.bike/manual
Properassemblyandcarearecrucialtoyouhavingthesafestrideofyourlife.
Ifyouareunabletocompletetheassemblyorneedhelpwithgeneralmaintenance,
pleasereachouttous.Youdidn’tjustpurchaseabike—youjoinedourteam,and
we’reheretosupportyouwheneveryoumayneedit.
WELCOME!

RidinganeBike,aswithanymotorizedvehicle,involvestheriskofproperty
damageandseriousorfatalinjury.BychoosingtorideaneBike,youassumethe
responsibilityforthatrisk,soit’simportantthatyouknowandpracticeresponsible
riding.Properuse,careandmaintenanceofyoureBikeareessentialinreducingthe
riskofinjury.Thismanualwillinclude bold warningsconcerningpotential
consequencesthatcanoccurasaresultofyourfailuretoproperlymaintainyour
eBikeorfollowsaferidingpractices.
Bolded textcombinedwiththisalertsymbol,willindicateanarrayof
warningsincludingbutnotlimitedto:
A potentially hazardous situation that could result in injury or death if not
avoided
A potentially hazardous situation that could result in minor/moderate
injury if not avoided
An alert regarding unsafe practices
A situation which could result in serious damage to the eBike or any
action that would void your warranty
Itwouldbenearlyimpossibletoanticipateeveryconditionyoumayexperience
whileridingyoureBike,thereforethismanualdoesnotrepresentthesafeuseof
youreBikeineverypossiblescenario.Therearerisksassociatedwiththeuseofany
eBikethatcannotbepredictedoravoided—thoserisksarethesoleresponsibilityof
therider.
2 3
Special Note for Parents:
Asaparent/guardian,youarefullyresponsibleforthesafetyofyourminor.
ThisresponsibilityincludesmakingsurethattheeBikeissizedappropriatelyforthe
child,thatitisoperatingcorrectly,andtheconditionsaresafe.Youmustalsoensure
thatyouandyourchildhavebothlearnedandunderstandhowtosafelyoperatethe
eBike,howtoobeylocalmotorvehicle,bicycleandtrafclaws,aswellascommon
senseforsaferesponsibleriding.Asaparent,itisimportantthatyoureadthrough
thismanualandfamiliarizeyourselfwiththewarningsandproperoperationofthis
eBike.Pleasereviewthemwithyourchildbeforeallowingthemtoride.
Make sure your child wears an approved eBike helmet only when riding
their eBike.
Make sure your child’s eBike is properly sized (adjust the seat so that
both feet can touch the ground). If the eBike doesn’t t, do not allow your
child to ride it. Riding an improperly tted bike can result in injury or even
death.
3
F5 Trail|OwnersManual F5 Trail|OwnersManual
www.x.bike www.x.bike
GENERAL WARNING

4
GETTING
STARTED
5
F5 Trail|OwnersManual F5 Trail|OwnersManual
4
GETTING
STARTED

6www.x.bike
F5 Trail|OwnersManual
7www.x.bike
F5 Trail|OwnersManual
GEOMETRY
TheF5Trailcomesinonesizethathasbeenengineeredtosuitavarietyof
ridersatdifferentheights.
Onthefollowingpage,youwillndageometrychartwiththemeasurements
forthemostimportantpartsofyourF5Trailframe.Measurementsaregiveninboth
StandardandMetricunitsforyourconvenience.
Please ensure that your eBike is properly sized for you before riding. If
your eBike is too small/too large, you may lose control and fall.
The most important part of t is ensuring that the seat position can be
adjusted so that the seated rider’s feet can touch the ground. This is
especially important for minors/children.
If your eBike does not t, please make the appropriate adjustments to
ensure a proper and safe t before riding.
A. Seat Tube Length
(Frame Size)
B. Seat Tube Angle
C. Head Tube Length
D. Head Tube Angle
E. Stack
F. Reach
18”(450mm)
73.5°
4 ⅓”(110mm)
68°
25”(633mm)
17 ⅓”(440mm)
G. Standover Height
H. Wheelbase
I. Chainstay Length
J. Bottom Bracket
Drop
K. Bottom Bracket
Height
28¾”(730mm)
46⅟5”(1174mm)
17 ⅔”(450mm)
2”(47mm)
12”(305mm)

89
F5 Trail|OwnersManual F5 Trail|OwnersManual
www.x.bike www.x.bike
FIT
Correct t is an essential part of eBike safety, comfort and proper
performance. If you are not able to make the proper adjustments to
ensure proper t yourself, please seek professional assistance.
Note: This will not apply to step-through models.
Aproperlyttedroadbiketoberiddenonpavedsurfacesshouldhavea
minimumstandoverclearanceof1inch(2.5cm).
Standover Height
Diamond Frame eBikes:
Standoverheightisanimportant
basicelementofproperbiket.Itrefers
tothedistancefromtheground,tothe
topofthebikeframewhereyourcrotch
iswhenyouarestraddlingthebike.
Tocheckforproperstandover
height,straddlethebikeandbounceon
yourheels.Ifyoutouchtheframe,the
bikeistoobigforyou.
Tip: Be sure to wear the shoes
you’dwearwhileriding. Figure1.StandoverHeight
Note:Theseatpostmustbeinsertedtoat least theminimumseatpostdepth
requirement.Ifyoucannotadjustyourseatproperly and meetthemimimum
seatpostdepthrequirement,youwillneedtopurchasealongerseatpost.
If you cannot test this yourself, head to a local bike shop and have a
professional help you set the seat to an optimal riding position.
1.Sitontheseatandplaceoneheelon
apedal(doesn’tmatterwhichside).
2.Rotatethecrankuntilthepedalwith
yourheelonitisinthedownposition
andthecrankisarmisparalleltothe
seattube.
3.Yourlegshouldbecompletely
straight.Ifitisn’t,yourseatheightneeds
tobeadjusted.Ifyoumustrockyour
hipsinorderforyourheeltotouchthe
pedal,yourseatistoohigh.Ifyourleg
isbentwhileyourheelisrestingonthe
pedal,yourseatistoolow.
Figure2.SeatAdjustmentTest
Seat Position
Properseatadjustmentisanimportantfactorwhenitcomestogettingthebest
ofbothcomfortandperformanceoutofyoureBike.Followthestepslistedbelowto
checkforyourcorrectseatheight.
After any saddle adjustments, make sure that the seat adjusting
mechanism is properly tightened before riding. Failure to do so can
cause damage to the seat post and/or can cause you to lose control and
fall. When properly tightened, the seat should not be able to move in any
direction. Periodically check to ensure it is properly tightened.

WHAT’S IN THE BOX
10 www.x.bike
F5 Trail|OwnersManual
11www.x.bike
F5 Trail |OwnersManual
1.
5.
3.
2.
5.
6.
8.
4.
7.
Overview
KnowingyourTrailinsideandoutwillhelpyougetthemostoutofit.Weencourage
youtofamiliarizeyourselfwiththecomponentsofyourbicycle,sothatyouknow
wheretostartwhenitcomestoassemblyandmaintenance.
Here’swhat’sincludedinyourbox:
If for any reason you are missing any parts- please reach out to us at:
hello@x.bike so we can get your missing part to you.
4. Pedals (x2)
1. Seat
3. Handlebars
6. Frame + Rear Wheel
5. Tools: Allen Key x2 & Wrench
2. Keys
7. Charger
8. Front Wheel

ASSEMBLY
www.x.bike
12
F5 Trail|OwnersManual
13www.x.bike
F5 Trail |OwnersManual
Overview
ThefollowingsectioncoverstheassemblydirectionsfortheF5Trail.Proper
assemblyisanessentialstepinensuringyoursafetyandtheproperoperationofthe
bike.If at any point you do not feel comfortable assembling the bicycle your-
self, please seek professional assistance or reach out to our support team.
YoucanalsondadetailedassemblyvideoontheFLXYouTubechannel:
www.x.bike/f5assembly
If you do not feel that you have the ability or skill to assemble the bike
yourself, please take it into a local bike shop for professional assistance.
Failure to properly assemble your eBike can result in serious injury or
death.
ToolsIncluded:
Please read through the entire assembly instructions section before you
begin. Proper assembly is important in order to ensure your safety and
satisfaction while operating your eBike.
STEP 1: Install the Handlebars
1.Usingthe4mmAllenwrench,unscrewthe4boltsandremovethestemplate.
2.Placeyourhandlebarsintothegrooveandreplacethestemplateoverthetop.
Tightentheboltsabout3/4thsoftheway.
3.Makethenaladjustmentsonyourhandlebarspositioning,ensuringthattheyare
centeredandatacomfortableanglebeforetighteningtheboltstherestoftheway.
Note: DO NOT depress the brake levers before installing the front wheel.
Figure1.StemPlateBoltRemoval Figure2.TighteningStemPlateBolts
Figure3.ConnectingtheLCDcables
STEP 2: Connect LCD Display
4mm&2.5mmAllenKeys 15mmWrench
1.LoosentheboltonthebackoftheLCD
usingthe2.5mmallenkey.
2.TwistaroundtheLCDscreenandplug
thecorrespondingconnectortoitsmatch-
ingport(greentogreen,purpletopurple).
3.RotatetheLCDbacktoyourpreferred
position,andre-tightenthebolt.

14 www.x.bike
F5 Trail|OwnersManual
15www.x.bike
F5 Trail|OwnersManual
Figure6.InsertingtheThruAxle Figure7.TighteningtheThruAxle
4.Tightentheendcapoftheaxleabout3/4thsoftheway.Then,iptheleverontheother
sideintotheupward/closedpositionandholdittherewhileyoutightentheaxletherestof
theway.(Tightening the axle should be done from the bolt side, not the clamp side)
5.Testthetensionbyopeningtheleveragain.Ifitiseasytoopen,tightentheaxleendcap
furtherandtryagain.Youwanttomakesurethereisgoodtensionasthiswillensurethat
yourwheelisonsecurely.Do not over-tighten the axle, as this can cause malfunction.
STEP 4: Install the Seat
1.Loosenthequickreleaseleverontheframeanddroptheseatintotheopening.
Findaheightthatworksforyouandclosethequickrelease.
Figure10.DroppingSeatintoBike
Note: The seat post must be
inserted to at least 5” in depth
to avoid damage to your frame.
If you need to raise the seat
above this height, please
purchase a longer seat tube to
satisfy the depth requirements.
STEP 3: Secure the Front Wheel
1.Removethethru-axlefromin-betweentheforks.Pushintheendtocollapsetheteeth
holdingitinplace,thenslideitoutbypullingontheotherend.
2.Slidethewheelintoplace,makingsurethebrakecaliperslidesontotherotorandthe
forksareproperlylinedupwiththewheel.
Figure4.PushtoremoveThru-Axle Figure5.PlacingtheWheel
Ensure that your Axle is properly seated by checking that the teeth have
expanded fully as this is essential in order for the axle to hold the wheel
secure. Failure to do so may result in serious injury or death.
Figure8.ProperlySecuredAxle-ExpandedFully Figure9.ImproperlySecuredAxle-NotExpanded
3.Insertthethru-axleonthesamesideasthebrakecaliper/rotor.

16 www.x.bike 17www.x.bike
F5 Trail|OwnersManual F5 Trail|OwnersManual
STEP 5: Attach the Pedals
1.Checktheendcaponbothpedalsinordertoidentifytheleftandrightpedal.
Tip:Imagineyouaresittingonthebiketocorrectlydetermineleftvs..rightside.
Note: The right pedal will tighten clockwise, while the left pedal will
tighten counter-clockwise.
2.Grabyourwrench,andscrewthepedaltightlyintothecorrectcrank.Thepedals
shouldthreadsmoothlyandeasilyifproperlyaligned.
Figure11.LeftVs.RightPedal Figure12.AttachingPedaltoCrank
Figure13.ChargingPort
1.Connectthechargertothecharging
portlocatedonyourbikeframerst,then
plugthechargerintoyourwalloutlet.
Tip:Allowthebatterytofullycharge
beforeriding(about8-12hoursthe
rstfewcycles).Afterthis,youmay
chargenormally(3-4.5hours).
Step 6: Charge the Battery
2.Afterallowingyourbiketofullycharge,testtomakesureyourLCDsmartdisplay
isworking.Pressandholdthepowerbutton(locatedonthethumbcontrols)for3
seconds,oruntilthescreenlightsup.Repeatthissteptoturnitoff.
Figure14.CheckingtheLCDDisplay
PedalAssist(5Speeds)
CurrentSpeed
DistanceTraveled
BatteryLife
Voila!
YourF5Trailisnowfullyassembledinallitsglory.Giveyourselfapatontheback
andadmireyourwork.Takesomepictures,callafriend,andtakeawell-deserved
breakwhileitcharges.

www.x.bike18
F5 Trail|OwnersManual
www.x.bike 19
MAINTENANCE
2.5mm,4mm&5mmAllenKey 15mmWrench
ToolsRequired:
25mmTorxBit
Reachusbyemail:
support@x.bike
VisitourShop:
4170MorenaBlvd.SuiteD
SanDiego,CA92117
Hours: 10am - 5pm Monday - Friday
F5 Trail|OwnersManual
WhileFLXbikesarebuilttoendureregularuse,youwillgetbetterperformance
andalongerlifefromyourbikeifyoukeepabasicmaintenanceschedule.Besureto
readthroughthisinstructionmanualcarefully,andyouwillbesetupforsuccess.
Proper maintenance is crucial for your safety when riding. If you are
unable to perform the general maintenance yourself, please reach out to
a qualied mechanic.
YoucanndmoredetailedmaintenancevideosontheFLXYouTubechannel:
www.x.bike/youtube
Many eBike service and repair tasks require special tools and knowledge.
Do not begin any service on your eBike unless you have learned from
FLX how to properly complete it. We recommend that signicant repairs
be done by a qualied eBike mechanic, as improper service can result in
damage to the bike, or an accident which can cause injury or death.
Figure19.CheckingBatteryLife
3.Checkthebatterylifebypressingon
thebuttontowardsthebottomofthe
batterypack.Thelightwillindicatehow
muchjuiceisleftinyourbattery.
Blue=Fullycharged
Green=Partiallycharged
Red=NeedstoCharge
Figure15.UnlockingtheBattery Figure16.RemovingtheBattery
Remove the Battery
1.Usingthekeysthatcamewithyourbike,unlockthebattery.(Youwillneedtoleave
thekeysinthebikewhileremovingthebattery).
2.Turnthesafetyswitch,locatedontheundersideofthebike,toreleasethebattery.
Then,carefullyremoveitfromtheframe.
Tip:Whenre-insertingthebattery,slidethebottomportioninrst,securethe
safetyswitchandthenlockthebatterywiththekeys.
Note: The following steps are optional and only need to be done if you
plan to remove your battery from the bike to charge it.

BRAKES
www.x.bike20
F5 Trail|OwnersManual
21www.x.bike
F5 Trail|OwnersManual
Riding with worn brake pads, improperly installed brakes, or wheels
where you can visibly see the wear from the brake pads is dangerous and
can result in serious injury or death.
Applying the brakes suddenly or with too much pressure can result
in your wheel locking up. This can cause you to lose control and fall.
Some brakes (like hydraulic disc brakes) are incredibly powerful, so it’s
important that you take extra care when becoming familiar with using
these brakes.
Disc brakes can get extremely hot during and after extended use. Be
careful not to touch a disc brake until it has had plenty of time to
cool. This is especially important to remember if you are performing
maintenance that requires you to remove the front or rear wheel.
Disc rotors have sharp edges, exercise caution when handling them
during maintenance.
Review the brake manufacturer’s user manuals and be sure to properly
care for your brakes. It’s your responsibility to be able to recognize when
your brake pads need to be replaced.
Sudden or excessive application of the front brake may pitch the rider
over the handlebars.
Youcanndthecorrectusermanualforyourbrakesonthemanufacturer’s
website,orat:www.x.bike/manuals
WARNING!
It’s important for you to learn and remember which brake lever controls
each brake (front/rear) in order to ensure your safety.
Traditionally,therightbrakeleverwillcontroltherearbrake,whiletheleftbrake
leverwillcontrolthefrontbrake.However,thismayvarydependingonwhatcountry
youarein,andcanalwaysbeadjustedtosuityourownpreference.
TocheckwhichcongurationyoureBikeissetupwith,squeezeonebrakelever
andlooktoseewhetherthefrontorrearbrakeengages.Nowdothesamewiththe
otherbrakelever.Rememberthisconguration.
Whileyouaretestingthebrakeconguration,makesurethatyourhandscan
comfortablyreachandsqueezetheleverswithnoissues.Ifyouexperienceany
issuesordiscomfortoperatingthebrakes,pleasereachouttousbeforeriding.
Disc Brakes
DiscBrakeswillbelocatedonametaldiscthatisseatedwithineachwheel.
Thediscbrakeswillclampontothisdiscinordertosloworstopyourbikedepending
onhowmuchpressureyouareapplying.

TIRES
www.x.bike22
F5 Trail|OwnersManual
Tire Pressure
Tirescomeavailableinmanydifferentsizesandtheirusescanrangefrom
generalpurposetohighlyspecializedweather/terrainconditions.It’simportantyou
knowwhichtiresyoureBikecomeswith,andunderstandthelimitationsand
specicationsthattheycanperformunder.
Size,pressureratingandotherinformationcanoftenbefoundonthesidewallof
thetire.TirePressureisthemostkeypieceofinformationforyoutoremember.
Inating a tire beyond the maximum pressure can blow the tire off the rim,
resulting in damage to the bike and potential injury to the rider.
Usingabikespecictirepumpwithabuilt-inpressuregaugeishighly
recommended.Ifyoudonothaveaccesstoone,ordonotfeelcomfortableinating
themyourself,pleaseseekprofessionalassistancefromyourlocalbikeshop.
Hightirepressuresworkbestforsmooth,drypavementrides,whilelowpres-
suresgivethebestperformanceonsmooth,slickterrain.However,increasingor
decreasingtirepressurewillhavenoaffectontheterrainthatthetireisdesignedto
handle.Aroadtireatlowpressurestillcannothandleterrainssuchasclayorsand.
Ifyouareunsure,reachouttousoryourlocalbikeshoptodeterminethebest
tirepressureforthekindofridingyouwilldomostoften.
YourF5TrailwillcomestandardwithMaxxisForekaster,27.5”x2.35”tires.It’s
importantthatyouunderstandtheappropriateconditionsandterrainhesetirescan
handleinordertoensuresaferiding.
23www.x.bike
F5 Trail|OwnersManual
Be sure to check your tire pressure frequently (at least every week) using
a high-quality dial gauge.
Tire Valves
Notallbiketubevalvesarecreatedequal,andit’syourresponsibilitytomake
surethatthebikepumpyouareusinghastheappropriatettingtothevalvestemson
youreBike.
TheF5TrailwillcomettedwithaSchradervalve.Thisvalveiscommonto
mostbikes,carsandeventractors.ToinateavalvetubeusingaSchraderheaded
bikepumpfollowthestepsbelow:
1.Removethevalvecap
2.Insertthepumpheadtothevalveheadandinate
3.Toletairout,pressdownonthevalvecorewithsomethingsmall(likea
pencap)
We recommend carrying a spare inner tube with you when riding your
bike, as patching a tube is an emergency repair. If you do not execute it
correctly or if you apply multiple patches, it can result in possible tube
failure. This could cause you to lose control and fall. Replace a patched
tube immediately.

www.x.bike24
BATTERY CARE
F5 Trail |OwnersManual
It’simportanttofollowtheseinstructionsandsafetytipsinordertopreservethe
longevityofyourbattery’slifeandensureproperperformance.
Fullychargethebatterybeforeeachridetomakesureit’sreadytogothefullrange.
Thiswillhelpreducethechanceofover-dischargingthebattery.
Based on IATA regulations, you are not allowed to ship Lithium Ion batteries
this size by air. Please consult a land or sea freight agent for transportation of
the battery.
If the battery becomes physically damaged, non-functional, has been dropped,
or involved in a crash, or you notice it performing abnormally, please
discontinue use and contact FLX Bike immediately.
Charging your Battery
Thechargerisratedfor100-240V.Besuretocheckthecharger,chargingcables,and
batteryfordamagebeforebeginningeachcharge.
Chargingtimetakesabout3-4.5hours.Onrareoccasion,itmaytakelongertoallow
thebatterytofullycharge,particularlywhenthebikeisnew,orhasbeenstoredfora
longperiodoftime.
Only charge the battery with the supplied FLX charger, as others may
cause damage to the battery or increase the possibility of re or
explosion.
Whilethechargerisdesignedtoautomaticallystopchargingoncethebatteryisfull,
donotleaveitpluggedinforperiodsoftimegreaterthan12hours.
Makesureyourchargeravoidscontactwithliquids,dirt,anddebris.
Thechargermaygethotwhileinuse.However,ifitgetstoohottotouchoryou
noticeanythingsuchasastrangesmellorotherindicationsthatitmaypossiblybeover-
heating,discontinueuseimmediatelyandcontactFLXBike.
25www.x.bike
F5 Trail|OwnersManual
Do not cover the charger while in use.
Do not open the charger or alter the voltage input.
If there appears to be any issue with the charger or battery, stop riding and
contact us immediately.
Balancing your Battery
Whenyourstreceiveyourbike,it’simportantthatyoufollowthesestepstoensure
thatyourbatterycellsareproperlybalancedinordertokeepthemoperatingasefciently
aspossible.
1.Fortherstinitialchargeuponreceivingyourbike(orafterlongstoragetimes),be
suretochargethebatteryforatleast8hoursbeforeriding.
Note:Werecommendthatyouletthebatterychargeforatleast8hoursforthe
rst3chargestomakesurethecellsbalanceproperly.
2.Aftertherst3rides,youmaybeginnormalchargingprocedures.
Storing Your Battery
Ifyouplanonstoringyourbike(orsparebattery)forlongerthantwoweeksatatime,
pleasebesuretofollowtheseguidelinesinordertomaintainthelifespanofyourbattery.
Itisrecommendedthatyoudonotleavethebatteryatlowerthanan80%charge
whenstoringforlongperiodsoftimes.Ifstoringforamonthorlonger,periodicallycheck
thebatteryandbesuretokeepthechargeuptoatleast80%
Storeyourbatteryinacool,dryareaawayfromwaterandotherelementsatatem-
peraturebetween50°F–77°F(10°C-25°C).
Failure to follow proper battery care practices can result in unnecessary
wear to the components, battery, and/or charger, which could lead to a battery
that underperforms, or becomes non functional. Loss of battery capacity is not
covered by warranty.

26 www.x.bike
F5 Trail |OwnersManual
Thiswarrantyisnotmeanttosuggestorimplythattheproductscannotbe
brokenorwilllastforever.Itdoesmeanthattheproductsarecoveredsubjecttothe
termsofthiswarranty.FLXwillhavenoobligation,underthislimitedwarranty,inthe
eventthattheproductisdamagedordestroyedasaresultofanyofthefollowing
events:wearandtear,componentuseonanonFLXproduct.
Warranty Information
FLXbikewarrantsthatthisproductiswarrantedtothebuyeragainstmanufac-
turingdefectsinmaterialsorworkmanshipforaperiodof(1)yearfromtheoginaldate
ofshipment.Theoriginalreceiptofpurchaseisrequiredtoestablishproofofpurchase
andmustbeprovidedtoFLXBikeforanyclaims.FLXBikewillrequirecustomersto
completeamandatorystandardprocedureforwarrantyclaimsthatwillinvolvemedia,
suchasphotosandvideostohelpFLXBikeestablishthefaultwiththeproduct.Only
theindividualcomponentsthemselvesarecoveredbythewarranty.Theremoval,as-
sembly,andtuningrequirementsofthecomponentisbornebythecustomermaking
theclaim.Thecostsandinconveniencethatresultfromalossofuseoftheproductis
notcoveredwhilstthewarrantyproceduretakesplace.
Thewarrantyforreplacementcomponentswillbebasedonthedateofship-
ment.Undernocircumstancewillareplacementcomponenthaveawarrantydate
thatisdifferentthantheoriginaldateofdelivery.Ifareplacementisnecessarydue
toadefectinmaterialsorworkmanship,thenFLXBikewillreplacethecomponent
duringthewarrantyperiod,oncethedefectiveparthasbeenreturnedtous.FLXwill
havenoobligationunderthislimitedwarrantyintheeventthattheproductisdam-
agedordestroyedasaresultofanyofthefollowingevents:componentuseonanon
FLXproduct,damageordestructionbyabuse,collision,theft,impropermaintenance,
ormishandlingoftheproduct,naturalforcessuchaswind,lightninghailetc.,any
willfulornegligentact,penetrationoropeningtheproductcasingsinanymanner.
ReplacementwillbehonoredonlybyFLX.ThisisFLX’sexclusivewarranty.Noparty
isgrantedexpressorimpliedauthoritytochangeorannulthiswarrantyinanyman-
ner.FLXdisclaimsanyliabilityforspecial,incidentalorconsequentialdamages.
WARRANTY
www.x.bike 27
F5 Trail|OwnersManual
Thewarrantyappliesonlytotheoriginalbuyeroftheproductandisnottrans-
ferabletosubsequentownersoranyotherparty.Thiswarrantyisvoidiftheproduct
issubjectedtoabuse,neglect,improperrepair,impropermaintenance,alteration,
modication,anaccidentorotherabnormal,excessivelyimproperuseatthesole
discretionofFLX.
Warranty Exclusions
Thiswarrantydoesnotcover:
-Damageorfailurefromabuse,neglect,misuseoraccident.
-Damagefromstuntriding,rampjumping,acrobatics,competitiveevents,
suchasbicycleracing,bicyclemotocrossracing,orsimilaractivitiesorany
activitythatisnotconsistentwiththeintendeduseoftheproduct.
-Damagesresultingfromimproperchargingofthebatterypackoruseofany
chargernotsuppliedbyFLX.
-Installationofanyparts,accessories,orelectricalcomponentsnotoriginally
intendedfororcompatiblewiththeproductassold,oranymodicationofthe
frameoranycomponentsoriginallysupplied;tires,brakepads,chains,lights,
motors,batteries,displays,orvehiclecontrollersthathavebeenopenedfor
anypurposewhatsoever,otherthanbyFLX.
-Allwarrantiesarevoidiftheproductisusedforanypurposeotherthanthe
reasonableintendeduseoftheproduct.Additionally,thiswarrantydoesnot
coverdamageassociatedwithcommercialuse.
-Aftermarketcomponentsormodications.
-Allimpliedwarranties,includingthewarrantiesofmerchantabilityandtness
foraparticularpurpose,arelimitedindurationtothatoftheexpresswarranties
statedabove.

MORE TIPS
Proper maintenance is essential for your safety and to ensure that you
get optimal performance from your eBike. If you are unable to perform the
general maintenance yourself, please reach out to a qualied mechanic.
www.x.bike28 www.x.bike 29
F5 Trail|OwnersManual
TAKING CARE
Service
Technological advances have made eBikes and their components more
complex, thus it is impossible for this manual to cover all of the
information required to repair/maintain your eBike. It’s important to have
any repairs or maintenance that are not covered in this manual, done by
a qualied professional in order to reduce the chances of an accident/
possible injury.
Lifespan
Like any machine, an eBike and its components will be subject to wear
and tear over time. Different parts and materials will have varying life-
spans, and when a components lifespan is exceed, it can suddenly fail,
resulting in serious injury or even death for the rider.
Be sure to check your eBike and components thoroughly for signs of
scratches, cracks, fraying or discoloration as any parts with these kinds
of visible distress may be at the end of their lifespan.
Components may be covered for a period of time through the warranty,
however there is no guarantee that a product will last the term of the
warranty. The lifespan of your eBike and its components is related to the
riding you do, and the care that you take.
A crash or heavy impact can put incredible stress on eBike components,
causing them to wear out prematurely. Components that suffer from
extreme stress can fail suddenly, causing loss of control, serious injury,
or death. Be sure to choose the correct bike for your intended purpose.
F5 Trail|OwnersManual
Besuretofrequentlyinspectandtightenyourcrankboltsasneeded.
Crankboltscanloosenonanybike,especiallyafterstrenuoususe.
Whileyouareabletorideintherain,rustisabikesworstenemy!
Besuretodryoffyourbikeafterawetride.
Inspecttheboltsonaregularbasistoensurethattheyaretightandall
componentsaresecure.
Note: Be sure they are secure, but avoid over tightening the
bolts as this can cause them to strip.
Regularlycheckyourbrakepads,andchangethemifyounotice:
-Contamination
-Lessthan.8mmofmaterial
-Cracksordeformation
Properlyinateyourtires.Underinatedtiresarepronetoatsandcan
affectthesmoothnessofyourride.
Ingeneral,itisgoodtogiveyourbikeanicewipedownwithadamprag
whenitgetsparticularlydirty.Makesuretobemindfulwhengoingnear
theelectronics.

CLASSIFICATION
30 www.x.bike
F5 Trail|OwnersManual
READY
TO RIDE
F5 Trail|OwnersManual
Laws vary in different states / countries.Pleasecheckyourlocalregula-
tions.HereisagoodresourceofinformationintheUS:http://peopleforbikes.org/our-
work/e-bikes/policies-and-laws/
Electric Bicycles are dened by the California Vehicle Code.
NewlegislationbecameeffectiveinJanuary2016.Thecurrentregulations
denean“electricbicycle”as:abicycleequippedwithfullyoperablepedalsandan
electricmotoroflessthan750watts,separatedintothreeclasses:
1. A “class 1 electric bicycle,”or“low-speedpedal-assistedelectricbicycle,”
isabicycleequippedwithamotorthatprovidesassistanceonlywhentherider
ispedaling,andthatceasestoprovideassistancewhenthebicyclereaches
thespeedof20milesperhour.
2. A “class 2 electric bicycle,”or“low-speedthrottle-assistedelectric
bicycle,”isabicycleequippedwithamotorthatmaybeusedexclusivelyto
propelthebicycle,andthatisnotcapableofprovidingassistancewhenthe
bicyclereachesthespeedof20milesperhour.
3. A “class 3 electric bicycle,”or“speedpedal-assistedelectricbicycle,”isa
bicycleequippedwithamotorthatprovidesassistanceonlywhentherideris
pedaling,(nothrottle)andthatceasestoprovideassistancewhenthebicycle
reachesthespeedof28milesperhourandequippedwithaspeedometer.
Localgovernmentordinancesareallowedtopermitorbananyclassofelectric
bicyclesondedicatedbicyclepathsandtrails,withClass1&2permitted,andClass
3banned,bydefault

www.x.bike
This manual suits for next models
1
Table of contents
Other FLX Scooter manuals


Popular Scooter manuals by other brands


Vela
Vela Meywalk 2000 Instructions for use

ANVL boards
ANVL boards Skatecycle instructions

Pride Mobility
Pride Mobility Elite Traveller Series INFINFB2039 Troubleshooting instructions

PLAYTIVE
PLAYTIVE 93708 Instructions for use

PIAGGIO
PIAGGIO X9 Evolution 500 user manual

Gogoro
Gogoro Smartscooter 2 user manual


