manuals.online logo
Brands
  1. Home
  2. •
  3. Brands
  4. •
  5. Flying Gadgets
  6. •
  7. Toy
  8. •
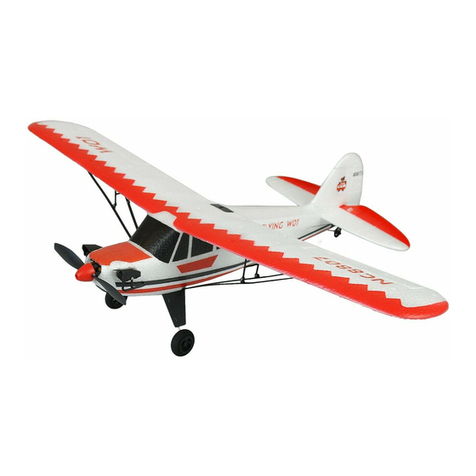
  9. Flying Gadgets 35008 User manual

Flying Gadgets 35008 User manual

LI-Po Batteries
Screwdrivers
Transmitter
3 x Propellors
Lower fusealge
motor unit
Install the battery with the correct polarity, when the red LED lights
up on the aeroplane then close the battery cover.
Connect the red & blue push rods magnetic connectors between the
upper fuselage and lower fuselage motor unit.Then connect the
fuselage magnetic connectors.
Frequency indicator light
Press the Throttle stick, then turn on the
transmitter. The buzzer will ring 3 times,
that means the transmitter is selecting a
frequency. During this time the blue LED on
the controller will be on as it searches for
the reciever.
Install the aeroplane battery in the lower fuselage motor unit. Once the
transmitter binds with the aeroplane the red LED light on the reciever will
flash. The blue LED light on the transmitter will turn off.
When connecting the aeroplane and transmitter, remember to switch on
the transmitter first and then the aeroplane battery.
To stop interference when connecting more than one aeroplane make
sure you only connect one at a time.
The connection of the aeroplane and the transmitter should take only 5
second. If it takes longer than 10 seconds retstart the process.
CHARGING THE AEROPLANE USING THE TRANSMITTER
Connect the Li-Po battery in the aeroplane to the charging socket on the
transmitter making sure it is connected using the correct polarity. Turn the
charging switch “on” on the transmitter. The green LED light will come on,
when it turns off charging is finished. Normal charging time will be around
35-45 minutes.
CHARGING THE AEROPLANE USING THE TRANSMITTER
The transmitter will beep when the batteries in it are low, replace
them ASAP.
Depending on the model you
are flying, make sure that the
servo switch is in the correct
position.
Everytime you connect the upper fuselage and lower fuselage motor
unit you need to check the elevator. The elevator should be aligned
with he horizontal stabilizer. If not you can adjust the elevator by
using the trimmer buttons on the left of the transmitter (See Pic).
Every time you connect the upper and lower fuselages together you
need to check the rudder and elavons. The rudder should be in line
with the vertical stabilizer. The elavons should be in line with the
trailing edge of the wing and parallel to the horizontal stabilizer.
Unscrew the motor, the gently remove the propellor as shown in the
photo and then replace with a new propellor.
Propellor not working
The aeroplane is spinning or
crashes on take off.
Can not take off
Aeroplane does not climb
No response from the
transmitter
Loosing control of
the aeroplane.
Aircraft not balanced
Not taking off towards the wind
Not enough speed
Interferance from another
device
out of range
Take off in to the wind
Increase the power
Fly somewhere else
Fly somewhere else
1.This product is a remote controlled aeroplane. It can be damged in
a crash or collision. Our warrenty does not cover any damge due
to accidents or collisions.
2. If you crash the model and need spare parts you can purchase
them from your local dealer or direct from Flying Gadgets Ltd.
3. We reserve the right to change the content or parts without
notice.
4. The contents of this manual has been checked thoroughly and
have no responsibility for any errors or omissions.
5. Pictures in this instruction manual are only for reference.

Other Flying Gadgets Toy manuals

Flying Gadgets T41 User manual

Flying Gadgets

Flying Gadgets T41 User manual

Flying Gadgets F-Series 2.4G User manual

Flying Gadgets

Flying Gadgets F-Series 2.4G User manual

Flying Gadgets F-Series User manual

Flying Gadgets

Flying Gadgets F-Series User manual

Flying Gadgets Flight 2 Channel Series User manual

Flying Gadgets

Flying Gadgets Flight 2 Channel Series User manual

Flying Gadgets F-series 2.4G User manual

Flying Gadgets

Flying Gadgets F-series 2.4G User manual

Popular Toy manuals by other brands

MOK 9F Loco Body Build instructions

MOK

MOK 9F Loco Body Build instructions

Mega Bloks Collector Series instructions

Mega Bloks

Mega Bloks Collector Series instructions

Fisher-Price Learning Table C5522 manual

Fisher-Price

Fisher-Price Learning Table C5522 manual

Lionel O-27 Santa Fe FT Passenger set How to use

Lionel

Lionel O-27 Santa Fe FT Passenger set How to use

Carson T78 "Catherine" instruction manual

Carson

Carson T78 "Catherine" instruction manual

Fisher-Price FUSION CREW FUSION DIME CHALLENGE quick start guide

Fisher-Price

Fisher-Price FUSION CREW FUSION DIME CHALLENGE quick start guide

REPTILE DRAGON instruction manual

REPTILE

REPTILE DRAGON instruction manual

VQ Airacobra P-39 instruction manual

VQ

VQ Airacobra P-39 instruction manual

BMI Carbooon 450-SC 0461-000 manual

BMI

BMI Carbooon 450-SC 0461-000 manual

LEGO 21131 instructions

LEGO

LEGO 21131 instructions

Mania TAMAGOTCHI instructions

Mania

Mania TAMAGOTCHI instructions

Mattel DREAMWORKS DINOTRUX ROCK SLIDE REVENGE instructions

Mattel

Mattel DREAMWORKS DINOTRUX ROCK SLIDE REVENGE instructions

Fisher-Price W9913 user manual

Fisher-Price

Fisher-Price W9913 user manual

Fisher-Price V3391 instructions

Fisher-Price

Fisher-Price V3391 instructions

Fisher-Price W3131 manual

Fisher-Price

Fisher-Price W3131 manual

Eduard F-22A interior S.A. Assembly instructions

Eduard

Eduard F-22A interior S.A. Assembly instructions

Reely SKY Jet Liner manual

Reely

Reely SKY Jet Liner manual

Faller 2 BUMPERS WITH SHEARING BRAKES quick start guide

Faller

Faller 2 BUMPERS WITH SHEARING BRAKES quick start guide

manuals.online logo
manuals.online logoBrands
  • About & Mission
  • Contact us
  • Privacy Policy
  • Terms and Conditions

Copyright 2025 Manuals.Online. All Rights Reserved.