Flyingvoice FIP16 User manual

!1
!

Contents FIP16 User Manual
Contents
Contact with FlyingVoice 3
Purpose 4
Cross references 4
Declaration of Conformity 5
Part 15 FCC Rules 5
Warnings and Notes 1
Warnings 1
Notes 1
Phone Start 3
Connect to a wireless network 4
Front panel 6
Use the redial key 10
Call from the phone book 10
Call from call log 11
Attended call transfer 12
Blind call transfer 12
All Forwarding 12
Busy Forward 13
No answer Forward14
Send text messages 19
Read text messages 19
Basic 29
LAN Host 29
Syslog 29
Account setting 30
SIP settings 36
VoIP QoS37
LAN 38
VPN 39
DMZ 41
Routing 42
Preferences 42
Phonebook 44
Call log 46
Dial Rule 47
Management 49
Firmware Management 51
Provision 51
TR069 53
The power is not reflected 55
No dial tone 55
Can not make a call56
Can not receive phone calls 56
No sound in the call 56
Can’t login Web page 56
Forget password 56

Contents FIP16 User Manual

Contents FIP16 User Manual
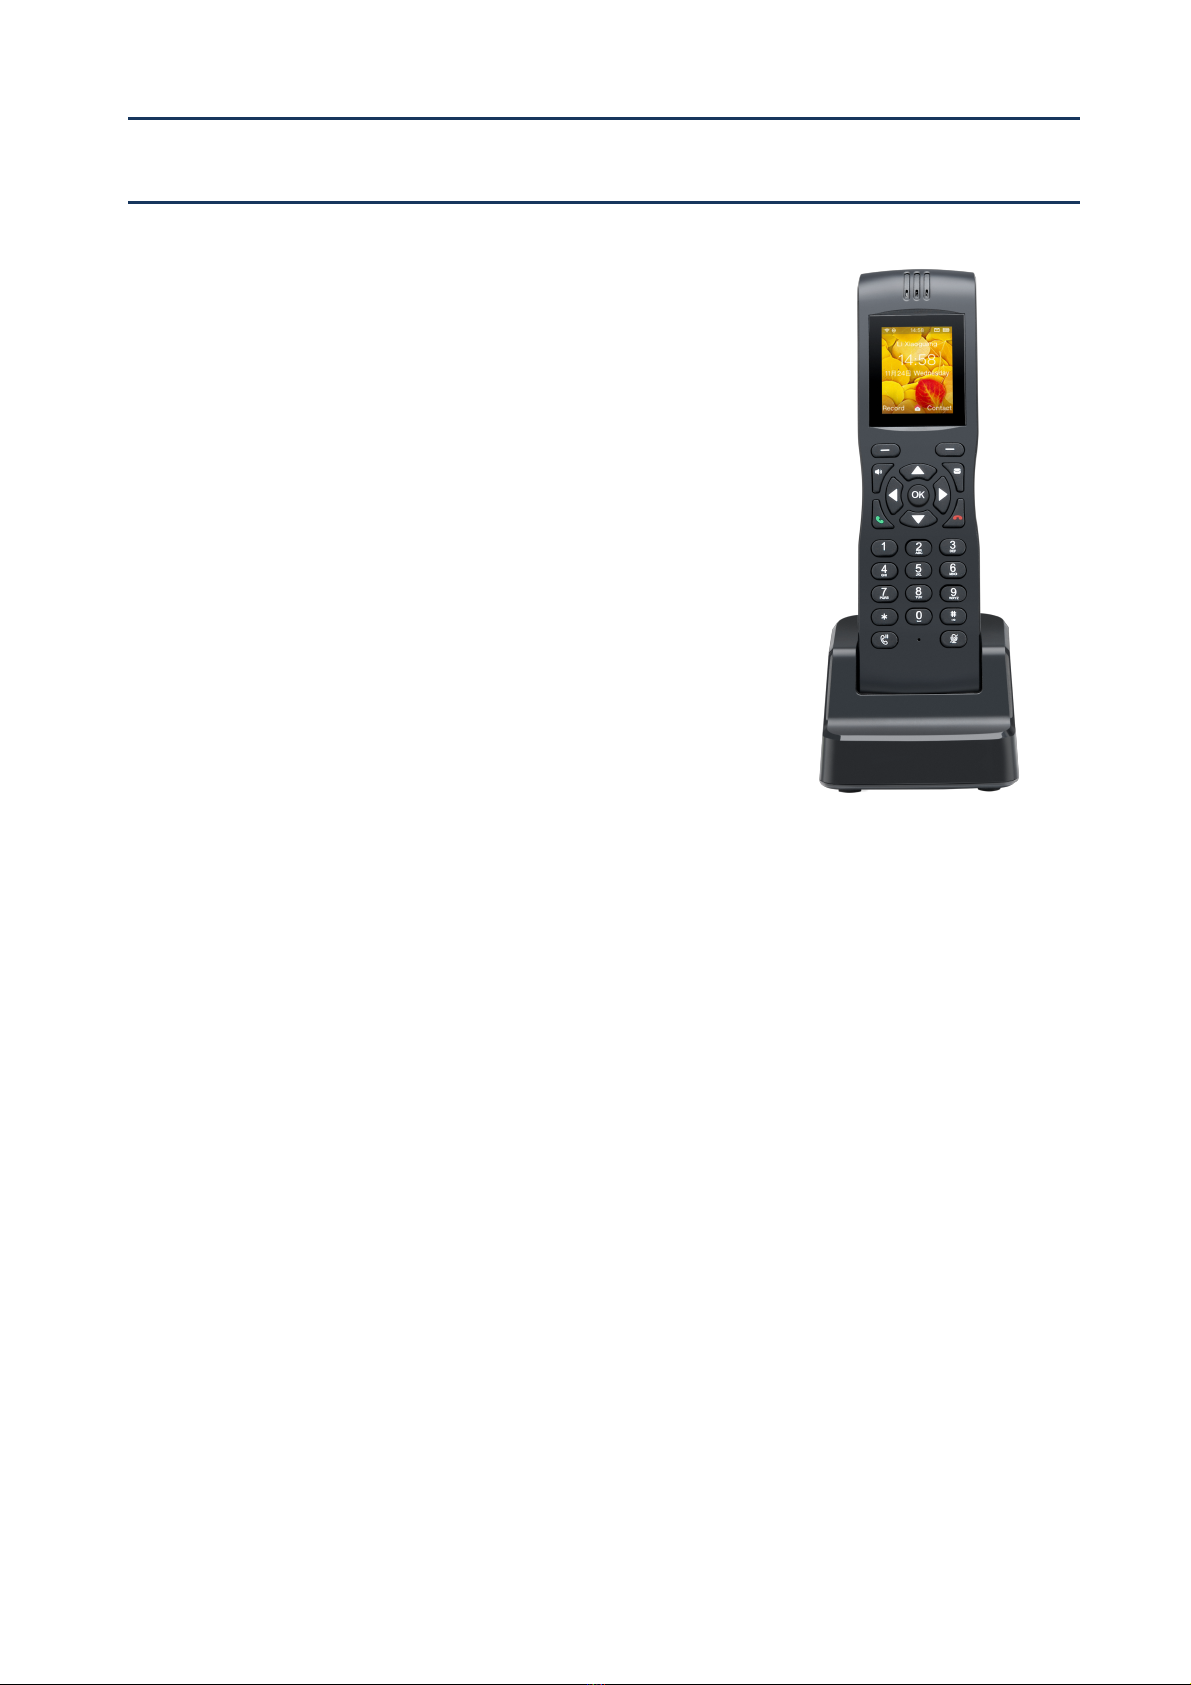
Thank you for choosing FlyingVoiceFIP16. The FIP16
which have one line is a full-featured VoIP (Voice over
Internet Protocol) phone that provides voice communication
over an IP network.
This phone functions not only much like a traditional phone,
allowing to place and receive calls and enjoy other features
that traditional phone has, but also it own many data services
which you could not expect from traditional telephone.
This guide will help you easily use the various features and
services available on your phone.
TheFIP16, which support 2.4GHZ&5GHZ, It can suooprt
802.11 b/g/n, 802.11ac, 2T2R, And the FIP16 have 1.8''
126*160 TFT Color Screen.
This guide contains the following:
·Contact with FlyingVoice
·Purpose
·Cross reference
·Feedback
·Product Declaration of Conformity
·Warnings and cautions
Contact with FlyingVoice
About This User Guide
Main website:
http://www.flyingvoice.com/
Sales enquiries:
Support enquiries:
Hotline:
010-67886296 0755-26099365
Address:
Room508-509, Bldg#1, Dianshi Business Park, No.49 Badachu
Rd,Shijingshan District, Beijing, China

Contents FIP16 User Manual
Purpose
The documents are intended to instruct and assist personnel in the operation, installation and
maintenance of the FlyingVoice equipment and ancillary devices. It is recommended that all
personnel engaged in such activities be properly trained.
FlyingVoice disclaims all liability whatsoever, implied or express, for any risk of damage, loss or
reduction in system performance arising directly or indirectly out of the failure of the customer, or
anyone acting on the customer's behalf, to abide by the instructions, system parameters, or
recommendations made in this document.
Cross references
References to external publications are shown in italics. Other cross references, emphasized in blue
text in electronic versions, are active links to the references.
This document is divided into numbered chapters that are divided into sections. Sections are not
numbered, but are individually named at the top of each page, and are listed in the table of
contents.

Contents FIP16 User Manual
Feedback
We appreciate feedback from the users of our documents. This includes feedback on the structure,
Declaration of Conformity
Part 15 FCC Rules
This device complies with Part 15 of the FCC Rules. Operation is subject to the following
two conditions:
“This equipment complies with FCC RF radiation exposure limits set forth for an uncontrolled
environment.
This equipment should be installed and operated with a minimum distance of 20 centimeters
between the radiator and your body.”
This equipment has been tested and found to comply with the limits for a Class B digital device,
pursuant to Part 15 of the FCC Rules.These limits are designed to provide reasonable protection
Warning
Changes or modifications to this unit not expressly approved by the party
responsible for compliance
could void the user’s authority to operate the equipment.
!

Contents FIP16 User Manual
against
harmful interference in a residential installation. This equipment generates, uses and can radiate
radio
frequency energy and, if not installed and used in accordance with the instructions, may cause
harmful
interference to radio communications. However, there is no guarantee that interference will not
occur in a particular installation.
If this equipment does cause harmful interference to radio or television reception,which can
be determined by turning the equipment off and on, the user is encouraged to try to correct
the interference by one or more of the following measures:
•Reorient or relocate the receiving antenna.
•Increase the separation between the equipment and receiver.
•Connect the equipment into an outlet on a circuit different from that to which the
receiver is connected.
•Consult the dealer or an experienced radio/TV technician for help

About This User Guide FIP16 User Manual
Warnings and Notes
The following describes how warnings and notes are used in this document and in all
documents of the FlyingVoice document set.
Warnings
Warnings precede instructions that contain potentially hazardous situations. Warnings are
used to alert the reader to possible hazards that could cause loss of life or physical injury. A
warning has the following format:
Notes
A note means that there is a possibility of an undesirable situation or provides additional
information to help the reader understand a topic or concept. A note has the following
format:
Warning
Warning text and consequence for not following the instructions in the
warning.arning text
and consequence for not following the instructions in the warning.
!
Notes
Notes text and consequence for not following the instructions in the Notes.

LCD Configuration FIP16 User Manual
This chapter covers::
·FIP16
·Internet connection
·Familiar with the phone
Chapter 1 Product description
FIP16/FIP16/FIP16P
Port/Model
FIP16

LCD Configuration FIP16 User Manual
Phone Start
Please refer to the quick installation manual for the telephone assembly!
Step 1.Press the power button more than 3s to power on the FIP16.
Step 2. After power on the FIP16, the LCD screen of the phone will display the signature of "FlyingVoice".
Step 3. When the phone has started normally,LED will go out and LCD will display the current status of the
phone, including SIP registration information, wifi connection information and so on.
Product Picture
LED
1.8 inch color LCD screen
126 * 160 resolution
Wi-Fi
2.4G&5G
Line
1
Ethernet Port
×
Headset
3.5mm
USB
1*USB for power adapter
Soft key
2
Code
G.711(A-law,U-law),G.723,G.729A/B,G.722,iBLC
TR069
√
SNMP
√
VPN
PPTP/L2TP/Open VPN
Auto configuration
TPTP/HTTP/HTTPS Tr069 Network management
Telephone book
√
Call history
√
SMS
√
Internet connection
Note
Make sure you had recharge the FIP16 enough power for power on .
Note
If the phone does not display the above information, please re-confirm the
installation and connection. If these operations are ineffective, you can try
unplugging the power plug and plug. it in again. If you still can not see the show,
contact your phone administrator or service provider.。

LCD Configuration FIP16 User Manual
Connect to a wireless network
You can configure a wireless connection in both the LCD and the web.
From the LCD menu:!
Step 1. Press menu and then use the ▲and ▼buttons or enter " Wireless Network" or just press
the wireless in the right of LCD.
Step 2. Select " Wireless network connection" and the phone will scan and display the surrounding
wireless network.
Step 3. Using the ▲and ▼buttons to navigate, use the softkey "Connect" connection under the LCD
to select the network, the logo appears on the LCD,The line network is connected.
From the page:
Step 1. Log in to the website and switch to the Network / Wireless page.
Step 2. choose one wireless network to connect.
Notes
If you need Wi - Fi certification, please fill in the authentication and password.!
从网页:

LCD Configuration FIP16 User Manual
Step 3. Use “connect”button at the bottom of the page.
Step 4. If the connected wireless does not have a password, you can connect directly; if the wireless
connection has a password, enter the password and click "OK" to confirm the connection.
Step 5. If AP is connected,the wireless icon on the main screen of the LCD will appear as connected
!

LCD Configuration FIP16 User Manual
Front panel
Familiar with the phone
No.
Name
Description
1
Power
Press the button for more than 3S to power on or power off
2
Volume button
Increase or decrease the volume

LCD Configuration FIP16 User Manual
The description of icons in the home screen
3
Logo
Flyingvoice Logo
4
LED
The LCD screen is used to display the status of the
phone, such as the IP address of the Internet port.
Phone number and line status
5
Soft key
You can select or control the opera t i o n i t e m s d i s p l a y e d
below the LCD screen. The function of the soft keys
depends on the contents of the corresponding LCD
display at that time.
6
Handsfree
Switch to handsfree mode
7
Navigation key
1. Navigation keys, including up, down, turn left, right
turn and confirm keys
2. Turn left and right turn is also the volume of the
shortcut keys
3. The confirmation key is also a shortcut to view the
current network status
8
Pick up
Pick up the call
9
Voicemail
Voicemail shortcuts
10
Hang up
Press the button to hang up the call
11
Numeric Keypad
Enters numeric digits for initiating a call or for entering
configuration information.
12
Hold
To hold the current call, press the Hold key again to
restore the current call
13
Mute
When the phone is on, press to switch to silent mode
14
Base
Base is used to charge to the phone
15
USB
Connect to the power cord to charge the phone
Icons
Description
The wifi is connected(There is little signal)
The wifi is connected(A lattice signal)
The wifi is connected(Two lattice signal)
The wifi is connected(Three lattice signal)
The wifi is connected(Full lattice signal)
!
!
!
!
!

LCD Configuration FIP16 User Manual
This chapter contains the following:
·SIP registration
·Dial number
·Answer the phone
·Mute the call
·Hold
·3-way conference
·Call transfer
·Call forward
The wifi is disconnected
Missed Call
Short message
Headset
Battery charging state (charge 20%)
Battery charging state (charge 40%)
Battery charging state (charge 60%)
Battery charging state (charge 80%)
Battery charging state (charge 100%)
Power surplus 20%
Power surplus 40%
Power surplus 60%
Power surplus 80%
Power surplus 100%
Enable auto answer
Do not disturb
Mute
Call forward is enable
!
!
!
!
!
!
!
!
!
!
!
!
!
!
!
!
!
!
Chapter 2 Basic functions

LCD Configuration FIP16 User Manual
·Call waitting
·Auto Answer
·DND
·End the call
·Blacklist
·SMS
·Voicemail
There are two ways to register a SIP account: register from the LCD and register from the web page
From the LCD:
Step 1. Press Menu.
Step 2. Use the ▲and ▼navigation keys to Setting--Account, you need to enter the login password.
Step 3. Select the line to register and fill in the relevant configuration as indicated by the LCD
Step 4. Use the soft key from to "save" the current configuration.
Step 5. Check the registration of the corresponding line on the display.
From the web page:
Step 1. Log in to the web page. Please refer to section 4.1 for details.
Step 2. Switch to the SIP Account configuration page.
!
Step 3. The account enable is set to "On" and the line can be used after opening.
SIP registration

LCD Configuration FIP16 User Manual
Step 4. The registration server fills in the IP address of the SIP server.
Step 5. Display Name Fill in the content is the name of the number displayed on the LCD.
Step 6. The registration account is filled with the account provided by the SIP server.
Step 7. The name of the authentication is the SIP account provided by the SIP server.
Step 8. The password is filled with the password provided by the SIP server registration account.
Step 9. When you are finished, click the Save button at the bottom of the page to make the
configuration take effect.
Step 10. Check the registration of the corresponding line on the display / web status page.
You can make a call by either of the following methods:
Use the handle
Step 1. Press the dial key to enter the destination number.
Step 2. Use the "Dial" / # / wait for 5 seconds to dial the phone number.。
Use handsfree!
Step 1. Press the handsfree off-hook, the LCD display shows "Enter the number"
Step 2. Press the dial key to enter the destination number.
Step 3. Use the "Dial" / # / wait for 5 seconds to dial the phone number.
Use headphones!
Step 1. Press the headset key to go off-hook, the LCD display shows "Enter number"
Step 2. Press the dial key to enter the destination number.
Step 3. Use the "Dial" / # / wait for 5 seconds to dial the phone number.
Use the redial key
In the standby mode, redial the number of the last call:
Step 1. Press the "History" softkey to quickly select the call log.
Step 2. Use the softkey to select "Redial List".
Step 3. Select a phone number and press the "Dial" softkey to redial the called number.
Call from the phone book
Add phone book:!
From the LCD menu:!
Step 1. Press menu button to enter the main menu and use the softkey to select phone book.(or you
can just press second softkey “pbook” to enter phoneebook.)
Step 2. Follow the prompts to add a phone book and press the "abc" softkey to toggle the input
method (numbers, uppercase and lowercase).!
Use the phone book:!
Step 1. Press menu button to enter the menu item and use the ▲and ▼navigation keys or enter the
number 1 to 1. Phonebook; Or use the phonebook shortcut kkeys in the LCD.
Step 2. Use the ▲and ▼keys to select the number you want to dial, press the "Call" softkey to make
a call immediately.
Notes
Step 3-9 is to fill in the required content, other parameters fill in the required!
从网页:
Dial number

LCD Configuration FIP16 User Manual
Call from call log
Step 1. Press menu button to enter the main menu and use the ▲and ▼navigation keys or enter the
number 2 to 2. Call history,Or in the standby or dial-up interface, use the softkey to enter the
"history"
Step 2. Select the dialed number of the dialed call / missed call / missed call. Press the "dial"
softkey to dial the call immediately.
When there is a call, the LED in the upper right corner of the phone will flash and the phone rings.
You can answer the call in the following ways:
1. Press the corresponding line button.
2. Press the Handsfree key to answer.
3. Pick up the handle and answer.
4. Press the earphone key to answer.
5. Press “answer” softkey to answer.
6. Auto Answer: If the phone is enabled for automatic answering, the device will automatically
answer the call when there is an incoming call.!
Mute mute: During a call, press !button, the MIC will be deactivated, the handle is available,
and the icon !is displayed on the screen. This can prevent the caller from hearing your or your
background sound.
Unmute: Press !button again, the icon disappears and the sound can be sent normally.
When the phone is talking:
Step 1. When A and B talk, A presses the HOLD button !to keep the current call, and then the
A handset can hear the dial tone, and B will play keep music.
Step 2. At this point the A phone can enter another phone number to make a call.
Step 3. A Press the HOLD button !again to release the current hold status and resume the
previous call.
Step 1. Start a conference call, A and B phone have a call ,during the call, A phone press !
Answer the phone
Call mute
Hold
3-way Conference

LCD Configuration FIP16 User Manual
button, the current call is held, A phone to hear the dial Tone, B phone play to keep music.
Step 2. Dial the phone number of the C telephone.
Step 3. When the C phone answers the call, the A telephone presses the "conference" as the
conference presenter to open the conference call.Same conference call.
Step 4. If the A phone (conference host) hangs up, the other two calls will be disconnected; if the
non-hosting party B / C side hangs first, A phone can still talk to the other party.
Attended call transfer
Functional Description:
Attended call transfer: the phone as a middle side of attended call transfer, after asking the
destination phone, then it will make the call which is connectting transferred to the destination
phone.
How to Use:
Step 1. A and B phone call, A phone !button. The current call is held, A phone to hear the dial
tone, B phone to keep playing hold music.
Step 2. A call C.
Step 3. C phone answers, speaks to A (and A asks if C want to connect with B).
Step 4. If C agrees to answer the transfer call, the A phone presses the "Transfer" softkey to complete
the transfer. Then A will be disconnect from all call.
Step 5. If C don’t agree to answer the transfer call, after A / C hangs up after the call, A presses
!button to resume the call with B.
Blind call transfer
Functional Description:
Blind call transfer: the phone as a middle side of blind call transfer, will be connected directly to the
destination phone without asking.
How to Use:
Step 1. A and B phone is making a call, A presses the "transfer" soft key during the call, A phone will
hear the dial tone, B phone will hear hold music.
Step 2. A call C.
Step 3. C answer the call, then talking to B, A will automatically hang up.
All Forwarding
Functional Description:
Transfer all calls to another number. Can be configured from an LCD or Web page
From the LCD:!
Step 1. Press !button.
Step 2. Use the ▲and ▼navigation keys or enter the number 8 to 8. Call Forward and select one of
them
1. CFWD All.
Call transfer
Call Forwarding

LCD Configuration FIP16 User Manual
Step 3.Fill the relevant configuration according to LCD instructions: whether open all forward; target
number; on code; off code.
Step 4. Use the second soft key from the left to "save" the current configuration.
From Web page:
Step 1. Log in to the phone web page and switch to the "Phone - Preferences" page.
!!
Step 2. There is a call item in the middle of the page.
!
Step 3. Enable all forward at position 1 and fill the destination number at position 2.
Step 4. At the bottom of the page, click ‘Save’ / ‘Save& Apply’, and the configuration is complete.
How to Use
Step 1. The A handset assumes that the unconditional transfer has been configured and the target
number is the C telephone.
Step 2. B Telephone Calls a telephone
Step 3. The C ringing, off-hook and B calls. A phone in the process without any reaction.
Busy Forward
Functional Description:
When the line is busy, transfer all calls to another number.Can be configured from LCD or Web page
From LCD :
Step 1. Press mu button.
Step 2. Use the ▲and ▼navigation keys to Setting---Call Forward and select 2.CFWD When Busy.
Step 3. Fill the relevant configuration according to LCD instructions: whether to open the busy
forward; target number;on code; off code.
Step 4. Use the second soft key from the left to "save" the current configuration.
From Web page:
Step 1. Log in to the phone web page and switch to the "Phone - Preferences" page.
Table of contents