flyingwings Venturi EVO 2 FPV User manual
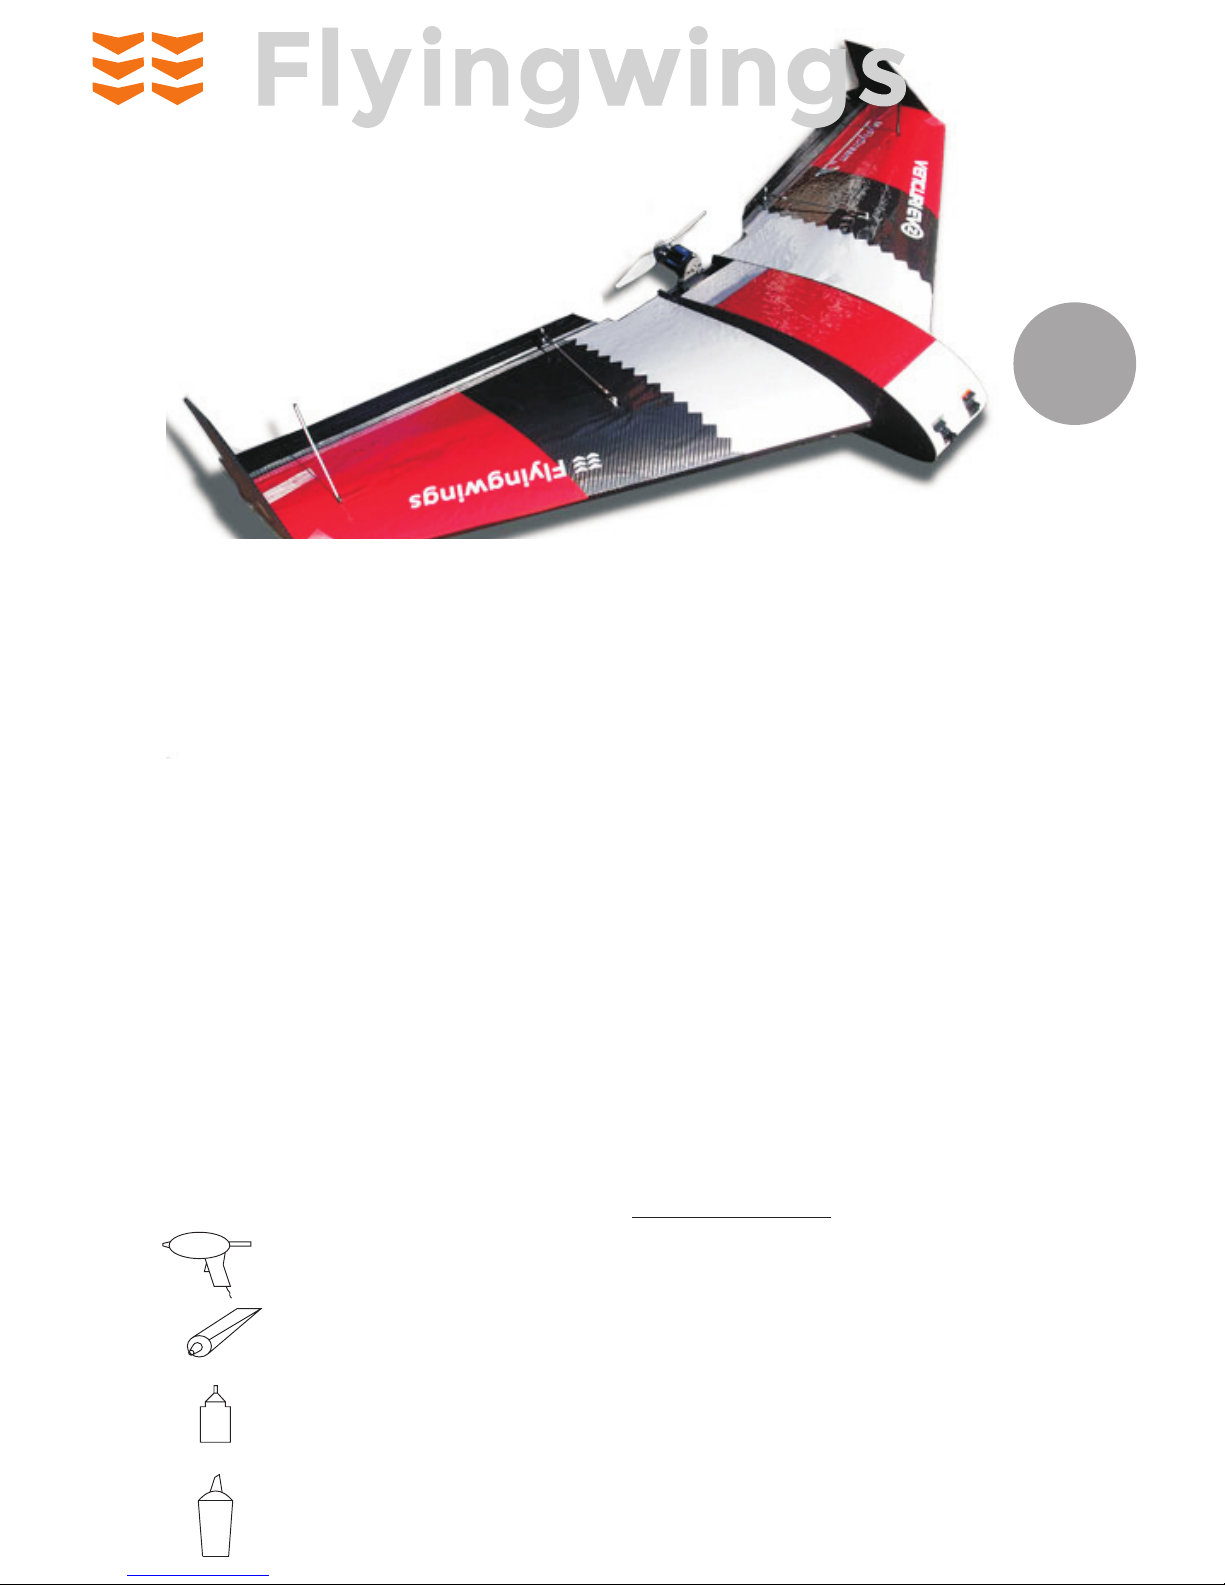
Venturi EVO FPV2
CRITICAL DATA
CENTRE OF GRAVITY 185 +/-10mm
BACK FROM THE FOAM WING LEADING
EDGE AT ROOT
TARGET FLYING WEIGHT
2000 grams without FPV gear & camera
with 2 x 3300mah 4S batteries
UHU POR
HOT GLUE GUN
CA GLUE
PVA WOOD GLUE
Thank you for purchasing the Venturi EVO FPV wing
The Venturi FPV is designed for First Person Viewing (FPV) and for UAV/Drone
experimentation.
There is a power system for this model, see the website for details.
As well as this power system you will require:
2 x Standard size servos 43g (standard size)
1 x Long range receiver
1 x Lipo battery(s) (2x 3300mah 3S or 4S 11.1v)
1 x connectors set
1 x Transmitter capable of elevon mixing or mixing module
1 x Lipo compatible charger
See website for power system details
STEP
STEP
1
2
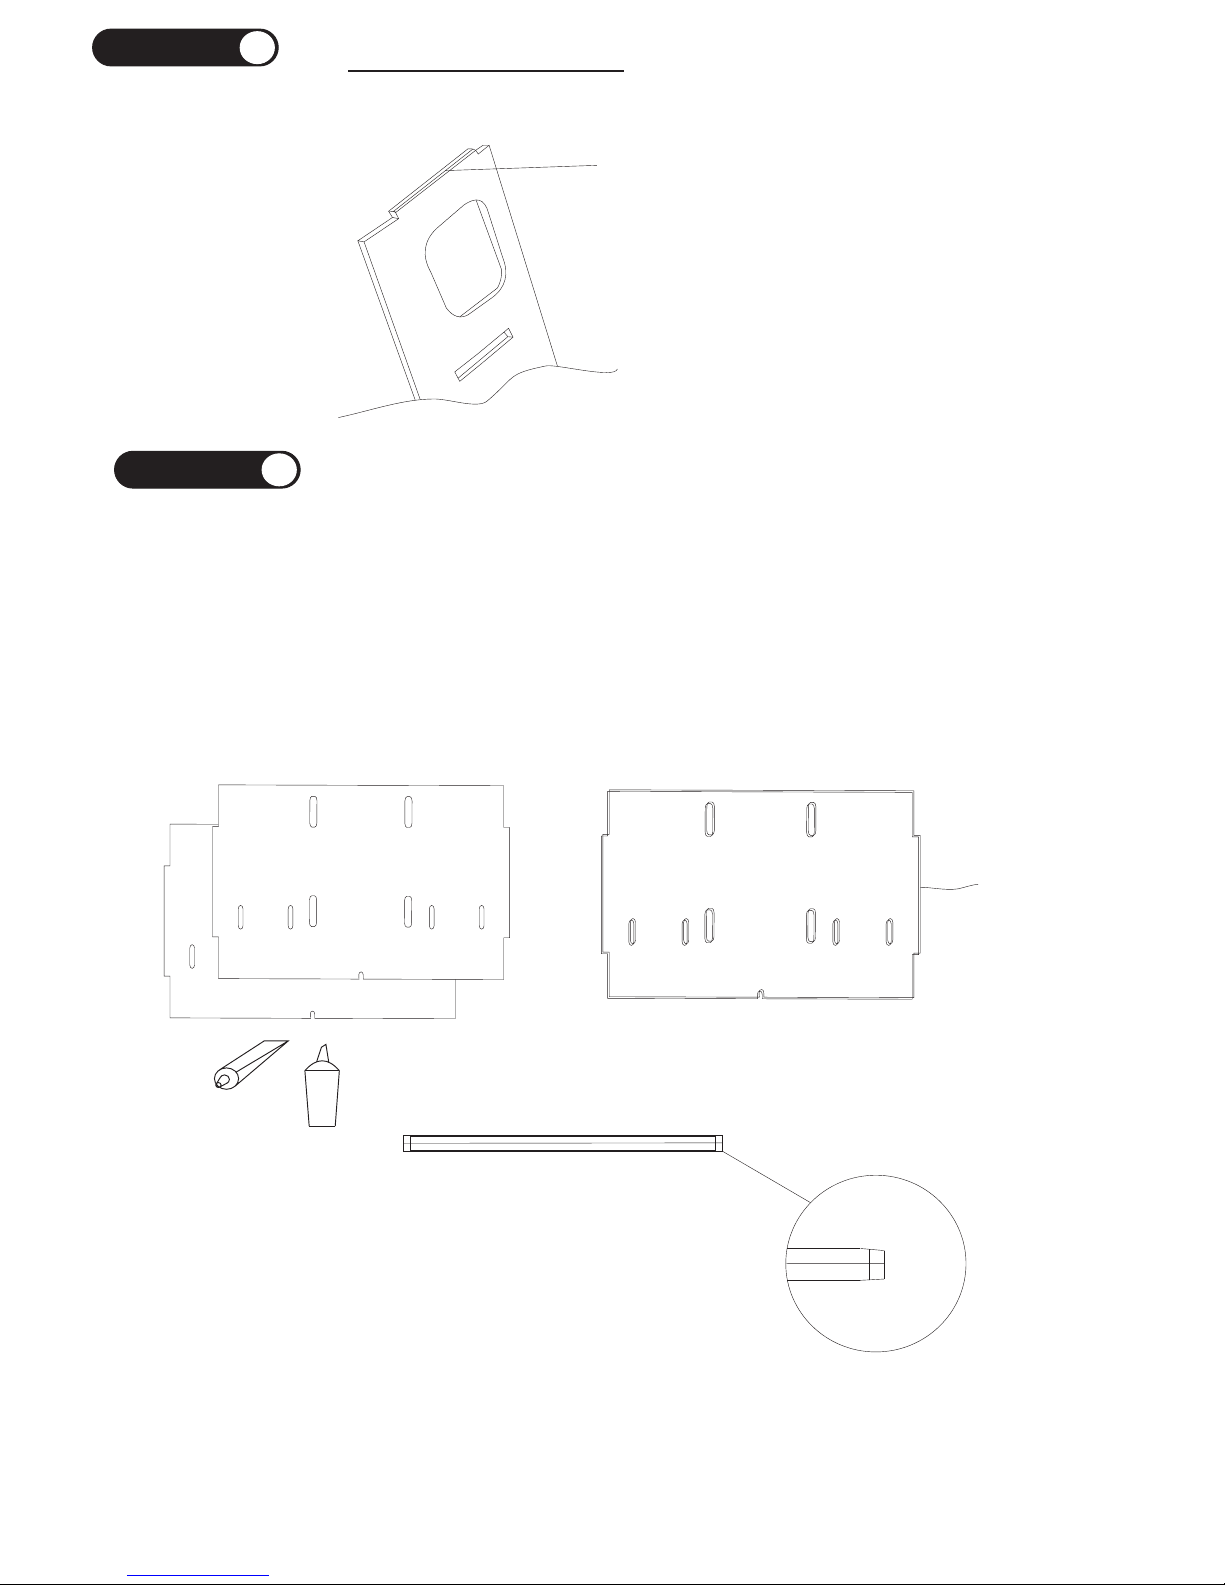
Fuselage assembly
Carefully cut the tabs holding
the parts on to the sheets of ply.
Sand off the remaining tab and
lightly bevel off the interlocking
part of the piece, to help in
assembly.
Glue the 2 motor plates together using wood glue or UHU por, be careful to
align them accurately, allow to dry
Sand the tabs down as shown
Tabs

Once you have trimmed and sanded the ply parts, its ready for assembly.
Lay the fuselage side on a flat surface and assemble without glue.
Once you have trimmed and sanded the ply parts,
its ready for assembly.
Lay the fuselage side on a flat surface and
assemble without glue.
You can use thin CA glue to hold the assembly together step by step.
Soak the CA glue into the tab joints, use a weight to hold it in position.
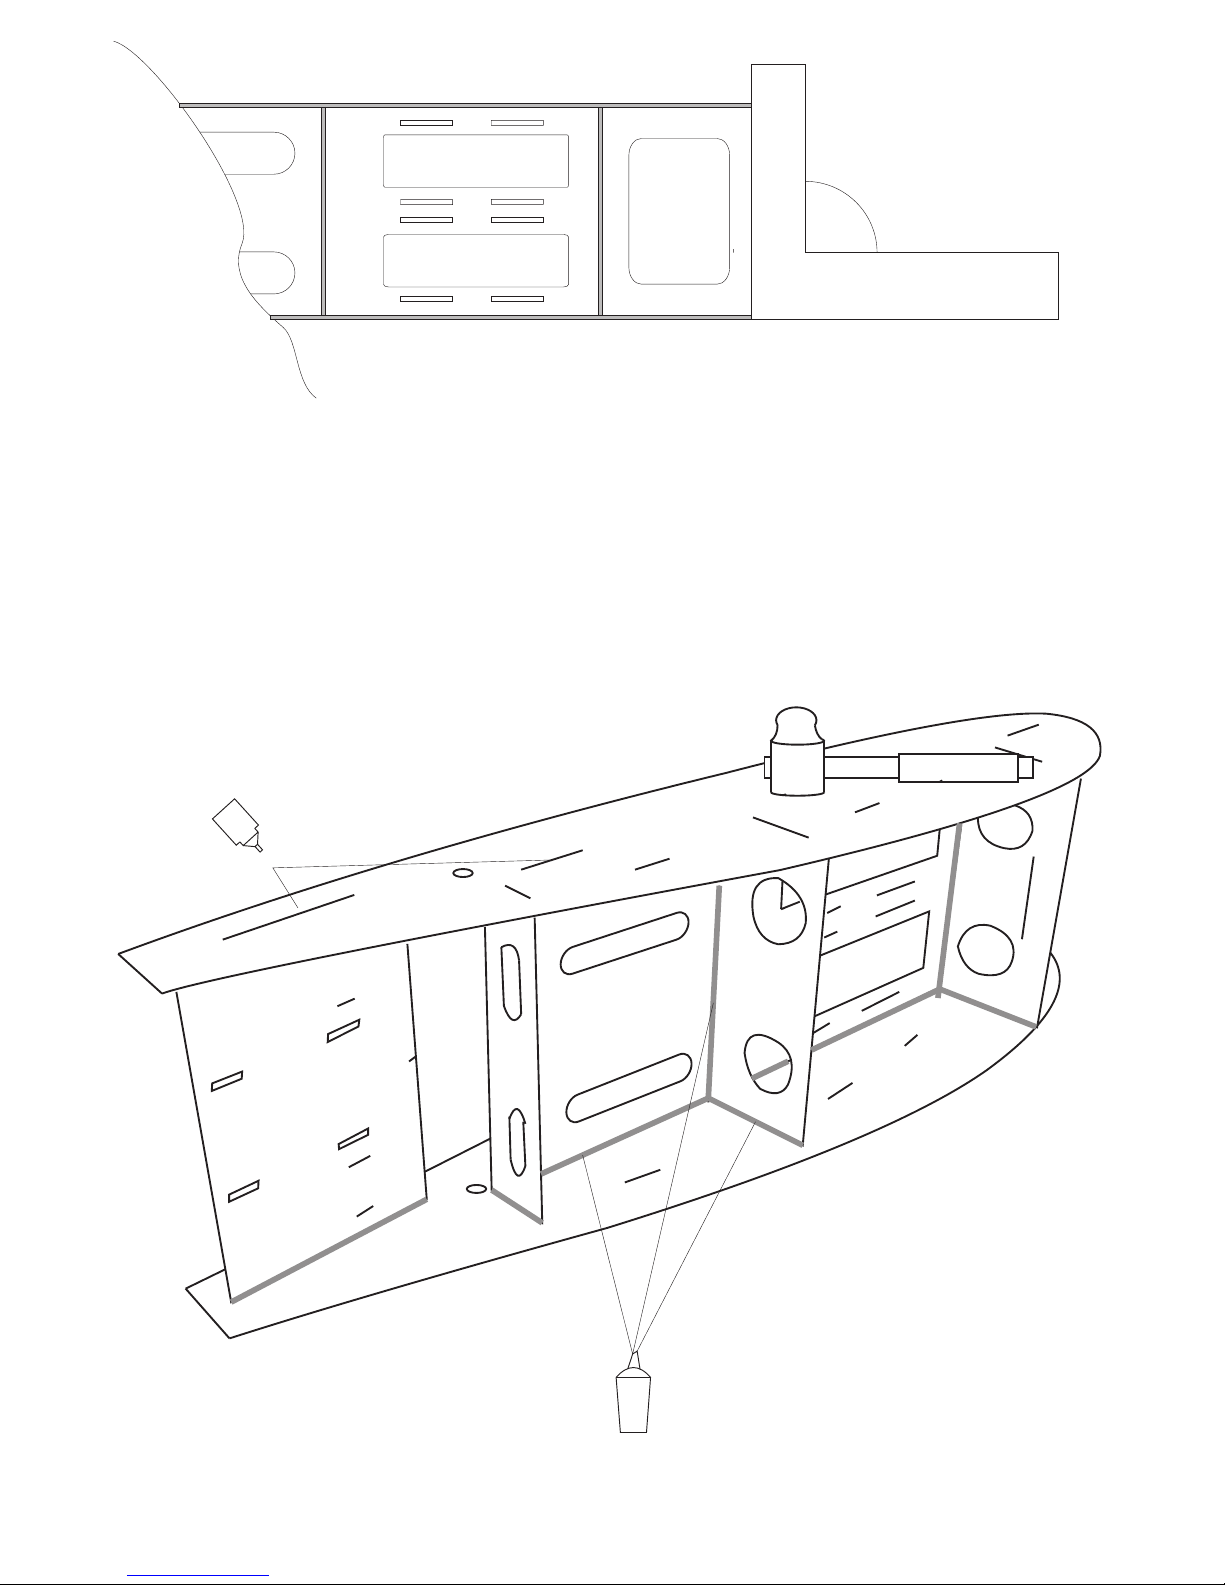
When you are happy that the fuselage
is correct and aligned, run a bead of
wood glue or UHU por around all the
joint lines.
Put aside to dry / set
IMPORTANT: check that the fuselage sides are aligned here before using
glue
90
degrees
Note !
Why not spray the fuselage with some
acrylic car paint, black looks good

Wing Preparation Guide lines
All FPV installations are different, but we offer
some guide lines for the Venturi EVO 2
GPS
Video TX
Receiver
There are some pre-cut slots in the
fuselage to run cables from the wing to the
autopilot /osd etc
Using the spar holes, hold the fuselage
against the wing and mark on the wing
where these slots line up. Then you can cut
slots in the wings for the servo , video tx etc
cables
Cut out the foam to accomodate your chosen
servos and FPV gear
When you are happy with this, remove the parts
and laminate the wing with 72 micron laminate
film.
Attaching wings to fuselage
IMPORTANT !
The tube spars are a tight fit in the wings, to help
assembly, use insert the spars into the wings with
twisting action making them easier to insert when
you come to assemble the wings.
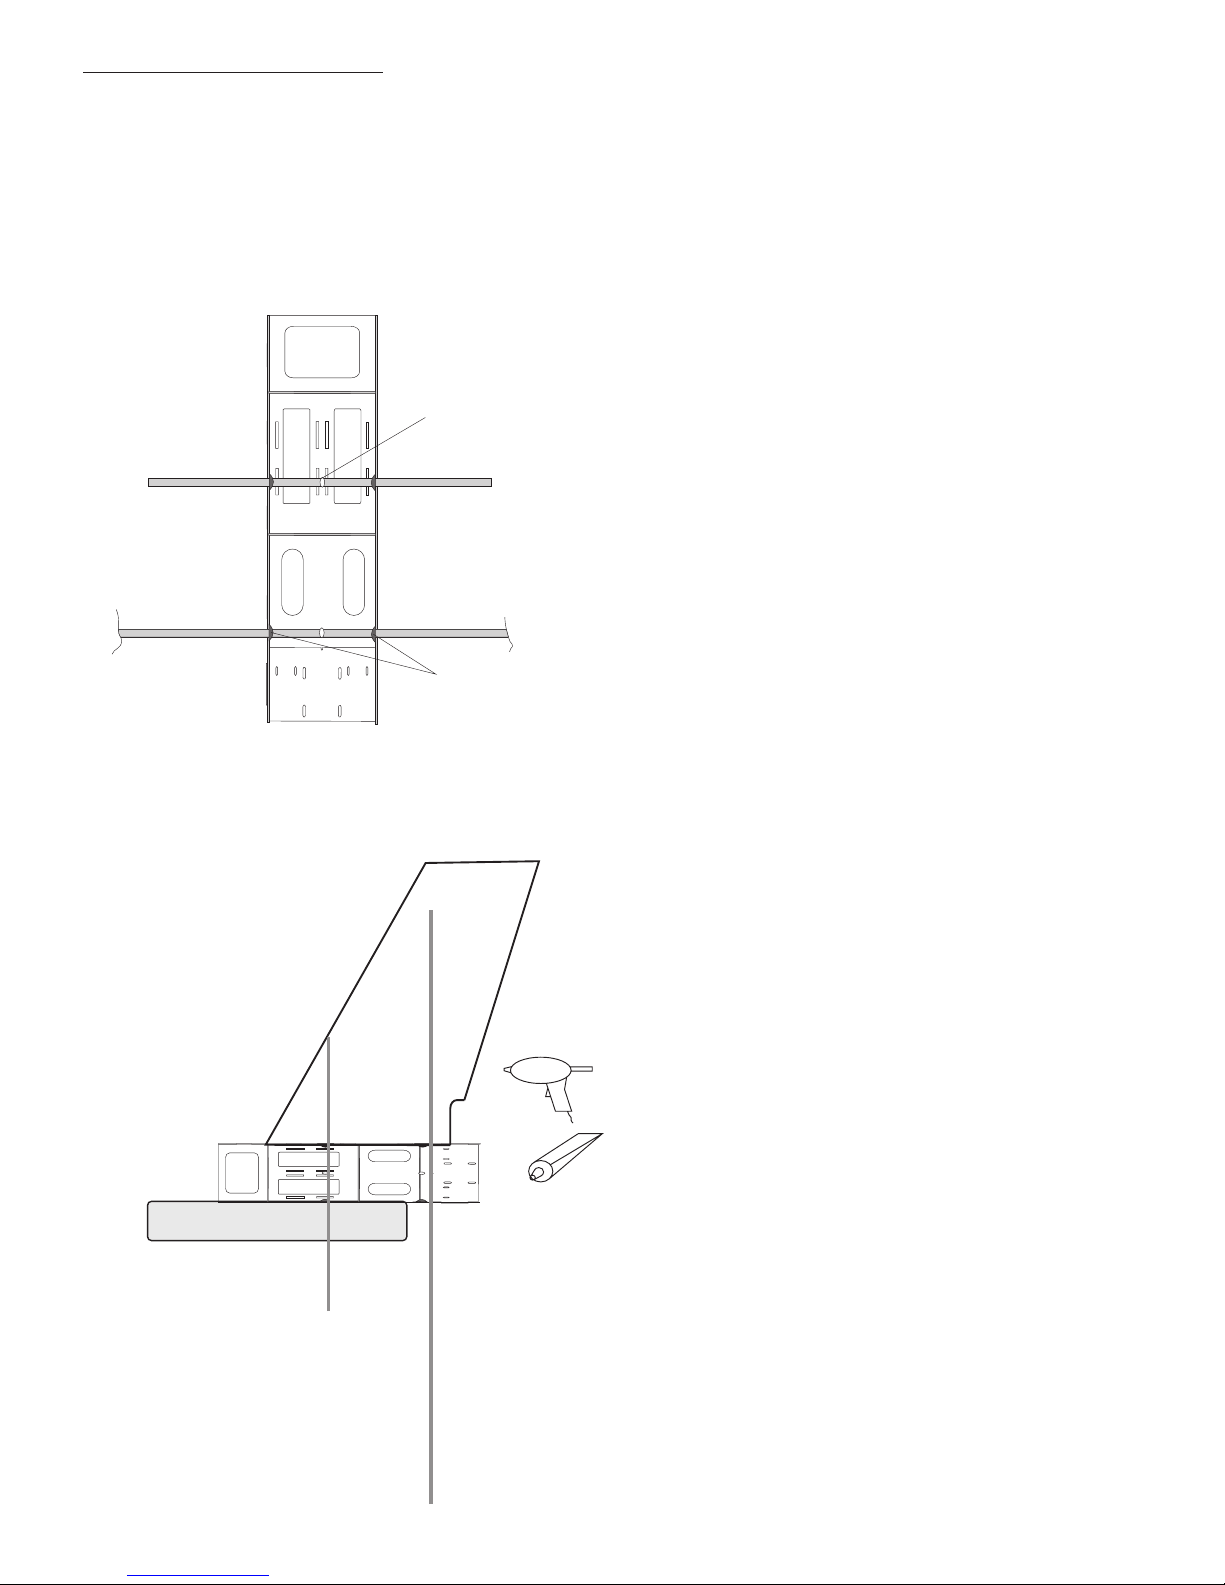
Mark each spar at the centre point
Slide the two carbon tube spars through the
fuselage, short on at the front.
Use a small amount of glue to hold the spars in
place
Bench
Run a small bead of UHU Por up each spar,
Slide the wing down the spars
Mark out where the wing will join the fuselage
and use plenty of glue.
Check the front and back of the wings for
alignment.
repeat for the other wing
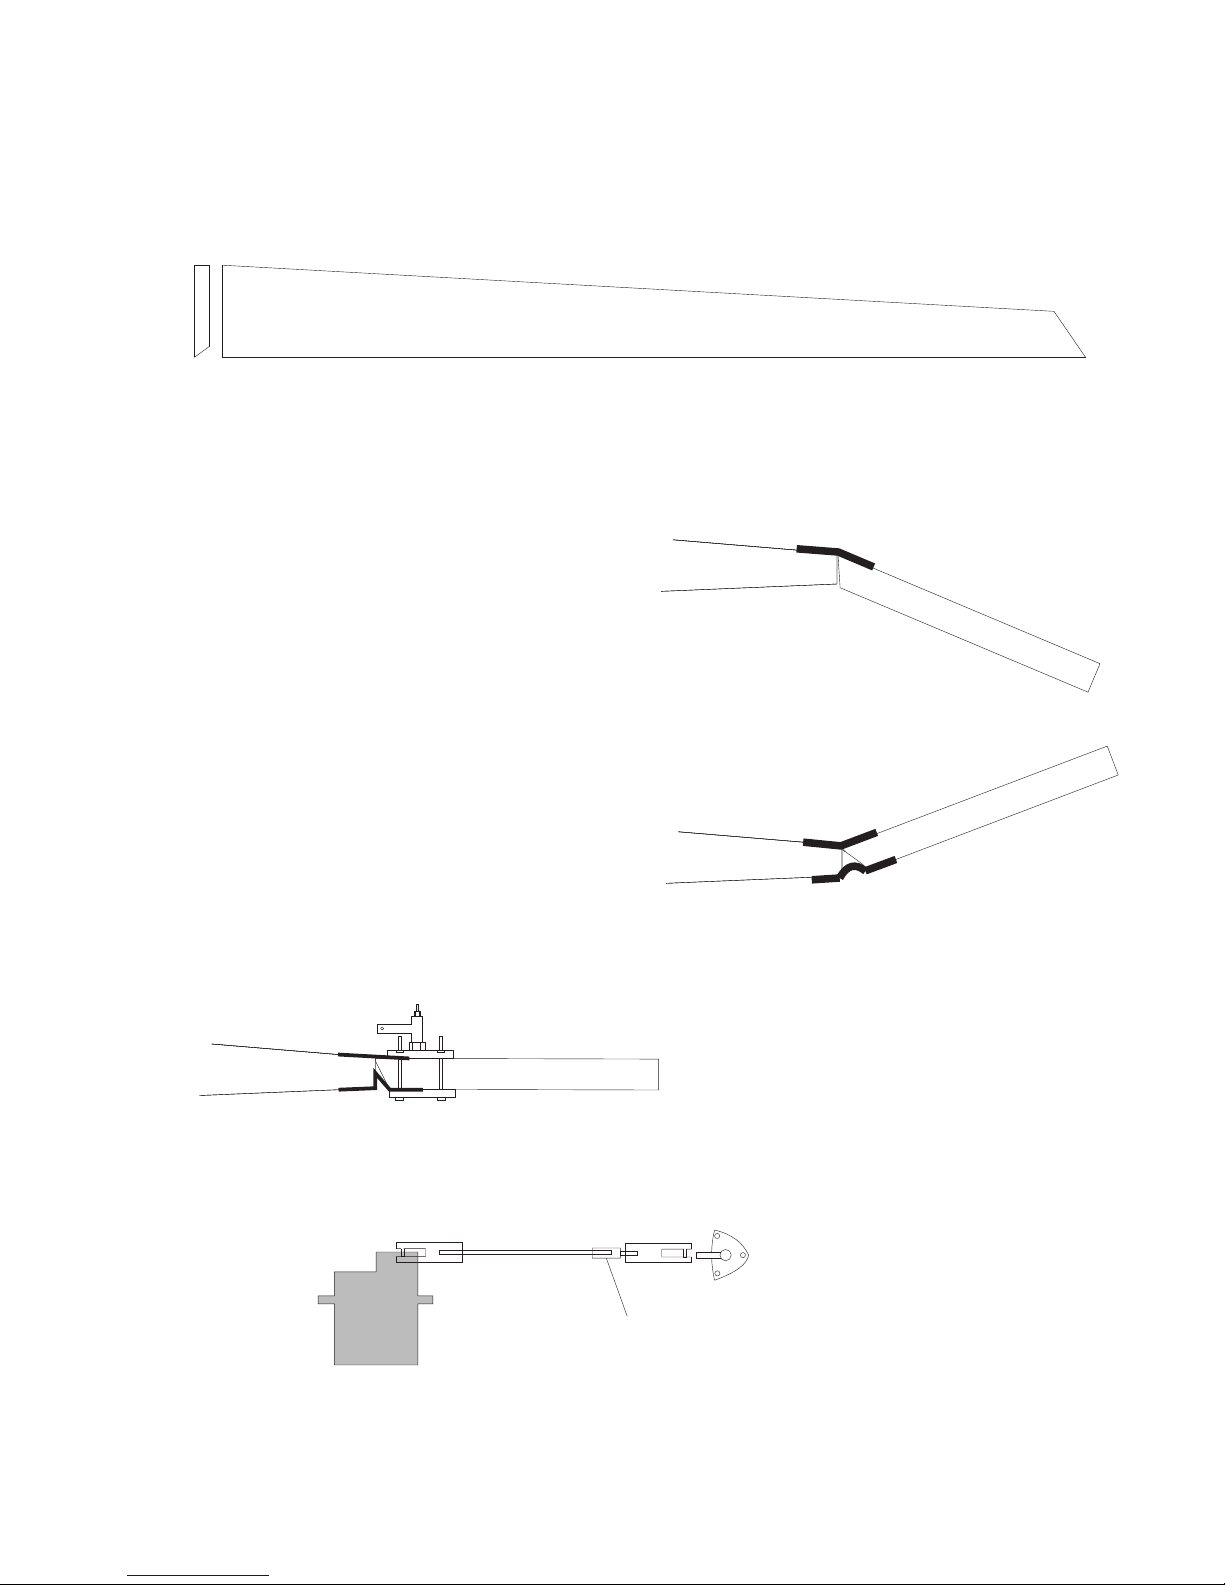
Using a sanding block, chamfer the leading edge of the Balsa elevons. Remember they are handed
left & Right, Cover using just coloured tape/
L e a d i n g E d g e
Elevon Preparation
Using 25mm strapping tape or cutting 50mm tape
down the centre, attach the elevons.
1. Run a strip down the back edge of one side of
the wing, half on half off, offer up the elevon at a
downward angle as show, attach it to the tape.
2. Angle the elevon up and apply the tape to the
bottom part of the hinge. Ensure free movement.
3. Set the elevon 3mm short of the wing’s end to
stop it rubbing against the correx wing tip.
Horn Assembly & Pushrod setup
Solder
Joint

Foam Parts
The foam parts installation is best in this sequence
1. Install motor mount & battery velcro straps
2. Glue in lower fuselage
3. Install all of your equipment, like the AP, ESC’s Motor etc
4. Glue in rear section
5. Modify the nose section as desired to accommodate your cameras
6. Attach Hatch using tape and velcro
7. Glue on nose section, when all is working correctly
Lower Fuselage
Upper Nose
Hatch Rear Cover
Rear Hatch Plate
Front Hatch Plate
optional
You can hinge the
hatch using strapping
cut some channels out to
accommodate the camera
cables

Motor Mounting Outboard style: quieter,
may need more nose
weight to balance
(CofG)wing
Inboard Style: Noisier,
easier to get balance
(CofG)
Note: Upthrust, this
is correct
Wingtips:
Cut some stapping tape, and
wrap it around the front
section of the wingtip, top and
bottom.
Feed a strip through the slots
and attach top & bottom.
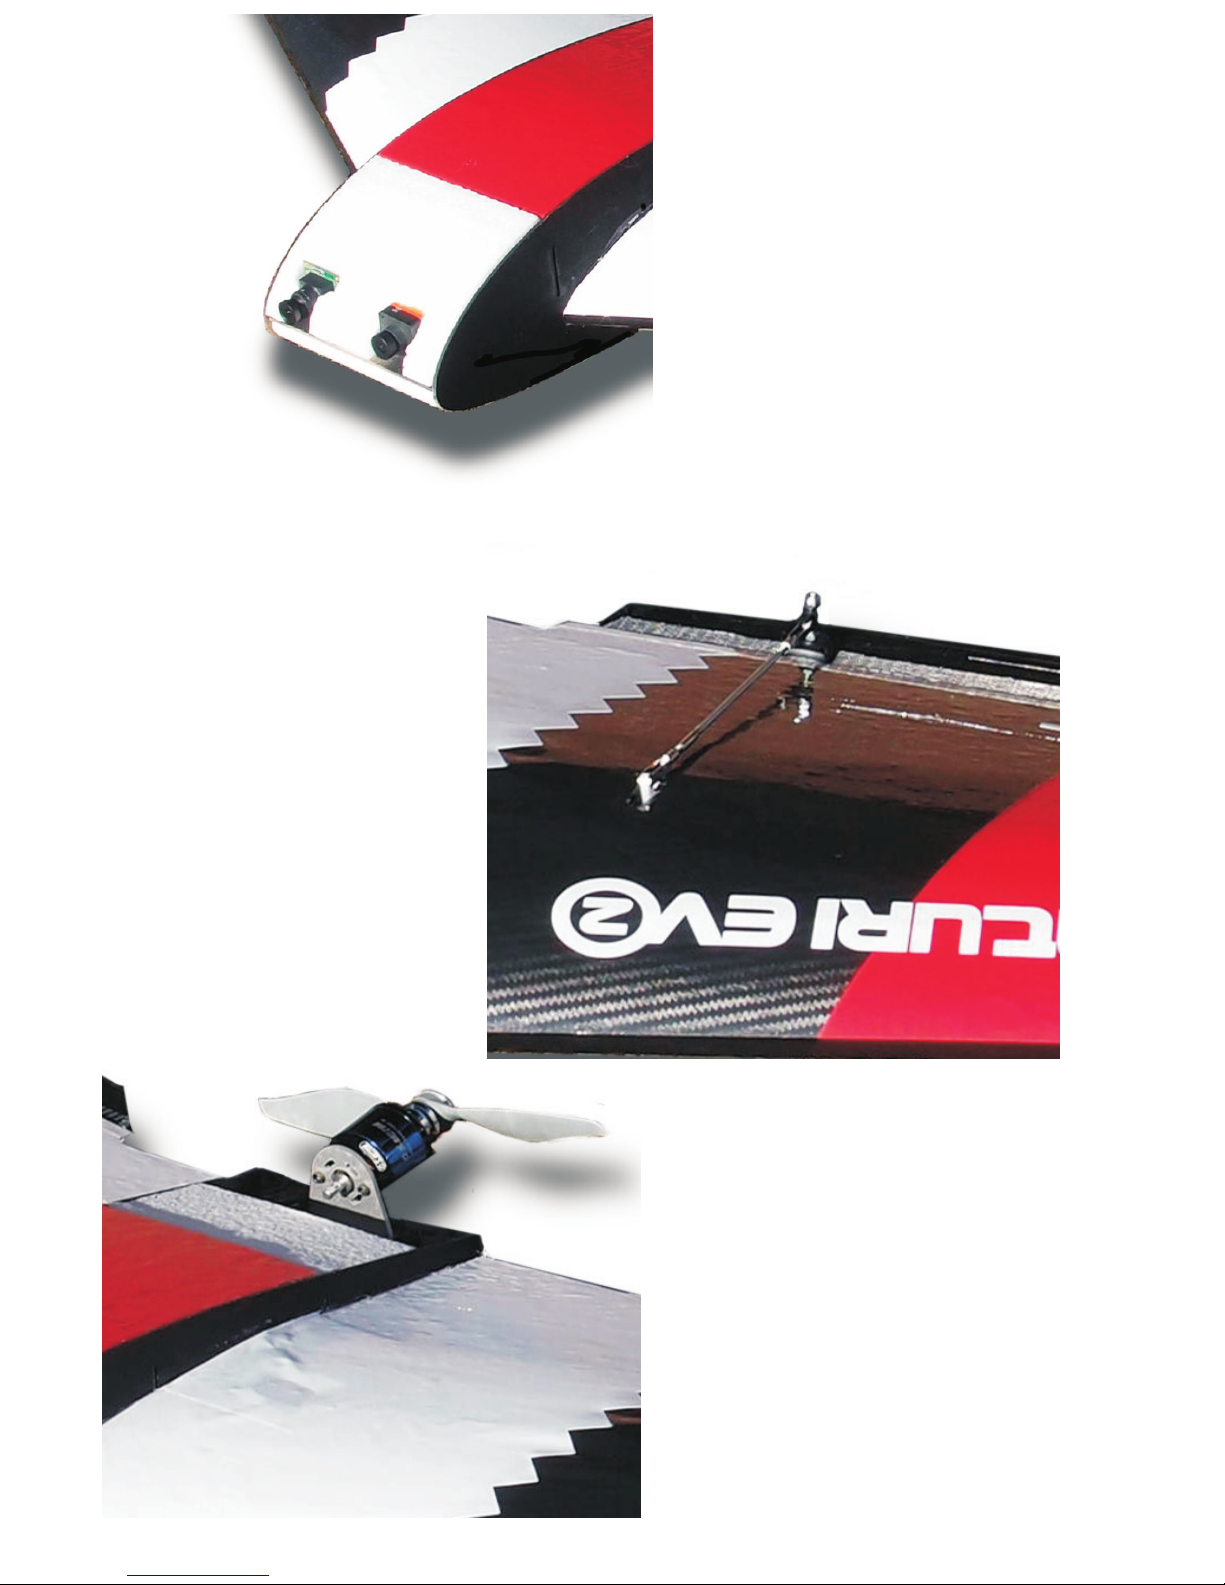
Table of contents


