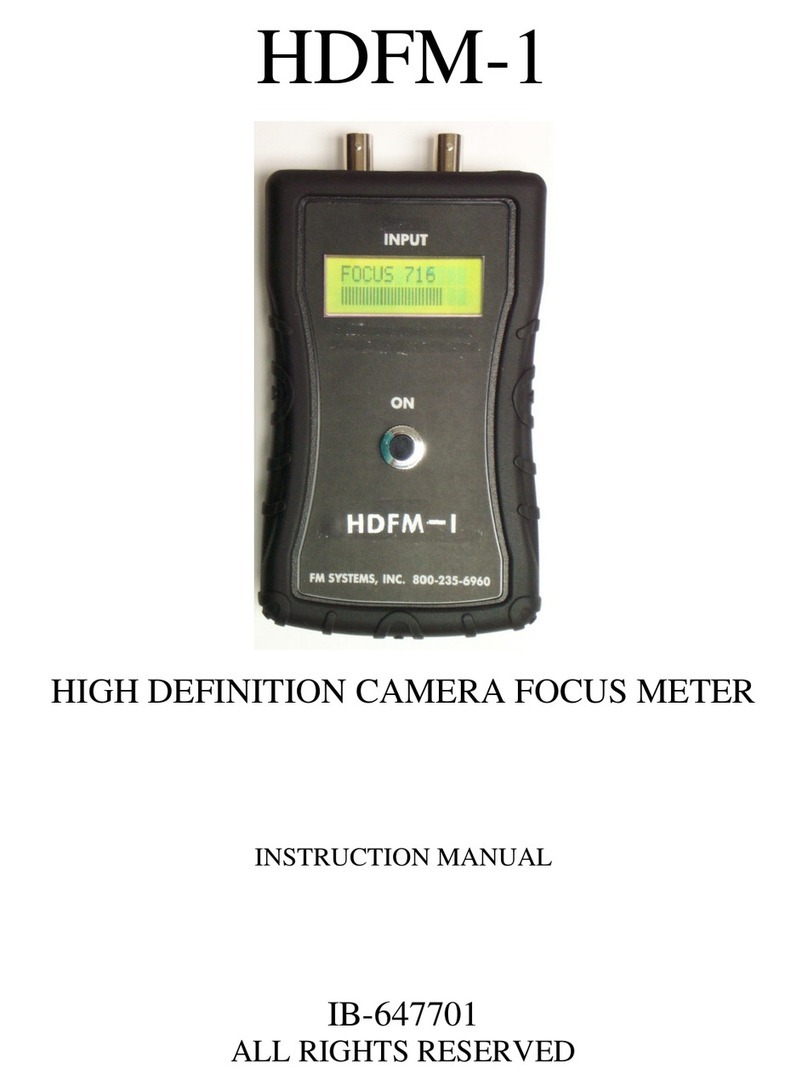
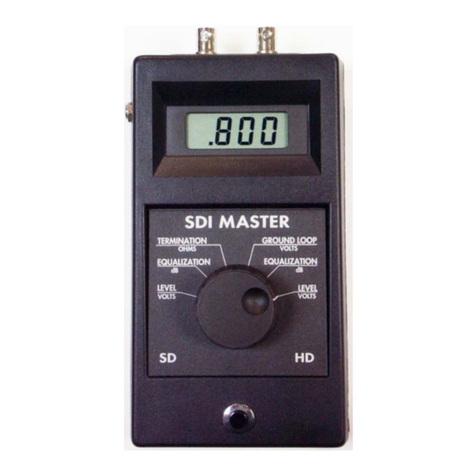
FM Systems CAMERA MASTER II User manual

CM-2
CAMERA MASTER II
OPERATORS MANUAL
IB 6367-03
COPYRIGHT
ALL RIGHTS RESERVED
2-10-2006

CM-2
CAMERA MASTER II
PAGE
DESCRIPTION 2
HOW TO MEASURE VIDEO SIGNALS 2-3
HOW TO MEASURE CCTV CAMERA LEVELS 3
MANUAL IRIS CCTV CAMERA 3
AUTOMATIC IRIS CCTV CAMERA 4
MULTI-CAMERA SWITCHED MONITOR SYSTEMS 4
COAXIAL CABLE CONTINUITY MEASUREMENT 4
HOW TO SET BACK FOCUS 5
CABLE SLOPE EQUALIZATION MEASUREMENT 5
GROUND LOOP MEASUREMENT 6
CARE AND MAINTENANCE 6
BATTERIES 6-7
CHARGER 7
AUXILIARY EQUIPMENT 7
VTM VIDEO TIMING METER 7
VTG VIDEO TIMING GENERATOR 7
VVMTERM PRECISION 75 OHM TERMINATION 7
MC1, MC2, MC3, CARRYING CASES 7
CCTV INSTALLATION TIPS 8-9
QUALITY ASSURANCE JOB RECORD 10
CM-2.ISB PAGE 1 of 10

DESCRIPTION
The CM-2 Camera Master measures six attributes of a camera video
signal:
1. SYNC measures the amplitude of the video synchronizing
pulse and can be used to check for correct video level,
coaxial cable continuity and correct termination impedance.
2. LUMINANCE measures the "white level" of the video, it is
used to adjust the camera IRIS to the correct setting for
the existing lighting conditions.
3. COMPOSITE measures the overall amplitude of the video
signal, (the peak to peak level).
4. COLOR BURST measures the Color Burst amplitude of a Color
Camera and is used to correctly slope equalize coaxial
cable runs for best transmission of detail and color.
5. FOCUS is used to set the Focus ring on the camera for the
sharpest picture without the need for a monitor.
6. GROUND-LOOP is used to detect any possible ground-loop on
the video cable and measure the amount of interference.
The SYNC, LUMINANCE, COMPOSITE, and COLOR BURST measurements are
displayed in I.R.E units. The Sync should measure 40 I.R.E. units
(0.2857 Volts peak to peak). The Luminance should measure 100 I.R.E.
units (0.7143 Volts peak to peak). The Composite should measure 140
I.R.E. units (1.000 Volts peak to peak), and the Color Burst should
measure 40 I.R.E. units (0.2857 Volts peak to peak).
The Focus is an open-ended numeric scale where the maximum
reading also correlates to the most accurate focus setting for the
scene before the camera. It can also be used to set the "Back Focus"
adjustment on the camera very accurately.
The Ground-Loop feature measures the amount of ground loop that
exists on the video cable. It is important to know if you have any
ground loop on your cables, because the ground loop can increase in
amplitude and cause problems after you leave the installation. Ground
loops are caused by 60Hz power use in the buildings and grounds on
your system. Early detection can prevent your having to return to the
premise to fix the ground loop problem.
HOW TO MEASURE VIDEO SIGNALS
The CM-2 is equipped with an I.R.E. Luminance filter,
Chrominance information is removed so that only the brightness
(Luminance) component of the picture signal is measured. This is in
accordance with standard video measurement practice. This may result
in this meter reading a different Voltage than that observed on a
wide-band oscilloscope, unless that scope is also equipped with an
I.R.E. Luminance filter. Wide-band scope measurements can be as much
as 10 to 20% too high because they also indicate the chrominance
component of a color video signal.
CM-2.ISB PAGE 2 of 10
HOW TO MEASURE VIDEO SIGNALS (cont.)

Two BNC coaxial connectors are provided, which are connected
directly together inside the case. The input is not internally
terminated and so it is a very high impedance input. This assures
that the video signal will not be reduced in amplitude when the meter
is connected to the circuit to be measured. When the meter is turned
on with no cable or termination connected to either coaxial
connector, the meter may give an indication on some scales. This is a
normal condition caused by Voltage-build-up on the very high input
impedance from stay radio signals. Placing a 75 Ohm termination on
either connector will cause the meter to read zero (+/-1) on all
scales.
Measurement is initiated by momentarily depressing the push
button switch located below the rotary function switch. This turns on
the meter. The meter will stay on for several minutes, then turn off
to conserve the battery. Depressing the power switch again during a
measurement will extend the on-time accordingly.
The output of a video source such as a video camera may be
measured by connecting a coaxial cable from that video source to one
of the two BNC connectors, and terminating the other BNC connector
with 75 Ohms or by connecting the coaxial cable leading to the video
monitor or DVR that is terminated with 75 Ohms. The most accurate
method of measure is to use the loop-through process using both BNC
connectors to make the measurement. Connect the actual load equipment
and measure the real levels in the system.
If calibrated video routing switches are available, connect the
CM-2 to an unused output and terminate the meter with 75 Ohms. This
meter is particularly well suited to calibrating video levels in
routing switches due to the 1% accuracy of this meter.
The CM-2 will measure any Black and White or color NTSC, CCIR,
(CCTV) or PAL video signal.
HOW TO MEASURE CCTV CAMERA LEVELS
Manual Iris CCTV Camera. Connect the camera video output to one
BNC connector on the CM-2 with a short coaxial patch cord. Connect
the coaxial cable linking the camera to the control center to the
other BNC connector, or place a 75 Ohm termination onto the other BNC
connector. NOTE: The camera must be terminated with 75 Ohms, either
at the meter or at the far end of the coaxial cable to obtain a
correct level measurement. Set the CM-2 dial to "SYNC" and
momentarily push the power ON button. The CM-2 will display sync
amplitude. The reading should be 40 I.R.E. units +/- 5 I.R.E. units.
If not between 35-45, check the end of line 75 Ohm termination at the
monitor end of the system. Next move the selector switch to
"LUMINANCE" and adjust the manual iris on the camera to read 100
I.R.E. units with normal average illumination. Try to keep the
reading between 85-115 with normal variations in scene illumination.
If variations in illumination are greater than this the DVR may not
operate properly. It can indicate NO VIDEO even if a monitor shows
good video. The high level of luminance is causing DIGITAL OVERLOAD.
CM-2.ISB PAGE 3 of 10
Automatic Iris CCTV Camera. Connect the camera video output to

one BNC connector on the CM-2 with a short coaxial patch cord.
Connect the coaxial cable linking the camera to the monitor center to
the other BNC connector or place a 75 Ohm termination onto the other
BNC connector. NOTE: The camera must be terminated with 75 Ohms,
either at the meter or at the far end of the coaxial cable to obtain
a correct level measurement. Set the CM-2 dial to "SYNC" and
momentarily push the Power ON button. The meter will display sync
amplitude. The reading should be 40 I.R.E. units +/- 5 I.R.E. units.
If it is not between 35-45 check the end of line 75 Ohm termination.
Move the selector switch to LUMINANCE and adjust the automatic iris
level control to read 100 I.R.E. units under normal illumination.
Adjust lighting and or camera angles to cover all reasonably possible
illumination levels. The "LUMINANCE" or WHITE level reading should
remain within 85-115 I.R.E. units. If readings exceed this range at
the high or low end, the automatic iris control (if provided) should
be adjusted to keep the readings within the desired range.
Multi-Camera, Switched Monitor Systems. Where two or more
cameras are switched to a single monitor or video tape recorder,
accurate video levels (both Luminance and Sync) are particularly
important. Connect the CM-2 between the video switcher and the
monitor or tape unit by looping the video signal through the CM-2.
Switch to each camera in turn and observe the sync level and the
white level. The sync levels should be within 35-45 I.R.E. units to
prevent "Black Bounce" during switching. The Luminance levels should
be within 85-115 I.R.E. units for consistent brightness. Adjust
cameras as needed.
Coaxial Cable Continuity Measurement. The Camera Master can be
used to identify cabling trouble conditions such as shorts, opens and
double terminations at the Monitor Station. This is done by cabling
the CM-2 between the Camera and the coaxial cable leading to the
Monitor location. Measure the Sync amplitude and observe for the
following conditions:
SYNC CONDITION
35-45 Cable is connected to Monitor or Switcher with standard
75 Ohm termination. (Optimum level is 40).
0-15 Partial or complete short circuit between center
conductor and shield on the coaxial cable, connector,
or Monitor equipment.
18-25 Indicates double termination at the Monitor equipment
(two 75 Ohm terminations inadvertently connected to one
cable, or more equipment, each with a termination of
its own, connected to one cable). Too many Terminations.
70-90 Open circuit on coaxial cable or connectors, or non-
terminated Monitor equipment.
NOTE THAT THE CORRECT READING FOR STANDARD SYNC. AMPLITUDE IS 40
I.R.E. UNITS FOR A PROPERLY TERMINATED VIDEO SIGNAL.
CM-2.ISB PAGE 4 of 10
HOW TO SET BACK FOCUS

The "Back Focus" adjustment on a camera is best set on a test
bench after the lens that is to be used has been installed. Place the
camera a known distance from a test pattern card or other picture
that contains high contrast and detailed image. Make sure that the
card fills the camera field of view and is perpendicular to the
pointing direction of the camera. Adjust the lens focus ring to the
measured distance between the camera and the test card. Connect the
Camera Master to the Camera to be adjusted and set the CM-2 selector
switch to the FOCUS position. Adjust the Back Focus control to the
highest reading on the CM-2. "Rock" the focus ring back and forth to
be sure the highest reading on the CM-2 has been attained. Observe
that the focus ring setting reads the same distance as that between
the camera and the test pattern card. To set the back focus in the
field, first use the meter to set the normal front focus for a
maximum reading (the highest reading is the best focus). Then set the
back focus for a higher reading. If the back focus reading cannot go
any higher on the reading then the back focus is already at maximum.
CABLE SLOPE EQUALIZATION MEASUREMENT
The CM-2 can measure cable slope loss and cable slope
equalization. This is the loss produced at high frequencies on long
coaxial cable runs. This is also referred to as Luminance-to-
Chrominance level inequality. This measurement is obtained by
comparing the Sync amplitude (15Khz low frequency) and the Color
Burst (3.58MHz high frequency) amplitude. A correctly equalized cable
will read 40 I.R.E. units on both the Sync Pulse and the Color Burst.
The slope loss of a coaxial cable can be corrected by a cable slope
equalizer combined with a video amplifier that corrects for the loss
induced by the cable. The CM-2 measures these levels at the video
Monitor location, not at the Camera. Connect the cable coming from
the Color Camera to the equalizer amplifier. Connect the CM-2 to the
output of the Video Amplifier and either terminate with the precision
75 Ohm termination or connect the other BNC connector on the CM-2 to
the (properly terminated) Monitor Equipment. Adjust the Equalizer
until the low frequency control reads 40 I.R.E. units on the “SYNC”
reading of the meter. Then adjust the high frequency control on the
equalizer for 40 I.R.E. units on the “Color Burst” reading of the
meter. When the “SYNC” and the “Color Burst” readings are both 40
I.R.E. on the meter then the video and cable are completely
compensated for the best picture quality. The coaxial cable run is
now correctly equalized for slope loss.
NOTE THAT CORRECT CABLE SLOPE EQUALIZATION WILL ALSO IMPROVE THE
PICTURE DETAIL RECORDED FROM BLACK AND WHITE CAMERAS.
To slope equalize a cable run from a monochrome (Black and
White) camera, temporarily replace it with a color camera or VLTG-800
video generator (to provide the color burst signal that the CM-2
measures). Complete the adjustment of the equalizer amplifier as in
the previous paragraph, then replace the color camera with the
monochrome camera leaving the equalizer in place. This process can
restore the detail and contrast lost by long cable runs.
CM-2.ISB PAGE 5 of 10
GROUND LOOP MEASUREMENT

To measure ground loop readings at the camera switch the
selector to “GROUND LOOP” and connect the cable coming from the
monitor equipment to either BNC connector on the CM-2. Then connect a
short cable to the camera output. Then take the loose end of the
short cable and touch the outer shield (the metal outside portion) of
the connector to the ¼ inch nut on the upper left hand side of the
meter next to the display. When the connection is made a decimal
point will appear on the display indicating a volts reading. The
reading will be the amount of ground loop voltage in the video cable.
This reading is calibrated in RMS and will indicate if you have a
ground loop problem.
To measure ground loop at the monitor end use the same procedure
as above except you connect to the DVR or monitor equipment instead
of the camera. The measurement is taken between the two cables using
only the shield of each cable. It does not matter which cable
connects to the BNC connector and which cable connects to the ¼ inch
nut on the side of the meter. They are interchangeable.
How much is too much? Our testing has revealed that any more
than 0.1 or 100 millivolts, one tenth of a volt is the point at which
problems begin to show up on the monitor equipment. The video is 1
volt in amplitude and any more than 10% interference will normally
create a problem with the video and even the Pan Tilt Zoom features
of control.
CARE AND MAINTENANCE
The CM-2 is a precision measuring instrument and should be
treated accordingly. While it can withstand ordinary everyday indoor
use, it should not be left outside in the rain or otherwise
mistreated. It is not waterproof. The battery should be removed if it
is placed into storage to prevent leakage of corrosive fluids from
batteries as they discharge and age.
Replace non-rechargeable batteries at least once a year even if
ordinary use does not discharge the battery because old batteries may
leak and cause corrosion damage.
No routine maintenance or test procedures are required other
that battery replacement. Attempts at field repair or adjustment will
void the warranty.
If the CM-2 fails to operate even after battery replacement, or
does not read a known video signal correctly, call the factory for a
Return Authorization Number and return it to the factory for repair.
BATTERIES
One alkaline 9 Volt "transistor" battery is used. These
batteries must not be used with the optional battery charger as the
alkaline battery is not designed to be charged and may leak and cause
damage to the internal electronics. End of the battery life is
indicated by the LCD display flashing when the meter is turned on.
CM-2.ISB PAGE 6 of 10
BATTERIES (cont.)

Readings should not be taken if LCD display is flashing, the
battery must be replaced by a fresh 9 Volt battery. Special circuitry
prevents incorrect meter reading under low battery conditions by
preventing instrument turn-on when the battery is discharged.
The battery is located in the case, under the digital meter,
with access provided by a sliding plastic cover plate that has the
word OPEN printed on it. Slide in the direction of the arrow to open.
When replacing the cover, place it flat into the grooves so that both
ends engage when closing.
CHARGER
An optional charger may be ordered. In this case, a "9 Volt"
nickel-cadmium battery must be installed in the battery compartment.
The initial charge of the nickel-cadmium battery requires 24 hours.
Plug the charger into the 115 Volt AC power source and connect the
plug on the end of the 9 volt cord into the connector on the side of
the case to the left of the meter face. After the initial charge,
operate the meter as needed until the LCD display begins to flash
before re-charging. Re-charging after every use builds a "discharge
memory" into the battery that will reduce battery capacity.
The charging current is low to minimize over-charging. When re-
charging is required, leave the charger on overnight, but do not
charge day after day continuously. The CM-2 will not operate on the
charger without the battery because the charger will not supply
enough current by itself. Always fully charge the battery, and remove
the charging cord before starting measurements.
AUXILIARY EQUIPMENT
The VTM Video Timing Meter is used to bring CCTV cameras into
synchronism so that monitors and or recorders can be switched among
cameras without causing "rolling" of the picture. The camera
synchronizing control is adjusted to cause the VTM to read zero,
indicating that both cameras have their vertical sync interval at the
same time, insuring that switching during the vertical interval can
occur without picture rolling.
The VTG Video Timing Generator provides up to ten video sync
signals with which to synchronize CCTV cameras in the field. The VTG
is intended to be used with the VTM Video Timing Meter to establish
accurate timing of multiple CCTV cameras.
The VVMTERM is a precision 75 Ohm termination that can be used
to compare with terminations in Monitors and Video Switches to
determine whether Monitor and Video Switcher terminations are in fact
present and are within allowed limits.
The MC1, MC2, and MC3 are Protective Carry Cases to house and
protect the Camera Master, Video Timing Meter, and the Video Timing
Generator while being transported. These are very rugged ABS cases
with foam lined interiors suitable for transporting one, two, or all
three instruments respectively.
CM-2.ISB PAGE 7 OF 10
CCTV INSTALLATION TIPS

Someone once said "Knowledge is the key to success". This rule
also applies to the installation and maintenance of CCTV camera
equipment. Have you ever installed a CCTV camera system and then had
to go back to solve a problem that was overlooked? A basic
understanding of CCTV video signals, can save you hundreds of man
hours, improve customer relations and increase job profitability all
at the same time. This section will discuss problems and solutions
for CCTV camera installations.
To discuss video let's start with the unit of measure, the
I.R.E. unit. I.R.E. stands for Institute of Radio Engineers, this
regulating body set the standards of measure for the video industry.
This standard has been adopted by all industries in the United States
and other parts of the world. 140 I.R.E. units is equal to 1 Volt
Peak to Peak. I.R.E. units are easier to use because they divide into
a video signal evenly.
For example proper Sync on a camera is 40 I.R.E. units, the
Voltage equivalent would be 0.2857143 Volts. Unfortunately this
voltage cannot be measured on the Volt Ohm Milliamp Meter.
SYNC PULSE AMPLITUDE, AND HOW IT EFFECTS CCTV INSTALLATIONS.
A CCTV video camera creates synchronization pulses to lock
the viewing monitor on the picture. These pulses occur at a rate of
15,750 times a second. There is one synchronization pulse or (sync
pulse) for each line in the picture frame. The sync pulse tells the
video monitor to start drawing a video line across the picture
screen. When it gets to the end of the screen another sync pulse
begins the next line, and so forth until the screen has been filled
with lines. It take 262 and a half lines to form a frame, and two
frames to form the video picture we see on the
monitor.
The proper level for sync is 40 I.R.E. units. If the sync
signal from the camera is too small in amplitude the picture will
break up or roll. If the sync pulse is too big, any black portion
of the picture will be more gray and the dynamic range of the picture
will be degraded. Peak white level will also be compressed causing a
blooming effect (loss of picture definition).
WHITE LEVEL IRIS SETTING, HOW MUCH IS ENOUGH?
There is a standard for Iris setting, or white level and it is
100 I.R.E. units. When setting a manual iris, or an automatic iris
the level should be the same, 100 I.R.E. units. If you set the iris
below 100 I.R.E. units, the picture will be dim with less than
desired dynamic range and the white picture elements will not be pure
white. If you set the iris for more than 100 I.R.E. units, the
picture can be washed out causing loss of picture definition.
Some cameras can be set to 120 I.R.E. units, but it should be
noted that the standard is 100 I.R.E. units and in any case all
camera's in the system should be set to the same level of white. This
will ensure that the white portion of the picture will be the same
brightness when a monitor is switched between them.
CM-2.ISB PAGE 8 of 10
PEAK TO PEAK MEASUREMENT OF THE CCTV SIGNAL.

A quick measurement of the peak to peak video signal will
re-assure you that the CCTV camera is putting out the right level.
The standard level is 140 I.R.E. units on the “COMPOSITE” scale.
COLOR CAMERA'S AND WHAT IS COLOR BURST ANYWAY?
More color cameras are being used in CCTV installations. The
color camera adds a chromanance component (color information) to the
signal, also known as Chroma. This Chroma signal operates at 3.58
Mega-Hertz. The standard level for the Chroma is 40 I.R.E. units.
When the chroma level is low, the colors will be dull. If this level
is too low, the color monitor will turn its color receiver off
causing a Black and White only picture. This condition also indicates
a loss of picture detail. You can see this effect on long cable runs.
The solution is to install a video equalizer GB-60 in the line and
adjust the color burst back to 40 I.R.E. units. If the Chroma signal
is too high the picture will display color flaring and reduction of
detail at the edge of the color flare.
VERTICAL INTERVAL, ITS MANY USES
The Vertical Interval (V.I.) is the part of the video signal
that tells the monitor to start drawing a new screen. It is made
up of special SYNC pulses with no picture elements. The standard
level for these SYNC pulses are 40 I.R.E. units. All video SYNC
pulses should be 40 I.R.E. units. The Vertical Interval is a very
useful place to put alarm and control signals. Some manufacturers
make equipment for pan and tilt camera control, alarm contact
information, and data transmission that is inserted into the V.I.
signal and sent up or down the cable.
TERMINATION, THE END OF THE LINE.
A termination for video is a 75 Ohm resistor placed at the end
of any video cable to prevent signal reflections that cause ghosting
or multiple images on the monitor. Some CCTV equipment have built-in
terminations some of which are switchable. If you are using this
equipment in series, you must switch off all terminations except the
termination at the last piece of equipment in the cable run. Proper
termination can be checked by measuring the SYNC pulse amplitude
anywhere in the video cable. It should read 40 I.R.E. with the
termination ON, and 80 I.R.E. with the termination OFF. If the SYNC
level does not change when you remove the termination, the camera or
video source is not standard 75 Ohms and should be serviced or
replaced. Problems with V.I. control systems can result if the level
does not double when you remove the termination.
THE BASIC THREE
To check performance of any CCTV camera installation make sure
the SYNC level is 40 I.R.E. units +/- 5 I.R.E.. WHITE level should be
100 I.R.E. units +/- 5 I.R.E.. Remember if you want to run high white
level say 120 I.R.E., be sure that all camera's in the system have
the same level of I.R.E +/- 5 I.R.E. Color burst level should be 40
I.R.E. units +/- 5 I.R.E.. SYNC, WHITE, and COLOR BURST are the three
basic measurements to make to insure proper operation of your CCTV
system.
CM-2.ISB PAGE 9 of 10
This manual suits for next models
1
Table of contents
Other FM Systems Test Equipment manuals
