FoMaKo 12X User manual

FoMaKo
E-mail: ivan@fomako.net
Website: www.fomako.net
Phone: 0086-18565635753
Address: 10F NiuLanQian Building,Minzhi,
longhua, shenzhen, China, 518000
Please feel free to contact us if you have any questions.
FoMaKo - Focus Your Streaming www.fomako.net
FoMaKo
NDI/SDI/HDMI/USB
PTZ IP CAMERA
User Manual
(V3.0)
Please Note: Only NDi version cameras have NDi function, other version cameras don’t have NDi function.
FoMaKo

FoMaKo - Focus Your Streaming www.fomako.net
1
FoMaKo IP Streaming Camera Quick Start
Dear Friend,
Thanks for ordering FoMaKo cameras. To setup your streaming system easier, please read this quick start instruction first.
Video Out Methods:
(1) HDMI video output:
- HDMI port to HDMI TV/monitor, to preview video and change camera setting by press “menu” on remote control
- HDMI port to HDMI video switch/mixer
- Use HDMI to USB video capture card converting HDMI signal to USB signal, then, you can use this camera as normal
USB camera
(2) 3G-SDI Video output : 3G-SDI video out is similar as HDMI, the only difference is your device should support SDI .
(3) LAN Video output: Before using “LAN Video Out” , we should add the camera to your network.
(4) USB Video out, you can use the camera as an USB webcam
(FoMaKo cameras come with LCD Screen and DHCP enabled, network settings is much easier than other cameras.)
Please do the connections as above, you’d better has a router in the network, then, router will assign IP address for all
the devices. It will save 20+ steps settings on computer.
Camera’s LCD screen will show camera’s ip address, you can use web browser to visit camera’s webpage by the ip
address.
username: admin password: admin
(Important: When added the cameras to the network successfully, you’d better turn off DHCP , otherwise, when camera
or router rebooted, the IP address maybe changed.)
If router can’t assign IP address for camera successfully, camera’s LCD will show default IP address: 192.168.5.163
Add Camera to IP PTZ Controller:
Some information you need:
IP Visca port: 5678 Sony Visca port: 52381 Onvif Port: 2000 User Name: admin Password: admin
We recommend to use Sony Visca or IP Visca control protocol, the two protocols are more steady and work better.
Let’s use FoMaKo KC608 Pro IP controller for example:
FoMaKo KC608 Pro controllers are optimized for FoMaKo cameras, it is very easy to let them work together.
(1) Add the controller to the same LAN as camera, the router will assign an IP address for IP controller

FoMaKo - Focus Your Streaming www.fomako.net
2
(2) Press “search” button on controller, it will show camera’s IP address
(3) Choose “VISCA Over IP” and press “Enter”
(4) Add to Shortcut Keys, you can assign 7 cameras to shortcut keys CAM1~CAM7
(5) Press CAM1~CAM7 to control the camera
If you need more supports, please contact us at: ivan@fomako.net, normally, we can reply you within 12hours.
FoMaKo Supports Team
FoMaKo - Focus Your Streaming www.fomako.net
3
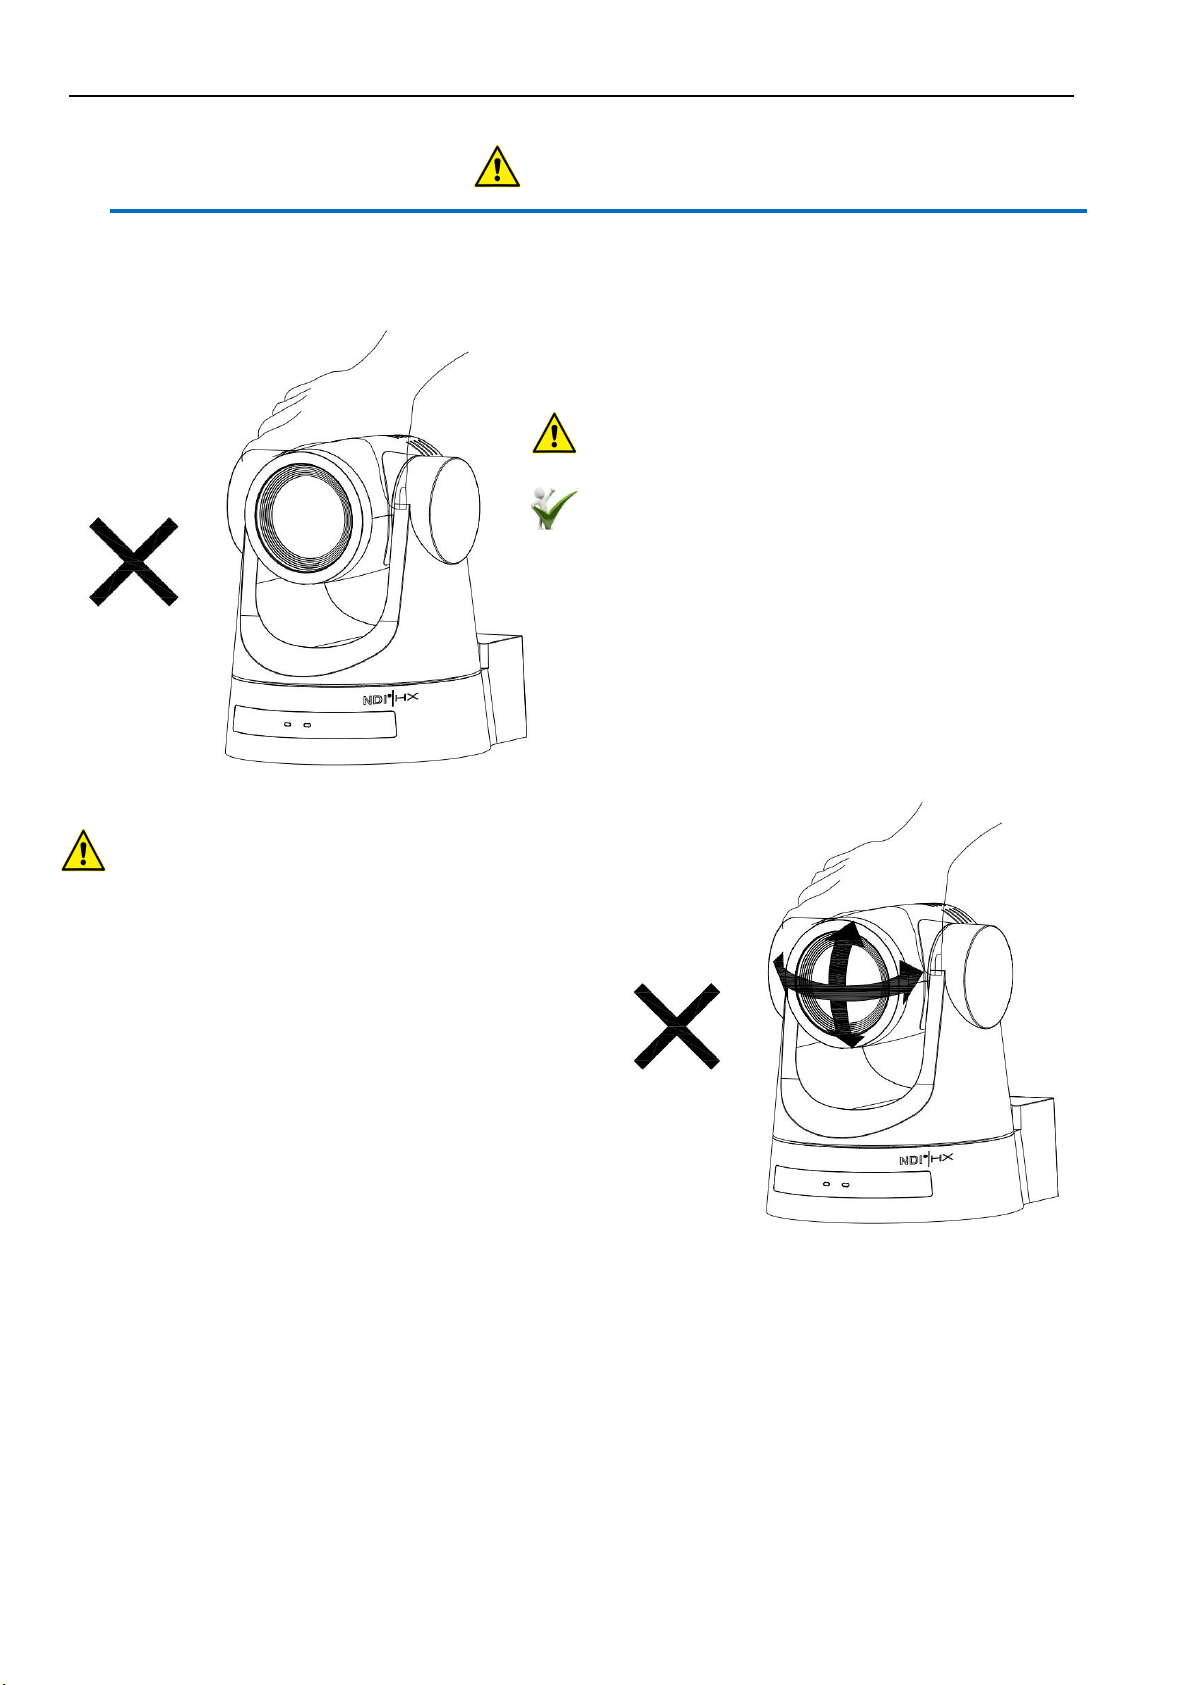
Attentions
Improper operations may damage the product structure and result in mechanical failure.
Please note the following tips:
Do not move the camera by grabbing the head.
Move the camera by holding the bottom with one
or both hands.
Please do not rotate the lens and holder manually no matter the camera is
power on or off; otherwise it may damage the
camera structure and result in failure of camera
self-check and unable to start the camera.
FoMaKo - Focus Your Streaming www.fomako.net
4
This manual introduces functions, installations and operations for this PTZ camera in details.
Please read this manual carefully before installation and use.
1.
Cautions
1.1
Avoid damage to product caused by heavy pressure, strong vibration or immersion during transportation,
storage and installation.
1.2
Housing of this product is made of organic materials. Do not expose it to any liquid, gas or solids which may
corrode the shell.
1.3
Do not expose the product to rain or moisture.
1.4
To prevent the risk of electric shock, do not open the case. Installation and maintenance should only be carried
out by qualified technicians.
1.5
Do not use the product beyond the specified temperature, humidity or power supply specifications.
1.6
Wipe it with a soft, dry cloth when cleaning the camera lens. Wipe it gently with a mild detergent if needed. Do
not use strong or corrosive detergents to avoid scratching the lens and affecting the image;
1.7
This product contains no parts which can be maintained by users themselves. Any damage caused by
dismantling the product by user without permission is not covered by warranty.
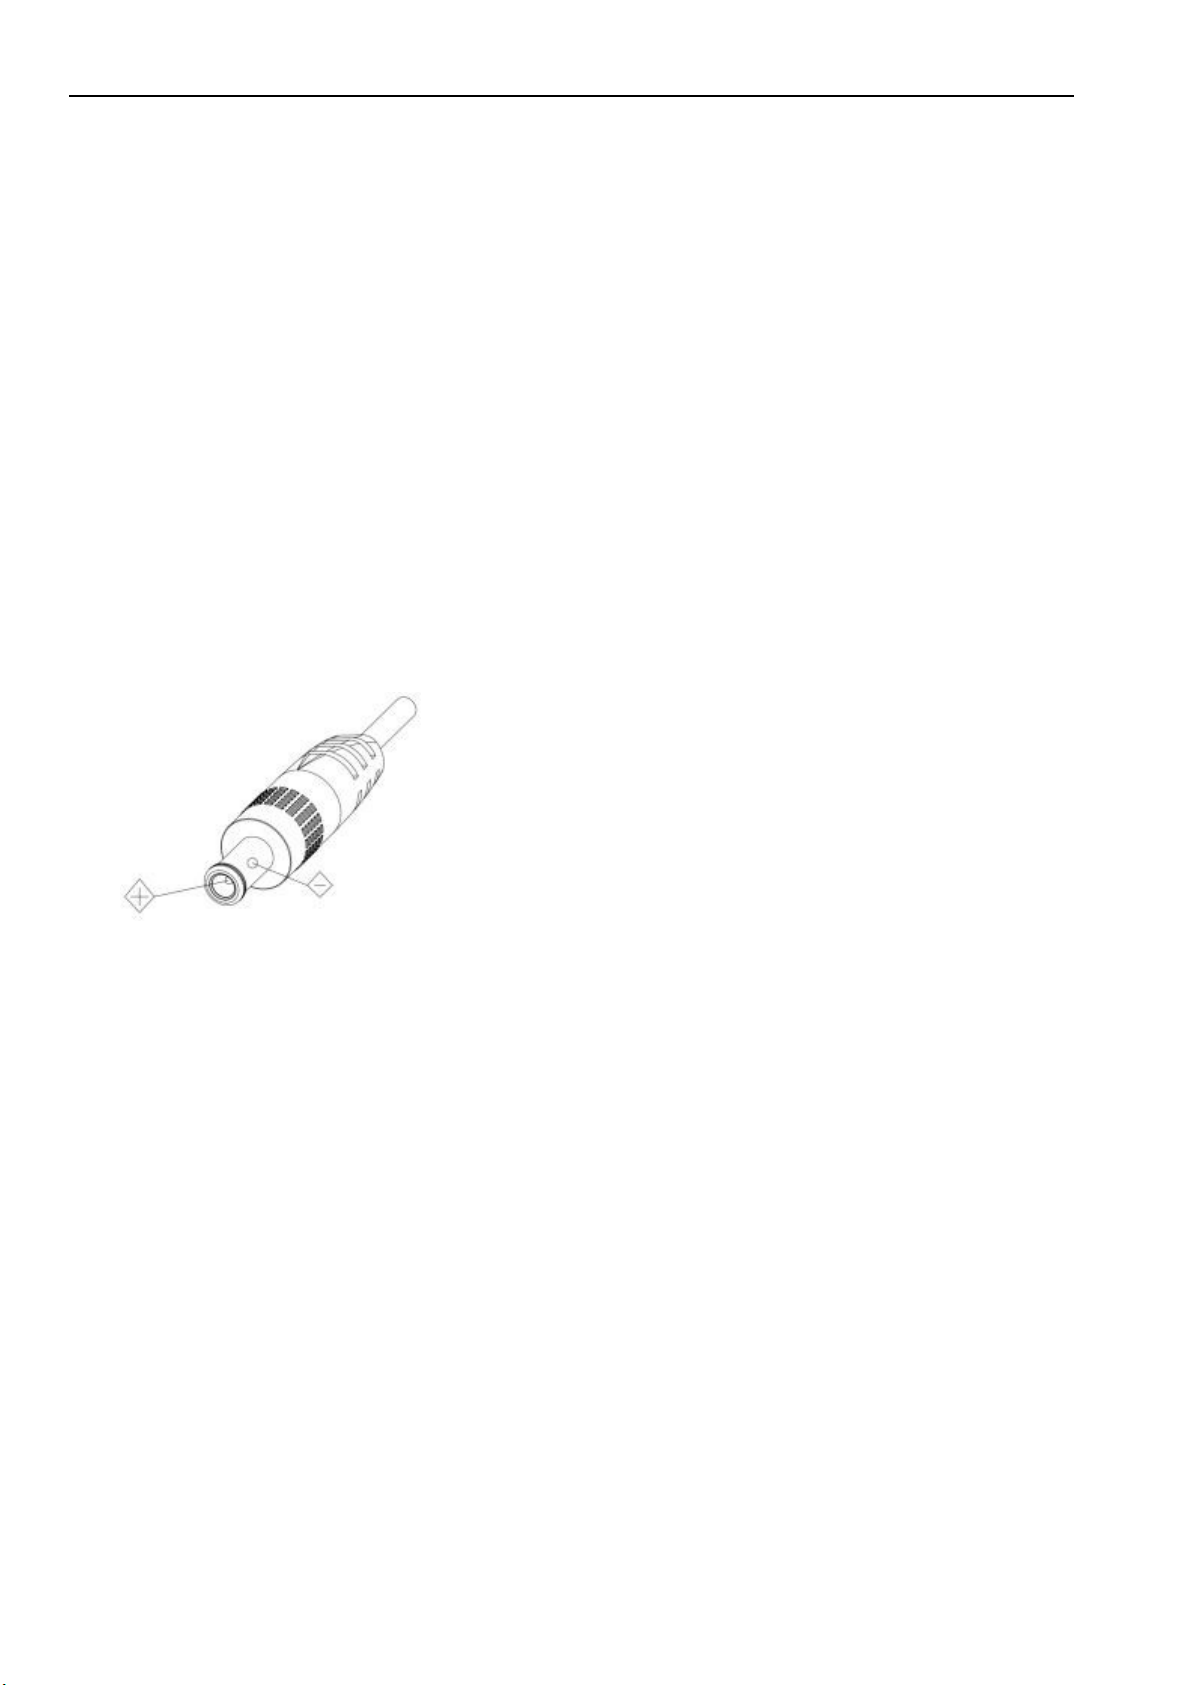
2.
Electrical Safety
Installation and use of this product must strictly comply with local electrical safety standards.
The power supply of the product is ±12V, the max electrical current is 2A .
3.
Install
3.1
Do not rotate the camera head violently, otherwise it may cause mechanical failure;
3.2
This product should be placed on a stable desktop or other horizontal surface. Do not install the product
obliquely, otherwise it may display inclined image;
3.3
Ensure there are no obstacles within rotation range of the holder.
3.4
Do not power on before completely installation.
4.
Magnetic Interference
Electromagnetic fields at specific frequencies may affect the video image. This product is Class A. It may cause
radio interference in household application. Appropriate measure is required.

FoMaKo - Focus Your Streaming www.fomako.net
5
Content
1. Camera Installation................................................................................................................................................................6
1.1
Camera Introduction....................................................................................................................................................6
1.2
Interfaces and Connection........................................................................................................................................... 6
1.3
Mounting Brackets...................................................................................................................................................... 7
2. Product Overview................................................................................................................................................................ 11
2.1
Dimension..................................................................................................................................................................11
2.2
Accessory...................................................................................................................................................................11
2.3
RS-232 Interface........................................................................................................................................................12
2.4
Rotary DIP Switch.....................................................................................................................................................14
2.5
Main Features............................................................................................................................................................ 14
2.6
Technical Parameter.................................................................................................................................................. 15
3. Remote Control....................................................................................................................................................................17
3.1
Keys Introduction for IR Remote Control................................................................................................................ 17
3.2
Menu Introduction..................................................................................................................................................... 20
4. Network Configuration........................................................................................................................................................22
4.1
Network Connection..................................................................................................................................................22
4.2
Web Login................................................................................................................................................................. 22
4.3
Streaming...................................................................................................................................................................23
4.4
Software Upgrading...................................................................................................................................................25
5.
Serial Port Communication and Control............................................................................................................................. 26
5.1
VISCA Protocol Return Command...........................................................................................................................26
5.2
VISCA Protocol Control Command......................................................................................................................... 26
5.3
VISCA Protocol Inquiry Command..........................................................................................................................29
5.4
Pelco-D Protocol Command List.............................................................................................................................. 31
5.5
Pelco-P Protocol Command List............................................................................................................................... 31
6.
Maintenance and Troubleshooting....................................................................................................................................... 33
6.1 Camera Maintenance................................................................................................................................................. 33
6.2 Troubleshooting.........................................................................................................................................................33
7.
Example: Streaming to Facebook........................................................................................................................................34
8.
Example:Streaming to Youtube.......................................................................................................................................... 35
9.
Example: Streaming to Vmix.............................................................................................................................................. 36
10.
Copyright Statement.......................................................................................................................................................... 36

FoMaKo - Focus Your Streaming www.fomako.net
6
1. Camera Installation
1.1
Camera Introduction
Figure 1.1 Interface of ST (standard) Model
1.
Camera Lens
2.
Power Light
3.
Status Light
4.
Infrared Receiver
5.
Reserved Mounting Hole
6.
Tripod Screw Hole
7.
Screw Hole for Tripod
8.
Safe Lock
9.
3G-SDI Output Interface
10.
HDMI Output Interface
11.
USB2.0 Interface
12.
LAN(NDI)Port
13.
DC12V Input Power Supply Socket
14.
Power Switch
15.
RS232 Control Interface (input )
16.
RS232 Control Interface (output )
17.
Rotary DIP Switch
18.
RS485 Input (left +, right-)
19.
19 RS422 Input
20.
Audio Input Interface (Line-in)
1.2
Interfaces and Connection

FoMaKo - Focus Your Streaming www.fomako.net
7
Figure 1.2 Wiring Diagram
1)
After power on and self-checking, the camera will automatically return to the preset 0 position if it’s pre-set.
2)
The default address for the IR remote control is 1#.
If restore the menu to factory defaults, the remote control address will restore to 1#.
1.3
Mounting Brackets
Notes:
Ceiling or wall mounting brackets can only be mounted on template and concrete wall.
For safety reason, plasterboard is not recommended.
1)
Wall Mounting


This manual suits for next models
2
Table of contents
Other FoMaKo Security Camera manuals


