Fontel RTX KF300WX-VoIP User manual

Bundle Part#: KF300WX-VoIP
(1) RTX SIP DECT Base
(1) Konftel 300Wx Conference Phone
More Information:
800-238-0787 sales@fontel.com
Konftel/ RTX SIP DECT Solution
Wireless SIP Conference Phone
Installation Guide
Konftel/RTX SIP DECT Installation Guide
Conguring the RTX Base Station
Finding the IP Address of the RTX Base Station
The RTX Base Station requires a DHCP server to boot for the rst time. After it boots there are three
recommended methods for nding out its IP address so that it can be connected to for conguration.
1. Native RTX DECT Handset:
a. Press “Menu”and then *47* to put the handset into base station search mode.
b. Then use the cursor down/up to select the base station based on its MAC address.
2. DHCP Server Leases:
a. Look at the DHCP server active leases table and nd the IP based on the MAC address
of the base station.
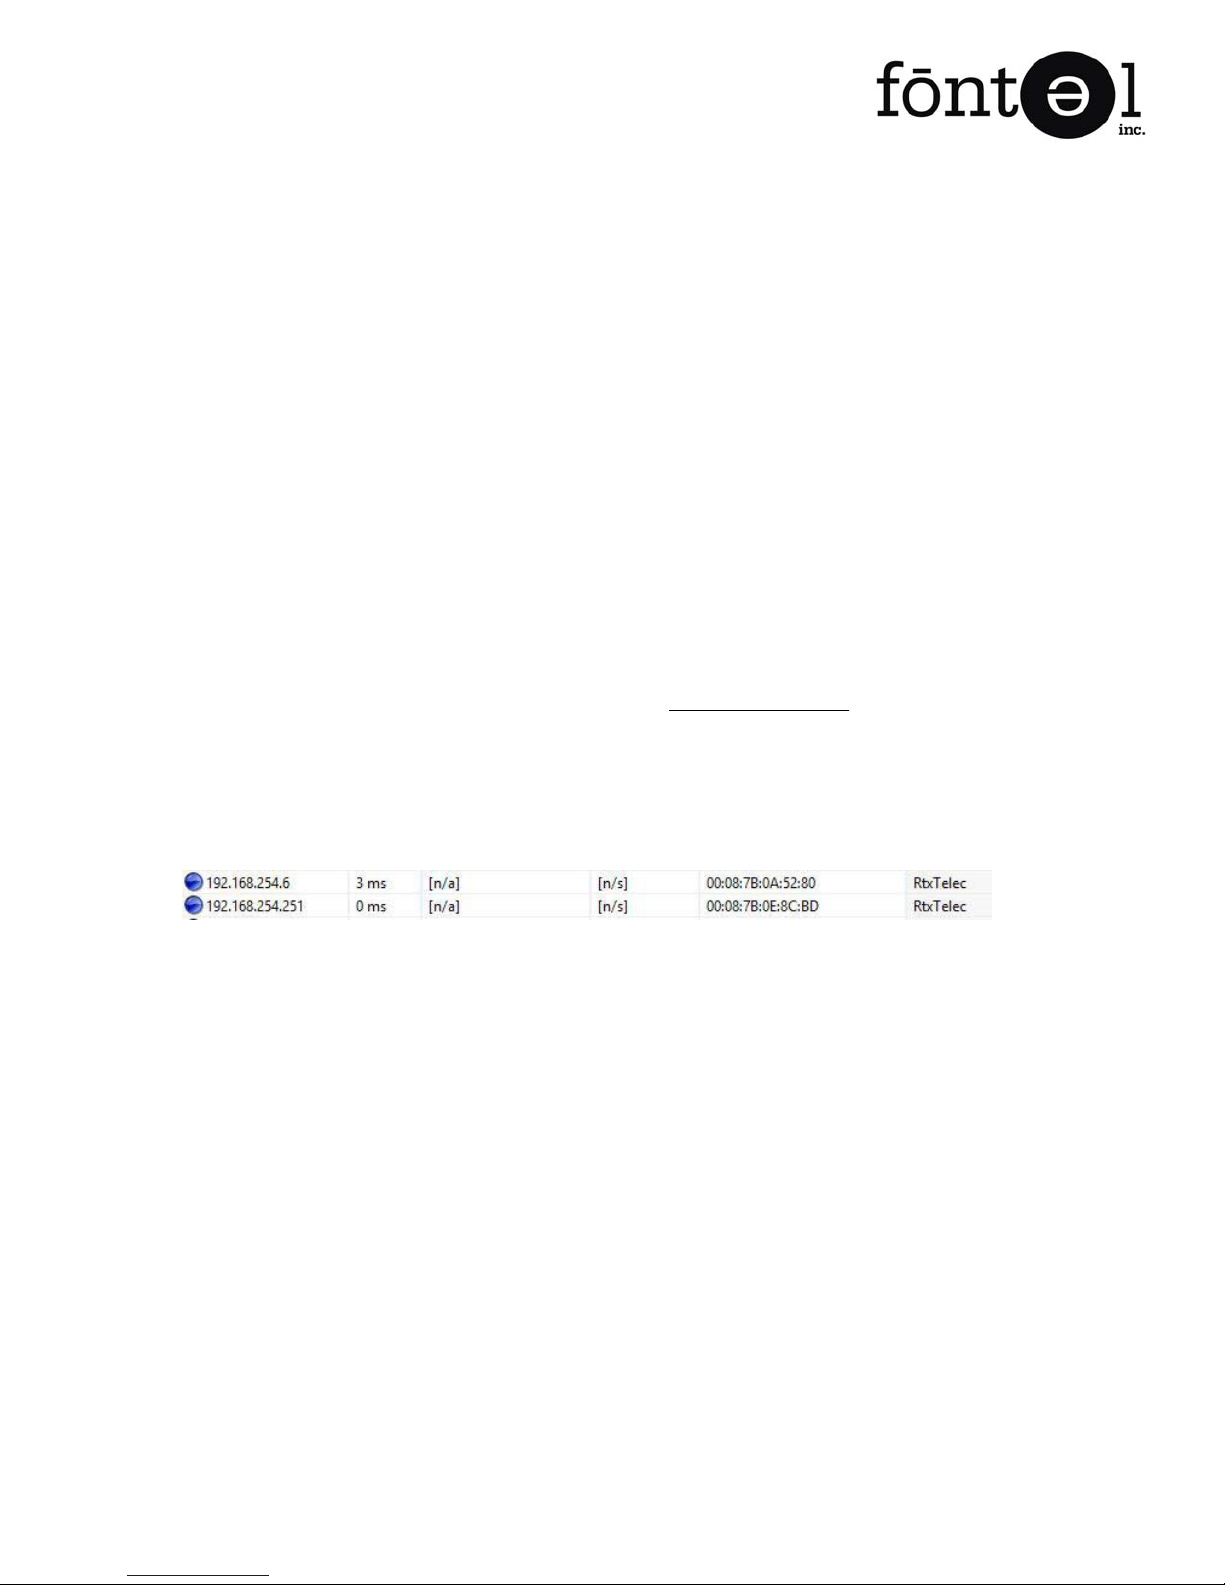
3. IP Scanner:
a. Use an IP scanner such as Angry IP Scanner from http://angryip.org
b. Find the IP by MAC address in the scan results
Note: Fresh installations of AngryIP do not show the MAC address column.
Enable that functionality under Tools > Fletchers
c. Example:
The IP address can be set statically under the “Network” menu of the RTX Base Station Administration
web interface. While a static LAN IP is not required, it does simplify adding phones in the future.
PAGE 2 MAY 2015
Fontel Inc. 800-238-0787
Konftel/RTX SIP DECT Installation Guide
Accessing the RTX Base Station Web Interface
Use a web browser to browse to the IP address of the RTX Base Station. The default login is
admin/admin
PAGE 3 MAY 2015
Fontel Inc. 800-238-0787
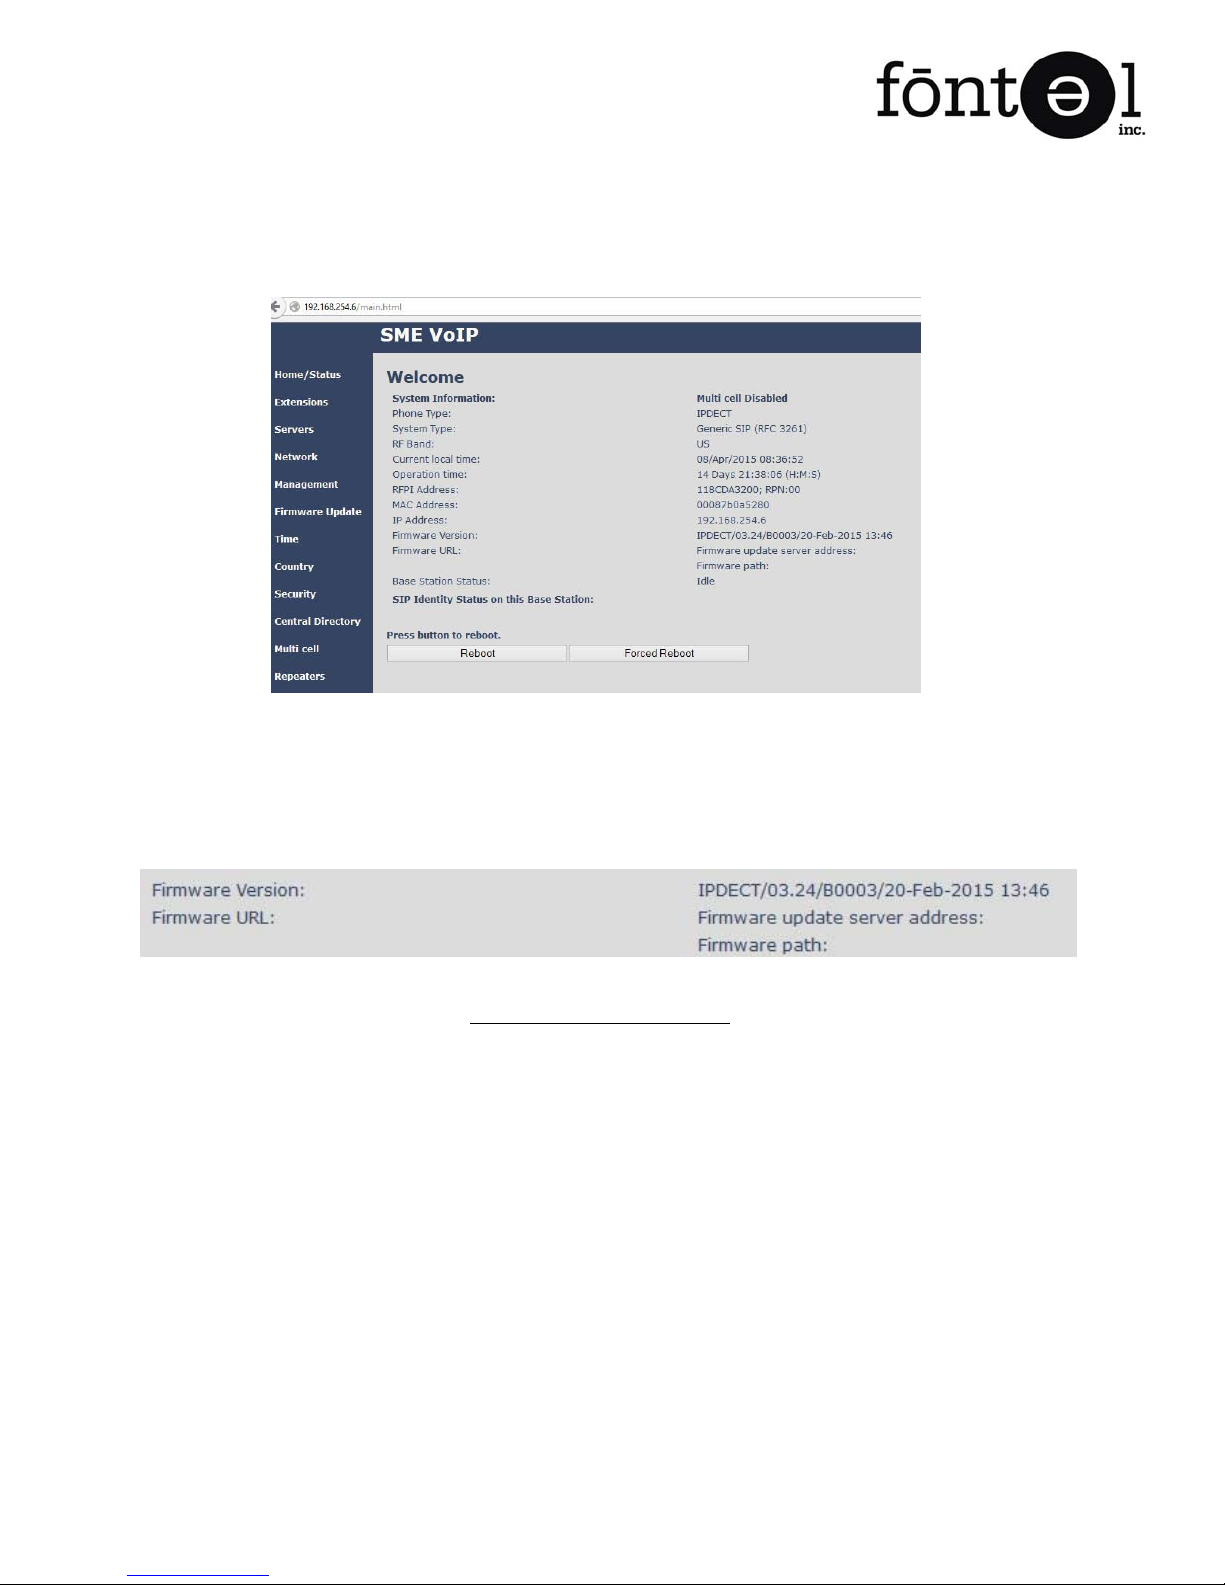
RTX Main Screen
RTX Base Station Required Firmware Version
Version 3.24 or better of the RTX rmware is required to connect Konftel devices. Click on
the “Home/Status” menu to check the rmware version.
the base station is not on at least 3.24.
Adding SIP IP PBX Setting to the RTX Base Station
Prerequisite Information: IP PBX Address or Hostname and audio codec capabilities
from the IP PBX vendor or hosted provider.
To add an IP PBX to the RTX Base Station:
1. Click on “Servers” from the RTX Main Screen.
2. Click “Add Server” in the “Servers”screen.
Konftel/RTX SIP DECT Installation Guide
PAGE 4 MAY 2015
Fontel Inc. 800-238-0787
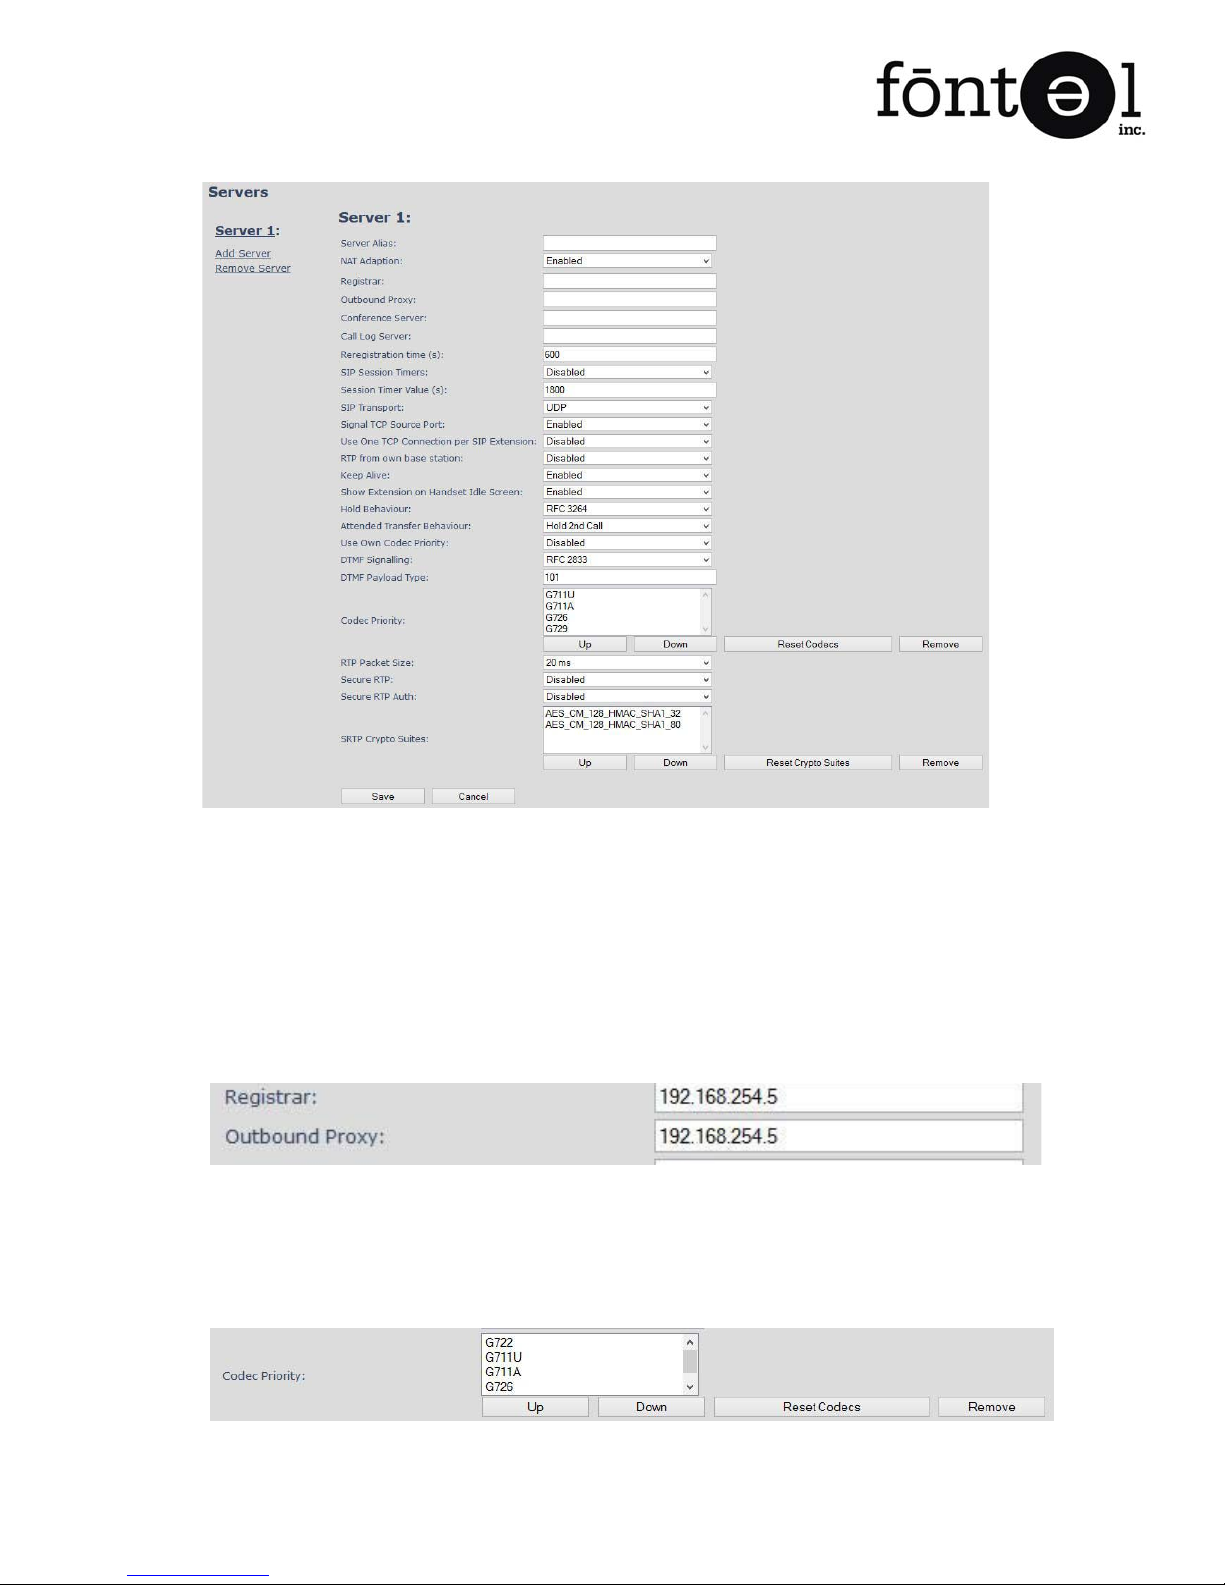
Blank “Add Server” Screen
3. For all IP PBX systems that are on the same LAN as the RTX Base Station and for most
remote IP PBX/Hosted Providers set“NAT Adaptation” to“Disable.”
4. Congure both the “Registrar” and “Outbound Proxy” to the IP Addess or DNS
Hostname of the IP PBX.
a. Note: Proper DNS resolution must be congured under the“Network” menu
if a hostname is used for these settings.
Sample IP PBX/Hosted Provider Settings
5. If G.722 HD Audio is supported by the IP PBX, click “Reset Codecs” under “Codec Priority”
and then use the Up/Down buttons to move G.722 to the top of the list.
a. Adjust other codec based on the requirements of the IP PBX.
Konftel/RTX SIP DECT Installation Guide
PAGE 5 MAY 2015
Fontel Inc. 800-238-0787
Sample “Codec Priority” Settings
6. Do not change ANY other settings on this page unless speci cally required by the IP PBX.
7. Click “Save”to save the IP PBX settings.
Adding Extension Settings to the RTX Base Station
Prerequisite Information: Registration credentials from IP PBX vendor or Hosted Provider for each
phone to be registered.
To add the extension registration information for the Konftel 300Wx:
1. Click on “Extensions” from the RTX Main screen.
2. Click on “Add extension” in the ”Extensions” screen.
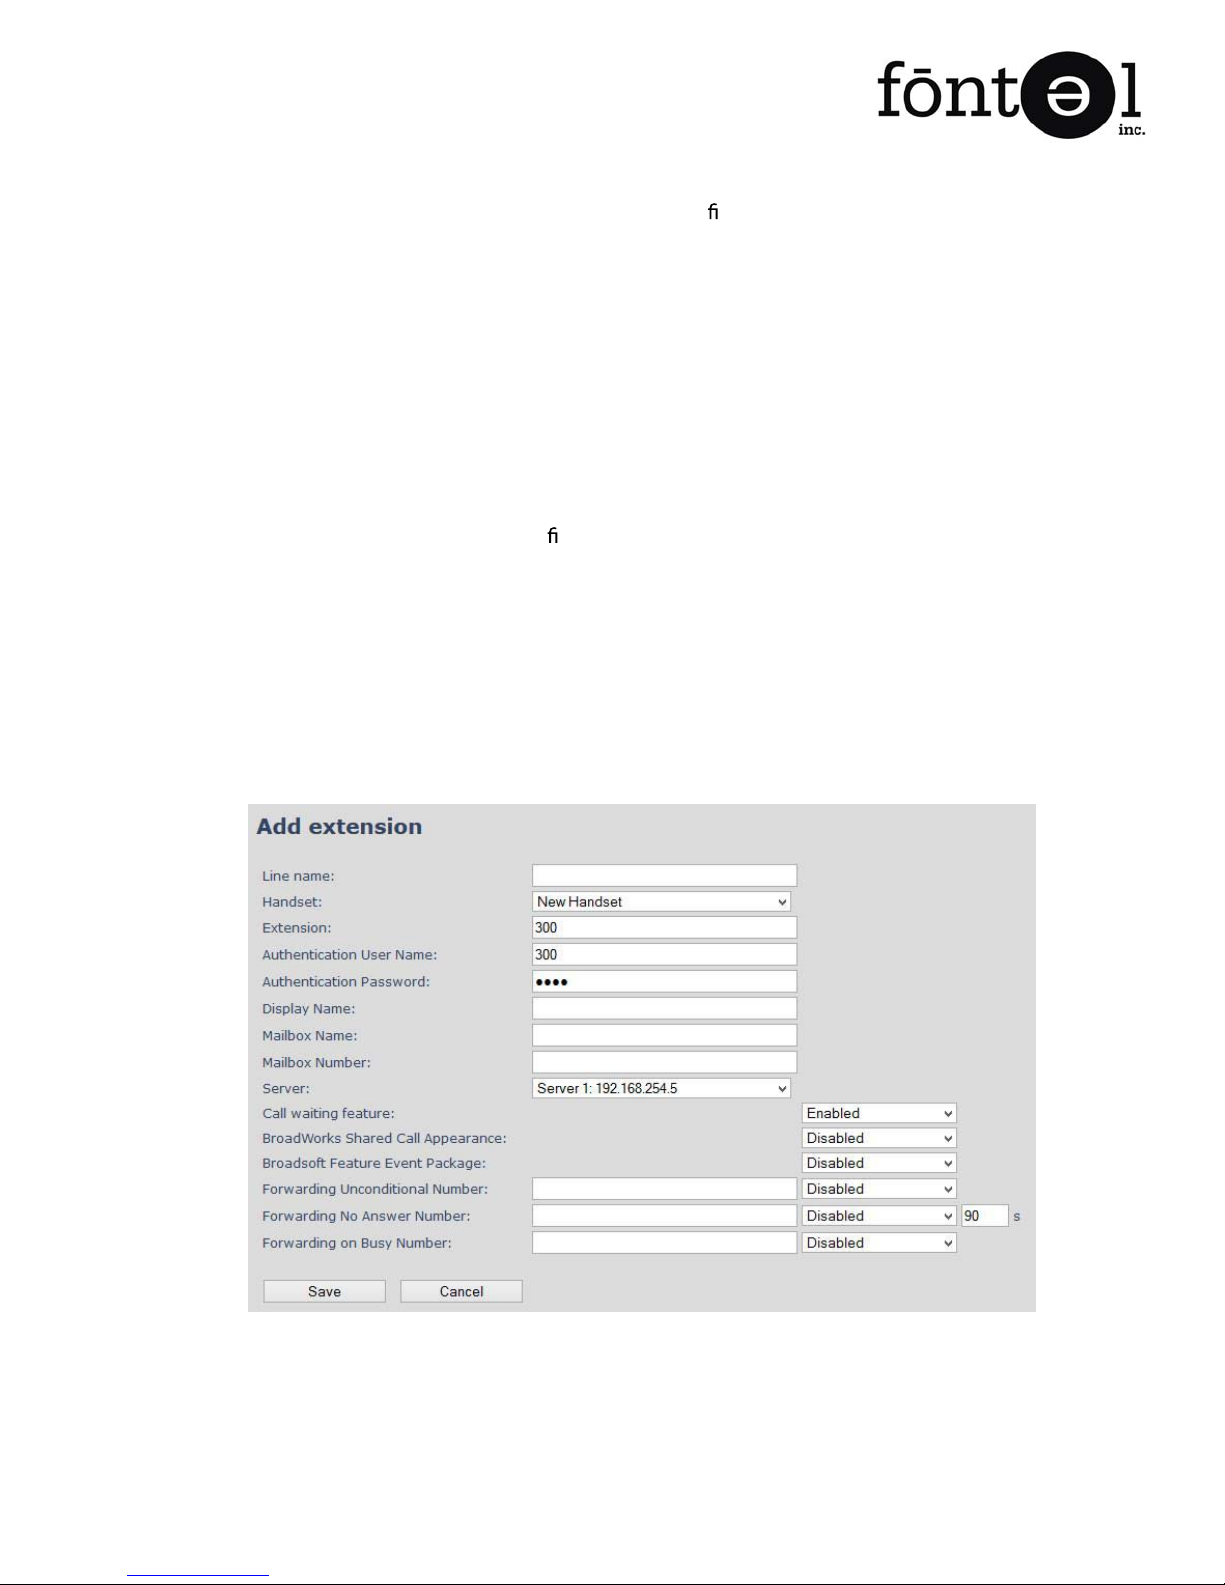
3. Populate the “Add Extension” form elds as follows:
a. “Extension” = Registration ID/User ID for the extension to be registered.
b. ”Authentication User Name” = Authetication ID for the extension to be registered.
i. Note: This is often the same as the Registration ID/User ID but this is not
always the case.
c. “Authentication Password” = the password for the extension to be registered.
d. “Server” will be auto-populated with the server that was created in the “Adding
SIP IP PBX Setting to the RTX Base Station” section.
Sample “Add extension” Settings
4. Click “Save”to save the IP PBX settings.
5. Repeat this section for any additional phones that will be connected to this RTX Base
Station.


