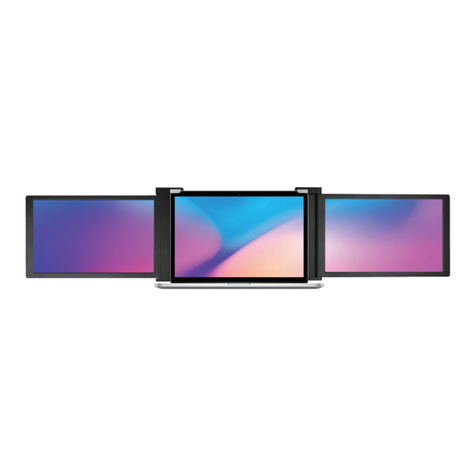
Fopo S17 User manual

Portable Monitor
Triple Portable Monitor
Model:S17


Contents
1. Overview
2. Package Contents
3. Inputs and Buttons
4. Set It Up
5. Connect the Monitor with Your Laptop
6. Choose Your cables
7. Connection Methods
7.1 Two Full Functioned Type-C/Thunderbolt-3 Ports Connection
7.2 One Full Functioned Type-C and HDMI Port Connection
7.3 Other Connection Type (Extra Adapter Needed)
8. Laptop Display Configuration
8.1 PC/WINDOWS
8.2 MAC
9. OSD Function Introduction
10. OSD Setting
11. Supported Brands & Models
12. Tech Specs
13. Cleaning & Maintenance
14. FAQ
------------------------------------------------------------------------------------
--------------------------------------------------------------------------------------
----------------------------------------------------------------------
---------------------------------------------------------------------
----------------------------------
---------------------------------------------------------------------------------------
-------------------------------------------------------------------------------
--------------------------------------------------------------------------------
------------------------------------------------------------------------------------------
---------------------------------------------------------
--------------------------------------------------------------
-------------------------------------------------------------
---------------------------------------------------------------------------
---------------------------------------------------------
--------------------------
------------------------
----------------------------------------------
-------------------------------------------------------------------------
-----------------------------------------------------------------------
1
2
3
5
6
7
8
8
10
11
12
12
13
14
15
18
22
23
24
15. Contact Us -------------------------------------------------------------------------------- 26

1. Overview
Triple Monitor
2*Mini HDMI to
HDMI Cables
VIDEO ONLY
1* Hook-and-loop
Fastener
1*Power Adapter
2*USB-C to USB-C
(90-degree) Cables
VIDEO & POWER
2*USB-C to USB-A
Cables
POWER ONLY
1

2. Package Contents
1* Portable Triple Monitor
2* Type-C Cables
2* HDMI Cables
1* Cleaning Cloth
2* Screen Protector
1* Power Adapter
1* Hook-and-loop Fastener
Please kindly check out all the accessories in the package. If you find anything
missing here, please don’t hesitate to contact us via the email address
fopo@afterservice.vip and we will help you solve the problems as soon as
possible.
Note:
2

3
3. Inputs and Buttons
*It only displays the interfaces and buttons function. Please check the actual
machine for the specific position of interfaces and buttons.
Type-C Full Function Port: Power Supply, Video
Signal Transmission
Mini HDMI Port (No Power Supply): Video Signal
Transmission
Press the Menu to enter the OSD (On-Screen Display) menu.
Increase the brightness; Enter the Menu, and press it to turn to
the next selection; Increase the value.
Decrease the brightness; Return to the previous page; Decrease
the value.
Type-C Port (Power Supply Only): Power Supply, Reverse Charging,
Compatible with PD2.0 power supply protocol, Supporting 5-20V
voltage input

Warning
Please handle the triple monitor with care and do not press the screens to avoid
damages. Do not unfold it to exceed its maximum turning angle showing as
below.
4
Turning Angle of Screens
Right screen(0° - 180°)Left Screen(0°-235°)
Note:

4. Set It Up
5
Unpack the triple monitor.
Open two screens in the directions as
shown in Fig. 2.
Place the bracket at the back of the
laptop screen and install it well with
the bracket clamping the screen
firmly.
Lift up the stand and stretch to its end.
Press and hold the button to adjust
the stand.
(The stand is embedded at the back of
the triple monitor, which can offer
extra support to the triple monitor. )
Using the necessary cables, plug one
end of the cable into the triple moni-
tor and the other into your laptop.
3 egap no ”snottuB dna stupnI“ eeS(
for the input diagram. )
1)
2)
3)
4)
5)
1
3
5
2
4

5. Connect the Monitor with Your Laptop
6
Length:325-450mm(12.8-17.7 inch)
325-450mm
235mm
Height:>235mm(>9.25 inch)
Thickness:<8mm(0.31 inch)
Please measure the length, height and thickness of the laptop first to make sure
it can be compatible with the monitor.
If it is not within this range, please feel free to contact us via the email address
fopo@afterservice.vip and we will help you solve the problems as soon as
possible.
Compatibility of Laptops for the Triple Monitor:
Notes:

7
To determine which cables you will use, first identify your laptop’s ports accord-
ing to the figure below or your laptop’s user manual.
*Make sure your USB-C port on the laptop is full-functioned port. Please refer to
your laptop's user manual.
Notes:
VIDEO & POWER:
VIDEO ONLY
POWER ONLY
6. Choose Connecting Cables

7. Connection Methods
8
Make sure that the laptop Type-C ports support power & data tranmission, and
has enough power supply above 5V/2A
If you can't connect the monitor with the laptop, please contact us via the email
address fopo@afterservice.vip, and inform the customer service of the model
number of your laptop to quickly determine the compatibility of the connecting
port.
7.1 Two Full Functioned Type-C/Thunderbolt-3 Ports Connection
Notes:
If there are 2 full-functioned Type-C or 2 Thunderbolt 3 ports on the laptop, use
two included Type-C cables to connect the laptop to the triple monitors. Pay
attention to connect the monitor's Type-C port labeled with this logo " "

7. Connection Methods
9
①Make sure the Type-C of your laptop is a Full-functioned Type-C port(support
both video & data transmission).
②Make sure 5V/2A or above power can be supported through Type-C port.
An external power supply of 5V/2A or above is needed for normal use.
Some Type-C ports may not be able to transmit currents above 5V/2A, please
connect an external power supply to better use the monitor.
If you can't connect the monitor with the laptop, please contact us via
fopo@afterservice.vip, and inform the Tech. Support of the model number of
your laptop to quickly solve your issues.
Notes:
USB-C to USB-A

7. Connection Methods
10
If there's one full functioned Type-C port and one HDMI port on the laptop:
1) Use the included full functioned Type-C cable to connect one side of the
monitor and the laptop.
2) Meanwhile, use the HDMI cable and an extra power supply (USB-C to USB-
A cord) to connect the other side of the monitor and the laptop.
The HDMI port does not provide power, so the monitor must be plugged into the
power supply(5V/2A or Above).
7.2 One Full Functioned Type-C and HDMI Port Connection
Notes:
USB-C to USB-A
USB-C to USB-A

7. Connection Methods
11
You can contact us via the email address [email protected] for the connection
adapter and inform the customer service of the model number of the laptop, and
we will find the connection adapter for you.
If you still can't find a solution to connect your monitors, pls directly contact us!
(email address: [email protected])
7.3 Other Connection Type (Extra Adapter Needed)
Notes:
USB-C to USB-AUSB-C to USB-A
If you lack enough HDMI port for connection
(1) Find a suitable HDMI adapter for your laptop. You can contact FOPO for an
extra HDMI adapter, we will help you find the right connection adapter to use.
(2) You need to use 4 cables with an extra adpater for connection:
First, connect one side of your FOPO monitor to laptop with a HDMI and a USB-C
to USB-A cord.
Second, connect the HDMI adapter to your laptop.
Finally, connect the other side of your FOPO monitor with another HDMI and
USB-C to USB-A cord.
HUB

8. Laptop Display Configuration
8.1 PC/WINDOWS
1.Enter the Display Settings interface. (Start >Settings > System > Display)
2.Identify the Screen/Set Display Direction
Click and drag the screens to the configuration shown.
3.Start Duplication/Extension Setting
“ eht kcilc( 3/2/1 kcilc esaelp ,rotinom elpirt eht no sedom yalpsid tnereffid tes ot deen uoy fI Identify”
Button down the screen to find the corresponding screen). Select one of them, and then enter into the
“Multiple displays” menu to set.
4.Start Rotation Setting
”noitatneirO“ eht kcilc nehT .neercs eht no unem yalpsid eht kcilc ,nwod edispu era sneercs eht fo yna fI
”)deppifl( epacsdnaL“ tceles dna unem nwodpord
5.Start Scaled Ratio Setting
tceles dna ”smeti rehto dna ,sppa ,txet fo ezis eht egnahC“ fo nwodpord eht kcilc ,mooz eht esaercni oT
“150%”.
* In the setting of the graphic card, you can set three displays sync. If you have any problems, please
consult FOPO service (email address: [email protected])
12

8.2 MAC
1. Identify the Screen/Display Direction Setting
kcilC neht dnA .unem eht morf ”yalpsiD“ tceleS . ”secnereferP metsyS“ eht nepO
“Arrangement”. Click and drag the screens to the configuration shown.
2. Start Duplication/Extension Setting
.”yalpsiD rorriM“ tceleS :gnitteS noitacilpuD
.”yalpsiD rorriM“ lecnaC :gnitteS noisnetxE
3. Rotation Setting
If any of the screens are upside down, click the display menu on that screen and
.nwodpord eht morf ”°081“ tceles
4. Scaled Ratio Setting
“ eht kcilc ,mooz eht esaercni oT Scaled Ratio” Button.
8. Laptop Display Configuration
13

9. OSD Function Introduction
.unem DSO eht etavitca ot nottub uneM ” “ eht sserP .1
.sgnittes ruoy esoohc ot nottub ”+“ sserP .2
.mrfinoc ot nottub uneM ” “ eht sserP .3
.egap suoiverp eht ot nruter ot nottub ”-“ sserP .4
BRIGHTNESS
BRIGHTNESS
CONTRAST
BLACK LEVEL
SHARPNESS
14

10. OSD Setting
Brightness
Brightness: The adjusting range is from 0 to 100.
Contrast: The adjusting range is from 0 to 100.
Black Level: The adjusting range is from 0 to 100.
Sharpness: The adjusting range is from 0 to 100.
Image
ECO: Presets the display settings for various
modes (Standard/Game/Movie/Text/FPS/ RTS
Modes).
DCR: Selects ON or OFF to enable or disable the
dynamic contrast ratio function.
Aspect: Adjusts the aspect ratio to 4:3/WIDE.
BRIGHTNESS
BRIGHTNESS
CONTRAST
BLACK LEVEL
SHARPNESS
IMAGE
ECOSTANDARD
DCR
ASPECT
OFF
WIDE
15

10. OSD Setting
Color Temp
Color Temp: Enables the adjustment of each
RGB color, or select a Warm or Cool preset level.
Red: The adjusting range is from 0 to 100.
Green: The adjusting range is from 0 to 100.
Blue: The adjusting range is from 0 to 100.
OSD Setting
Language: Selects OSD language. The selections
are as follows, English, French, German, Simpli-
fied Chinese, Italian, Spanish, Portuguese,
Turkish, Polish, Dutch, Japanese, Korean.
OSD Timer: Sets time-out for monitor settings
menu (10-60 seconds).
Transparency: Sets the transparency of monitor
settings menus.
COLOR TEMP
COLOR TEMP COOL
RED
GREEN
BLUE
38
43
45
OSDSETTING
LANGUAGE
OSDTIMER
TRANSPARENCY
OSDH.POS.
OSDV.POS.
20
16
50
50
16

10. OSD Setting
Reset
Reset: Selects RESET to revert all settings to
the factory default mode.
MISC
Signal Source:
Contains two signal sources: Type-C and HDMI.
Low Blue Light:
Decreases the amount of blue light in the
display.
HDR MODE:
Enables HDR (High Dynamic Range) when
connected to a compatible device, with three
modes (OFF/Auto/2084).
RESET
RESET
MISC.
SIGNAL SOURCETYPE C
LOW BLUE LIGHT
HDR MODE
1920 X 1080 60HZ
OFF
0
17
Table of contents
Other Fopo Monitor manuals
