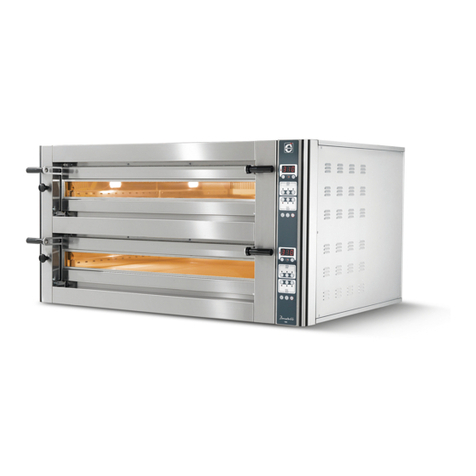
FORNI Gennarino 80 User manual

www.stefanoferraraforni.it
Stefano Ferrara Forni S.R.L.
Forni a legna artigianali
Neapolitan handmade brick ovens
Via Fausto Coppi, 3/B
80010 Quarto, Napoli
Tel./Fax: +39 081 876 1664
e-mail: info@stefanoferraraforni.it
P.IVA 06771801211
C.C.I.A.A. 838246
GENNARINO
WOOD OVEN
INSTALLATION AND OPERATING MANUAL
Gennarino 80
Gennarino 100
PLEASE READ ALL INSTRUCTIONS BEFORE INSTALLING AND USING
THE APPLIANCE
A MAJOR CAUSE OF OVEN-RELATED FIRE IS FAILURE TO MAINTAIN
REQUIRED CLEARANCES (AIR SPACES) TO COMBUSTIBLE
MATERIALS. IT IS OF UTMOST IMPORTANCE THAT THIS OVEN BE
INSTALLED ONLY IN ACCORDANCE WITH THESE INSTRUCTIONS.
SAVE THESE INSTRUCTIONS

www.stefanoferraraforni.it
2
Table of content Page
- Installation operating and maintenance preface .................................................................................... 3
- Features ................................................................................................................................................. 4
- Instruction for lifting and moving oven .................................................................................................... 5
- Packaging removing and placement oven on support stand ………………………………….................. 7
- Installation procedures ………………………………………………………………………………............... 9
•Placement marble shelf …………………………………………………………………………..... ... 9
- Oven venting ……………………………………………………………………………………………............ 11
- Oven care during first fires …………………………………………………………………………… ............ 12
- Oven management.................................................................................................................................. 13
•Firing your oven ......................................................................................................................... 13
•Fire in the oven cooking ............................................................................................................. 13
•Maintenance and cleaning ......................................................................................................... 14
- Warranty terms and conditions................................................................................................................ 15

www.stefanoferraraforni.it
3
INSTALLATION OPERATING AND MAINTENANCE PREFACE
WARNING !
READ THIS ENTIRE MANUAL BEFORE YOU INSTALL THE OVEN. FAILURE TO
FOLLOW INSTRUCTIONS MAY RESULT IN PROPERTY DAMAGE, BODILY INJURY, OR
EVEN DEATH.
•When this oven is not properly installed, a fire may result. To reduce the risk of fire, follow the
installation instructions
•Contact your local building or fire officials for clarification on any restrictions on installation of this oven
in your area, or need for inspection of the oven installation.
•DO NOT close the oven door while a fire is in the oven.
•Place the door over the oven opening after cooking is completed at the end of the work day.
•Hot while in operation. Keep children, clothing and furniture away. Contact may cause skin burns.
•Do not burn garbage or flammable fluids.
•Smokes of the burning must be expelled through a flue system conform to the local rules.
•Do not connect the oven to a chimney flue serving another appliance.
•Keep children and pets away from hot oven.
•DO NOT USE products not specified for use with this oven.
•DO NOT USE liquid fuel (firelighter fluid, gasoline, lantern oil, kerosene or similar liquids) to start or
maintain a fire
•DO NOT use water to dampen or extinguish fire in the oven.
•Keep a proper extinguisher (class A) close to the oven at all times .
•Instruct all personnel about location and use of the fire extinguisher and proper fire emergency
procedures.
•DO NOT pack required air spaces with insulation or other materials.
•Use only well dried wood.
•Remove the ashes from the oven by using a metal shovel and placing them in a metal bin with a tightly
fitting lid. The container should be stored on a non-combustible surface, away from all combustible
materials. Ensure ashes are completely cold before disposing of them appropriately.
•DO NOT expose the oven to the weather, if the oven is installed outdoors to shelter it under a canopy.
•The oven is meant only for cooking pizza and/or bread it is not recommended for cooking other food or
food in pan ,chafe of metal pans can get the floor soon damaged and grease spatter from roasting can
be absorbed from the floor that lose its correct properties of cooking.
SAVE THESE INSTRUCTIONS

www.stefanoferraraforni.it
4
FEATURES:
Cooking chamber made of refractory bricks
Fully insulated
Support frame and front enclosure of stainless steel
Marble shelf
Inox door
Mouth sizes mm. 400 wide x mm. 175 heigh (16” x 7”)
External covering of ceramic mosaic tiles
Alimentation: wood
Suggested working temperature 400/450°C – 750/850°F
Flue output: Ø 150 mm.
Smokes temperature output: 190°C
Extract air flow: 650 mc/h (at starting)
500 mc/h (at fully operating)
Venting: Natural draft

www.stefanoferraraforni.it
5
INSTRUCTIONS FOR LIFTING AND MOVING OVEN
FOR OVENS ALREADY INSTALLED ON THE SUPPORT STAND
1- USING A FORKLIFT
Determine if forklift capacity is sufficient to lift oven. (See pag. 9 for weights and sizes)
Prior to lifting, make sure the forks are long enough as whole diameter of the oven, if not fork extensions
should be used.
Keep forklift straight. Carefully place forks on a side of the oven through the stand legs and
position under the oven. Slowly lift and move the oven as needed
2- USING A PALLET JACK
Determine if pallet jack capacity is sufficient to lift oven. (See pag. 9 for weights and sizes)
Prior to lifting, make sure pallet jack is long enough to reach both horizontal angles at lower end of steel tube
support legs. Place pallet jack on a side of the oven , place the forks between tube steel support legs under
the bottom circular tubes.
Carefully lift oven and move slowly.

www.stefanoferraraforni.it
6
INSTRUCTIONS FOR LIFTING AND MOVING OVEN
FOR OVEN SHIPPED SEPARATELY FROM THE SUPPORT STAND
1- USING A FORKLIFT
Determine if forklift capacity is sufficient to lift oven. (See pag. 9 for weights and sizes)
Prior to lifting, make sure the forks are long enough as whole diameter of the oven, if not fork extensions
should be used.
Under the oven there are four little steel feet 4” (10 cm) high to permit placing of the forks.
Keep forklift straight. Carefully place forks on a side of the oven through the steel feet and position under the
oven. Slowly lift and move the oven as needed.
2- USING A PALLET JACK
Determine if pallet jack capacity is sufficient to lift oven. (See pag.9 for weights and sizes)
Prior to lifting, make sure the forks are long enough as whole diameter of the oven.
Place pallet jack between the steel feet and position under the oven.
Carefully lift oven and move slowly.
ONLY VERTICAL LIFTING IS ALLOWED DO NOT TURN UPSIDE DOWN THE
OVEN

www.stefanoferraraforni.it
7
PACKAGING REMOVING AND PLACEMENT OF THE OVEN ON SUPPORT STAND
On the bottom of the crate (front side and back side) there is the required space for insert the forks of the
forklift. (photo 1)
The crate is fixed to two metal brackets placed under the oven (photo 2)
photo 1 photo 2
Once removed the crate, in order to remove the brackets, lift the oven with a forklift and unscrew the bolts.
Note the removed bolts (17 mm. hexagonal head screw) will be the same to use for fixing the oven on the
support stand, so preserve them for the next use.
ASSEMBLY THE SUPPORT STAND
The support stand consist of:
N. 4 inox tubes (legs)
N. 7 inox curves plates of legs conjunction
N. 1 inox front paneling
All the pieces are labelled with numbers.
Assembly all the pieces respecting the order of the numbers and pairing the same numbers

www.stefanoferraraforni.it
8
Lift the oven with a forklift until a higher height than the metallic support stand (photo 3)
Let down carefully for inserting the steel feet placed under the oven into the legs of the support stand (photo
4)
Once placed the oven on the support stand to screw the furnished screws (17 mm. hexagonal head screw)
in the existing holes on the back of each stand leg. (photo 5 – 6)
photo 3 photo 4
photo 5 photo 6

www.stefanoferraraforni.it
9
INSTALLATION PROCEDURES
1. Be sure to have a sufficient space in the desired location for the oven.
Minimum floor space required:
2. Any adjacent combustible floor which
projects in front of the oven opening must
be a minimum of 30 inches (75 cm) away
from each side of the door opening and
36 inches (90 cm.) from the front of the
door opening.
3. It is essential to maintain clearance space
between the oven components and any
combustible material, such as walls and
ceilings.
The oven must have a minimum 10” (25,5
cm.) clearance to combustibles from all
sides and 14" (35,5 cm) clearance to
combustibles from the top.
Warning : Don’t place any type type of
insulation in the required clearance
spaces surrounding the oven

www.stefanoferraraforni.it
10
4. Placement of the marble shelf
For greater safety, the oven is shipped without the marble shelf, you will find it into a separate
packaging. Fasten the marble on the existing iron support plate placed in front of the oven mouth
using some silicone and waiting until it will be completely dry before use them as support shelf.

www.stefanoferraraforni.it
11
OVEN VENTING
The venting system of our wood burning ovens is to direct connection, exploiting the natural draught.
The oven employs an integral exhaust hood above the front opening. All flue gases exit the front opening and
drafts into the exhaust hood to be subsequently expelled through a flue pipe (150 mm / 6 in O.D.) located at the
top of the oven.
The flue pipe is intended to be connected to a natural draft chimney system complying with the regulations on
the matter existing in the installation country or complying with NFPA96 (for USA and Canada)
For the flue system we recommend to use a building heating appliance chimney grease duct assembly , (UL
listed for USA and Canada or complying with the local regulations for other countries).
Stainless steel pipes single or twin-walled 150 mm/6 “ in diameter (meant as internal diameter in case of twin
walled pipes) to connect from the chimney connector existing on the top end of the oven up to the desired
place where the smokes will go out.
Induct the elements according to the toward of the smokes. The toward of the smokes is understood from
the “ masculine” to the “female” part.
Sew together the elements having care of not damage the seal inserted in the female part. It is advisable to
lubricate the masculine part with a light coat of fat, spray or liquid soap.
To mount and to shut the security wrappers for every junction.
WARNING !
The above informations are just some suggestions , for building the flue system is of utmost
importance contact a specialized company and submit your venting plans to local authorities
before proceeding with installations.
The purchaser is responsible of the conformity, correct installation and correct working of the flue
system.

www.stefanoferraraforni.it
12
OVEN CARE DURING FIRST FIRES
As the oven has just been built, it is still damp and the mortar full of water which needs to dry out. Therefore,
it cannot be used immediately for baking but it needs a period of drying out. This can be achieved with one
week (around 8 hours daily) of keeping medium fires just to let it dry and at the same time "cook" both the
bricks and the baking surface.
It's important that you cure your oven slowly, by building a series of central increasingly larger fires. If you
begin building large fires in your oven right way, you could compromise your oven's longevity and ability to
cook well, and even to cause damage.
Place a small amount of wood and kindling on the hearth over a fire-starter block.
Light fire starter. At any time do not use more than four pieces of wood.
Get the oven working for at least 6/8 hours daily proceeding as follows:
Day 1- 2 - 3: The temperature should not exceed 150 °C (302 F).
It could happen that the temperature increases more than 150°C (302 F), this is normal and is due to the
heat retained by the refractory bricks.
During cooking pizzas, bricks absorb heat transferring some humidity to the oven with consequent balancing
of temperature; when no food is placed into the oven, there isn’t this balancing and all the heat is
accumulated and retained by the refractory bricks.
Any way, if the temperature increases more than 150 °C (302 F), get temperature decrease act as follows:
1- Do not add other wood.
If temperature doesn’t decrease:
2- Spread the wood or coals around on the cooking floor for getting less fire.
If also in this case there isn’t any temperature decreasing:
3- Remove some wood from the oven.
WARNING !
Take care during removing wood, wait until when it will be just coal, don't remove wood
with flame. Use a metal shovel for this operation and place the removed wood in a metal
bin with a tightly fitting lid placed on a non-combustible surface, away from any
combustible materials
Day 4: Get the oven work for the entire day at 200°C ( 392 F)
Day 5 through day 7: Increase the temperature of 50°C (122 F) per day
For a better a more sure temperature measurement you can use an infrared thermometer (non provided with
the oven)
During these days of first fires DO NOT CLOSE the door of the oven to the end of the day.
The door opened allows the expulsion of the vapours of the dampness, closing the door the vapours remain
trapped into the oven generating pressures can cause raising of the oven floor.
With the first fires the inside of the oven will become black due to the damp conditions, however after about
two days of baking, the bricks should start to become again clear and that indicates that the oven is finally
ready by to use.
Any cracks on the exterior decoration, normally in the filling between tiles, or on the external plaster for
ovens not provided with finishing of tiles ,it is generally due to the oven stabilization, and it is nothing to worry
about nor it compromise the correct functioning of the same oven.
Note : The week of oven care is sufficient if immediately after this first week the oven continue in working
daily. If for any reason, after the first time of care, the oven is left without building any fire for some days ,
when you will build again the fire you must not start with large fires but it’s good to start with low temperature
increasing it a bit for time .
As more time the oven has been without any fire , much more time you will need for increase of the
temperature

www.stefanoferraraforni.it
13
OVEN MANAGEMENT
After the first days of firing the oven is ready for cooking
Use well seasoned or dried wood only (wood is considered properly dried if the contained moisture is not
more than 15-20%).
It’s suggested use of beech wood that has a good calorific power , it burns slowly, giving long combustion
autonomy.
If not able to find this type of wood also oak, almond, walnut, cherry, apple etc. can be used. To be
categorically excluded the use of resinous and / or treated wood.
For ignition place a small amount of wood on one side of the oven.
Placement of the fire on a side makes more easy the natural circulation of heat and the checking of the
cooking
The flame must reach the center of the dome, as soon as it is stabilized add more wood and waiting the
oven reaches the right temperature.
It is suggested place always the fire on the same side of the oven to preserve the integrity of the plain for
cooking which is subject to wear especially in the area where the fire is built because of the erosion of the
same fire and rubbing of the wood. Continuous changes in the position of fire can cause the erosion of
several parts of the plain for cooking with consequent reduction of the area in good condition for placing the
pizzas.
Usually about four large pieces of firewood are required , but if you don’t be able to get the right temperature
with that amount of wood , you can add some piece of wood in more , one for time. During the work continue
to add fuel as needed to maintain the desired heated rate.
The right temperature to cook Neapolitan pizza is 400°/450° C ( 750°/850°F), the oven can achieve and to
bear higher temperatures but it is not need to get the oven working with higher temperatures
At the end of the work day , place the door over the oven opening . When the morning after you will be ready
to start your new work day your oven will be ready for retained heat cooking. You can remove the door ,
during the night the inside temperature of the oven will be fallen off to about 250 °C (480°F) and you can
cook bread also without to build any fire.
There is not need to broom often the oven. Only when the floor is dirty of possible splashed ingredients
remove them.
Any way it’s better pay attention in avoid splashing of ingredients (tomato, oil, mozzarella etc.) on the floor
that with passing of the time could compromise its performance.
When required remove the ashes from the oven by using a metal shovel. Ashes are to be placed in a metal
bin with a tightly fitting lid. The container should be stored on a non-combustible surface, away from all
combustible materials. Ensure ashes are completely cold before disposing of them appropriately.
Warning
DO NOT brush strongly the plain of cooking with metal brush
DO NOT strike the plain of cooking with the pizza tools
DO NOT use any resinous wood or treated wood
DO NOT use any fire accelerator or chemical flammable substances
Wood must be added with care not to throw it from the opening door, for adding wood to add one
piece for time with the help of a metallic peel , place one piece of wood on the peel and put it into
the oven placing it gently on the floor.
Use only well dried wood

www.stefanoferraraforni.it
14
MAINTENANCE AND CLEANING
The oven can inspected through the door opening. Allow the oven to get completely cool before inspecting
the vent and chimney pipe for creosote build up.
Creosote – Formation and need for removal.
When wood is burned slowly, it produces tar and other organic vapors that combine with expelled moisture
to form creosote.
The creosote vapors condense in a relatively cool oven flue and exhaust hood of a slow burning fire. As a
result, creosote residue accumulates on the flue lining and exhaust hood. When ignited, this creosote makes
an extremely hot fire.
The external hood of the oven should be cleaned every two months . For removing soot you can use an ash
cleaner . However if the oven works with wood it’s suggested periodically inspect the hood as sometimes it
could be need a more frequently cleaning
The oven flue should be inspected at least twice a year to determine when creosote buildup has occurred.
When creosote has accumulated, it should be removed to reduce risk of fire.
At any way regarding maintenance and cleaning of the flue follow the instructions provided by the company
that built your vent system

www.stefanoferraraforni.it
15
WARRANTY TERMS AND CONDITIONS
:
Stefano Ferrara Forni Srl warranties its equipments to the original purchaser against defects in material or
manufacture for a period of one year from the original date of purchase, subject to the following exclusions
and limitations.
EXCLUSIONS
The warranty provided by Stefano Ferrara Forni do not apply in the following instances:
1. In the event that the equipment is improperly installed. Proper installation is the responsibility of the
installer; proper installation procedures are prescribed by the Stefano Ferrara Forni installation manual.
2. In the event the equipment is improperly maintained. Proper maintenance is the responsibility of the user;
proper maintenance procedures are prescribed in the Stefano Ferrara Forni installation manual.
3. In the event that the failure or malfunction of the appliance or any part thereof is caused by abnormal use
or is otherwise not attributable to defect in material or manufacture.
4. In the event that the appliance, by whatever cause, has been materially altered from the condition in which
it left the factory.
5. In the event that the label has been removed, altered or obliterated.
6. On parts that would be normally worn or replaced under normal conditions.
7. Normal cracking due to expansion and contraction stress relief in either the dome or floor blocks.
8. In the event that pressed log products of any type have been burned in the equipment.
9. Damage resulting from the use of chemical cleaning products in the oven, as well as any damage from
liquids or chemicals being poured or sprayed into the oven.
If any oral statements have been made regarding this appliance, such statements do not constitute
warranties and are not part of the contract of sale. This Limited Warranty constitutes the complete, final and
exclusive statement with regard to warranties.
THIS WARRANTY IS EXCLUSIVE AND IN LIEU OF ALL OTHER WARRANTIES WHETHER WRITTEN,
ORAL OR IMPLIED, INCLUDING, BUT NOT LIMITED TO, ANY WARRANTY OF MERCHANTABILITY OR
FITNESS FOR PARTICULAR PURPOSE OR WARRANTY AGAINST LATENT DEFECTS.
LIMITATIONS OF LIABILITY:
In the event of warranty claim or otherwise, the sole obligation of Stefano Ferrara Forni shall be the repair
and/or replacement, at the option of Stefano Ferrara Forni, of the appliance or component or part thereof.
Such repair or replacement shall be at the expense of Stefano Ferrara Forni with the exception of the
shipping costs and all involved customs operations , travel and staying on site during the time need for
reparation which shall be at the expense of the purchaser.
Any repair or replacement under this warranty does not constitute an extension of the original warranty for
any period of the appliance or for any component or part thereof. Parts to be replaced under this warranty
will be repaired or replaced at the option of Stefano Ferrara Forni with new or functionally operative parts.
The liability of Stefano Ferrara Forni on any claim of any kind, including claims based on warranty,
expressed or implied, contract, negligence, strict liability or any other theories shall be solely and exclusively
the repair or replacement of the product as stated herein, and such liability shall not include, and purchaser
specifically renounces any rights to recover, special, incidental, consequential or other damages of any kind
whatsoever, including, but not limited to, injuries to persons or damage to property, loss of profits or
anticipated profits, or loss of use of the product.
Any controversy shall be subject to the only and exclusive jurisdiction of the Courts of Naples- Italy
This manual suits for next models
1
Table of contents
Other FORNI Oven manuals