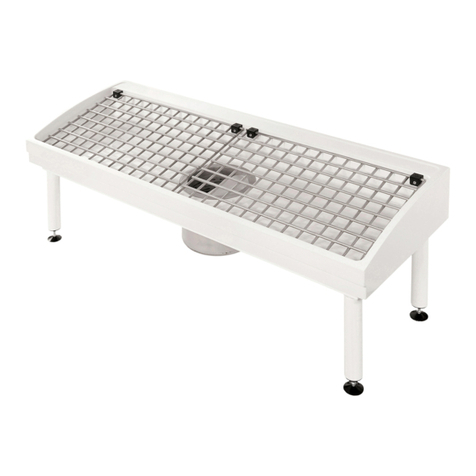
Forterra Bio Clean ARS User manual

BIO CLEAN ARS
Installation Manual
English
Play Setup Video

INTRODUCTION
WARNING
Introducing the Bio Clean ARS assembly manual. In this manual, we will show you how to assemble your
own Bio Clean ARS. Before beginning the assembly, make sure that there is enough room for installing
and assembling your product. The contractor shall furnish all labor, equipment, materials, and incidentals
required to install the ARS and appurtenances in accordance with the contract documents. Any damage
to the existing drainage structure (retrofit applications) or surrounding infrastructure that may need to be
repaired to allow for proper installation of the ARS shall be considered incidental and to be paid for at no
cost to the client. Bio Clean does offer installation services in certain areas. Please contact Bio Clean for
more information on pre-authorized 3rd party contractors that can provide install service in your area.
2
The manufacturer of the Bio Clean ARS does provide a warranty against
defects in materials and workmanship for a period of 5 years from the date of
acceptance by the Engineer. The Bio Clean ARS also carries a 2-year warranty
on installation.

3
PARTS & TOOLS CHECK LIST
Ensure that the following parts are included with your Bio Clean ARS. These are crucial components that
will be the mainframe of your entire assembly.
Center Hydra ARS Assembly x1 Left Hydra ARS Assembly x1 Right Hydra ARS Assembly x1
Cable Slide Member x1 Center Connector Plate x1 Aperture Connection
Spring x1
Hinged &
Adjustable End Mount x1
Hydra Blade
Amount Varies
Tension Regulators
(Optional) x1
Right End Plate x1
Left End Plate x1 Mounting Block x1

4
PARTS & TOOLS CHECK LIST
Ensure that the following parts are included with your Bio Clan ARS. These are crucial components that
will be the mainframe of your entire assembly.
3/8” x 2 3/4” Anchors x1
1/4” x 20 Bolt & Washer x1
.125” x 20 Bolt x1
Tamper Proof Screws
(Depends on the county)
Quick Release Pin x1
Pivot Rod Support x1 Pressure Mount x1 Spring Stud x1

5
PARTS & TOOLS CHECK LIST
The following tools are recommended for this installation.
Caulking Gun x1
9-16 Wrench x1
Hand Level x1
Safety Glasses x1
Square Straight Edge x1
Impact Drill with Socket x1
Sharpie x1
Tape Measure x1
Roto Hammer x1
Sledge Hammer x1
Working Gloves x1 1/8” and 1/4”
Allen Key x1
Grinder With Cutting Disk
x1

PARTS
Below is a breakdown of the core parts for your final product, as detailed below. The Bio Clean ARS comes
fully assembled, and there are many configurations depending on the catch basin.
Aperture
Connection Spring
Cable
Slide Member
Patented Flow
Control Hydrablades
Center
Connector Plate
Hinge &
Adjustable End
Mount
The hinge and
adjustable end
mount will attach
to the curb of the
basin for easy
installation with
specific hardware
included. Ensure
that the tools
mentioned in the
The aperture
connection spring
adjusts the gaps
and tensions of
the hydrablades
depending on your
preference.
The cable slide
member adjusts
the hydrablades
so that they can
be attached or
detached on the
center connector
plate
The Bio Clean
Blades are patent-
ed to withstand
water flow and
contain areas
The center con-
nector plate is
designed to con-
nect to various
walls that best fit
your basin gap.
6

7
INSTRUCTIONS
Verify that the Bio Clean ARS fits accordingly
Mark the anchor bolt hole with a marker and se-
cure the bolt
Align and place the Left Bio Clean ARS
Install the pressure mount system
Begin Step One by locating the Left, Center, and Right Bio Clean ARS
panels and ensure that they fit in the basin. It is recommended that
the basin be clean ahead of time before proceeding with installation
of the Bio Clean ARS.
Mark the hole location of the anchor bolt, and proceed to drill into
the marked area using a marker, then drill the hole using a roto
hammer drill. Place the Left Bio Clean ARS unit back into position,
and secure teh bolt into the hole using an impact wrench with a
9/16” socket.
Place the Left Bio Clean ARS into the left most section of the basin,
as shown. The left angle can be adjusted depending on the corner
of the basin. Some basins may have straight corner edges or some
may have curved edges. Adjust the left side hinge accordingly to
best fit the basin corner.
Finally, loosen the nuts on the mount system, and apply caulking to
the upper and lower sections of the mount system to further secure
the Left Bio Clean ARS into place. After securing the Left Bio Clean
ARS into place, tighten the nuts to complete step 1.
1.
3.
2.
4.
Step 1 - Installing the Left Bio Clean ARS

Secure the connection plate with the hardware
provided
INSTRUCTIONS
Locate the Center Bio Clean ARS, align, and place
into position
Tighten the hardware using an allen key
Install the pressure mount system
If no temper-proof screws are needed, proceed to tighten the
hardware using an allen key. Take care not to over tighten the screws.
Finally, repeat the pressure mount installation methods from the
previous step, and if your unit came with multiple panels, simply
repeat these steps and attach them all, as needed.
1.
3.
4.
Step 2 - Installing the Center Bio Clean ARS
Secure the connection plate with the hardware provided. Depending
on the county you are located in, you may need to install temper-
proof screws. Please check your project drawings to verify the
hardware needed.
Begin Step Two by locating the Center bio Clean ARS and aligning
it to the previously installed Left Bio Clean ARS so that the center
sections connect, as shown.
2.
8

INSTRUCTIONS
Locate the Right Hydra ARS, align, and place into
position
Install the unit to the center connector plate
Push the side plate into the connector plate and line up the holes so
that they match in place.
1.
3.
Step 3 - Installing the Right Bio Clean ARS
Mark the anchor bolt hole with a marker and se-
cure the bolt
Secure the unit with proper hardware
Mark the hole location of the anchor bolt, and proceed to drill into
the marked area using a marker, then drill the hole using a roto
hammer drill. Place the Right Bio Clean ARS unit back into position,
and secure the bolt into the hole using an impact wrench with a
9/16” socket.
Begin Step Three by locating the Right Bio Clean ARS and attach the
adjustable hinge to fit accordingly to the right corner of the basin
and push into place
Finally, attach the proper hardware to secure the unit to the assembly,
depending on the county you are in as stated in the project drawings.
Installation of the Bio Clean ARS unit is complete.
2.
4.
9

10
INSTRUCTIONS
Step 4 - Adjusting the Bio Clean ARS Length
Locate the quick release pin on the back of the
Bio Clean ARS unit
Slowly wiggle the center plate and remove it
Cut the measured length of the tension spring &
aperture bar & remove the excess hydrablades
Retread the spring stud and reattach the center
plate and quick release pin
If your installation length is too long, proceed by using a measuring
tape to measure the total amount of excess space that overlaps
the connector plate. This measured length will serve as the cutting
length. There is no need to remove the Bio Clean ARS unit. The
quick release pin can be found on the back of the unit. Simply pull
the quick release pin out so you can detach the excess hydrablades.
Wiggle the center plate back and forth until it becomes loose enough
to be easily removed. Set the center plate aside once it becomes
loose enough.
Using a grinder with a cutting disk, cut the measured length of the
tension spring and remove the excess hydrablades from the unit
until the amount measured is properly removed. Proceed to also cut
the section of the aperture bar until the cut length has been properly
removed.
To easily attach the spring stud onto the tension spring, use the
quick release pin’s midsection to twist the stud clockwise until it
locks into place. Next, reattach the center plate by wiggling it back
and forth until it is securely tightened. Finally, reattach the quick
release pin, and verify that all blades are tightly entact and not loose.
1.
2.
3.
4.

INSTRUCTIONS
11
Loosen the lateral screw with an Allen Key and
adjust tension
Tighten the tension by moving the screw to the left
Secure the screw into place once adjustment is
complete
1.
3.
4.
Step 5 - Adjusting the Bio Clean ARS Tension
Loosen the tension by moving the screw to the
With the Allen Key still attached to the screw, move the screw to the
right to have the tension loosened to your liking. The tension depends
on the county, project drawings, or engineer recommendations.
With the Allen Key still attached to the screw, move teh screw to
the left to have the tension tightened to your liking.
Once adjustment is complete, tighten the screw using an Allen Key.
Locate the screw attached to the side plate with a slot that is
attached to the mounting block, and loosen it using an Allen Key.
2.

Technical support
(855) 566-3938
stormwater@forterrabp.com
Bio Clean Corporate Office
5796 Armada Drive, Suite 250
Carlsbad, CA 92008
https://biocleanenvironmental.com/
© BioClean 2020, All Rights Reserved
Other manuals for Bio Clean ARS
1
Table of contents
Other Forterra Cleaning Equipment manuals