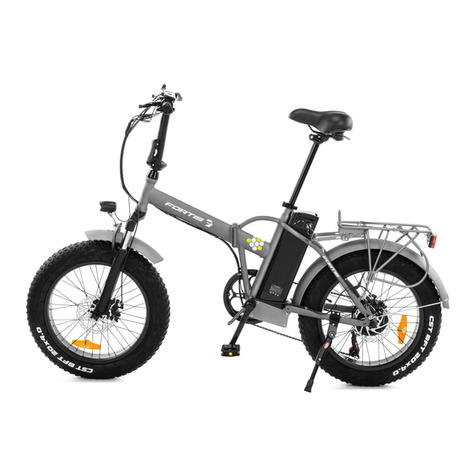
Fortis FS20FATEBKC User manual

20” FAT TYRE FOLDABLE
ELECTRIC BIKE
FS20FATEBKC

2
Safety & warnings
3
Overview
6
Assembly
8
Operation
15
Cleaning & care
18
Troubleshooting
19

3
• Read all of the following instructions before use. Keep this user guide for future
reference. Do not skip, substitute or modify any steps or procedures in this guide, as
doing so could result in personal injury or product damage.
• The following user guide is only a guide to assist you and is not a complete or
comprehensive manual of all aspects of maintaining and repairing your bicycle. If you
are not comfortable or lack the skills or tools to assemble the bicycle yourself, you
should take it to a qualified mechanic at a bicycle shop. Additionally, you can contact
Kogan.com for support.
Electric Assisted Bike Regulations
The EN 15194 EU standard or EPAC (Electric Power Assisted Cycle) conforms to the
following characteristics for electric power assisted bikes:
• Motor assistance only starts when the cyclist pedals.
• The assistance cuts out as soon as the cyclist stops pedalling.
• The assistance cuts out as soon as the speed exceeds 25km/h.
Adherence to this standard enables the use of the electric bikes in the same conditions as
any other bicycle, particularly on bicycle paths and bicycle-specific lanes.
Recommendation Before First Ride
• Before first use, please double-check the function of all the parts of your electric bike. If
you have any doubts or if you detect a problem, please contact your authorised dealer
or technical service department.
• Regularly check the tire pressure. This will make pedalling easier, minimize battery
consumption, and reduce the likelihood of damage to your tyre.
• Always check the brakes prior to riding to make sure they are working correctly. Adjust
the brake sensitivity if needed. Only ride at a speed that the conditions permit, for
example, slow down on snowy or rainy days.
• Always hold the handlebars with both hands, except when you need to notify others
you are turning.
• If you lend your bicycle to a third party, ensure they are familiar with this user guide
before the first ride.
• Use a light at night or when visibility is not good. If you are not able to see clearly with a
light, do not attempt to ride your bike.
• Respect local and national road traffic regulations.
SAFETY & WARNINGS

4
• For your safety, it is highly recommended that you wear a certified helmet.
• When used during heavy rain, snow, in slippery conditions or in the case of low visibility,
be careful and adjust your speed.
• At night, ride using the lights and wear bright clothing to help make you visible to
others.
• Trying to repair anything that implies removing mechanical or electrical components is
strongly advised against. If necessary, please contact help.Kogan.com for after-sales
support.
• Using high pressured water jets to clean the bike is strongly advised against.
• Check the battery level before use. You must fully charge it before first use.
• To extend battery performance and lifespan, do not half charge and adapt your ride
length to battery level.
• The batteries' life will vary depending on where you ride it (inclines will reduce power
rapidly) and how you ride (assistance mode chosen). The greater the assistance used,
the more you'll use the battery and the shorter it will last. Use the gears accordingly
relative to riding conditions to extend battery life. The amount of weight carried also
impacts on battery life span. Extreme low temperatures may also impact battery life
span.
• It is recommended that you charge the battery at least every 2 months when the bike is
not being used; during winter, for example.
• This bike can be used in the rain; however, it must not be submerged in water or
puddles. The controller, motor and other electrical devices may be short circuited,
causing damage and creating possible dangerous situations.
• Store the battery in a dry place after having completely recharged it. Avoid extreme
temperatures (low and high) as they can damage the battery. Optimal operating range:
-10°C to 35°C.
Warning
• Do not ride after taking drugs or alcohol or while using medication which might make
you drowsy. Pedal-assisted bicycles are not designed for 2 people.
• Do not ride double as these bicycles are not designed to carry the additional load of a
second rider.
• Do not put batteries in normal waste bins. Dispose of used batteries in a certified
recycling facility.
• Do not over lubricate; if oil contacts the wheel rim, brake pads or brake disks, this will
result in loss of braking performance and an increase in stopping distances. This could
potentially cause loss of control, accidents and injury.
5
Safety ride
• It is highly recommended that you do not overload your pedal-assisted bicycle as you
could damage the electrical components or cause malfunctions, like overheating of the
battery or the motor.
• Do not store the battery in excessively hot or cold places.
• Maximum loading weight on the bicycle must not exceed 100kg.
• Regularly check battery brackets and mountings.
• Always wear a helmet when riding your pedal-assisted bicycle.
• If a rack is not already fitted to your bicycle, please do not attempt to fit one yourself.
• Do not carry anything on the rack that might hide lights or reflectors.
• Make sure your body and other objects do not come into contact with the chain or the
wheels whilst they are moving.
• Never touch the charging connector on the battery case with your hands when they are
wet or with keys or other metallic objects, in case they damage the battery pole and
cause a short circuit.
• All the components and parts of your bicycle are subject to normal wear and fatigue.
Keep a close eye on any change in the shape or colour of a component or traces of
oxidation (rust) on your bicycle. If this occurs, do not use the product until the
component has been replaced.
• Use the charger which was provided with this bike. Never use a charger from a different
model.
• The charger is designed for indoor use only. Keep the charger away from water to avoid
short circuit. Do not use it in a dampening, combustible, or explosive environment. Do
not remove the plug by pulling the cord, always grip the charging port by its metal
body.
• If possible, do not ride in adverse weather conditions, low visibility or if you are very tired
for your safety.

6
1
Front hub
12
Freewheel
2
Rear motor
13
Bottom Bracket set
3
Spoke
14
Rear derailleur
4
Rim
15
Crank set
5
Tire
16
Shift cable
6
Handlebar
17
Front light
7
Right shifter
18
Rear light
8
Front brake
19
Brake lever
9
Rear brake
20
Saddle
10
Suspension fork
21
Carrier
11
Seat post
22
Foldable stem
OVERVIEW

7
23
Kickstand
33
Seat clamp
24
Front fender
34
Grip
25
Rear fender
35
Fender support sheet
26
Display
36
Wrapping tape
27
Pedal
37
Frame buckle
28
Controller
38
Disc brake rotor
29
Chain
39
Nylon cable tie
30
Rear fender support
40
Wheel reflector
31
Front brake cable
41
Headset
32
Rear brake cable
Tools supplied
3mm Allen
Key (display)
4mm Allen Key
(fender)
5mm Allen
Key (brake)
6mm & Phillips
Head Key
(bell & stem lock)
Multifunction
Wrench
(front wheel, pedal,
front & rear light)
Recommended Fastener Torque
Part
Fastener size
Torque
Stem locking screw lock
M8
18-25 N.m.
Saddle lock
M8
20-25 N.m.
Front wheel nut
M10
30-35N.m.
Rear wheel nut
M10
35-40N.m.
Notes:
The assembly of this e-bike does not require the use of the above tools, they are used
for further adjustment.

8
Step 1: Getting Started
Remove the e-bike and all accessories from the packaging. DO NOT dispose of the original
packaging until assembly is complete. Check all packaging to ensure all necessary
components are found before beginning assembly.
Step 2: Handlebar/Stem
Figure 1
Align the handlebar to the groove, then insert it into the folding stem. The handlebar should
be perpendicular to the front wheel. (Figure 2-3)
Figure 2
Figure 3
ASSEMBLY
WARNING: To prevent steering system damage and possible loss of
control, the stem must be inserted enough so that the minimum
insertion marks are completely covered (Figure 1).
Minimum Insertion Mark

9
Unfold the stem and lock the folding buckle. (Figure 4-5)
Figure 4
Figure 5
Figure 6
Notes:
If the steering stem is loose, fasten the steering stem lock screw and make sure that it
is securely fastened. (Figure 6).

10
Step 3: Unfolding Bike
Unfold the bike. Lock the folding buckle back into place to prevent the bike from collapsing.
Refer to the below images for the correct positioning for locking the folding buckle after
unfolding the bike. (Figure 7)
Figure 7
To fold the bike, lift the handle up and fold the bike frame in half. (Figure 8)
Figure 8

11
Step 4: Seat and Seat Post
• Insert the seat post into the frame. Ensure the seat post is inserted to the minimal
indication on the seat stem.
• Tighten the quick-release clamp and then fold the lever to the closed position. The
minimal torque specification is 19.5Nm.
• Ensure the quick-release clamp is turned on a 45 degrees angle (Figure 9). This will
allow for an easier battery removal.
Note: Do not adjust the seat post beyond its maximum extension mark.
Figure 9
Step 5: Pedals
The pedals come pre-assembled. While supporting the back of the pedal with your hand,
use the palm of your other hand to unfold the pedals. (Figure 10)
Figure 10

12
Step 6: Rear Light
• The rear seat light comes pre-assembled on the electric bike. Before using the bike,
remove the “PULL” sticker.
• To turn the light on, press the button under the light. (Figure 11)
Figure 11
Battery Installation
Install: Press the release button under the saddle to fold it forward. Then align the slot on
the bottom of the battery with the track on the frame. The battery should slide smoothly
into place. Insert the key and turn it clockwise twice to the ON position, fold back the saddle
and the bike is ready for use.
Lock:After the battery is installed in place, turn the key clockwise by one gear to OFF, at
which time the key can be removed to lock the battery.
WARNING: While folding the saddle, ensure hands are clear of the
front folding parts. (Figure 12)

13
Battery Charging
Battery removal:Press the release button under the saddle to fold the saddle forward. Turn
the key counter clockwise twice to the UNLOCK position, then grab the battery handle and
lift it up.
Charging: Open the dust cover on the battery to expose the charging port. Insert the low-
voltage output plug of the charger into the battery charging port and insert the charger into
an electrical outlet. The indicator light of the charger will change from GREEN to RED,
indicating normal charging. When the battery is fully charged, the indicator light of the
charger changes from RED to GREEN. After charging, remove the plug from the outlet and
then from the battery. Replace the battery dust cover.
Check battery level: Insert the key into the battery lock hole and turn it clockwise to the ON
position. Press the power indicator button on the top of the battery to check whether the
battery power is sufficient. If all three LED lights are on the power is sufficient. Two lights
indicate that the battery is not full. If the one light is bright red and the others are dim, the
battery is low and must be charged. (Figure 13)
Figure 12
Figure 13

14
Note:
• Ensure the charge plug is always securely in place to prevent humidity entering.
• Do not charge the battery for more than 10 hours to avoid overcharging and damaging
the battery. After the light turns green, the charger enters trickle charging and will
slowly maintain the state of charge. If you are going to leave the bike unattended for an
extended period, disconnect the charger, especially in hot weather.
• While charging, keep the charger and battery out of the reach of children. Do not place
anything on top of the charger whilst in use and prevent any liquid, metal or metal
fillings from coming into contact with the charger.

15
Display
LCD Screen Setup and Assistance Level
OPERATION
Notes:
Turn battery lock key to “ON” position before starting system operation. Press the On -
Off button (A) for 2 seconds in order to start the system or shut the system off.
ELECTRONIC PAD LAYOUT
A: On/Off Mode
B: More assistance
C: Less assistance
1
2
3
4
1
10
9
5
7
6
8

16
1
Max speed
Press the on-off button (A) and the "+" button(B) at the same
time to display the highest speed of this cycling. Press again
to exit max speed display.
2
Front light
Hold + button (B) for 2 seconds to turn on/off the light.
This symbol lights up to indicate that the headlights are on.
3
Controller failure
There is a fault with the controller. Cease use and contact
help.Kogan.com for support.
4
Speedometer
The meter will calculate the true speed based on the wheel
diameter and signal data. Unit MPH, KM/H (Default is KM/H)
5
Motor failure
There is a fault with the electric motor. Cease use and
contact help.Kogan.com for support.
6
Battery low
The battery is low and needs to be charged.
7
Walk mode
When the vehicle is stationary, Hold - button (C) for 2 seconds
to enter the 6KM/h walk mode, release the button to exit the
walk mode.
8
Assist level
Total 5 level assist. Adjust the assist gear by pressing the + or
- button. the boot default is 0 level assist (0 means without
assist)
9
Battery level
The power indicator bar will display the percentage of power
according to the battery's power-to-voltage ratio.
10
Multi-function
display area
Short press On - Off Mode (A) to switch between different
display contents when the display is on.
Multi-function Display
ODO (total mileage)
TRIP (single mileage)
TI (Operation hours)
VOL (Current voltage)
Electric current
Error (Error code)

17
Parameter Setting
Press the + (B) - (C) button together for 2 seconds, to enter/exit the setting interface.
Press + (B) and - (C) to adjust parameter, press on-off button (A) to switch menu.
• P01 backlight brightness: 1 is darkest, 3 is brightest (default is 2)
• P02 mileage unit: 0; KM; 1; MILE; (default is 0)
• ODO Zero-Out: Long press the + button(B) for 3 seconds and ODO value will be reset.
After setting, press the + (B) - (C) button together for 2 seconds, to save the settings and exit
the setting interface.

18
Care and Lubrication
Only use specific bicycle lubricants.
Pedals: A few drops every 6 months on the axle.
Chain: Spray the whole surface every 6 months.
Bottom bracket: Every 6 months, please check with your authorised dealer.
Motor: Every year, please check with your authorised dealer.
Maintenance and Advice
• Never modify your bicycle with non-certified parts.
• Never ride in deep water.
• Do not use for jumps or stunts.
• Avoid long distance rides when it is raining.
• Keep both hands on the handlebar.
• Avoid sudden braking.
• Be careful when riding in pools of water.
• Thoroughly check the bicycle before each ride.
• Avoid leaving your bicycle in heavy rain or snow. If you do so, wipe dry before riding.
It is highly recommended to have your bike serviced by an authorised dealer at least once a
year or every 1000km. Check your brake cables, sheaths and brake pads. Lubricate all
transmission components, chain and derailleur with a suitable product. If the rear tire has a
puncture, remember that if you must remove it, it is attached to the motor, so make sure to
disconnect the cable. (Figure 14)
Figure 14
CLEANING & CARE

19
Error Code
Indication
Solution
E01
Motor Failure
• Check whether the motor waterproof
cable is loose and re-plug the motor
waterproof cable.
• Check whether the motor lead wire is
damaged.
• Replace the motor;
E03
Controller Failure
• Open the junction box to check whether
the instrument wire plug is loose
• Replace the controller
E05
Battery Undervoltage
• Charge the battery
• Replacement battery
E06
Communications
Receiving Failure
• Open the junction box and check whether
the display wire plug is loose
• Replace display or controller
E07
Communications
Sending Failure
• Open the junction box and check whether
the display wire plug is loose
• Replace display or controller
TROUBLESHOOTING

20
Need more information?
We hope that this user guide has given you
the assistance needed for a simple set-up.
For the most up-to-date guide for your product,
as well as any additional assistance you may require,
head online to help.kogan.com
Table of contents
Other Fortis Scooter manuals

Fortis
Fortis FS14IEBIKEA User manual

Fortis
Fortis FS36V16EBKA User manual

Fortis
Fortis FS7MDLDBWMA User manual

Fortis
Fortis FS20ELBIKEC User manual

Fortis
Fortis FS20ELBIKEB User manual

Fortis
Fortis 700C BAFANG User manual

Fortis
Fortis QiCYCLE 20 User manual

Fortis
Fortis CITY BREEZE+ User manual

Fortis
Fortis FS20FATEBKB User manual

Fortis
Fortis FS36V16EBKA User manual