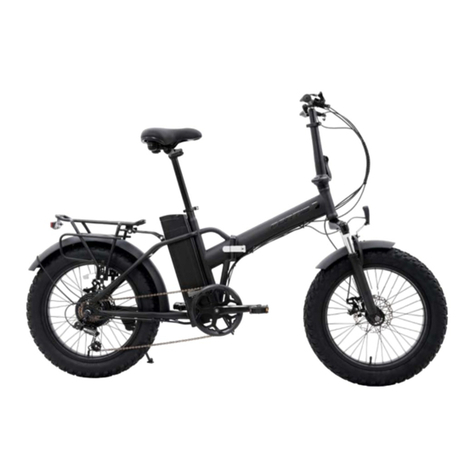
Fortis QiCYCLE 20 User manual

QiCYCLE 20" 36V
SMART ELECTRIC BIKE
FSQC20EBKGA

2
Safety & warnings 3
Overview 8
Components list 11
Assembly 11
Operation 15
Cleaning & care 20
Specifications 22
Troubleshooting 24
Notes 26

3
IMPORTANT: Read all safety precautions and instructions and save this user guide for
future reference.
Failure to follow any instructions in the user manual may result in electric shock, fire and/or
serious injury.
The rider must wear a helmet and appropriate safety gear when operating this bike. Ensure
local laws and regulations for electric bike use are followed at all times.
ATTENTION: This bike is designed for city roads and must not be operated in non-urban
road or off-road environments.
Safety instructions
•It is strictly forbidden for persons under the age of 16 to ride electric bike on the road.
•The electric bike should be operated in non-motorised vehicle lanes and the maximum
speed shall not exceed 25km/h.
•On a road without non-motorised vehicle lane, only ride on the left-hand side of the
vehicle lane.
•Do not lend the electric bike to people who don’t know how to operate in order to avoid
injury.
•Ensure you abide by local laws and regulations if you carry people or objects with the
electric bike.
•Always wear a helmet when riding.
•In rainy or snowy days, the braking distance will become longer.
•Pay attention to slow down and try to avoid riding in severe weather. such as heavy
rain.
Battery and charging
•The operating temperature for charging is between 0°C to 45°C and for discharging is
between -20°C to 60°C.
SAFETY & WARNINGS

4
•The charger is designed for indoor use only. Do not place the battery in any liquid
(acidic or alkaline). Keep the charger dry and never expose it to rain and high
temperature environment.
•Connecting reversely the polarity of battery is strictly prohibited.
•Do not incinerate, disassemble, reassemble, short circuit batteries or destroy the
battery.
•Charge with original or authorised charger. The maximum charging time is 6 hours and
the charging current should be less than 1.7A. Misuse other types of batteries may burst
causing personal injury and damage.
•Keep the battery in cool and dry place and charge it for 2 hours every 2 months for a
better maintenance.
•Always follow the instructions in the user manual for charging the battery.
•Do no use the unqualified charger that is not applicable to the specified type and
voltage to charge the battery. The charger can charge Lithium-ion battery (36 Vdc,
max. capacitance: 7500mAh (single battery pack), comply with IEC 62133).
•Do not used for non-rechargeable batteries, as they can overheat and break.
•The chargers are not intended to charge automobile batteries.
•Prevent foreign objects from entering the charger during its use and storage. Prevent
water and other liquid from getting in, otherwise a short circuit may occur. Keep the
battery well ventilated when charging. Do not charge the battery in an enclosed area,
in high temperature environments or under direct sunlight. Prevent flames and sparks,
explosive gases. Store the charger in a cool and dry place when not in use.
•When charging, insert the battery first and then connect the charger to the power
supply. When the battery is fully charged, cut off the power supply first and then
remove the battery connector.
•When the indicator turns green, cut off the power supply in time. Do not connect the
charger to an AC power without a load for a long time.
•If there is an odour, the indicator displays an error or the charger shell overheats during
charging, stop charging immediately or go to the official dealer for repairing or contact
the after-sales service department for help.
•If possible, do not carry the charger with the bike. If required, you can put the charger
into a toolbox with proper shock absorption and then carry the toolbox with the bike.
•Do not disassemble or replace any components in the charger without authorisation. If
the supply cord is damaged, it must be replaced by kogan.com, an authorised service
agent, or similarly qualified persons in order to avoid a hazard.
•Connect the charger directly to a power source. Never use extension cords.
•If the performance of the batteries decreases substantially, it is time to replace the
batteries.
•Keep electrical appliances out of reach from Children or infirm persons. Do not let them
use the appliances without supervision.
•This appliance can be used by children aged from 8 years and above, and persons with
reduced physical, sensory or mental capabilities, or people with a lack of experience

5
and knowledge, if they have been given supervision or instruction concerning use of the
appliance in a safe way and understand the hazards involved.
Riding
•Cycling involves risk of personal injury and damage of the bike, you should assume the
responsibility for that risk.
•For your safety, always follow the local rules and regulations for cycling, as well as
those contained within this guide. If any statements contradict, defer to your local laws.
•Perform regular maintenance, as this too can reduce the risk of injury to yourself and
others.
•This user manual contains warnings and precautions concerning the consequences of
failure to maintain or inspect your bike and of failure to follow safe cycling practices.
•As with all mechanical components, electric bicycles are subject to wear and high
stress. Different materials and components may react to wear or stress fatigue in
different ways. If a component's service life has passed, it may suddenly fail and cause
personal injury. Any cracks, scratches or colour change in the high-stress areas indicate
that the component's service life has passed and should be replaced.
•If there was any impact on the bicycle due to a collision, it is recommended to
immediately go to an professional bike shop for inspection and maintenance if required.
The user may not be able to see the damage caused by impact on the components
made of composite materials, which may result in a second accident and personal
injury.
•Check the front and rear brakes before use and adjust them if necessary. The front
brake is controlled by the right brake lever and the rear brake is controlled by the left
brake lever. After properly adjusting the brakes, the bicycle should brake reliably when
pulling both the left and the right brake lever halfway. When the brake pads are worn
excessively, they must be replaced in time.
•Check whether the chain is properly lubricated before using the bicycle. Turn the pedal
by hand and check whether the chain links move smoothly and are corrosion-free. If the
chain is corrosive or frozen, add an appropriate amount of lubricant or replace the
chain if necessary.
•Before riding the bicycle, check the tyre pressure, the handlebar movement, the
rotation of the front and rear wheel, the electrical circuit, the battery level and the
working condition of the motor, as well as the lights, bell and fasteners.
oLow tyre pressure will increase the friction between the tyre and the road surface.
This will increase the tyre's wear and thus reduce its total mileage. It will also
negatively affect the bicycle's handling and steering and thereby reducing
comfort and safety. If the tyre pressure is too low, immediately inflate the tyres.
The recommended tyre pressure is 40–65 PSI.
oIf the handlebar is stuck or does not turn smoothly, it should be adjusted or
lubricated in time. Use calcium-based or lithium-based grease as a lubricant. First
loosen the front fork's locknut, then turn the front fork's upper block. Once it is
adjusted as preferred, tighten the front fork’s locknut.
6
oIf the front and rear wheel do not rotate smoothly due to friction, the bicycle's
power consumption will increase and its mileage will reduce. To prevent failure,
make sure the bicycle is lubricated and maintained in a timely manner. Use
calcium-based or lithium-based grease as a lubricant. If the hub fails, replace the
bearings or the complete hub. If the motor fails, it must be repaired by an
authorised dealer.
oPower on the bicycle when checking the electrical circuit for continuity. Check
whether all connectors are firmly plugged in and all fuses are working normally.
Check whether the output of the battery terminals is optimal and whether the
wiring harness is properly connected to the battery. Solve any issues in a timely
manner.
oBefore riding, check whether the battery level is enough for the expected mileage.
If the battery level is insufficient, supplement by pedalling the bicycle to avoid
battery undervoltage.
oBefore riding, check whether the motor works properly. Start the motor and adjust
its speed to visually inspect and listen to the motor. If there is any unusual
behaviour, it should be repaired in a timely manner.
oBefore riding, check whether the lights and bell are working properly, especially
when riding at night. The front light is supposed to be bright and its light beam
should fall in a range of 5–10 meters in front of the bicycle. The bell is supposed to
ring loudly and the dashboard should work normally.
oBefore riding, check whether all parts are properly fastened. For example, the
handlebar, handle post, saddle, seat post, front wheel, rear wheel, crank axle,
locknut and pedals. If any part is loose or lost, it should be tightened or replaced
immediately.
oThe recommended torque specifications are:
Handle post 18-20 N⋅m Crank axle nut 35-50 N⋅m
Handlebar 6-8 N⋅m Pedals 35-45 N⋅m
Saddle 18-25 N·m Rear wheel 35-45 N⋅m
•The combination of the safety alert symbol and the word WARNING indicates a
potentially hazardous situation which, if not avoided, could result in serious injury or
death.
•The combination of the safety alert symbol and the word CAUTION indicates a
potentially hazardous situation which, if not avoided, may result in minor or moderate
injury or is an alert against unsafe practices.
•The word CAUTION used without the safety alert symbol indicates a situation which, if
not avoided, could result in serious damage to the bike or the voiding of your warranty.
•Many of the warnings and precautions say, “you may lose control and fall”. Since any
fall can result in serious injury or even death, these warnings of possible injury or death
will not always be mentioned.

7
•Always read the warning message on the handlebar: “Before each ride, make sure the
handle post hinge is properly tightened and safely secured.”
•Since it is not possible to predict every situation or condition that may occur during
cycling, this user manual does not represent a safe use of the bike in all situations.
There are risks associated with the use of any bike which cannot be predicted or
avoided and which are the sole responsibility of the rider.
•You may ride the bike only after you have carefully read this manual and are familiar
with the product performance.
•Untrained individuals are not advised to use this product.
•Before riding, check the voltage meter cable, buttons and data display.
•Before riding, check the tyre pressure (Recommended: 40 - 60 PSI).
•Wear a helmet when riding and comply with traffic regulations.
•This bicycle is suitable for riding on paved urban roads. To avoid danger, it is not
recommended to ride it on other terrains.

8
1Saddle 9Kickstand 17 Disc brake
2Seat post 10 Chain 18 Front fork
3Seat post clamp 11 Pedals 19 Front light
4Rear light 12 Crank 20 Head tube folding clasp
5Charging port 13 Chain ring 21 Head tube
6
Rear mudguard
14
Battery (inside)
22
Shift lever
7Motor 15 Tyre valve 23 Brake levers
8
Derailleur
16
Wheel hub
24
Display screen
OVERVIEW
Note:
The product, parts and user interface images in this manual are for reference only. Due
to updates and upgrades, the actual product may be slightly different from the images
shown here. Refer to the actual product.

9
Handlebar
1 Front brake lever 6 Display screen
2 + / – button (N, 1, 2, 3 modes) 7 Shift lever
3 Left handlebar grip 8 Right handlebar grip
4 Red power button 9 Rear brake lever
5 Walk assist button

10
Display Screen
1 ‘N’ mode indicator (neutral,
no power assistance) 7 Battery level
2 1, 2, 3 mode indicators
(power-assisted modes) 8 Abnormal temperature indication
3 Digital meter 9 System error
4 Charge percentage 10 Bluetooth connection status
5 Light 11 Speed unit
6 Charging 12 Walk assist mode indicator

11
Pedals (x1 pair) Power adaptor (x1) 4, 5, 6mm Allen key (x1)
Quick release lever (x1)
M5 screw (x4)
User guide (x1)
Unfold the head tube
•Remove the electric bike and all additional components from the box. Ensure all
components (listed in the Overview and Components List) are present before disposing
of any packaging.
•Unfold the head tube to the vertical position and secure into place with the folding
clasp.
•Pull the folding clasp wrench to the upright position.
ASSEMBLY
COMPONENTS LIST

12
Install and secure the handlebar
•Insert the handlebar into the head tube, adjusting the handlebar to ensure it is
perpendicular (90° right angle) to the wheel.
•Tighten the 4 screws at the top of the head tube.
Install the front wheel
Insert the front wheel between the front forks, ensuring the disc brake and calliper are
positioned on the left, then lock the quick release latch to secure.

13
Adjust the saddle height
Loosen the limit screw under the seat post. Open the quick release seat post
clamp, insert the seat tube to the suitable position for the rider, then secure
the quick release seat tube clamp.
When adjusting the height of the saddle, the highest safety line (MIN) must not
be higher than the upper edge of the seat tube clamp and the lowest safety line
(MAX) must not be lower than the seat tube clamp. Otherwise, it may cause
damage to the bicycle and cause personal injury. After adjusting the saddle
height, secure the quick release seat tube clamp.
Refer to size chart at the side of this page for recommended post heights.
MIN
MAX

14
Install the pedal
The left pedal is marked with “L” on the outer
axis. Screw counter-clockwise to attach.
The right pedal is marked with “R” on
the outer axis. Screw clockwise to attach.
Attach the pedals to the crank by hand, screwing the left pedal counter-clockwise and the
right pedal clockwise. Once each pedal has begun to screw in properly by hand (ensuring
they are correctly aligned with the crank threads), use a 6mm Allen key to tighten each
pedal.
The tightening torque of the pedal screw is 30-35 N•m.

15
Charging
Before using the electric bike for the first time, use the provided power adapter to charge
the electric bike and activate the battery.
If the battery power is too low, the battery will sleep. Ensure it is sufficiently charged, then
turn it on again.
When powered on, the display screen shows the percentage of battery power while
charging.
OPERATION
Note:
If the battery power is less than 50% and the bicycle is not used for 7 days, the battery
will enter the sleep mode. You will need to connect the power adapter to activate it.
Connect
the adapter

16
Power on
Press and hold the red power button on the left side of the handlebar to turn on the power.
If there is no operation within 10 minutes, it will automatically shut down
Power off
When already powered on, press and hold the red power button on the left side of the
handlebar to turn off the power. When the power is turned off, you can ride the electric bike
without electricity.
Press and hold the
red power button
Press and hold the
red power button

17
Bluetooth connection
Scan the QR code to download QiCYCLE app. If you cannot scan the
QR code, search “QiCYCLE” on the Play Store (Android) or App Store
(iOS), and download.
Once downloaded, open the app on your device, locate the model “C2”
and tap Connect. After the connection is successful, the Bluetooth
indicator on the meter will be on.
Power-assisted mode
Press the “+” or “-” button on the left side of the power button to switch between N, 1, 2 and
3 modes. N is no power assist, neutral gear. Gears 1, 2 and 3 will increase the power assist
level with each gear. When the speed exceeds 25km/h, the assist will be automatically
turned off. N mode (neutral gear) has no power assist.
Press "+/-" button to change mode
QiCYCLE app
is connected

18
Walk assist
While powered on, press and hold the walk assist button to start the boosting function. In
this mode, the speed will not exceed 6km/h. Release the walk assist button to stop.
The walk assist feature is recommended when carrying heavy loads or travelling uphill. It
may be too fast for general walking speeds on flat ground or with low weight.
Turn on/off lights
Press and hold the “+/-” button to toggle the front and rear lights on/off.
Press and hold
the "+/-" button
Walk assist button

19
Battery assembly drawing
Frame number location
The frame number is located at the head tube above the lights.
1. Place the battery
into the frame tube
2. Secure the battery
with the screws
Frame number

20
•It is recommended to use warm water and a sponge to clean the bicycle. When using
special cleaning products, pay close attention to the directions of the cleaning product.
Do not use acid, lubricating oil, high-temperature grease, brake cleaner or other harsh
cleaning products to clean the bicycle.
•To avoid short-circuiting the electrical system, do not clean the bicycle with high water
pressure
•Recommended maintenance interval: at least annually, or after every 150 kilometres,
whichever comes first.
oCheck the integrity and condition of the tyres and rims, adjust the brake lines and
check the chain drive. Carefully check whether the following parts are torqued
properly: handle post, saddle, seat post, front wheel, rear wheel, crank axle nut,
pedals.
oAfter 300 to 600 kilometres, check the brake pads, chain, sprockets and rims for
wear and tear. Furthermore, make sure that any bolted parts are properly
tightened.
oAfter every 1,000 kilometres, carry out a major maintenance to repair,
disassemble, inspect, clean and apply lubricating oil. It is recommended to
replace consumable parts such as hubs, pedals, brakes and gears every 1,000
kilometres.
•When the bicycle comes into contact with water, especially any water with salt, clean
the bicycle in a timely manner so as to avoid corrosion of metal parts and aging of
painted parts.
•After the bicycle is used for a period, it should be inspected and adjusted as per the
directions in this user guide.
•Tightening and lubrication is essential. Check whether any parts are loose and ensure
the chain drive moves smoothly. After lubricating the chain, wipe off any excess
lubricant. Add a small amount of lubricating oil on the flywheel. The tyres must be
inflated to the correct tyre pressure so as not to affect the riding comfort and safety as
well as the service life of the tyres. The brakes must be inspected frequently to
guarantee the rider's safety. If any issues occur, immediately carry out the required
adjustment or repair.
•After riding, store the bike in a place away from direct sunlight and rain.
•Regularly check the belt. If it is worn, replace the belt.
•Regularly check the screws and connections to ensure all parts are securely installed.
Recommended torque (Unit: N·m): 6 - 8 for handlebar screws; 17.5 - 20 for handle post
screws;17.5 - 25 for saddle screws; 32 - 45 for wheel nuts.
•Typical tension on a chain is roughly 2 cm, when pressing on the chain from the top
and from the bottom. If the movement exceeds 2 cm, adjust the tension or contact the
dealer.
CLEANING & CARE
This manual suits for next models
1
Table of contents
Other Fortis Scooter manuals

Fortis
Fortis FS14IEBIKEA User manual

Fortis
Fortis FS20FATEBKC User manual

Fortis
Fortis FS20ELBIKEB User manual

Fortis
Fortis FS36V16EBKA User manual

Fortis
Fortis FS7MDLDBWMA User manual

Fortis
Fortis FS20FATEBKB User manual

Fortis
Fortis FS20ELBIKEC User manual

Fortis
Fortis CITY BREEZE+ User manual

Fortis
Fortis 700C BAFANG User manual

Fortis
Fortis FS36V16EBKA User manual