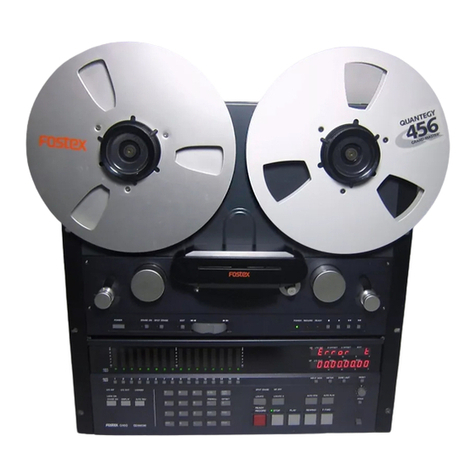
Fostex VR800 User manual

Owner’sManual
Model
Digital Multitrack Recorder
8288 429 000
SHIFT P.EDIT LOC MEM
RECORD STOP PLAY REW F FWD
AUTO PUNCH
CLIPBOARD
AUTO RTN
OUTIN
ENDOUTINSTART
EJECT
ACCESS
5678
OL
24
12
6
0
1234
RECORD TRACK
4321 5 678
EXECUTE
/ YES
EXIT
/ NO
DISP SEL
UNDO / REDO
EDITHOLD/ STORE SETUP
JOG
VARI PITCH SCRUBLOCATEAUTO PLAY
PGM SEL
AUTO RTN TIME BASE SEL SHUTTLE
LOCATE REC END
LOCATE ABS 0
CLIPBOARD PLAY
PUNCH
AUTO
OPTICAL
A SYNC
PREVIEW

VR800 Owner’s Manual (Safety Instructions)
2
CAUTION: TO REDUCE THE RISK OF ELECTRIC SHOCK,
DO NOT REMOVE COVER (OR BACK).
NO USER - SERVICEABLE PARTS INSIDE.
REFER SERVICING TO QUALIFIED SERVICE PERSONNEL.
CAUTION
RISK OF ELECTRIC SHOCK
DO NOT OPEN
"WARNING"
"TO REDUCE THE RISK OF FIRE OR ELECTRIC SHOCK,
DO NOT EXPOSE THIS APPLIANCE TO RAIN OR
MOISTURE."
SAFETY INSTRUCTIONS
1. Read Instructions - All the safety and operating instructions
should be read before the appliance is operated.
2. Retain Instructions - The safety and operating instructions
should be retained for future reference.
3. Heed Warnings - All warnings on the appliance and in the
operating instructions should be adhered to.
4. Follow Instructions - All operating and use instructions should
be followed.
5. Water and Moisture - The appliance should not be used near
water - for example, near a bathtub, washbowl, kitchen sink,
laundry tub, in a wet basement, or near a swimming pool, and
the like.
6. Carts and Stands - The appliance should be used only with a
cart or stand that is recommended by the manufacturer.
9. Heat-The applianceshouldbe situatedawayfromheatsources
such as radiators, heat registers, stoves, or other appliances
(including amplifiers) that produce heat.
10. Power Sources-Theapplianceshould beconnectedtoa power
supply only of the type described in the operating instructions
or as marked on the appliance.
11. GroundingorPolarization-Theprecautionsthatshouldbetaken
so that the grounding or polarization means of an appliance is
not defeated.
12. Power Cord Protection - Power supply cords should be routed
so that they are not likely to be walked on or pinched by items
placeduponoragainst them, paying particular attention tocords
at plugs, convenience receptacles, and the point where they
exit from the appliance.
13. Cleaning - The appliance should be cleaned only as
recommended by the manufacturer.
14. Nonuse Periods - The power cord of the appliance should be
unplugged from the outlet when left unused for a long period of
time.
15. Object and Liquid Entry - Care should be taken so that objects
do not fall and liquids are not spilled into the enclosure through
openings.
16. Damage Requiring Service - The appliance should be serviced
by qualified service personnel when:
A. The power supply cord or the plug has been damaged; or
B. Objects have fallen, or liquid has been spilled into the
appliance; or
C. The appliance has been exposed to rain; or
D. The appliance does not appear to operate normally or
exhibits a marked change in performance; or
E. The appliance has been dropped, or the enclosure damaged.
17. Servicing - Theuser should not attempt toservice the appliance
beyond that described in the operating instructions.
All other servicing should be referred to qualified service
personnel.
The lightning flash with arrowhead symbol, within an equilateral
triangle, is intended to alert the user to the presence of uninsulated
"dangerous voltage" within the product's enclosure that may be
of sufficient magnitude to constitute a risk of electric shock to
persons.
The exclamation point within an equilateral triangle is intended to
alert the user to the presence of important operating and
maintenance (servicing) instructions in the literature
accompanying the appliance.
CAUTION:
TO PREVENT ELECTRIC SHOCK, MATCH WIDE BLADE OF
PLUG TO WIDE SLOT, FULLY INSERT.
ATTENTION:
POUR EVITER LES CHOCS ELECTRIQUES, INTRODUIRE
LA LAME LA PLUS LARGE DE LA FICHE DANS LA BORNE
CORRESPONDANTE DE LA PRISE ET POUSSER JUSQU'
AU FOND.
An appliance and cart combination should be moved with care.
Quick stops, excessive force, and uneven surfaces may cause
the appliance and cart combination to overturn.
7. Wall or Ceiling Mounting - The appliance should be mounted to
a wall or ceiling only as recommended by the manufacturer.
8. Ventilation - The applianceshouldbe situated so thatits location
or position dose not interfere with its proper ventilation.
For example, the appliance should not be situated on a bed,
sofa, rug, or similar surface that may block the ventilation
openings;or, placed in abuilt-ininstallation, such as abookcase
orcabinet that may impede the flow of air through the ventilation
openings.

VR800 Owner’s Manual (Table of Contents)
3
Introduction.............................................................................5
Main features...........................................................................5
Precautions..................................................................................6
Note on repair..........................................................................6
About copyrights....................................................................6
About damage.........................................................................6
NamesandFunctions...............................................................7
Top panel..................................................................................8
Rear panel..............................................................................14
Side panel...............................................................................15
Display section...................................................................16
Display when the power is turned on...........................16
Preset display.....................................................................16
Display examples for time base selected via
the TIME BASE SEL key..........................................17
Selecting time base using the DISP SEL key.................17
The REMAIN display.........................................................18
Warning message..............................................................19
BeforeStarting..........................................................................20
Time Base.............................................................................20
Recording method and REMAIN indicator...................21
Managing songs by Program Change function............22
Real tracks and Additional tracks.....................................23
Input monitoring and playback monitoring................24
Audio file and event.............................................................25
FormattingaDisk.....................................................................27
Recording mode....................................................................27
Formatting the current drive (SCSI disk)........................28
Formatting the current drive (E-IDE hard disk).............30
Formatting a backup disk (SCSI disk)...............................30
Formatting a backup disk (fixed disk).............................31
HandlingPrograms..................................................................32
Creating a new Program....................................................32
Using a Program Change function....................................33
Deleting a Program...........................................................34
Editing a Program title......................................................35
PunchIn/OutRecording.........................................................36
What is Punch In/Out recording?.....................................36
Auto Punch In/Out...............................................................36
Preparation...................................................................36
Rehearsing auto punch in/out recording...................38
Auto punch in/out Take.................................................39
Undo/redo auto punch in/out recording...................39
Manual Punch In/Out recording......................................40
preparation...................................................................40
Rehearsing manual punch in/out recording.............40
Manual punch in/out Take............................................41
Undo/redo manual punch in/out recording.............42
RecordingtoaMetronomeSound.......................................43
DigitalRecording......................................................................45
Digital recording from an external digital device..........45
Digital recording to an external device............................46
StoringaLocatePoint(EditPoint)........................................48
Storing and editing the locate points
to the memory keys .................................................49
Storing in real-time...........................................................49
Editing and storing locate data......................................50
Editing and storing data..................................................50
Storing and editing LOCATE key.......................................51
Storing in real-time...........................................................51
Editing and storing locate data......................................52
Edit and re-store data that is already stored...............53
LocateFunction........................................................................54
Direct Locate.......................................................................54
Auto Play............................................................................55
Auto Return........................................................................55
Auto Repeat........................................................................56
Cue&ReviewFunction...........................................................57
Cue & Review function using
the REWIND and F FWD button............................57
Cue & Review function using the SHUTTLE feature......57
Digital scrubbing using the SCRUB function..................58
PreviewFunction......................................................................59
Executing the Preview function.........................................59
Trimming the sound while previewing...........................60
EditingTracks...........................................................................61
Copy & Paste and Move & Paste......................................61
Storing the edit points......................................................62
Checking and adjusting the edit points.......................62
Executing Copy (or Move)..............................................62
Checking the clipboard data..........................................62
Executing Paste..................................................................63
Undo/redo Paste...............................................................63
Erase..................................................................................64
Storing the edit points......................................................65
Checking and adjusting the edit points.......................65
Executing Erase..................................................................65
Undo/redo Erase...............................................................65
Track Exchange.................................................................66
Executing Track Exchange..............................................67
Table of Contents

VR800 Owner’s Manual (Table of Contents)
4
MIDISyncfunction...................................................................68
MIDI clock sync system....................................................68
MTC sync/MIDI Machine Control system.......................70
External MIDI equipment sync system by the
slave mode................................................................... ..73
SavingandLoadingSongData.............................................75
Outline of the save/load operation..................................75
Saving and loading data using a SCSI drive
as the current drive...................................................78
Saving/loading data using another SCSI drive...........78
SCSI drive connection and preparation...............78
Saving data.................................................................79
Loading data...............................................................80
Saving/loading via a DAT or adat.................................81
Saving and loading data using an 3.5-inch
E-IDE hard disk as the current drive......................82
Saving song data via a DAT or adat...............................82
DAT (or adat) connection and preparation........82
Saving data.................................................................83
Loading song data via a DAT or adat............................84
DAT (or adat) connection and preparation........84
Loading data...............................................................85
Saving and loading song data via a SCSI drive............86
Quick Troubleshooting...................................................87
ChangingtheInitialSettings(SETUPmode)......................88
Selecting SETUP mode.........................................................89
Setting a time signature.......................................................90
Setting a tempo.....................................................................92
Setting the metronome function.......................................93
Setting a preroll value..........................................................94
Setting MIDI sync output signal.........................................95
Setting an MTC frame rate..................................................96
Setting an MTC offset value................................................96
Setting MTC Offset mode....................................................97
Setting the slave mode ........................................................98
Setting the slave type...........................................................99
Setting the Record Protect function...............................100
Setting digital input tracks...............................................101
Setting digital output tracks.............................................102
Setting BAR/BEAT resolution mode...............................103
Setting the MIDI device number.....................................104
Checking the number of each track events..................105
MIDIImplementationChart..................................................106
MMC Command List/Inquiry Message List....................107
FostexSystemExclusiveMessage...................................108
StatusRequest.......................................................................109
DataType.................................................................................111
Explanationonthecommand/modelist...........................113
Thestatusrequestcommand.............................................115
Explanationonthestatusreply...........................................116
Maintenance/Specifications..............................................118

5
VR800 Owner’s Manual (Introduction/Main features/Precautions)
• An “Undo/Redo function” enables you to easily correct
recording and editing mistakes.
• A “Vari Pitch function” allows you to fine-tune the pitch.
• The VR800 has a “digital input track setup” function that
enables you to input S/P DIF or adat digital signals and record
them on any two tracks or all eight tracks.
• The VR800 has a “digital output track setup” function that
enables you to output digital data as S/P DIF or adat digital
signals and record them on an external digital device (DAT,
MD, adat, etc.).
• You can also use the DATA IN/OUT jacks to an external DAT
or adat, and to save and load song data (audio data and
SETUP mode settings) to and from the DAT or adat.
• High-speed SCSI Save/Load is also an option by connecting a
non-DAT or adat SCSI backup drive.
• A maximum of 99 Locate Pointers can be programmed for a
LOCATE only feature. Simply select the LOCATE number
desired for swift location.
• MIDI clock and Song Position Pointer can be transmitted
according to the internal programmable Tempo Map.
You can set up a synchronization system with a sequencer or
a rhythm machine without wasting a track.
• You can use the VR800 as a sync slave machine by sending
MTC from a connected device.
• The VR800 supports MTC, MMC, and Fostex System Exclusive
Message, which allows for advanced control and high-
precision synchronization from external sequencing software.
You can set the device number and MTC frame rate for MMC
and Fostex System Exclusive Message. Also, “MTC Offset
function” and “Offset Mode function” are useful for setting
up a sync environment using an external sequencing software.
• Auto Punch In/Out and Manual Punch In/Out functions offer
two modes: “Take” for a real recording, and “Rehearsal” for
monitoring the part between the in and out points.
• The “Program Select function” enables you to select a song
from up to 99 songs and name the songs.
• A “Bar/Beat Resolution function” is used to edit audio at the
beginning of the beat (round up or round off to a beat).
• The “Metronome function” can be used as a rhythm guide
for recording.
• Various edit functions using an edit point (locate point), such
as Copy & Paste, Move & Paste, Erase, Auto Punch In/Out,
Auto Locate, are available. You can also locate ABS 0 or REC
END regardless of the edit point (locate point).
• You can set a preroll time of 0 to 10 seconds.
• A “Disk Remain Display function” offers a clear indication
of available recording time and disk space (in mono track
recording). You can choose the Time Base from ABS, MTC,
and BAR/BEAT/CLK.
Introduction
Thank you for purchasing the Fostex Model VR800.
The VR800 is a 8-track digital multitrack recorder with
sixteen additional tracks that employs a 3.5-inch E-IDE
type removable hard disk, or external SCSI device
(removable or fixed) as the recording media, instead of
conventional type.
The VR800 is a digital multitrack recorder that is designed
to connect to a digital mixing console using optical cables.
For recording media, it uses 3.5-inch E-IDE hard disks,
removable disks, such as SCSI Zip and MO drive disks, or
fixed disks to provide you with a maximum of eight tracks
of simultaneous recording and playback, along with 16
additional tracks.
The VR800 records uncompressed digital audio using
16-bit linear quantization, and a sampling frequency of
44.1kHz, which enables you to configure a completely
digital recording system that combines various digital
mixers. Adopting A.D.A.C (*) has expanded the disk
recording capacity by a factor of four. You can select
one of three recording modes, depending on the
recording media and application.
You can back up data to DAT tapes or to an adat using a
special adat back-up function. SCSI ports permit fast back-
up.
Using an optional Model VC-8 (adat-analog converter)
allows you to connect an analog mixer to the VR800.
Please read this Owner’s Manual and the Quick Operation
Guide.
Main features
The VR800’s recorder section uses a recording format
called FDMS-3 (Fostex Disk Management System-3). It
uses an 3.5-inch E-IDE hard disk, external SCSI device
(stationary disk or removable disk) as the recording
media.
• The VR800 features a 3.5-inch bay for easy installation of a
3.5-inch E-IDE hard disk. A SCSI connector enables you to
connect a SCSI device (removable or fixed) as the current or
back-up drive.
• The VR800 features non-destructive audio editing (a great
advantage of digital recording) such as Copy & Paste, Move
& Paste, Erase, etc. You can choose Time Base (ABS or MTC)
or MIDI bar/beat/clock as the unit.
• A “Preview function” allows for an intuitive fine-adjustment
of an editing point (locate point).
Other manuals for VR800
1
This manual suits for next models
1
Table of contents
Other Fostex Recording Equipment manuals
Fostex
Fostex X-55 User manual
Fostex
Fostex X-15 Multitracker User manual
Fostex
Fostex A-8 User manual
Fostex
Fostex FR-2 Technical manual
Fostex
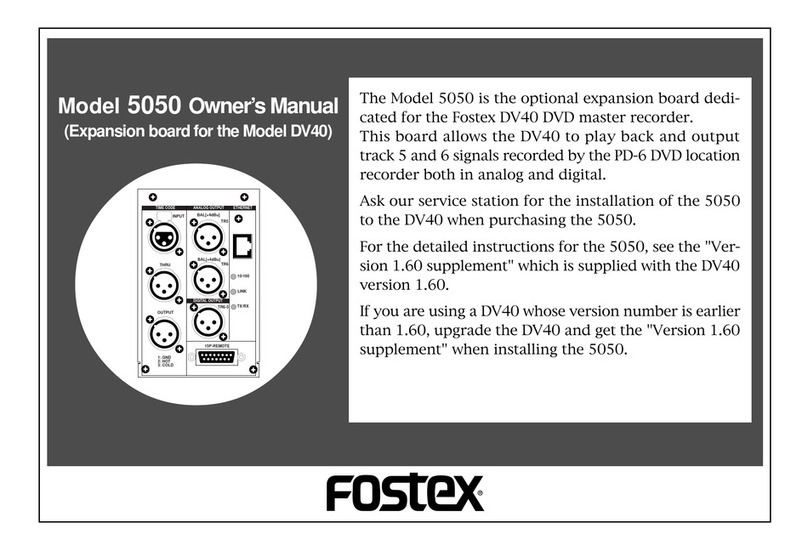
Fostex DV-40 User manual
Fostex
Fostex 8700 User manual
Fostex
Fostex 280 User manual
Fostex
Fostex D2424LVmk2 User manual
Fostex
Fostex MTC1 User manual
Fostex
Fostex D2424LV MKII User manual

