© PRINTED IN JAPAN JUNE 2004 8588 057 000 FX
(406658)
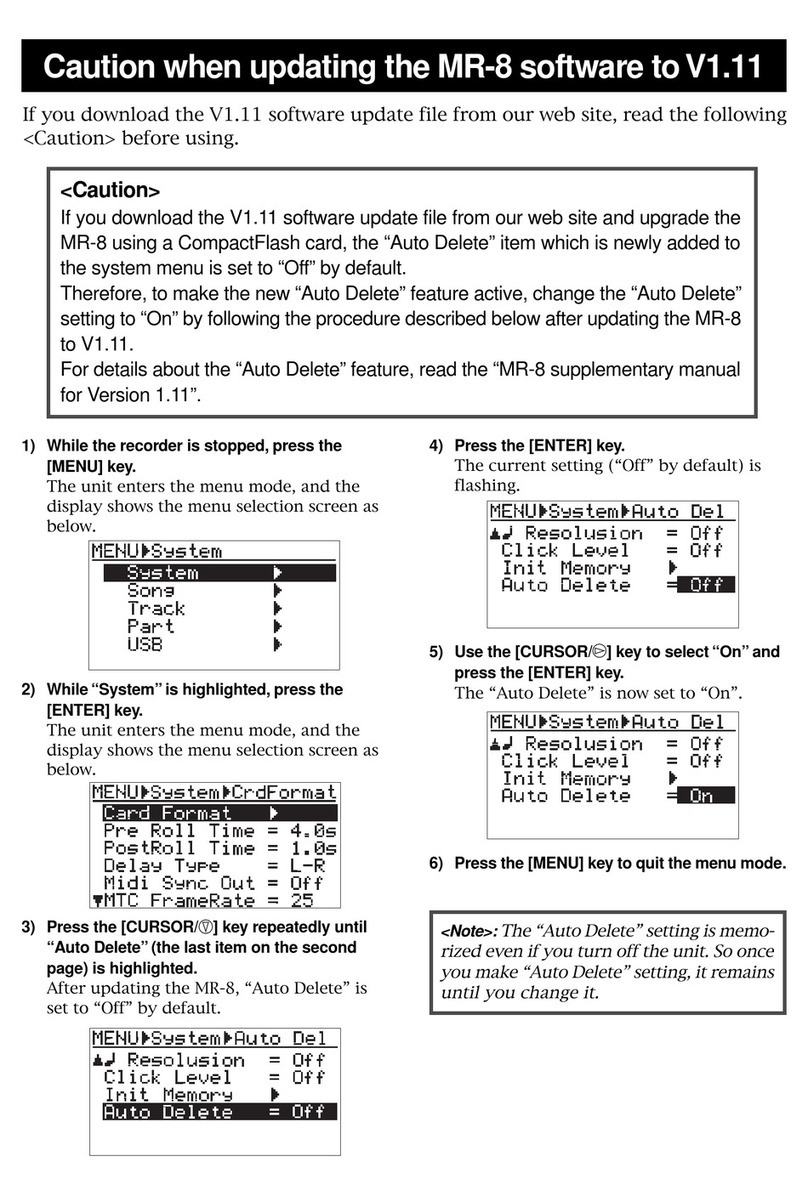
How to set "Auto Delete"
By default, the "Auto Delete" menu item which is newly added to the System menu is set to
"On". As described on the other page, if you execute "Erase Track" or "Erase Part" in this
condition, the corresponding WAV file is completely deleted and you cannot undo erasing
(while the remaining space of the memory card increases).
Therefore, if you want to make the "Erase Track" or "Erase Part" operation undoable, you
have to change the setting of "Auto Delete" to "Off".
You can find the new "Auto Delete" menu item at the bottom on the second page of the
System menu in the menu mode. The following shows how to set the "Auto Delete" to "Off".
<Note>:
The "Auto Delete" setting is memorized even if you turn off the unit. So once
you make "Auto Delete" setting, it remains until you change it.
After executing erasing a track or part while "Auto Delete" is set to "Off", if you want to
completely delete the file which is kept for the undo operation, execute "Delete Un-
used". It deletes all unused files, as well as increases the remaining space of the memory
card. See page 61 of the owner's manual for details about "Delete Unused".
1) While the recorder is stopped, press the
[MENU] key.
The unit enters the menu mode, and the
display shows the menu selection screen as
below.
2) While "System" is highlighted, press the
[ENTER] key.
The display now shows the first page of the
System menu screen.
3) Press the [CURSOR/ ] key repeatedly until
"Auto Delete" (the last item on the second
page) is highlighted.
4) Press the [ENTER] key.
The current setting ("On" by default) is
flashing.
5) Use the [CURSOR/ ] key to select "Off" and
press the [ENTER] key.
The "Auto Delete" is now set to "Off".
6) Press the [MENU] key to quit the menu mode.
Carry out the similar procedure as above if you
want to change the "Auto Delete" setting from
"Off" to "On".
