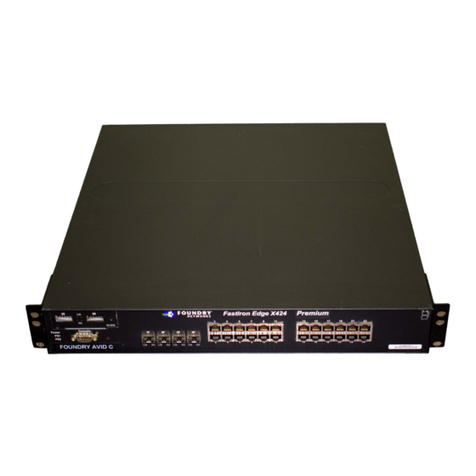
Foundry Networks ServerIron 4G-SSL User manual

October 2008 © 2008 Foundry Networks, Inc. 4 - 1
Chapter 4
ServerIron 4G Series
This chapter describes the ServerIron 4G Series.
Overview
The ServerIron 4G Series includes three stackable switches: ServerIron 4G, ServerIron 4G-SSL, and FIPs 140-2
level 2 certified ServerIron 4G-SSL-FIPS.
NOTE: ServerIron 4G-SSL-FIPS requires software release 10.2.01 or later.
Targeting small and mid-sized enterprise, eCommerce, and service provider sites, ServerIron 4G Series highlights
include:
• ASIC-Based Application Processors
• Choice of non-SSL and SSL-Integrated switches
• Hardware SSL Acceleration (ServerIron 4G-SSL and 4G-SSL-FIPS)
• FIPS 140-2 level 2 certification (ServerIron 4G-SSL-FIPS only)
NOTE: The fundamental difference between the SSL and non-SSL ServerIron switches is internal. There is an
embedded hardware ASIC for SSL acceleration in the ServerIron 4G-SSL and 4G-SSL-FIPS switches.
Figure 4.1 on page 4-1 shows the ServerIron 4G.
Figure 4.1 ServerIron 4G
Figure 4.2 shows the ServerIron 4G-SSL.

Foundry ServerIron Hardware Installation Guide
4 - 2 © 2008 Foundry Networks, Inc. October 2008
Figure 4.2 ServerIron 4G-SSL
Figure 4.3 ServerIron 4G-SSL-FIPS
Common Features
• Compact 1.5 RU Height
• 4-Ports of 100/1000 Mbps Copper and Gigabit Fiber Combination
• Optional Redundant and Hot Swappable Power Supplies in the Rear (DC power option is available)
• Wire-Speed Layer 2/3 Switching and Routing for Non-Application Flows
• All Features of TrafficWorks OS
Common Components
This section describes hardware components that are common to the ServerIron 4G Series SSL and non-SSL
Stackable device switches.
Front Panel
Figure 4.4 on page 4-3 shows the ServerIron 4G Series front panel.
NOTE: The ServerIron 4G-SSL front panel shown below is identical to the ServerIron 4G front panel. Only the
name (4G-SSL) on the front panel is different.
WARNING: On the right-hand side of the front panel is ia small, rectangular, face plate that can be unscrewed.
Hidden behind this face plate you have direct console access to the application processor. This port should
NEVER be accessed without specific instructions and guidance from Foundry TAC.

ServerIron 4G Series
October 2008 © 2008 Foundry Networks, Inc. 4 - 3
Figure 4.4 ServerIron 4G Series Front Panel
Interfaces
The ServerIron 4G Series interfaces are designed for you to use any four ports from the following options:
• Four 1000 Mbps ports with mini-GBIC slots for SFP compliant fiber transceivers
• Four 100/1000 Mbps ports with RJ-45 copper connectors
LEDs
This section describes the front panel LEDs for the ServerIron 4G Series. Table 4.1describes the LEDs.
Table 4.1: ServerIron 4G Series LEDs
LED Color Description
PWR Green • ON Indicates board is powered on.
• OFF Indicates board is not powered on or not present.
PS1 Green • ON Indicates power supply is powered on.
• OFF Indicates power supply is not powered on or not
present.
PS2 Green • ON Indicates power supply is powered on.
• OFF Indicates power supply is not powered on or not
present.
BP
Out Green • ON Indicates BP is transmitting packets.
• OFF Indicates BP is not transmitting packets.
In Green • ON Indicates BP is receiving packets.
• OFF Indicates BP is not receiving packets.
Fiber Ports (4 Sets)
Link Green • ON Indicates port connectivity.
• OFF Indicates no port connectivity.
™
S e r v e r Iro n 4 G SSL
P W R
PS 1
PS2
BP
O u t
I n
L I N K
A C T
L I N K
A C T
L I N K
A C T
L I N K
A C T
L I K A C T
++
1 0 0/1 0 0 0 M b p s R J . 4 5 ( c o p p e r ) p o r ts
Powe r
L E D s
C o n s ol e 1 F
1 C 2
F
2
C3
F
3
C4
F
4
C
Cons o le
p o r t
B a r r e l
p r o c e s s o r
L E D s
R e s e t b ut t o n
S F Pm i n i GBIC(fi b e r ) p o r t s
a n dp o r t L E D s
R J . 4 5 p o r t L E D
i d e n t i f i e r

Foundry ServerIron Hardware Installation Guide
4 - 4 © 2008 Foundry Networks, Inc. October 2008
Reset
The reset button allows you to restart the system without switching the power supplies off and on or using the CLI.
The reset button is located to the right of the serial management interface and is recessed to prevent you from
accidentally pushing the button.
Console
The console port is a serial management interface that allows you to configure and manage the device using a
third-party terminal emulation application on a directly connected PC. A straight-through EIA/TIA DB-9 serial
cable (M/F) ships with the device. The console port is located in the left corner of the front panel.
Cooling System
The ServerIron 4G Series provides two three-speed fans that operate at high-speed by default. Both fans operate
simultaneously at the same speed. If one fan fails, it does not affect the operation of the other fan.
The following fan speeds are available:
• low
• medium
• high
You can change the settings of the temperature thresholds using the following command:
FastIron#fan-speed lo
Syntax: fan-speed lo | med | hi
Power Supply
Each ServerIron 4G Series switch comes with one RPS5 or RPS5DC power supply, depending upon the order.
They all have two power supply slots, so you might want to install a second power supply for redundancy.
Table 4.2 lists the supported power supplies.
The supported power supplies can be swapped in or out of the device while the device is running. You can
remove and insert a power supply without opening the chassis. If the device contains redundant power supplies,
ACT Green • ON Indicates port activity.
• OFF Indicates no port activity.
Copper Ports (4 Sets)
Link Green • ON Indicates port connectivity.
• OFF Indicates no port connectivity.
ACT Green • ON Indicates port activity.
• OFF Indicates no port activity.
Table 4.2: Supported Power Supplies
Device Supported Power Supplies
ServerIron 4G RPS5 and RPS5DC
ServerIron 4G-SSL
Table 4.1: ServerIron 4G Series LEDs
LED Color Description

ServerIron 4G Series
October 2008 © 2008 Foundry Networks, Inc. 4 - 5
you can remove one of the supplies without interrupting operation. The remaining supply provides enough power
for all the ports.
The RPS5 power supply is 100VAC @ 3.5A, 240VAC @ 1.5A, 50-60Hz, auto-sensing, and auto-switching. The
RPS5DC is a 36-72 VDC power supply.
Figure 4.5 on page 4-5 shows a rear view of a ServerIron 4G containing one RPS5 power supply.
Figure 4.5 RPS5 Power Supply
Figure 4.6 on page 4-5 shows a rear view of a ServerIron 4G containing one RPS5DC power supply.
Figure 4.6 RPS5DC power supply
Installing ServerIron 4G Series
WARNING: The procedures in this manual are for qualified service personnel.
This section contains describes how to install the ServerIron 4G series devices.
Site Preparation
This section describes the procedures required to prepare the site for installatoin.
Cabling Infrastructure
Ensure that the proper cabling is installed in the site. See “Technical Specifications” on page 4-21 or
www.foundrynetworks.com for a summary of supported cabling types and their specifications.
Installation Location
Before installing the device, prepare its location and orientation relative to other devices and equipment. Allow at
least 3" of space at the front of the device for the twisted-pair, fiber-optic, and power cabling. Also, allow a
minimum of 3" of space between the sides and the back of the device and walls or other obstructions.
Package Contents
The ServerIron 4G Series systems ship with the following items. Review the list below and verify the contents. If
any items are missing, contact the place of purchase.
• Foundry Networks ServerIron 4G or ServerIron 4G-SSL device
• 115V AC power cable (for AC sourced devices)
Plastic Latch AC Power
Connector
Power Supply (standard)

Foundry ServerIron Hardware Installation Guide
4 - 6 © 2008 Foundry Networks, Inc. October 2008
• Rack mount brackets and mounting screws
• CD-ROM containing software images and the user documentation (including this guide)
• Warranty card
General Requirements
To manage the system, you need the following items for serial connection to the switch or router:
• A management station, such as a PC running a terminal emulation application.
• A straight-through EIA/TIA DB-9 serial cable (F/F).
You can separately order the serial cable from Foundry Networks. If you prefer to build your own cable, see
the pinout information in “Attaching a PC or Terminal” on page 4-12.
You can use the serial connection to perform basic configuration tasks such as assigning an IP address and
network mask to the system. For more information on basic configuration tasks, see: “Configuring an IP
Address” on page 4-15.
WARNING: Do not use the handles on the power supply units to lift or carry a Foundry device.
Basic Installation Tasks
To install your ServerIron 4G Series device, follow these guidelines.
1. Ensure that the physical environment that is to host the device has the proper cabling and ventilation. See:
“Site Preparation” on page 4-5.
2. If you need to install a second or redundant power supply, it might be easier to install it before mounting the
device. See: “Installing a Redundant Power Supply” on page 4-8.
3. Install the device on a desktop, on the wall, or in an equipment rack. See: “Installing a ServerIron 4G Series
Device” on page 4-9.
4. Plug the device into a nearby power source that adheres to the regulatory requirements outlined in this
manual. See: “Powering On the System” on page 4-10.
5. Verify that the system LEDs are registering the proper LED state after power-on of the system. See:
“Checking the Power Status” on page 4-11.
6. Attach a terminal or PC to the device. See: “Attaching a PC or Terminal” on page 4-12.
7. No default password is assigned to the CLI. For additional access security, assign a password.
Installation Precautions
Read these precautions before installing a Foundry device.
General Precautions
CAUTION: Risk of explosion if battery is replaced by an incorrect type. Replace the battery only with the same
or equivalent type recommended by the manufacturer. Lithium battery is a long life battery and it is very possible
that you will never need to replace it. However, should you need to replace it, do not dispose of the battery along
with household waste. Contact your local waste disposal agency for the address of the nearest battery deposit
site.
WARNING: All fiber-optic interfaces use Class 1 lasers.
CAUTION: Do not install the device in an environment where the operating ambient temperature might exceed
40o C (104o F).

ServerIron 4G Series
October 2008 © 2008 Foundry Networks, Inc. 4 - 7
CAUTION: Make sure the air flow around the front, sides, and back of the device is not restricted.
Lifting Precautions
WARNING: Make sure the rack or cabinet housing the device is adequately secured to prevent it from becoming
unstable or falling over.
WARNING: Do not use the handles on the power supply units to lift or carry a Foundry device.
WARNING: Mount the devices you install in a rack or cabinet as low as possible. Place the heaviest device at
the bottom and progressively place lighter devices above.
Power Precautions
CAUTION: Use a separate branch circuit for each AC power cord, which provides redundancyin case one of the
circuits fails.
CAUTION: Ensure that the device does not overload the power circuits, wiring, and over-current protection. To
determine the possibility of overloading the supply circuits, add the ampere (amp) ratings of all devices installed
on the same circuit as the device. Compare this total with the rating limit for the circuit. The maximum ampere rat-
ings are usually printed on the devices near the input power connectors.
CAUTION: All devices with DC power supplies are intended for installation in restricted access areas only. A
restricted access area is where access can be gained only by service personnel through the use of a special tool,
lock and key, or other means of security, and is controlled by the authority responsible for the location.
CAUTION: For the DC input circuit to a ServerIron 4G Series, (DC power supply part number RPS5DC and
RPS-X424-DC), make sure there is a 10-amp listed circuit breaker, minimum -48VDC, double pole, on the input to
the terminal block. The input wiring for connection to the product should be Listed copper wire, 14 AWG, marked
VW-1, and rated 90 degrees Celsius.
CAUTION: Make sure you insert the power supply right-side up. It is possible to insert the supply upside down,
although the supply will not engage with the power backplane when upside down. The power supply is right-side
up when the power connector is on the left and the fan vent is on the right.
CAUTION: Remove the power cord from a power supply before you install it in or remove it from the device.
Otherwise, the power supply or the device could be damaged as a result. (The device can be running while a
power supply is being installed or removed, but the power supply itself should not be connected to a power
source.)
WARNING: Disconnect the power cord from all power sources to completely remove power from the device.
WARNING: Make sure to choose the appropriate circuit device depending on the number of AC power supplies
installed in the chassis. The minimum current draw for the system is one AC power supply.
WARNING: Power supplies are hot swappable. However, Foundry Networks recommends that you disconnect
the power supply from AC power before installing or removing the supply. The device can be running while a
power supply is being installed or removed, but the power supply itself should not be connected to a power source.
Otherwise, you could be injured or the power supply or other parts of the device could be damaged.

Foundry ServerIron Hardware Installation Guide
4 - 8 © 2008 Foundry Networks, Inc. October 2008
WARNING: Make sure that the power source circuits are properly grounded, then use the power cord supplied
with the device to connect it to the power source.
WARNING: If the installation requires a different power cord than the one supplied with the device, make sure
you use a power cord displaying the mark of the safety agency that defines the regulations for power cords in your
country. The mark is your assurance that the power cord can be used safely with the device.
Installing a Redundant Power Supply
The FastIron Stackable device ships with one AC or DC power supply. You can install a second supply for
redundancy.
If you need to install a redundant power supply, it might be easier to install it before mounting the device, although
the power supplies are “hot swappable” and can be installed or removed after the device is mounted and powered
on.
Installing an AC Power Supply
WARNING: Before beginning the installation, see the precautions in “Power Precautions” on page 4-7.
To install an AC power supply, do the following:
1. If necessary, remove the power supply locking screw located in the center rear of the device (illustrated
below).
2. If the empty power supply bay has a cover plate, press inward on the two latches near the edges of the cover
plate to unlock the plate, then remove the plate.
3. Remove the power supply from its packaging.
4. With one hand, hold the bar on the front panel of the power supply. With the other hand, support the
underside of the power supply, and insert the power supply into the empty power supply slot. Press until the
supply is completely in the slot, so that the connectors on the back of the supply are fully engaged with the
pins on the power backplane.
CAUTION: Make sure you insert the power supply right-side up. It is possible to insert the supply upside
down, although the supply will not engage with the power backplane when upside down. The power supply is
right-side up when the power connector is on the left and the fan vent is on the right.
5. Press the two latches near the edges of the supply outward to lock the supply in place.
6. Connect the power cord to the power supply.
7. Connect the plug end of the power cord into an outlet.
Installing a DC Power Supply
Use the following procedures for DC power supplies in ServerIron 4G devices.
WARNING: Before beginning the installation, see the precautions in “Power Precautions” on page 4-7.
Power Supply locking screw

ServerIron 4G Series
October 2008 © 2008 Foundry Networks, Inc. 4 - 9
1. If necessary, before installing a power supply, remove the power supply locking screw located in the center
rear of the device (illustrated below).
2. If the empty power supply bay has a cover plate, press inward on the two latches near the edges of the cover
plate to unlock the plate, then remove the plate.
3. Remove the power supply from its packaging.
4. Prepare the positive, negative, and ground wires by stripping about 1/4" of insulation off the end of each one.
(Use 14 AWG wire.)
5. Loosen the three screws used to hold the wires in the connector. These are the wires under the following
markings:
6. Slip the ground wire into the opening under the marking until the wire is fully in place, then tighten the
screw to hold the wire in place.
7. Repeat for the negative (—) and positive (+) wires.
8. Pull gently on each wire to make sure they are securely fastened in the connector.
9. With one hand, hold the bar on the front panel of the power supply. With the other hand, support the
underside of the power supply, and insert the power supply into the empty power supply slot. Press until the
supply is completely in the slot, so that the connectors on the back of the supply are fully engaged with the
pins on the power backplane.
CAUTION: Make sure you insert the power supply right-side up. It is possible to insert the supply upside
down, although the supply will not engage with the power backplane when upside down. The power supply is
right-side up when the power connector is on the left and the fan vent is on the right.
10. Press the two latches near the edges of the supply outward to lock the supply in place.
11. If necessary, replace the power supply locking screw.
12. After the power supply is properly inserted, connect the power source to the wires to activate the circuit.
Installing a ServerIron 4G Series Device
You can install a ServerIron 4G Series device on a desktop, in an equipment rack, or on the wall. Make sure the
rack or cabinet housing the device is adequately secured to prevent it from becoming unstable or falling over.
WARNING: Mount the devices you install in a rack or cabinet as low as possible. Place the heaviest device at the
bottom and progressively place lighter devices above.
Desktop Installation
1. Set the device on a flat desktop, table, or shelf.
2. Make sure that adequate ventilation is provided for the system. A 3-inch clearance is recommended on each
side.
3. Go to “Powering On the System” on page 4-10.
Power Supply locking screw

Foundry ServerIron Hardware Installation Guide
4 - 10 © 2008 Foundry Networks, Inc. October 2008
Wall Mount Installation
1. To mount the device on a wall, you must order and install the Wall Mount Bracket kit (part number 70076-
000). Follow the instructions included in the kit to mount the device on a wall.
2. Proceed to “Powering On the System” on page 4-10.
Rack Mount Installation
NOTE: You need a #2 Phillips-head screwdriver for installation.
1. Remove the rack mount kit from the shipping carton. The kit contains two L-shaped mounting brackets and
mounting screws.
2. Attach the mounting brackets to the sides of the device as illustrated in Figure 4.7 on page 4-10.
3. Attach the device in the rack as illustrated in Figure 4.7 on page 4-10.
4. Proceed to “Powering On the System” on page 4-10.
Figure 4.7 Installing the Device in a Rack
Powering On the System
After you complete the physical installation of the system, you can power on the system.
1. Ensure that all power supplies are fully and properly inserted and no power supply slots are uncovered.
CAUTION: Never leave tools inside the device.
2. Remove the power cord from the shipping package.
3. Attach the AC power cable to the AC connector on the rear panel.
4. Insert the power cable plug into a 115V/120V outlet.
NOTE: To turn the system off, simply unplug the power cord(s).
NOTE: The socket should be installed near the equipment and should be easily accessible.
™
S e r v
e r I
ro n 4 G
S
SL
C o n s
ol e
1 F
1
C2
F
2
C3
F
3
C4
F
4
C
P W R
PS 1
PS2
B
P
O u t
n
L I N K
&
A C T
L I N K
&
AC T
L I N K
&
A C T
L I N K
&
AC T
LINK ACT

ServerIron 4G Series
October 2008 © 2008 Foundry Networks, Inc. 4 - 11
NOTE: If the outlet is not rated 115/120V, stop and get the appropriate cable for the outlet.
Verifying Proper Operation
After you have installed any redundant power supplies, verify that the device is working properly by plugging it into
a power source and verifying that it passes its self test.
If your device has more than one power supply installed, repeat this procedure for each power supply.
1. Connect the power cord supplied with the device to the power connector on the power supply on the rear of
the device.
2. Insert the other end into a properly grounded electrical outlet.
3. Because ServerIron 4G Series devices use power supply model RPS5, they do not have power switches.
These switches power on when you connect a power cord to the device and to a power source.
If your installation requires a different power cord than that supplied with the device, make sure you obtain a
power cord displaying the mark of the safety agency that defines the regulations for power cords in your
country. The mark is your assurance that the power cord can be used safely with the device.
4. Verify that the LED for each power supply is a solid green.
5. Verify proper operation by observing the LEDs:
All the port LEDs should flash momentarily, usually in sequence, while the device performs diagnostics. After
the diagnostics are complete, the LEDs will be dark except for the ones that are attached by cables to other
devices. If the links on these cables are good and the connected device is powered on, the link LEDs will
light.
For more details on specific LED conditions after system start-up, see “Checking the Power Status” on
page 4-11 and “Technical Specifications” on page 4-21.
Checking the Power Status
Table 4.1 lists the LEDs that show power status. The power supplies themselves do not have LEDs.
Table 4.1: LEDs for Power
LED Position State Meaning
Power Left side of front
panel On The device is powered on and has enough
power to operate.
Off The device is not powered on, or has
been powered on but does not have
sufficient power to operate.
PS1 Left side of front
panel On Power supply 1 is installed and is
functioning normally. Power supply 1 is
located in the right-hand bay (when you
are facing the rear of the device).
Off Power supply 1 is not installed or is not
providing power.

Foundry ServerIron Hardware Installation Guide
4 - 12 © 2008 Foundry Networks, Inc. October 2008
The software regularly polls the hardware for power status information. You can display the status information
from any management session. In addition, the software automatically generates a Syslog message and SNMP
trap if a status change occurs.
Attaching a PC or Terminal
To assign an IP address, you must have access to the Command Line Interface (CLI). The CLI is a text-based
interface that can be accessed through a direct serial connection to the device and through Telnet connections.
You need to assign an IP address using the CLI. You can access the CLI by attaching a serial cable to the
Console port. After you assign an IP address, you can access the system through Telnet, the Web management
interface, or IronView.
To attach a management station using the serial port:
1. Connect a PC or terminal to the serial port of the system using a straight-through cable. The serial port has a
male DB-9 connector.
NOTE: You need to run a terminal emulation program on the PC.
2. Open the terminal emulation program and set the session parameters as follows:
• Baud: 9600 bps
• Data bits: 8
• Parity: None
• Stop bits: 1
• Flow control: None
When you establish the serial connection to the system, press Enter to display the CLI prompt in the terminal
emulation window. For example:
• FastIron>
• FastIron-PREM>
If you see one of these prompts, you are now connected to the system and can proceed to “Assigning Permanent
Passwords” on page 4-13.
You can customize the prompt by changing the system name.
If you do not see one of these prompts:
1. Make sure the cable is securely connected to your PC and to the Foundry system.
2. Check the settings in your terminal emulation program. In addition to the session settings listed above, make
sure the terminal emulation session is running on the same serial port you attached to the Foundry system.
The EIA/TIA 232 serial communication port serves as a connection point for management by a PC or SNMP
workstation. Foundry switches and Layer 3 Switches come with a standard male DB-9 connector, shown in Figure
4.8 on page 4-13.
PS2 Left side of front
panel On Power supply 2 is installed and is
functioning normally. Power supply 2 is
located in the left-hand bay (when you are
facing the rear of the device).
Off Power supply 2 is not installed or is not
providing power.
Table 4.1: LEDs for Power (Continued)
LED Position State Meaning

ServerIron 4G Series
October 2008 © 2008 Foundry Networks, Inc. 4 - 13
Figure 4.8 Serial Port Pin and Signalling Details
Most PC serial ports also require a cable with a female DB-9 connector.
Terminal connections will vary, requiring either a DB-9 or DB-25 connector, male or female.
Serial cable options between a Foundry switch or router and a PC or terminal are shown in Figure 4.9 on page 4-
13.
NOTE: As indicated in Figure 4.8 on page 4-13 and Figure 4.9 on page 4-13, some of the wires should not be
connected. If you do connect the wires that are labeled “Reserved”, you might get unexpected results with some
terminals.
Figure 4.9 Serial Port Pin Assignments Showing Cable Connection Options to a Terminal or PC
Assigning Permanent Passwords
By default, the CLI is not protected by passwords. To secure CLI access, Foundry strongly recommends assigning
passwords.
NOTE: You cannot assign a password using the Web management interface. You can assign passwords using
IronView if an enable password for a Super User has been configured on the device.
The CLI contains the following access levels:
•User EXEC – The level you enter when you first start a CLI session. At this level, you can view some system
15
96
Pin Assignment
DB-9 male
Pin Number
1
2
3
4
5
6
7
8
9
Switch Signal
Reserved
TXD (output)
RXD (input)
GND
CTS (input)
RTS (output)
Reserved
Reserved
Reserved
1
2
3
4
5
6
7
8
9
1
2
3
4
5
6
7
8
9
Reserved
DB-9 to DB-9
Female Switch
Reserved
Reserved
Reserved
Terminal or PC
1
2
3
4
5
6
7
8
9
8
3
2
20
7
6
4
5
22
Reserved
DB-9 to DB-25
Female Switch
Reserved
Reserved
Reserved
Terminal or PC

Foundry ServerIron Hardware Installation Guide
4 - 14 © 2008 Foundry Networks, Inc. October 2008
information but you cannot configure system or port parameters.
•Privileged EXEC – This level is also called the Enable level and can be secured by a password. You can
perform tasks such as manage files on the flash module, save the system configuration to flash, and clear
caches at this level.
•CONFIG – The configuration level. This level lets you configure the system’s IP address and configure
switching and routing features. To access the CONFIG mode, you must already be logged into the Privileged
level of the EXEC mode.
You can set the following levels of Enable passwords:
•Super User – Allows complete read-and-write access to the system. This is generally for system
administrators and is the only password level that allows you to configure passwords.
NOTE: You must set a super user password before you can set other types of passwords.
•Port Configuration – Allows read-and-write access for specific ports but not for global (system-wide)
parameters.
•Read Only – Allows access to the Privileged EXEC mode and CONFIG mode but only with read access.
To set passwords:
1. At the opening CLI prompt, enter the following command to change to the Privileged level of the EXEC mode:
FastIron> enable
2. Access the CONFIG level of the CLI by entering the following command:
FastIron# configure terminal
FastIron(config)#
3. Enter the following command to set the super-user password:
FastIron(config)# enable super-user-password <text>
NOTE: You must set the super-user password before you can set other types of passwords.
4. Enter the following commands to set the port configuration and read-only passwords:
FastIron(config)# enable port-config-password <text>
FastIron(config)# enable read-only-password <text>
NOTE: If you forget your super-user password, see “Recovering a Lost Password” on page 4-14.
Syntax: enable super-user-password | read-only-password | port-config-password <text>
Passwords can be up to 32 characters long.
Recovering a Lost Password
By default, the CLI does not require passwords. However, if someone has configured a password for the device
but the password has been lost, you can regain super-user access to the device using the following procedure.
NOTE: Recovery from a lost password requires direct access to the serial port and a system reset.
To recover from a lost password:
1. Start a CLI session over the serial interface to the Foundry device.
2. Reboot the device.
3. While the system is booting, before the initial system prompt appears, enter b to enter the boot monitor mode.

ServerIron 4G Series
October 2008 © 2008 Foundry Networks, Inc. 4 - 15
4. Enter no password at the prompt. (You cannot abbreviate this command.)
5. Enter boot system flash primary at the prompt. This command causes the device to bypass the system
password check.
6. After the console prompt reappears, assign a new password.
Configuring an IP Address
You must configure at least one IP address using the serial connection to the CLI before you can manage the
system using the other management interfaces. In addition, Foundry routers require an IP subnet address for the
subnet in which you plan to place them in your network.
Foundry devices support both classical IP network masks (Class A, B, and C subnet masks, and so on) and
Classless Interdomain Routing (CIDR) network prefix masks.
• To enter a classical network mask, enter the mask in IP address format. For example, enter
“209.157.22.99 255.255.255.0” for an IP address with a Class-C subnet mask.
• To enter a prefix number for a network mask, enter a forward slash ( / ) and the number of bits in the mask
immediately after the IP address. For example, enter “209.157.22.99/24” for an IP address that has a network
mask with 24 significant (“mask”) bits.
By default, the CLI displays network masks in classical IP address format (example: 255.255.255.0). You can
change the display to the prefix format.
NOTE: If your network uses a BootStrap Protocol (BootP) server or a Dynamic Host Configuration Protocol
(DHCP) server, you can allow the Foundry device to obtain IP addresses for the hosts on the network.
Connecting ServerIron 4G Series
WARNING: The procedures in this manual are for qualified service personnel.
Connecting Network Devices
This section describes how to connect network devices.
Connectors
• 100Base-TX ports come with RJ-45 jacks for standard unshielded twisted pair (UTP/Category 5) cable
connections.
• 1000Base-T ports come equipped with RJ-45 connectors.
• 1000Base-SX ports come equipped with SC connectors for SFP transceivers.
• 1000Base-LX ports come equipped with SC connectors for SFP transceivers.
Connecting to Fast Ethernet Hubs
For copper connections to Ethernet hubs, a 10/100BaseTX or 1000BaseT switch, or another Foundry device, a
crossover cable is required (Figure 4.10 and Figure 4.11). If the hub is equipped with an uplink port, it will require
a straight-through cable instead of a crossover cable.
NOTE: The 802.3ab standard (automatic MDI/MDIX detection) calls for automatic negotiation of the connection
between two 1000Base-T ports. Therefore, a crossover cable may not be required; a straight-through cable may
work as well.

Foundry ServerIron Hardware Installation Guide
4 - 16 © 2008 Foundry Networks, Inc. October 2008
Figure 4.10 UTP Crossover Cable
Figure 4.11 Cat-5 Crossover Cable for 1000BaseT
NOTE: The 802.3ab standard calls for automatic negotiation of the connection between two 1000BaseT ports.
Consequently, a crossover cable may not be required; a straight-through cable may work as well.
Connecting to Workstations, Servers, or Routers
Straight-through UTP cabling is required for direct UTP attachment to workstations, servers, or routers using
network interface cards (NICs).
Fiber cabling is required for direct attachment to Gigabit NICs or switches and routers via fiber ports. See
“Connecting to a Fiber Port” on page 4-16.
Automatic MDI/MDIX Detection
All 100/1000 Ethernet Copper ports on the Foundry FastIron devices support automatic Media Dependent
Interface (MDI) and Media Dependent Interface Crossover (MDIX) detection. This feature is enabled on all 100/
1000 copper ports by default and cannot be disabled.
Connecting to a Fiber Port
For direct attachment from the Foundry device to a Gigabit NIC, switch, or router, fiber cabling with an LC
connector is required.
To connect the Foundry device to another network device using a fiber port, you must do the following:
1
2
3
4
5
6
7
8
1
2
3
4
5
6
7
8
18
UTP Crossover Cable
10/100BaseTX
unused
unused
unused
unused
unused
unused
unused
unused
1
2
3
4
5
6
7
8
1
2
3
4
5
6
7
8
18
Cat-5 Crossover Cable
1000BaseT

ServerIron 4G Series
October 2008 © 2008 Foundry Networks, Inc. 4 - 17
• Install a fiber optic module (SFP transceiver or mini-GBIC for Gigabit Ethernet ports)
• Cable the fiber optic module
Installing a Fiber Optic Module
You must install a fiber optic module (SFP) in each Gigabit Ethernet fiber port you want to use.
You can install a new copper or fiber optic module in a port while the FastIron Stackable device is powered on and
running.
Before installing one of these modules into the port, have the following on hand:
• An ESD wrist strap with a plug for connection to a metal surface.
WARNING: For safety reasons, the ESD wrist strap should contain a series 1 meg ohm resistor.
To install a copper orfiber optic module, do the following:
1. Put on the ESD wrist strap and ground yourself by attaching the clip end to a metal surface (such as an
equipment rack) to act as ground.
2. Remove the new module from its protective packaging.
3. Gently insert the copper or fiber optic module into the port until the module clicks into place. The module is
keyed to prevent incorrect insertion.
Cabling a Fiber Optic Module
To cable a fiber optic module, do the following:
1. Remove the protective covering from the fiber-optic port connectors and store the covering for future use.
2. Before cabling a fiber optic module, Foundry strongly recommends cleaning the cable connectors and the
port connectors. For more information, see “Cleaning the Fiber-Optic Connectors” on page 4-17.
3. Gently insert the cable connector(s) (a tab on each connector should face upward) into the port connector(s)
until the tabs lock into place.
4. Observe the link and active LEDs to determine if the network connections are functioning properly. For more
information about the LED indicators, see Table 4.1 on page 4-18.
Cleaning the Fiber-Optic Connectors
To avoid problems with the connection between the fiber optic module (SFP (mini-GBIC) or XFP) and the fiber
cable connectors, Foundry strongly recommends cleaning both connectors each time you disconnect and
reconnect them. In particular, dust can accumulate in the connectors and cause problems such as reducing the
optic launch power.
To clean the fiber cable connectors, Foundry recommends using the fiber-optic reel-type cleaner that shipped with
your FastIron chassis. You can also purchase this type of cleaner from the following Website:
http://www.fisfiber.com
When not using an SFP or XFP connector, make sure to keep the protective covering on.
Testing Connectivity
After you install the network cables, you can test network connectivity to other devices by pinging those devices.
You also can observe the LEDs related to network connection and perform trace routes.
Pinging an IP Address
To verify that a Foundry device can reach another device through the network, enter a command such as the
following at any level of the CLI on the Foundry device:
FastIron> ping 192.33.4.7
Syntax: ping <ip addr> | <hostname> [source <ip addr>] [count <num>] [timeout <msec>] [ttl <num>] [size <byte>]
[quiet] [numeric] [no-fragment] [verify] [data <1-to-4 byte hex>] [brief]

Foundry ServerIron Hardware Installation Guide
4 - 18 © 2008 Foundry Networks, Inc. October 2008
NOTE: If you address the ping to the IP broadcast address, the device lists the first four responses to the ping.
Observing LEDs
After you install the network cables, you can observe certain LEDs to determine if the network connections are
functioning properly. Table 4.1 outlines the LEDs related to the network connections, the desired state of each
LED, possible abnormal states of each LED, and what to do if an LED indicates an abnormal state.
If a problem persists after taking these actions, contact Foundry Technical Support.
Table 4.1: Network Connection-Related LED States
LED Desired
State Meaning Abnormal
State Meaning/Action
Link (Lnk) On
(Green) A link is established
with the remote port. Off A link is not established with the remote port.
You can do the following:
• Verify that the connection to the other
network device has been properly made.
Also, make certain that the other network
device is powered on and operating
correctly.
• Verify that the transmit port on the
Foundry device is connected to the
receive port on the other network device,
and that the receive port on the Foundry
device is connected to the transmit port
on the other network device. If you are not
certain, remove the two cable connectors
from the port connector and reinsert them
in the port connector, reversing their
order.
• Dust may have accumulated in the cable
connector or port connector. For
information about cleaning the
connectors, see“Cleaning the Fiber-Optic
Connectors” on page 4-17.
• If the other actions don’t resolve the
problem, try using a different port or a
different cable.
Active (Act) On or
blinking
(Green)
The port is
transmitting and
receiving user
packets.
Off for an
extended
period.
The port is not transmitting or receiving user
packets. You can do the following:
• Check the Link LED to make sure the link
is still established with the remote port. If
not, take the actions described in the
Meaning/Action column for the Link LED.
• Verify that the port has not been disabled
through a configuration change. You can
use the CLI. If you have configured an IP
address on the device, you also can use
the Web management interface or
IronView.

ServerIron 4G Series
October 2008 © 2008 Foundry Networks, Inc. 4 - 19
Tracing a Route
To determine the path through which a Foundry device can reach another device, enter a command such as the
following at any level of the CLI on the Foundry device:
FastIron> traceroute 192.33.4.7
Syntax: traceroute <host-ip-addr> [maxttl <value>] [minttl <value>] [numeric] [timeout <value>]
[source-ip <ip addr>]
The CLI displays trace route information for each hop as soon as the information is received. Traceroute requests
display all responses to a given TTL. In addition, if there are multiple equal-cost routes to the destination, the
Foundry device displays up to three responses by default.
Troubleshooting Network Connections
• For the indicated port, verify that both ends of the cabling (at the Foundry device and the connected device)
are snug.
• Verify that the Foundry device and the connected device are both powered on and operating correctly.
• Verify that you have used the correct cable type for the connection:
• For twisted-pair connections to an end node, use straight-through cabling.
• For fiber-optic connections, verify that the transmit port on the device is connected to the receive port on
the connected device, and that the receive port on the device is connected to the transmit port on the
connected device.
• Verify that the port has not been disabled through a configuration change. You can use the CLI. If you have
configured an IP address on the device, you also can use the Web management interface or IronView.
• If the other procedures don’t resolve the problem, try using a different port or a different cable.
Managing ServerIron 4G Series
This section describes how to manage ServerIron 4G Series devices.
Managing Temperature Settings
This section describes how to display temperature settings on the ServerIron and how to change the temperature
warning and shutdown levels.
Using the Temperature Sensor
The ServerIron comes with a built-in temperature sensor. The temperature sensor causes the device to generate
a Syslog message and SNMP trap if the temperature exceeds a specified warning level or shutdown level. If the
device’s temperature exceeds the safe threshold (shutdown level), the device will shut itself down.
The software reads the temperature sensor according to the chassis poll time, which is 60 seconds by default. If
the temperature equals or exceeds the shutdown temperature for five consecutive polls of the temperature by the
software, the software will shut down the device to prevent damage.
You can use the CLI to do the following:
• Display the temperature of the device
• Change the warning and shutdown temperature levels
• Change the chassis poll time

Foundry ServerIron Hardware Installation Guide
4 - 20 © 2008 Foundry Networks, Inc. October 2008
Viewing Fan Speed Switches and Temperature Thresholds
You can view the speed at which the fans are currently operating and the configured temperature thresholds for
fan speed switching. To display the temperature of a device, enter the following command at any level of the CLI:
Syntax: show chassis
By default, the software polls the temperature sensor every 60 seconds to get the current temperature. This poll
rate is controlled by the chassis poll time, which also controls how often the software polls other system
components.
Displaying Temperature Messages
The software sends a Syslog message and an SNMP trap if the temperature crosses the warning or shutdown
thresholds. The following methods describe how to view the system log on the device. If you have configured the
device to use a Syslog server or SNMP trap receiver, see the documentation for the server or receiver.
To display the system log, enter the following command at any CLI level:
Changing the Temperature Warning Level
The Foundry device sends a warning message whenever the device’s internal temperature reaches the default or
configured warning temperature. The default warning temperature is 45o C degrees. You can change the
warning temperature using the following command.
ServerIron# temperature arning 47
Syntax: temperature warning <value>
The <value> can be 0 – 125oC.
ServerIron>sho chassis
po er supply 1 ok
po er supply 2 ok
po er supply 1 to 2 from left to right
fan 1 ok
fan 2 ok
fan speed set to high
Current temperature : 39.0 C degrees
Warning level : 65 C degrees, shutdo n level : 75 C degrees
Boot Prom MAC: 00e0.5200.0001
ServerIron#sho log
Syslog logging: enabled (0 messages dropped, 0 flushes, 0 overruns)
Buffer logging: level ACDMEINW, 8 messages logged
level code: A=alert C=critical D=debugging M=emergency E=error
I=informational N=notification W= arning
Static Log Buffer:
Dynamic Log Buffer (50 entries):
at 0 days 0 hours 2 minutes 0 seconds, level alert
Temperature 48.0 C degrees, arning level 45.0 C degrees, shutdo n level 55.0 C
degrees
at 0 days 0 hours 1 minutes 0 seconds, level alert
Temperature 50.0 C degrees, arning level 45.0 C degrees, shutdo n level 55.0 C
degrees
This manual suits for next models
2
Table of contents
Other Foundry Networks Switch manuals

Foundry Networks
Foundry Networks NetIron M2404C User manual

Foundry Networks
Foundry Networks NetIron M2404C User manual

Foundry Networks
Foundry Networks FESX User manual

Foundry Networks
Foundry Networks FES User manual

Foundry Networks
Foundry Networks FastIron LS 648 Manual

Foundry Networks
Foundry Networks FES2402 User manual

Foundry Networks
Foundry Networks EdgeIron 2402CF User manual

Foundry Networks
Foundry Networks Switch and Router Operator's manual

Foundry Networks
Foundry Networks OSI User manual