Fox 32DLE80 User manual

Model:32DLE80

Table Of Contents
Safety Information.................................................................................................................2
Preparations Guide
Important Safety Precautions.................................................................................................3
Installed And Connected TV
TV Bracket assemble.............................................................................................................4
TV Buttons And Terminal Interface........................................................................................ 5
External device connection diagram...................................................................6
Install And Connect TV...........................................................................................................7
Input Source...........................................................................................................................8
TV Menu
Channel Menu........................................................................................................................8
Picture Menu..........................................................................................................................9
Sound Menu.........................................................................................................................10
Time Menu............................................................................................................................10
Option Menu.........................................................................................................................10
PC Menu
Screen Menu........................................................................................................................12
Media Menu
Media Menu.........................................................................................................................12
1
Other Information
Help......................................................................................................................................13
Specifications.......................................................................................................................14
TV Stand installation Instructions.......................................................................7
This user manual for reference only
..............................................................................................................15

Safety Information
2
High voltages are used in the operation of
this product.to reduce the risk of electric
shock,do not remove cover of the cabinet,
refer servicing to qualified service personal
If the TV any changes or coarse adjustment, electric shocks
to be hurt, do not attempt to open a machine-maintenance,
customer contact centres needed overhaul.
The exclamation point within an equilateral
triangle is intended to alert the user to the
presence of important operting in the
literature accompanying the appliance.
Warning
The lightning flash with arrowhead symbol
within an equilateral triangle,is inten ded to
alert the user to the presence of uninsulated
dangerous voltage within the products
enclosure that may be of sufficient magnitude
to constitute a risk of electric shock to persons.

3
Important Safety Precautions

4
TV Bracket assemble
F ix t he T V o n the wall
1.First,put the TV on the table smoothly and put some soft cloth on the table to avoid
scratching the screen.
2.User the screw driver to take off the screws which are fixed on the bottom stand
(the direction of the arrow, refer to the ptoto1).And take off the bottom stand(please
take off the screws and bottom stand carefully).
3.Make one bracket which can fix on the wall according to the size of arrow direction
of photo2 and photo3.
4.Drill four holes properly on the wall (the size only for reference) and put into four
screws.(optional parts) Drill four holes properly on the wall (the size only for reference)
and put into four screws.(optional parts)
5.according to the step 4,use the screwdriver to lock the screw on the back of the TV.
then hang the TV on the wall.
Note:
1.The bracket fixed on the wall is optional part.
2.when you assemble the TV, there should be no other articles on the around and front
and please keep the distance from other articles.
3.When assemble the TV, please ask the career man to fix in order to avoid the danger.
4.The fixing picture is only for reference.
5.Please follow the use manual about bracket assemble to fix the TV.
6.Attach the mounting bracket from the VESA compatible wall mounting kit.
1 2
34
NOTE:
IF YOUR PROGRAM ON TV WILL BE INCLUDED BY CABLE TELEVISIONS,
PLEASE CHECK YOUR EARNING AND POTENTIAL EVALUATION ON THE CABLE OF YOUR
CABLE OPERATOR.
FOR THESE INFORMATION CONTACT YOUR CABLE OPERATOR.


External device connection diagram
DVD Set-top boxes
HDMI
HDMI
VIDEO R L
OUTPUT
HDMI input connection
VIDEO R L
INPUT
AV input connection
AV output connection
VIDEO R L
INPUT
Y Pb Pr
INPUT
Y Pb Pr input connection
USB connection
TV connection
Set-top boxes
SCART connection
6
AV input connection
VGA input connection

Install And Connect TV
7
TV ANT
FM ANT
TV signal output
Set your TV
To put your TV in a firm place which can
bear the weight of the TV.
To avoid danger, please don’t expose the
TV near water or heating place (such as
light, candle, heating machine),do not block
the ventilation at the back of TV.
Connect antenna and power
1.Connect the antenna cable to the antenna
socket on the back of the TV.
2.To plug the power cord of TV (AC 100-
240V~ 50/60Hz).
1
3
Turn on TV
3.Press the power button of the TV the
indication light will turn to green. if it is
on standby mode (the light is red),press
the power button on the remote control
to turn on the TV.
Note:
Picture for reference purposes only.
Note:
Picture for reference purposes only.
2
TV Stand Installation Instructions

TV Menu
8
Input Source
Press SOURCE to display the input source list.
Press ▼/▲ to highlight the input source
and press ENTER to confirm.
Press EXIT to hide the On-Screen menu.
Note: The Channel Menu is available only
in TV mode, and the item is the default
when pressing MENU, if you want view
the Picture/Sound/Time/Option Menu,
please press to select.
Tune Type Cable/Air
Channel Menu
Move Menu Enter Exit
ENTE R
CHANNEL Tune Type Air
Auto Tuning
NTSC Channel Menu
PAL Channel Menu
Move Menu Enter Exit
ENTE R
CHANNEL Auto Tuning
ATV Manual Tuning
Programme Edit
ATV Manual Tuning
-
Color System PAL
Sound System DK
Fine-Tune 49.75MHZ
AFC Off
Search
+
Current CH 1
Menu
Current CH
Set the channel number
Color system
Select the color system(PAL/SECAM)
Sound System
Select the sound system(DK/BG/I)
Fine-Turn
Adjust the frequency of the channel finely.
AFC
Automatic Fine tuning.
Search
Please press to select .
Auto Tuning
Auto Tuning will search for available
channels and programs. Press▼/▲ to
select Auto Tuning, then press to
start auto search. If you want to stop
searching, press MENU or EXIT.
Enter
Channel Tuning
TV : 5 Programme(s)
44%... 433.75MHZ (TV)
Menu
ATV Manual Tuning
Note: The above is for reference only, to
prevail any kind
PC
AV
Media1
Input Source
TV
YPbPr
Enter
Enter
ENTER
HDMI1
HDMI2
Media2

TV Menu
9
Programm Edit
The four colored key is the shortcut key for
programming the channel.
First press ▼/▲ to highlight the channel
you want to delete or rename or move or
skip, then:
Press the Red button to delete the channel.
Press the Green button to enter the
rename state, then press to select
the word you want to change, and ▼/▲ to
select word.
Press the Yellow button to set the channel
to mo ving state.then press ▼/▲ to mo ve
it to the position you want to put.
Press the Blue button to skip the select
channel.
Fav Add or Delete the channel to your faver
ate list.
Dele te Rename Move Skip
FAV
Fav Menu
Programm Edit
Enter Menu
Enter
ENTE R FAV Fav
Picture Mode
Highlight the item and Press ENTER or
to enter the sub-menu, that shows
the picture mode you can choose:
Dynamic/Standard/ UserMild/
Press PMODE on the remote control
to select picture mode directly.
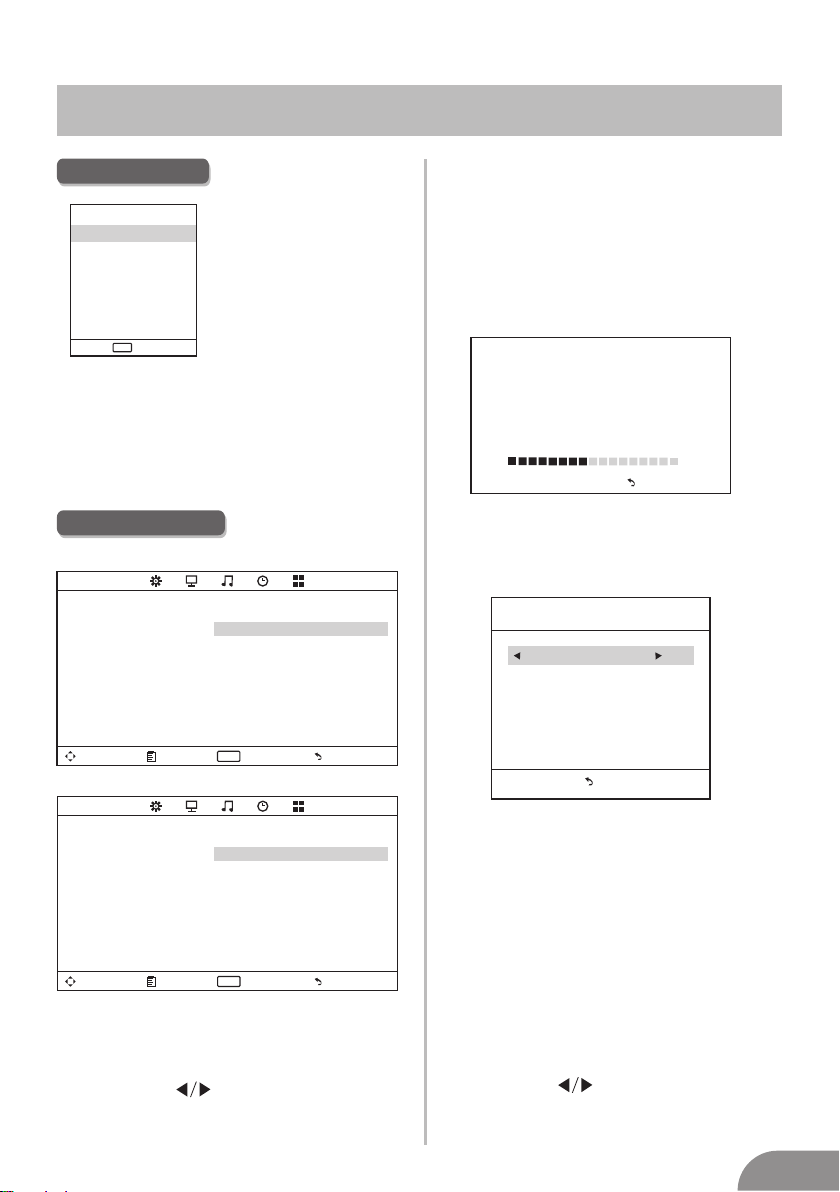
Contrast
Adjust the white level of the picture.
Brightness
Adjust darkness of black sections in the
picture.
Color
Adjust the color intensity of the picture.
Tint
Adjust the hue(Red,Green,Blue) of the
picture.
Sharpness
Object edges are enhanced for picture d
etail.
Color Temperature
Select the color temperature that you feel
comfortable.
Noise Reduction
Off/Low/Middle/High
You can clear up the input signal by
setting the item.
Picture Menu
Move Menu Enter
ENTE R
PICTURE
Picture Mode Standard
Contrast 50
Brightness 50
Color 50
Tint 50
Sharpness 50
Color Temperature Medium
Noise Reduction Middle
ECO Mode Off
ECO Mode
Exit
It is used to ON/OFF the ECO mode.

TV Menu
10
Option Menu
Move Menu Enter Exit
ENTER
OPTION OSD Language English
Aspect Ratio 16:9
Blue Screen Off
Key Lock Off
Caption Off
Parent Control
Reset
Software Update(USB)
Move Menu Enter Exit
ENTER
TIME
Sleep Timer Off
OSD Timer 10s
Auto Sleep Off
Sleep Timer
Select the time in minutes(off,10min,
20min,30min,60min,90min,120min,
180min,240min) that you want the
TV to shut off automatically after you
set the time. Cancel by setting it to Off
Auto Sleep
Select the time in hours(off,3h,4h,5h)
that you want the TV to remain on after
your last operation. Cancel by setting it
to Off.
OSD Timer
Select the time in seconds(5s,10s,15s,
20s,25s,30s,) that you want the On-
Screen Men remain display after your last
operation.
Time Menu
Sound Menu
Sound Mode
Standard/Music/Movie/Sports/User/Only
in this mode, Treble and Bass can be
adjusted.)
Treble
Adjust the high frequency sounds.
Bass
Adjust the low frequency sounds.
Balance
Adjust the level of sound coming from
the left and right speakers.
Auto Volume
Press . Auto Volume.select ON or OFF
Move Menu Enter Exit
ENTER
SOUND Sound Mode Standard
Treble 50
Bass 50
Balance 0
Auto Volume Off
SPDIF MODE PCM
MODE

TV Menu
11
OSD Language
Set the OSD display language.
Aspect Ratio
Select the suitable aspect Ration.
Blue Screen
Set the background color to blue or black
when having no input signal.
Key Lock
Set to prevent it from being used by young
children, or other unexpected using.
Caption(NTSC)
Select from below closed-caption modes.
CC1,2,3,4 Displays corresponding caption
channels of a analog program. (Usually
be set to Cc1 for most programs.)
Text1,2,3,4 Displays corresponding text
service channel of a analog program.
Parent Control(NTSC)
Set Password First you should enter
the correct old password then enter new
password twice.
Lock System
Set the lock system ON or OFF.
Menu
Set Password
Lock System ON
TV
MPAA R
Canada English PG
Canada French G
TV
TV-Y General audience
TV-Y7 Parental guidance suggested
TV-G Parents strongly cautioned
TV-PG Restricted
TV-14 No one 17 and under admitted
TV-MA Adult audience only.
MPAA This system defines the rating
control which come from MPAA rules.
G General audience. All ages admitted
PG Parental guidance
PG-13 Parents strongly cautioned.
Some material may be inappropriate for
children under 13.
R Restricted. Children under 17 require
accompanying parent or adult guardian.
NC-17 No one 17 and under a admitted.
X Adult audience only
N/A Not available
Canada English The ratings are for
programs which are using English rating
system.
C Children
C8+ Children 8 years and older
G General programming
PG Parental guidance
14+ Viewers 14 and older
18+ Adult programming
E Exempt
Canada French The ratings are for
programs which are using French rating
system.
G General
8 ans+ Not recommended for younger
children
FV Fantasy violence
D Suggestive dialogue
L Strong language
S Sexual situations
V Violence
Menu
S
TV rating
TV-Y
TV-Y7
TV-G
TV-PG
TV-14
TV-MA
ALL
ALL
ALL
ALL
ALL
ALL
VLD
VSLD
VSL
FV

TV Menu
12
13 ans+ Not recommended for children
under age 13
16 ans+ Not recommended for ages
under 16
18 ans+ This p rogram is restricted to
adults
E Exempt
Reset Recall the default setting.
Software Update(USB) Update your
TV set.Select the software inthe root of
your USB memory,and pressENTER.
Screen Menu
Move Menu Enter Exit
ENTE R
SCREEN Aut o Adj us t
Hor izo nt al Pos . 50
Vertica l Pos . 50
Cloc k 50
Pha se 99
Auto Adjust
Automatically adjust Clock, Phase,
H-Position, and V-Position settings.
Horizontal Pos.
Shift the screen up or down.
Vertical Pos.
Shift the screen left or right.
Clock
Adjust the internal sampling clock rate.
Phase
Adjust the internal signal phase.
The color of the icon means whether
your TV has detected a USB memory or
not. Bule: Yes; Gray: No;
Press
Movie/Text icon and ENTER to enter
the USB memory.
to select Photo/Music/
Media Menu
Media Menu
PC Menu

Help
13

Machine Technical Specifications
14
Screen Size
16”
19”
20”
22”
24”
32”
39”/40”
42”
43”
46”
50”
TV System
PAL/NTSC
Preset Channels
PAL:0-199,NTSC:AIR 2-69
CABLE1-125
Speaker Output
PAL/NTSC
PAL/NTSC
PAL/NTSC
PAL/NTSC
PAL/NTSC
PAL/NTSC
PAL/NTSC
PAL/NTSC
PAL/NTSC
PAL/NTSC
5W+5W
5W+5W
5W+5W
5W+5W
5W+5W
10W+10W
10W+10W
10W+10W
10W+10W
10W+10W
10W+10W
PAL:0-199,NTSC:AIR 2-69
CABLE1-125
PAL:0-199,NTSC:AIR 2-69
CABLE1-125
PAL:0-199,NTSC:AIR 2-69
CABLE1-125
PAL:0-199,NTSC:AIR 2-69
CABLE1-125
PAL:0-199,NTSC:AIR 2-69
CABLE1-125
PAL:0-199 NTSC:AIR 2-69
CABLE1-125
PAL:0-199,NTSC:AIR 2-69
CABLE1-125
PAL:0-199,NTSC:AIR 2-69
CABLE1-125
PAL:0-199,NTSC:AIR 2-69
CABLE1-125
PAL:0-199,NTSC:AIR 2-69
CABLE1-125
28”PAL/NTSC 8W+ 8W
PAL:0-199,NTSC:AIR 2-69
CABLE1-125
65” PAL/NTSC 10W+10W
PAL:0-199,NTSC:AIR 2-69
CABLE1-125
LIFE TIME
39”/40”
power Consumption
24W
36W/48W
36W/48W
36W/48W
36W
56W/65W/100W
60W/70W/76W
67W/70W/95W/100W
65W/80W
100W/108W/135W
100W/135W/140W/160W
159W/165W/195W
36W/48W
Screen Size
16”
19”
20”
22”
24”
32”
42”
43”
50”
55”
65”
Main accessories
User's manual x1
Remote controller x1
Power cord x1
AAA Batteries x2
28”
: 60,000 Hrs


Model:32DLE80


2
Table of contents
Other Fox LED TV manuals