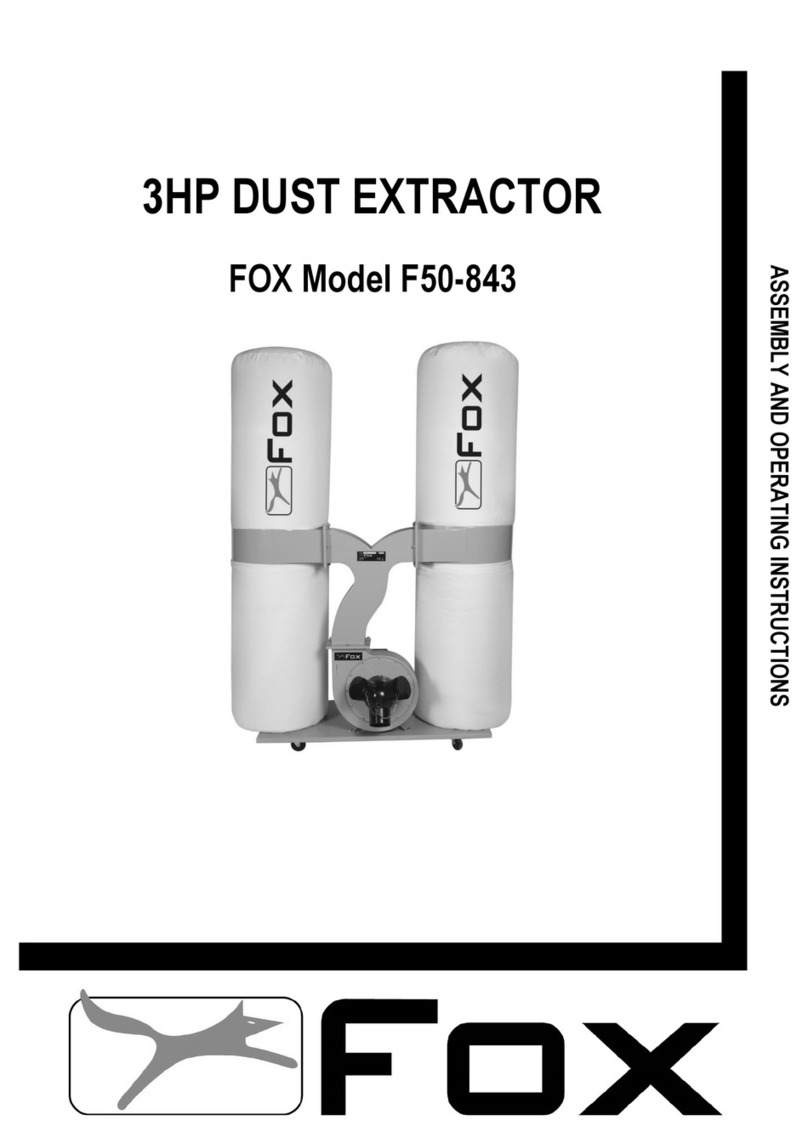
Fox F50-800 User manual

1
WET & DRY
VACUUM EXTRACTOR
Model F50-800
ASSEMBLY AND OPERATING INSTRUCTIONS

2
Wet & Dry Vacuum Extractor
FOX MODEL F50-800
TABLE OF CONTENTS
Safety instructions……………………………………………………………………………… Page 3
Specifications…………………………………………………………….……………………... Page 6
Electrical connections……………………………………………………………….…………..Page 7
Environmental protection……………………………………….……………………………… Page 8
Symbols…………………………………………………………………………………….……. Page 8
Package contents…………………………………………………………………………..…... Page 9
Assembly……………………………………………………………………………………..….. Page 10
Switching On/Off …….……………………………………………………………….………… Page 10
Dry vacuuming cleaning………………………………………………………………………...Page 11
Wet vacuuming cleaning….………………………………………………………………..…...Page 12
Blowing…………………………………………………………………………………………… Page 13
Vacuum maintenance…………………………………………………………………………...Page 13
Cartridge filter maintenance…………………………………………………………………….Page 14
Troubleshooting…………………………………………………………………………………. Page 14
Consumables……………………………………………………………………………………. Page 15
DART Tool Group Guarantee………………………………………………………………......Page 16
Declaration of Conformity…………………………………………………………………….... Page 17

3
ATTENTION :
- Read the instructions for use carefully before using the machine
- This device meets current safety standards for electrical machines.
- Incorrect use may result in injury. Anyone not familiar with the instructions for use should not use the
machine. Keep these instructions for use safe.
SAFETY INSTRUCTIONS
ALWAYS DISCONNECT THE MACHINE FROM THE POWER SOCKET BEFORE ATTEMPTING ANY
MAINTENANCE.
Keep a safe working zone for both staff and equipment. NO CHILDREN must be allowed in the
working zone under any circumstance.
The machine must be always disconnected when not in use. Use the on/off switches on the machine. Always
disconnect the machine by pulling the plug, do not pull the power cord.
Before using the machine, remove all tools used for setup and keep them away from your working zone. Reconnect
the machine. Check that the working zone is clear and that there is plenty room to work with the wood.
Ensure you are in good working position. If the work will produce dust or small pieces, wear safety gear, protective
glasses, gloves, a mask and ear defenders. If you have long hair, tie it up. Do not wear watches or bracelets. Wear
shoes with good grip and remember to never place your fingers too near the blade.
Do not use the machine if you are tired or distracted because you risk injury.
Do not use this machine anywhere containing flammable liquids and/or volatile gases.
1. Keep your working area clean. Untidy working zones and busy workbenches invite injuries.
2. Avoid a dangerous environment. Do not expose machines to rain and not use them in wet places. Ensure your
working zone is well lit. Do not use the machine where there is gas or flammable liquids.
3. Protect yourself from electric shocks. Avoid touching earthed surfaces.
4. Keep children and visitors well away from the working area.
5. Tidy up any tools not in use. When tools are not used, they should be kept in a dry, locked place, out of reach of
children.

4
6. Do not force the machine. It will work better when used with the pressure it was designed for.
7. Use the correct tools. Do not force a small tool to do the work of a bigger tool. For example, do not use a circular
saw to cut branches or logs.
8. Wear appropriate clothing. Avoid loose clothing, and remove jewellery which could become caught in moving parts.
Non-slip shoes are particularly recommended when working outside. Keep long hair tied up.
9. Always wear safety glasses. Also wear a mask if operating the machine creates dust.
10. Do not mistreat the power cord. Never use the power cord to pull out the plug. Keep the power cord away from
heat, oil and sharp edges.
11. Do not bend over the machine. Keep your balance at all times.
12. Keep tools in good condition. Clean tools to obtain the best results with them. Follow instructions to grease and
change accessories. Regularly check the power cord and replace it if damaged. Keep handles dry, clean and free
from oil and grease.
13. Disconnect the tool when not in use, before the maintenance and while changing accessories such as blades,
drills, etc.
14. Remove all maintenance tools. Get used to checking that all maintenance tools are removed before using the
machine.
15. Avoid accidentally starting the machine. Make sure that the switch is in the "OFF" position before connecting the
power.
16. If the machine is used outside, use only extension leads designed for outdoor use.
17. Be observant. Use common sense when operating machinery. Do not use the tool when tired.
18. Inspect parts before use. Before continuing to use the tool, inspect any protective parts) which could be damaged
to make sure that they work well. Verify that the moving parts are properly aligned, and are not jammed or broken.
Check the assembly and any other conditions which may affect the correct functioning of the machine. Any
damaged part or guard must be repaired or replaced by an approved after-sales service centre. Do not use the
tool if the switch does not work correctly.
19. Warning: the use of any non-recommended accessory can present a health risk.
20. Have the machine repaired by a qualified person. This machine is built according to relevant safety requirements.
Repairs must only be made by a qualified person using original spare parts, otherwise it may be very dangerous
for the user.
21. Keep these instructions.

5
SPECIFIC SAFETY INSTRUCTIONS FOR VACUUM EXTRACTORS
1. The filtration housing contains a high speed fan blade that can amputate fingers, grab loose clothing and
neckties, and propel dust at high velocities. DO NOT OPERATE WITHOUT ALL PARTS IN PLACE.
2. Do not attempt to clean, remove the filter, or service the unit when the power is on. Turn the unit off and
disconnect the cord from the power source.
3. Static shocks are common in dry areas or when the relative humidity of the air is low. The use of a humidifier
where the dust collector is to be used will help raise the relative humidity, and may reduce static shocks.
4. Sparks inside the electrical parts can ignite flammable vapours or dust.
5. Do not vacuum, or use the vacuum extractor near flammable or combustible liquids, gases, gasoline or other
fuels, lighter fluid, cleaners, oil-based paints, natural gas, hydrogen, or explosive dusts like coal dust, magnesium
dust, grain dust, or gun powder.
6. To avoid health hazards from vapours or dusts, do not vacuum toxic materials.
7. Do not use or store near hazardous material.
8. Do not use outdoors or on wet surfaces.
9. Put the unit on a stable, level surface.
10. Position the vacuum hose and electric cord away from traffic areas.
11. Do not allow the unit to be used as a toy. Close attention is necessary when used by or near children.
12. Do not leave the vacuum extractor plugged in. Unplug from the outlet when not in use and before servicing.
13. Do not unplug by pulling on the cord. To unplug, grasp the plug, not the cord.
14. Turn off the controls before unplugging.
15. Do not use with a damaged cord, plug, or other parts. If your dust collection system is not working as it should,
has missing parts, has been dropped, damaged, left outdoors, or dropped into water, return it to an authorised
Service Centre.
16. Do not pull or carry by the cord, use the cord as a handle, close the door on the cord, or pull the cord. Keep the
cord away from heated surfaces.
17. Do not handle the plug of the dust collector with wet hands.
18. Do not put any object into the ventilation openings. Do not vacuum with any ventilation opening blocked; keep

6
free of dust, lint, hair or anything that may reduce air flow.
19. Keep hair, loose clothing, fingers, and all body parts away from openings and moving parts.
20. Extension cords in poor condition or that are too small can cause fire and shock hazards. When using an
extension cord, ensure it is in good condition.
21. Connect to a properly grounded outlet only.
22. Safety is a combination of common sense, staying alert, and knowing how your dust collector works.
23. Keep these instructions safe.
Health Warning
Some dusts created by power sanding, sawing, grinding, drilling and other construction activities contain chemicals
known to cause cancer, birth defects or other reproductive harm.
Some examples of these chemicals are:
Lead from lead-based paints, crystalline silica from bricks and cement and other masonry products, and arsenic and
chromium from chemically-treated lumber. The risk from these chemicals varies depending on how often you do this
type of work.
To reduce your exposure to these chemicals: work in a well ventilated area, and work with approved safety equipment,
such as dust masks that are specifically designed to filter out microscopic particles.
SPECIFICATIONS
Motor : 1400W –240V (1.75hp)
1000W –110V (1.5hp)
Power take-off : 240V / 110V
Power take-off maximum draw : 1400W (240V) / 1000W (110V)
Drum capacity : 30L
Filtration : 0.5 Micron
Flow rate : 60L/sec
Dimensions (h x l x d) : 640x375x470mm
Weight : 9kg

7
EXTENSION CORDS
Before using an extension cord, ensure the insulation is not cut or worn. Immediately repair or replace a damaged
or frayed cord.
ATTENTION :
Extension cords must be removed from the work area or located so that they will not get caught in parts, tools or other
objects while using the tool.
This appliance must be grounded. If it should malfunction or break down while in use, grounding provides a path of
least resistance for the electrical current and reduces the risk of electrical shock to the operator. This appliance has
a power cord with equipment-grounding conductor and grounding plug. The plug must be inserted into an appropriate
outlet that is properly installed and grounded in accordance with all local codes and ordinances.
Improper connection of the equipment-grounding conductor can result in a risk of electric shock. Check with a
qualified electrician or service person if you are in doubt as to whether the outlet is properly grounded.
Do not modify the plug provided with the machine. If it will not fit the outlet, have a proper outlet installed by a qualified
electrician.
ELECTRICAL CONNECTIONS

8
ENVIRONMENTAL PROTECTION
INFORMATION FOR USERS
In accordance with art. 13 of Legislative Decree 25th July 2005, no. 151 “Implementation of
Directives 2002/95/EEC, 2002/96/EEC and 2003/108/EEC, relative to reducing the use of
hazardous substances in electric and electronic appliances and the disposal of waste”, please
take note of the following:
The crossed out wheelie bin symbol found on the appliance or the packaging indicates that
the product must be disposed separately from ordinary household waste when it reaches
the end of its working life.
The user must consign the unwanted appliance to an authorised waste disposal centre for
electric and electronic goods, or alternatively, hand it over to the relative dealer at the
moment of purchasing a new appliance of the same type on a basis of a one to one ratio.
Differentiated disposal to enable possible recycling or environmentally compatible
elimination of the appliance, helps to limit undesirable effects on health and environment
and promotes the reuse and/or recycling of the materials that compose the appliance.
WARNING!
In accordance with the relative legislation in force in the country of use, sanctions will be
imposed on the user if the appliance is disposed of illegally.
SYMBOLS
Read the instruction manual carefully
Use personal protection devices
(goggles, dust mask, earphones)
Serial number / year of production

9
Unpack your vacuum extractor carefully, taking care with the loose parts.
Note : if any parts are damaged or missing, do not connect the machine to the power and do not
switch it on until the missing/damaged parts are replaced.
Do not throw away the cardboard box until you are sure the machine is working correctly.
Locate the two side clasps which hold the top section in place (Fig. 2)
Undo the clasps, remove the top section and take out the items in the
container.
Check and identify each component listed below. If anything is missing or
damaged, please contact your supplier immediately.
Parts Description
1. Handle
2. Top section
3. Blow connection
4. Filter basket
5. Hose set
6. Crevice tool
7. Rubber adaptor
8. Stainless steel tube
9. Floor nozzle
10.Dust bag
11.Safety float valve
12.Function switch
13.Air regulator handle
14.Cartridge filter
15.Drain outlet
16.Foam filter
17.Socket
18.On/Off switch
19.Clasp x 2
20.Vacuum hose connection
21.Container
22.Castors x 4
PACKAGE CONTENTS

10
1. Ensure the mains plug is disconnected (Fig. 1)
2. Undo the clasps (Fig. 2)
3. Lift off the top section assembly (Fig. 3)
4. Remove the contents from inside the container (Fig.
4)
5. Turn the container upside down and insert the four
feet with castor wheels at the rear of the tank.
Ensure they are mounted correctly and pushed all
the way in. Screw in until tight (Fig. 5)
6. For wet vaccum cleaning, fit the supplied foam filter
(Fig. 6a)
7. For dry vacuum cleaning, fit the supplied cartridge
filter (Fig. 6b)
8. Or for dry vacuum cleaning, fit the optional dust bag
(Fig. 6c)
9. Replace the top section onto the container (Fig. 7)
10.Align the top section with the clasps and snap into
place, by applying pressure at the mid-point of the
clasps (Fig. 8)
11.Insert the large end of the hose into the front inlet of
the container and screw it in until tight (Fig. 9)
12.Choose the desired nozzle/extension tube(s) and
push it onto the suction tube (Fig. 10)
13.Store accessories as shown by inserting the accessory into the storage slot after use (Fig.
11)
A: Function switch
B: Outlet socket
C: On/Off switch
1. Connect the mains plug
2. To switch on the vacuum cleaner, press or
3. Switch on the electrical appliance. Only connect electrical appliances with a maximum power
rating of 1200W (240V) / 1000W (110V)
4. Switching on the electrical appliance automatically switches on the vacuum cleaner.
5. Once the electrical appliance has been switched off, the vacuum cleaner switches off
following a time lapse
6. To switch off the vacuum cleaner, press
ASSEMBLY
SWITCHING ON/OFF

11
Warning! Ensure you read, understand and follow the Safety Instructions on pages 3 to
6.
Reminder: DO NOT vacuum hazardous substances. Use of an incorrect dust bag will
invalidate your warranty.
1. Ensure the machine is unplugged from
the power supply (Fig. 1)
2. Remove the top section and fit the
optional dust bag flange onto the inlet
stub, taking care not to damage the bag
(Fig. 2a)
3. Or remove the top section and fit the
supplied cartridge filter onto the basket,
taking care that the filter is pushed all the
way in (Fig. 2b)
4. Reposition the head onto the drum body
and clip in place (Fig. 3)
5. Insert the larger end of the flexible hose
into the front inlet on the container and
lock in place. Push the required
attachment onto the free end of the hose
(Fig. 4)
6. Plug in the power supply (Fig. 5)
7. Switch the motor on (position ) (Fig. 6)
8. When you have completed vacuuming, press the switch to “Off” (position ) and unplug
from the power supply. Regularly check the cartridge/dust bag filter
Do not use the cartridge/dust bag filter for wet.
DRY VACUUM CLEANING

12
1. Ensure the machine is unplugged
from the power supply. Make sure
the tank is clean and free from dust
and dirt (Fig. 1)
2. Remove the cartridge filter/dust bag
and fit a foam filter over the filter
basket. Replace the top section onto
the container (Fig. 2)
3. Fit the desired nozzle to the same
flexible hose as used in dry cleaning
(Fig. 3)
4. Ensure the switch is “Off” (position
ds) before plugging in the power
supply (Fig. 4)
5. Press the switch to the “On” (position
oo) (Fig. 5)
6. After use, empty the tank and dry it
(Fig. 6)
To vacuum large quantities of liquid, from a sink or tank, etc. do not immerse the nozzle
completely in the liquid. Leave a gap at the top of the nozzle opening to allow an air inflow. The
machine is fitted with a float valve which stops the suction action when the tank has reached its
maximum capacity. The user will notice an increase in motor speed. When this happens, turn off
the machine, disconnect from the power supply, remove the head from the container and empty
the liquid into a suitable receptacle or drain. To continue vacuuming, refit the head and proceed.
After wet vacuuming, turn the machine off and remove the plug from the power supply. Empty
the container and clean/dry the inside and outside before storage.
Remember! After wet vacuuming, the foam filter must be removed and a cartridge filter/dust
bag must be fitted before dry vacuuming again.
WET VACUUM CLEANING

13
Push the large end of the flexible hose into
the blow connection in the top of the motor
housing (Fig. 1)
Ensure the power switch is turned off and
plug in the power supply (Fig. 2)
Switch on the power (position ) (Fig. 3)
The unit will now blow through the vacuum
hose and can be used to clear obstructions
within the pipe (Fig. 4)
Warning! If, after a few seconds, the hose
is still blocked, turn off the unit and clear
the hose manually.
1. Ensure the machine is unplugged from
the power supply (Fig. 1)
2. Disconnect the hose from the container
(Fig. 2)
3. Undo the clasps and remove the motor
head from the container (Fig. 3)
4. Open the drain outlet cover to allow the
vacuumed liquid to drain out. Clear out
any dirt or debris from the container and
hose (Fig. 4)
5. Clean the foam filter by washing it in a
mild soapy solution (Fig. 5)
6. Check the hoses and attachments, and check the power cable to make sure it has not
received any damage (Fig. 6)
BLOWING
VACUUM MAINTENANCE

14
Warning! Always disconnect the plug from the wall outlet before removing the tank
cover.
Notice: this filter is made of high quality paper designed to stop small particles of dust.
The filter should be used for dry pick-up. A dry filter is necessary to pick up dust as,
when the filter is wet, the filter will clog quickly and be very difficult to clean.
Handle the filter carefully when removing it for cleaning or when installing it. Check the filter for
tears or small holes as even a small hole can let dust pass through and out of the cleaner. Do
not use a filter with holes or tears, replace it immediately.
Installing and Cleaning
1. Slide the cartridge filter down over the filter basket and
push fully home (Fig. 1 & 2)
2. When removing the filter for cleaning, hold the cartridge
filter carefully to avoid damaging it (Fig. 3)
3. Clean a dry filter by tapping it inside a waste bin (Fig. 4)
4. Clean a wet filter by rinsing it from the inside (Fig. 4)
5. When wet, the cartridge filter should be removed and
allowed to air dry for 24 hours before being re-fitted onto
the filter basket
Problem
Cause
Fix
Cleaner will not operate
1. No power supply
2. Faulty power cable, switch
or motor
3. Container full of liquid
1. Check power supply
2. Check and repair or
replace faulty item
3. Empty container
Dust comes from the motor
cover
Dust bag or cartridge filter
missing or damaged
Fit or replace dust bag or
cartridge filter
Reduced efficiency and
increased and increased
motor speed/vibration
Nozzle, hose or container
inlet blocked
Check nozzle, hose and
contain
CARTRIDGE FILTER MAINTENANCE
TROUBLESHOOTING

15
Dust bags (standard)
Dust bags (fine)
Foam filter
Cartridge filter
Important! You must change the dust bag cartridge filter regularly. If the machine is used without
the dust bag/cartridge filter, the motor will burn out eventually and your guarantee will be
invalidated. Always keep a pack of spare bags handy.
CONSUMABLES

16
DART TOOL GROUP GUARANTEE
DART TOOL GROUP takes pride in the quality of the power tools it supplies. The component
parts of our tools are inspected at various stages of production and each finished tool is subjected
to a final check before being packaged for shipment. Because of our confidence in our
engineering quality, DART TOOL GROUP agrees to repair or replace any part or parts of FOX
Power Tools and accessories which, upon examination, prove to be defective in workmanship or
material. The warranty period for the FOX branded products is one year for parts and labour and
three years for parts only. The guarantee does not include repair, labour or parts requiring
replacement because of misuse, abuse, or normal wear and tear. Repairs made by other than the
factory, DART TOOL GROUP service centre or authorised FOX service dealers relieves DART
TOOL GROUP of further liability under this guarantee. THIS GUARANTEE IS MADE
EXPRESSLY IN PLACE OF ALL OTHER GUARANTEES OR WARRANTIES, EXPRESSED OR
IMPLIED, WITH RESPECT TO QUALITY, MERCHANTABILITY, OR FITNESS FOR A
PARTICULAR PURPOSE.

17
CE DECLARATION OF CONFORMITY OF THE MANUFACTURER
SERRACON
WHEATFIELD ROAD
DUNNIKIER BUINESS PARK
KIRKCALDY, UK, KY1 3PD
Tel. +44 (0) 1592 652946 Fax: +44 (0) 1592 654854
Declares that the: WET & DRY VACUUM EXTRACTOR (F50-800)
is in compliance with the regulations included in the Directives: CEE 2006/42-2004/108-2006/95
Person authorized to create the technical file: Robert Paterson
06.05.2011
The Director
Table of contents
Other Fox Scrubber manuals
Popular Scrubber manuals by other brands

Nilfisk-Advance
Nilfisk-Advance Cr 1100 Quick start troubleshooting manual

StarTech.com
StarTech.com HD2A quick start guide

HydraMaster
HydraMaster RX20 NEXTGEN 120 VAC owner's manual

MASTERBLEND
MASTERBLEND MASTERFORCE Operating and maintenance manual

BEST SANITIZERS
BEST SANITIZERS BSX Boot Scrubber Series user manual

Nobles
Nobles Speed Scrub 2001 612946 Operator and parts manual