Fracino Heavenly User manual

Manual
coee machines
For Models:
Fracino Heavenly, Cherub, Classico & Little Gem
Fracino Bambino, Contempo & Romano
Fracino Retro
“World class espresso coee machines”

Document change
v5.3 17/05/21 Transfer to InDesign
Remove IDEA Frother instructions
Remove Retro Gas section as it duplicates
all info from the Gas chapter.
HTB

Contents
1
4
610 11
14 24 29
36
38
29
5
Warnings
Overview
Model Specic
All Machines
Coee Machine
Overview - All
Heavenly, Cherub,
Classico & Little Gem
Bambino, Contempo
& Romano
Gas Machines
Making Coee Steaming & Frothing
Milk
Hot Water Valve
Warranty
Technical & Spare
Parts
Cleaning & Storage
Coee Machine
Overview - Retro
a) Legend
b) Gas & LPG
7. Water Filter
a) Inserting Water Filter
8. Start Up/Daily Procedure
a) Turning the machine on
a) Steaming / Frothing
Technique
26. F.A.S.T Steam
a) F.A.S.T Steam Overview
b) F.A.S.T Steam Operation
a) Hot Water - Bambino
b) Hot Water - Contempo &
Romano
a) Terms & Conditions
b) Items not Covered by
Warranty
a) Electronic - Factory
Reset
b) Constant Fill
c) Boiler Time-Out
40. Spare Parts
12. Start Up/Daily Procedure
a) Turning the machine on
11. Gas Start Up / Daily Procedure
a) Warnings
b) Turning the machine on
c) Adjustment
d) Technical Data
e) Servicing Parts
14. Making Coee & Programming
Coee Measures
a) Loading Coee
b) Semi-automatic Model Coee
Control
c) Electronic/Auto Model Coee
Measures
d) Electronic Programming Coee
Measures
17. Retro/Making Coee
a) Heating the Group
b) Making Coee
19. Romano & Automatic Machine
Troubleshooting
a) Button Not Operating
b) Low Level Water
c) Water Consumption
d) Boiler Relling Time-Out
e) Flow Meter Alarm
a) Daily Cleaning
b) Backwash Cleaning Procedure
c) Other Daily Cleaning Procedures
d) Precautions for Using Liquid
Quartz
e) Special Precautions for Storage
f) Special Precautions for
Maintenance
35. Retro Cleaning
a) Daily Cleaning
44. Romano Cleaning
a) Automatic Group Cleaning Cycle
a) Legend

Warnings
Ensure you read, understand and follow all instructions in this manual before using your
machine, taking note of all warnings.
WARNING: The machine was designed solely for preparing espresso coee and hot
beverages using hot water and steam, and for warming cups.
WARNING: Maximum inlet water pressure is 0.1 - 0.6Mpa
WARNING: The equipment does not exceed 70db
WARNING: This appliance must not be installed on or against any combustible surface.
1. Appliance shall be for indoor use only.
2. Before removing any body panels, ensure the mains power and water supply has
been turned o and the machine has been allowed to cool and de-pressurise.
3. Always treat the machine with respect. Do not use if the machine has been dropped,
vandalised or otherwise damaged. If in double contact your supplier or Fracino
(0121 3285757)
4. Do not allow unqualied personnel to tamper with your machine.
5. Your machine should have regular service. This usage and hardness of the water in
your area will determine the regularity (minimum once a year). It is essential that a
water treatment unit be tted to minimise the build up of lime scale.
6. Care should be taken when making drinks, water is hot and can scald.
7. Do not operate the machine without adequate training.
8. It is your responsibility to have a Boiler Test Inspection carried out annually. This
is a requirement of the HSE under the PSSR Act of 2000. Contact Fracino or
an authorised service agent for further information or to arrange a Boiler Test
Inspection.
9. If the supply cord or plug is damaged it must be replaced by the manufacturer or its
service agent or similarly qualied persons in order to avoid a hazard.
10.Coee machines are heavy, take care when lifting or moving.
11. Cleaning and user maintenance shall not be made by children without supervision.
12.This appliance can be used by children aged from 8 years and above, and persons
with reduced physical, sensory or mental capabilities or lack of experience of
knowledge if they have been given supervision or instruction concerning use of the
appliance in a safe way and understand the hazards involved.
1

2
13. Disconnecting, bypassing, tampering with or otherwise interfering with safety valves,
high limit thermostats, pressure switches or other safety or control devices may
cause serious injury and/or damage to the appliance.
14.If the steam pressure gauge reads more than 1.5Bar do not use the machine. Isolate
the machine from the mains power supply and mains water supply. Contact Fracino
or a Fracino approved service centre for advice, inspection and repair.
15.If the water/pump pressure gauge reads more than 12Bar do not use the machine.
Isolate the machine from the mains power supply and mains water supply. Contact
Fracino or a Fracino approved service centre for advice, inspection and repair.
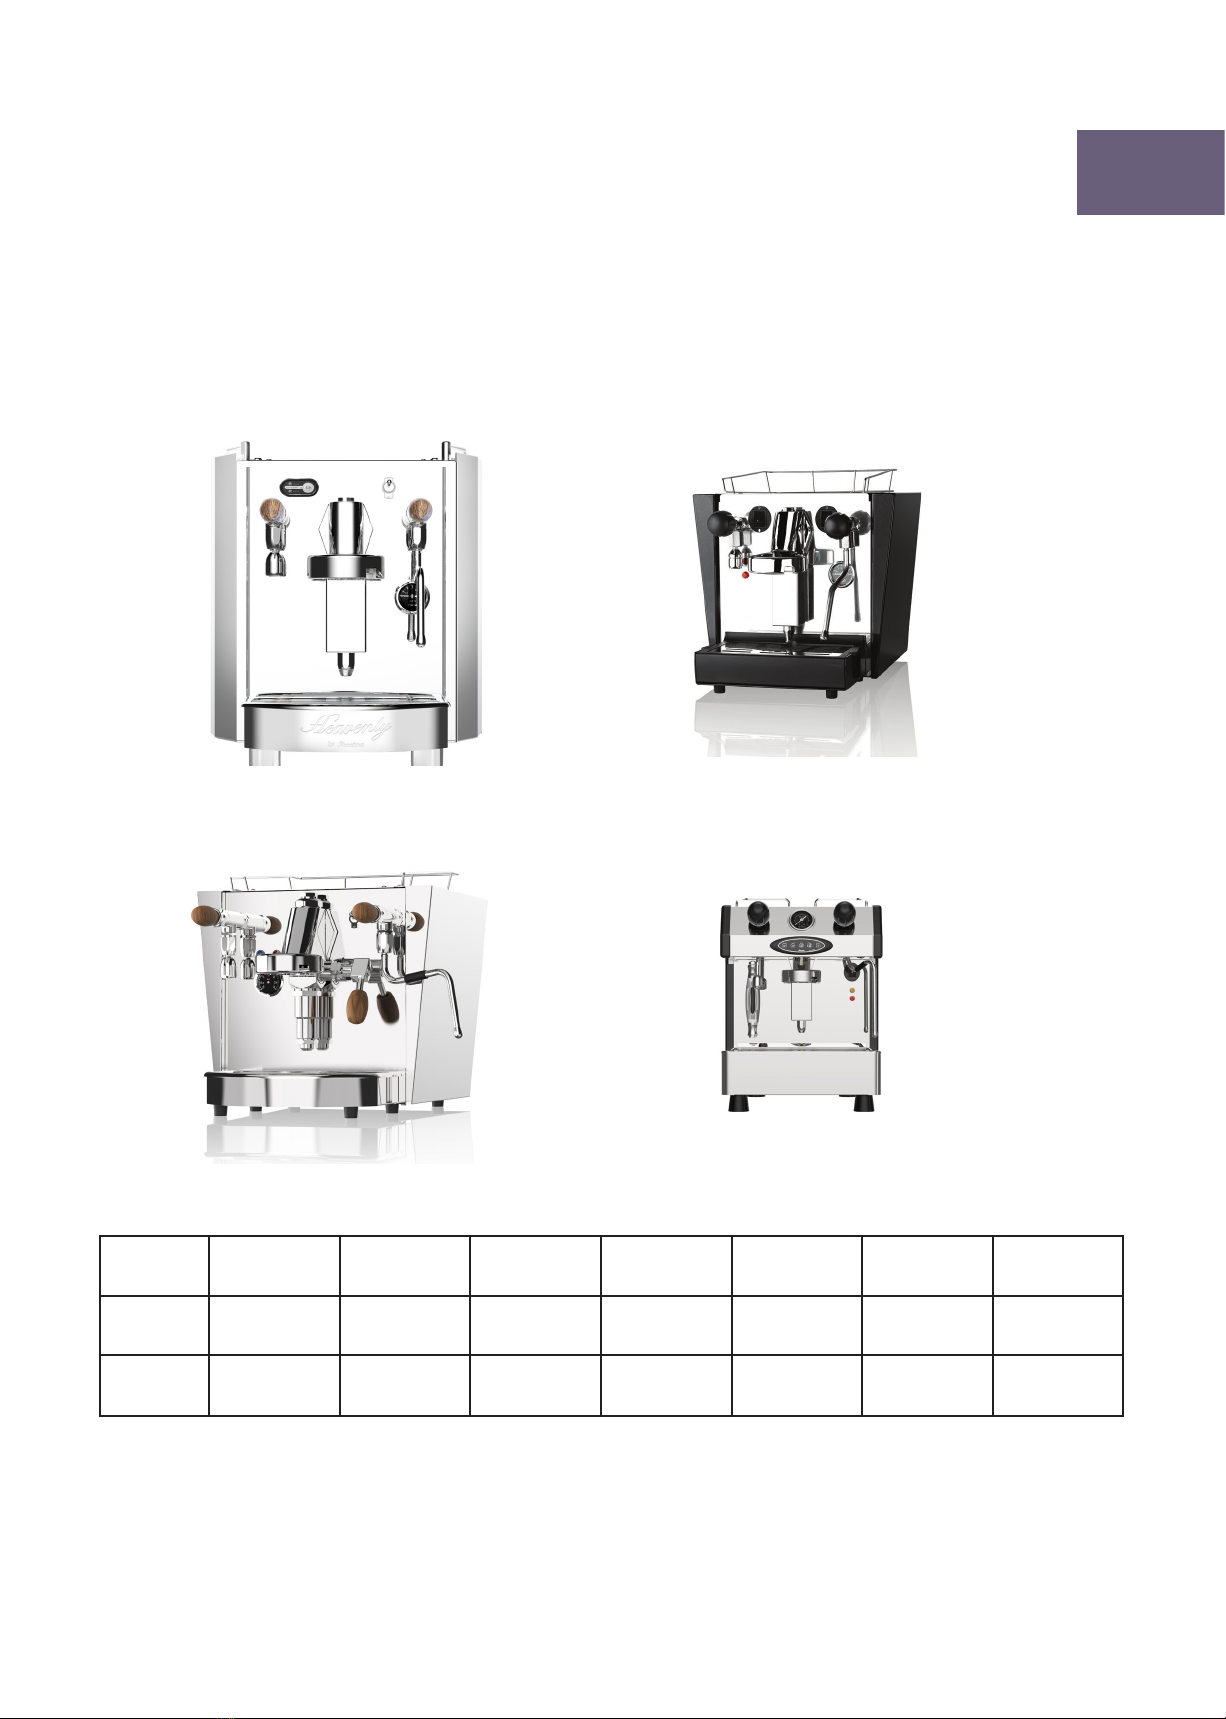
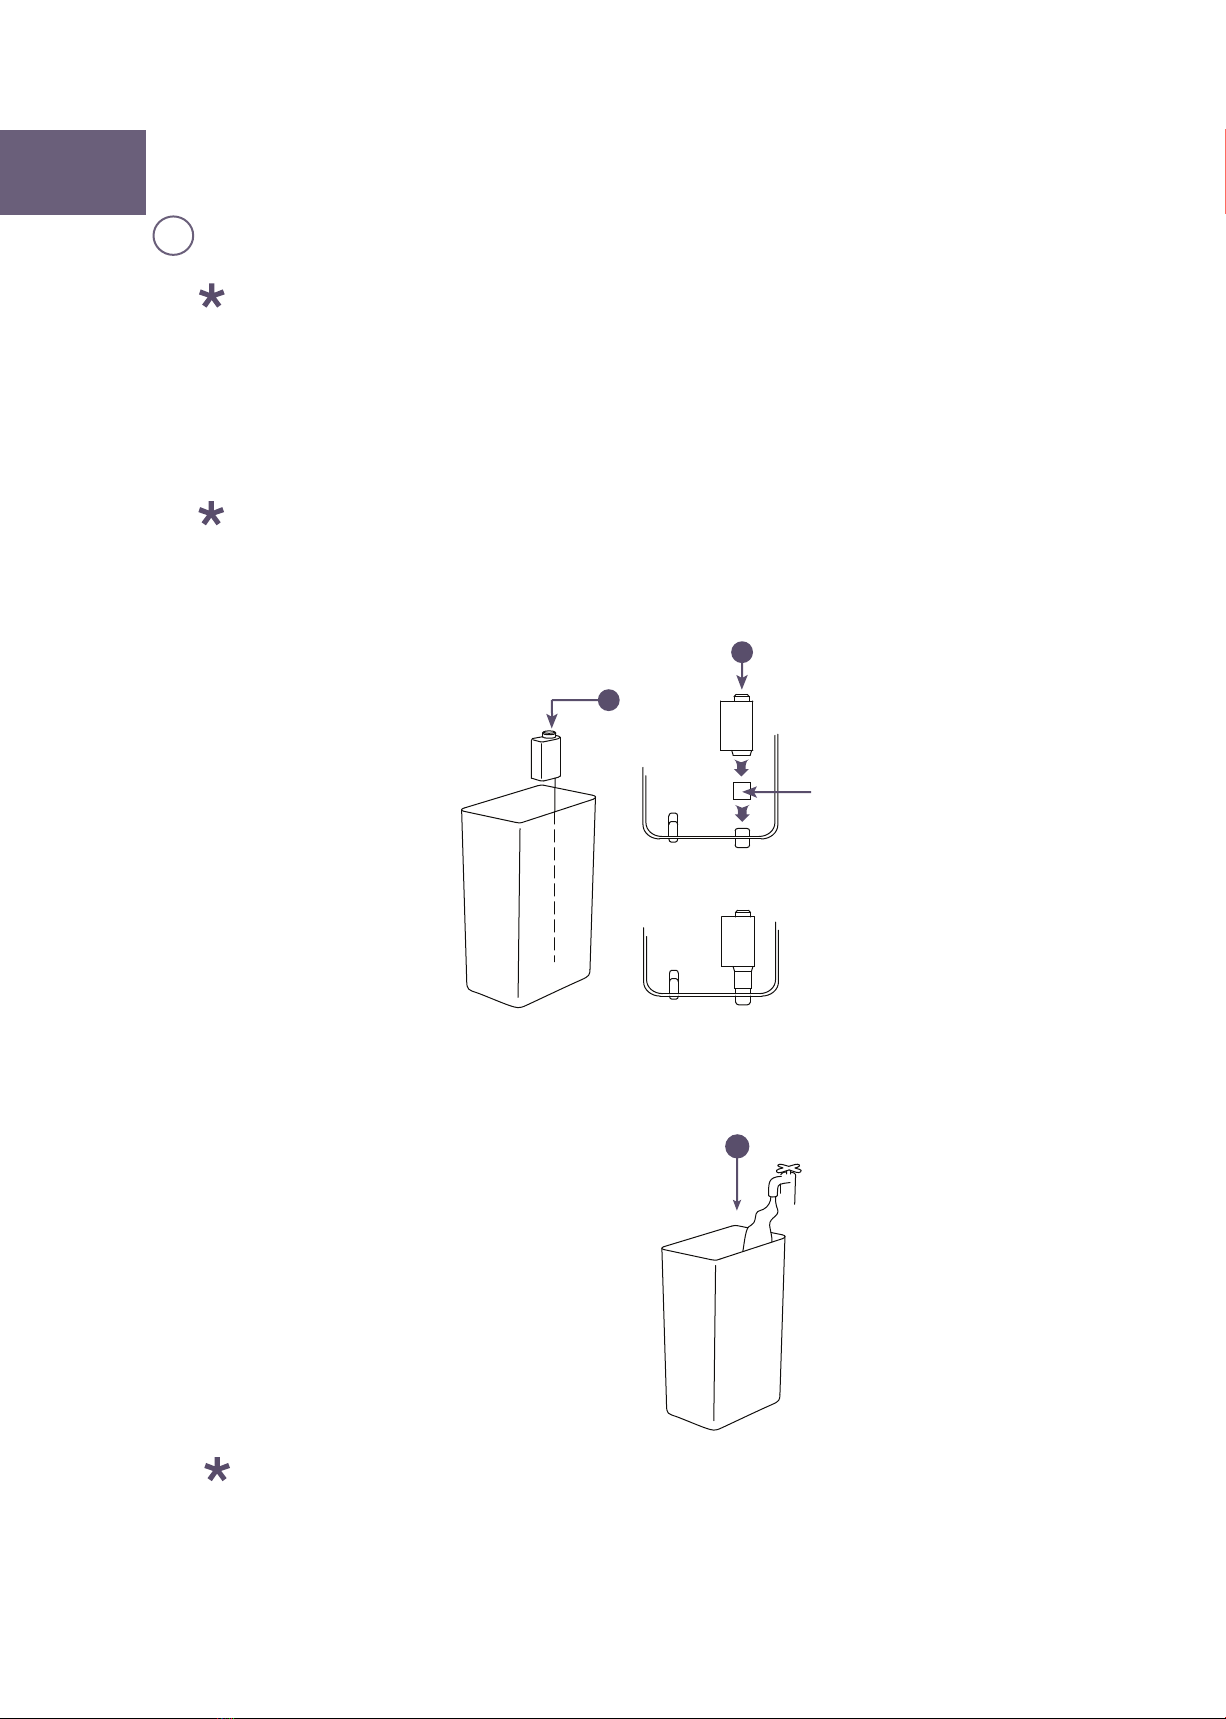
16.When using the Heavenly, Cherub, Classico and Little Gem models, ensure the
water tank has sucient fresh cold water in it. Do not run the machine without water
in the tank as doing so will damage the pump.
17.Machines contain high voltage parts. At no time should body panels be removed
while the machine is switched on.
18.Do not operate the machine without water in the tank, doing so may cause damage
to the machine.
19.Ensure whoever is operating the appliance is fully conversant with its operation
and aware of dangers involved in incorrect operation and cleaning, especially the
dangers of burns or scalds from hot water, steam and from hot surfaces of the
working area.
20.Fully isolate the gas supply at the gas bottle when the machine is not in use.
21.Clearance around the appliance must be:
Ceiling/Shelf: 600mm Rear: 75mm Sides: 75mm
22.If using an inverter, ensure the selector switch is on ‘GAS’ otherwise the unit will
overload.
23.The following procedure can only be done by qualied personnel. Adjustments can
only be made to increase or decrease steam pressure or to regulate the low ame
height.
24.Check the Sight Glass to ensure there is water in the boiler. The water lever should
be at least half way up the Sight Glass.
25.By their nature lever machine can be dangerous if used incorrectly. Ensure you have
read and understood all instructions before using the Retro Lever machine. If in
doubt contact Fracino for advice.
26.The appliance must not be cleaned with a water jet, or located in an area where a
water jet could be used.

Advisory
Failure to vent the steam tube before steaming milk could result in milk being sucked
back into the boiler, which then becomes sour and turns brown giving an obnoxious
small and taste to new milk being foamed.
The following models require a mains water supply: Bambino, Contempo and Romano.
It is extremely important that these machines have a constant water supply while they
are on. Operating these machines without a water supply may cause damage to the
machine and void the warranty.
The appliance is not suited to commercial kitchens.
It is recommended that the machines should not be left unattended when switched on.
Do not clean the water tank from the Heavenly, Cherub, Classico & Little Gem in a
dishwasher. Doing so may damage the tank.
3

Machine Overview
1
18
2
3
24
19
20
1716
15
14
13
12
9
10
11
21
8
4
5
6
7
25
O
22
N
22 23
12
10
13
3
7
14
4
8
15
16 17 18 19 20
Legend
21 22 23 24 25
Gas& LPG
5
9
6
11
Romano only, on Bambino
and Little Gem it is the
HotWater Tube)
(on Contempo and
12
(Electronic models
only) Contempo and Romano
Semi-automatics have a push
button. Bambino and Little Gem
Semi-Automatic models
have a rocker switch
(Contempo & Romano
model only)
(Bambino, Contempo
and Romano only)
(on Contempo and
Romano only, on
Bambino and Little Gem
it is the Hot WaterV alve
Handle)
Mains On/
O Switch
Drip Tray Hot Water
Tube
Inner Drip
Tray
Espresso
Tray
Left Hand Group
Boiler Drain Steam Tube Sight Glass for
Boiler Water Level
L/H Steam Valve
Handle
Hot Water Valve
Handle
Pump / Expansion
Pressure
Main Gas Valve
Isolator
Ignition Switch Main Gas Control
Valve including
Flame Failure Safe-
ty Device
Fuel Selector
Switch
Gas Burner Sight
Hole
Steam Pressure Cup Tray R/H Steam Valve
Handle
Touch Pad
Steam Tube
Safety Clip
Steam Tube Group Exhaust Right Hand
Group
4

Retro Overview
5

Heavenly, Cherub, Classico
& Little Gem
Model Voltage Power Rating Current Rating Boiler Capacity Expansion Valve
Set Pressure
Safety Valve Set
Pressure
Boiler Max
Working
Pressure
HEA1, CHE1,
CLAS1
230Vac 50Hz 2.85kW 13Amp 3L 12Bar 1.6 - 1.8Bar 1.3Bar
LG1, LG1E 230Vac 50Hz 2.7kW 13Amp 4L 12Bar 1.6 - 1.8Bar 1.3Bar
6

Start Up/Fitting Water Filter
AFitting the Water
Filter
Note: For machines tted with a removable water tank a water lter is supplied with
the machine. This must be used to soften water and prevent lime scale build up. It is
recommended that only Fracino approved lters are used.
1) Follow the instructions supplied with the lter. Push the Filter Adapter onto the Filter, then
gently push the Filter onto the tting at the bottom of the Water Tank. The Filter will hold itself in
place.
The Filter must be replaced regularly, every 2 months is recommended even if the machine
has not been used constantly. It should be replaced more regularly if it is subjected to more
heavy usage - refer to the instructions supplied with the Water Filter for more information.
Note: The Water Tank must be cleaned regularly, remove the tank from the machine and clean
using a mild detergent and warm water.
ADVISORY: Do not clean the Water Tank in a dishwasher, doing so may damage the tank.
2) Fill the water tank with fresh cold water, this can be done with a jug. Alternatively the Water
Tank can be removed and lled at a sink.
1
1
WATER FILTER
ADAPTER
2
7

Start Up/Daily Procedure
ATurning the
Machine on
Note: Remove all protective coverings and lm before use.
1) Depending on the year of the model either lift the black lid or unscrew the silver lid on top of the machine.
2) Fill the tank with fresh, cold water.
Note: Ensure water lter has been tted correctly
Plug the machine in and switch it on at the mains.
3) Turn the machine on via the black rocker on/o switch below the top of the machine on the right hand side.
A red or blue light on the switch will illuminate. For Classico models turn the machine on via the toggle on/o
switch.
4) An amber light will illuminate and the machine will start to ll the boiler with water from the water tank.
Note: For Heavenly, Cherub, and Classico models only: When the water level reaches the probe in the boiler
it will stop lling and the amber light will go o. There is a time out feature in the electronics to protect the
element which may stop the boiler lling before it is full. If this occurs, switch the machine OFF and then back
ON again to reset, the boiler will begin to ll until it reaches the probe, then the amber or blue light will go o
and the red light will come on to indicate the machine is heating.
Note: For Little Gem models only: When the water level reaches the middle of the sight glass the amber light
will go out and the machine will cut out. Rell the tank and then turn the on/o switch to the OFF position.
Wait 5 seconds and then turn the on/o switch back on, the machine will continue to ll. When the water level
reaches half way on the sight glass the red light will go out. The amber light will remain on until the water
reaches the correct level and will then go out.
ADVISORY: Do not operate the machine without water in the tank, doing so may cause damage to the
machine.
Note: The machines are tted with a warning alarm that will sound if the tank runs empty. If this alarm
sounds when the tank is full, carefully remove and re-insert the tank and carefully press it down to ensure it is
correctly positioned.
1
2
4
31
2
8

57
6
8
9
5) Open the steam valve by turning the black handle anti-clockwise.
6) Wait for steam to vent from the steam tube which will take between approximately three and four
minutes.
7) Then close the steam valve by turning the black handle clockwise until it stops.
ADVISORY: Do not over tighten the Steam and Water Valves or you will damage the seals.
ADVISORY: Failure to vent the steam tube before steaming milk could result in the milk being sucked
into the boiler, which then becomes sour and turns brown giving an obnoxious smell and taste to new
milk being heated.
8) Wait for the pressure to come up to 1.00 – 1.2 BAR.
9) Once up to pressure the red light will go o.
The machine is now ready to use.
Note: It is advisable to leave the machine to stand for about 15 minutes before making coee. This will
enable it to warm up thoroughly and to produce coee at the correct temperature. You can also ush
water through the lter holder and group to pre-heat these parts to speed up the process.
Programming Manual Fill Automatic Machines
The machine is tted with a set volume control, allowing the user to set single and double shot volumes.
1) Ensure the machine is turned o at the on/o switch.
2) Press and hold the start/stop button on the left keypad, then turn the machine on via the on/o switch,
until the light on the keypad ashes.
3) Press the start/stop button to start the drink and again when required volume is achieved. Once the
drink is set, the LEDs will stop ashing.
4)Turn the machine o and on again and the volume will be set. Push the start/stop button once for a
single shot and twice for a double shot.
12 3
or or
9

Bambino, Contempo &
Romano
Start Up/Daily Procedure
ATurning the
Machine on
1
2
Note: Remove all protective coverings and lm before use.
1) Switch the machine on, using the black rocker switch.
2) Open the steam valve to allow the air to vent.
ADVISORY: Failure to vent the steam tube before steaming milk could result in the milk being sucked into
the boiler, which then becomes sour and turns brown giving an obnoxious smell and taste to new milk
being heated.
5
3
4
3) Once steam starts to pass through the steam tube (approximately 15 minutes from switching machine
on).
4) Close the valve(s).
5) The pressure will then build up to between 1.0 and 1.2Bar. The machine is now ready to use.
Note: It is advisable to leave the machine to stand for about 15 minutes before making coee. This will
enable the group to warm up thoroughly and to produce coee at the correct temperature. You can also
ush water through the lter holder and group to pre-heat these parts and speed up the process.
WARNING: If the gauge reads above 1.5Bar, turn the machine o and isolate the mains electrical and
water supply, contact Fracino or a suitably trained engineer to inspect, repair and test the machine.
10

Gas Machines
Start Up/Daily Procedure
A
B
Warnings
Turning the
machine on
WARNING: Ensure whoever is operating the appliance is fully conversant with its operation and aware of
dangers involved in incorrect operation and cleaning, especially the dangers of burns or scalds from hot
water, steam and from hot surfaces of working area.
WARNING: Fully isolate the gas supply at the gas bottle when the machine is not in use.
WARNING: This air supply must not be installed on or against any combustible surface and the appliance
must not be installed on or against any combustible surface.
WARNING: Clearance around appliance must be:
Ceiling Shelf:600mm Rear:75mm Sides:75mm
WARNING: If using an inverter, ensure the switch is on “GAS”, otherwise the unit
will overload.
ADVISORY: It is recommended that the machine should not be left unattended when switched on.
Note: Remove all protective lm before use.
Note: See Installation Manual for full installation instructions. Installation is only to be carried out by full
qualied engineers.
1) Before turning on the machine please select which fuel you would like to use via the switch to the right of
the right hand group. Click the switch towards you for Electric and away from you for Gas.
2) Switch the machine on via the on/o switch.
3) Open the steam valve to allow the air to vent
1
Front of
Machine
2
3
1
11

CAdjustment
Note: To heat the machine on gas only the fuel selector switch must in the GAS position (see item 1). The
machine will now control the steam pressure automatically.
Note: Check the Sight Glass to ensure there is water in the boiler. The water level should be at least half way
up the Sight Glass.
8) Once steam starts to pass through the steam tube (approximately 15 minutes using electricity or 30
minutes using gas from switching machine on) close the valve. The pressure will be then build up to 1.0 – 1.2
BAR.
The machine is now ready to use.
WARNING: The following procedure can only be done by qualied personnel. Adjustments can only be made
to increase or decrease steam pressure or to regulate low ame height.
1) Remove the drip tray, the gas regulator can be found on the right hand side of the machine. The
adjustment screws are located on the left hand side of the regulator, next to the gas inlet pipe.
2) Steam pressure should be set at 1.0 – 1.2 BAR as shown on right hand side of the pressure gauge.
Adjustment is done using a 4mm Allen key to adjust the top screw
3) When the machine is up to pressure the low ame height should be set to just burn 6mm o the top of the
burner tube. Adjustment is via the bottom screw on the control valve.
4) To ignite the burner turn the main gas regulator/isolation valve on.
5) Press the silver gas ow control valve button in and hold.
6) Press the black electronic igniter button until a blue ame appears.
7) This can be viewed through round hole in front panel. Keep the silver gas ow button depressed for 20
seconds to allow thermocouple to reach temperature then release slowly.
8
4756
12

2
3
1
Group Gas Category Operating
Pressures
Jet Size Heat Input
1
I3+ (28 - 30/37) mbar
0.7mm
2.20kW
I3B/P(30) 30mbar 2.20kW
I3P(37) 37mbar 2.20kW
I3B/P(50) 50mbar 2.20kW
2
I3+ (28 - 30/37) mbar
0.85mm
2.75kW
I3B/P(30) 30mbar 2.75kW
I3P(37) 37mbar 2.70kW
I3B/P(50) 50mbar 3.25kW
3
I3+ (28 - 30/37) mbar
1.1mm
4.00kW
I3B/P(30) 30mbar 4.00kW
I3P(37) 37mbar 4.00kW
I3B/P(50) 50mbar 5.00kW
D
E
Technical
Data
Service
Parts
Gas operating pressure at appliance test point
Description
Burner 1 group
Burner 2 group
Burner 3 group
Main gas isolation valve 2 position
Thermo-couple M8 x 450mm
Spark generator
H T lead
Electrode
Pilot assembly
Injector 1 group
Injector 2 group
Injector 3 group
Gas valve Knob
Control valve (complete)
Electronic ignition
Gas valve Label for gas valve
Part Number
FCL305-1
FCL305
FCL305-3
FCL306/13
FCL304
FCL308
FCL308H
FCL302
FCL303
FCL301-1
FCL301
FCL301-3
FCL307A
FCL169COM-14
FCL308ELECTRONIC
LABEL-GASVALVEFCL306-13
Note: The recommended service interval is 12 months. Service must only be carried out by qualied
personnel, who are Gas Safe registered with a COMCAT 2 certicate.
13

Making Coee &
Programming Coee Measures
ALoading the Filter
Holder & Making Coee
1) Put ground coee into the lter holder. One shot of coee for single, two shots for double. Each machine
comes with lter holders which have interchangeable lters (single, double and blank) which clip inside the
holder. The single lter makes one coee, the double makes two. The blank lter (solid bottom with no holes)
is used for cleaning your group (see cleaning section).
2) Use tamper to level out and compress the coee granules in the lter holder or, if tted used the tamp on
your grinder for this purpose.
3) Put the lter holder into group. It will t into the group from the left and turns to the right until the handle is
facing forwards towards you.
4) Place the warmed cup(s) under the lter holders and in line with the beak(s).
Note: The quality of the espresso shot depends on a number of factors, including the coarseness of the grind,
freshness of coee, amount of coee used and tamping pressure, it is the users responsibility to adjust these
factors as required.
Note: It is important if you have a machine with more than one group that all groups are used equally rather
than just one of the groups otherwise the groups not used will stop working.
2
1
Coffee Machine
3
4
14

5
5) Press the button to start the coee ow as shown below. Once the coee ow stops any excess pressure
that is left in the lter holder is discharged through the exhaust valve below the group. Remove the lter
holder from the group, empty used coee grounds into drawer or receptacle and place empty lter holder
back in the group to keep it warm.
1) For the semi-automatic model press either the silver button or black rocker switch to start the coee ow.
2) On the Classico, lift the lever on the right hand side of the group upwards to start the coee ow, push the
lever back down to stop the ow.
Note: On the semi-automatic models the user is in control of the amount of coee that is dispensed into
the cup – the button is pressed to start the ow and needs to be pressed again to stop it once the required
amount of coee is in the cup.
Single Espresso: Use the single Filter Holder, one shot of coee, one espresso cup.
Single Coee: Use the single Filter Holder, one shot of coee, an espresso, cappuccino or latte cup.
Double Espresso: Use the double Filter Holder, two shots of coee and two espresso cups.
Double Coee: Use the double Filter Holder, two shots of coee, two espresso, cappuccino or latte cups.
Manual Override: can be used as an on/o button for the group or for programming coee volumes for the
buttons above.
Note: The espresso is usually programmed as a short shot of espresso. The coee is usually programmed as
a longer shot of espresso, used for cappuccino or latte.
B
C
Semi-Automatic model
coee control
Automatic model coee
control
Semi-automatic
1or
ON
OFF
2
Classico Only
Single Espresso
Single Coffee
Double Coffee
Double Espresso
Automatic
model coffee
R
M
a
d
e
i
n
E
n
g
l
a
n
d
Manual override
15

1) Machines with two or more groups are programmed on the left hand group/touch pad. When the process is
completed the settings will be stored for all groups. Any groups to the right can be programmed independently
by following the same procedure.
2) Put one shot of coee into a single lter holder and t the holder into the left hand group as shown at the
start of this section.
3) Put the espresso cup under the beak.
4) Press the star button on the left hand touch pad and hold for 5 seconds until the lights above the symbols
start to ash. The machine is now in program mode.
5) Press the single espresso button within 5 seconds and allow the coee to ll the cup to the required level.
Press the button again to stop and store the setting
Note: If the button is not pressed within 30 seconds the machine will revert back to the previous settings and
you will need to repeat the this step again.
DElectronic programming
coee measures
1
2
3
5 seconds
R
M
a
d
e
i
n
E
n
g
l
a
n
d
4
R
M
a
d
e
i
n
E
n
g
l
a
n
d
5 seconds
5
16

Repeat steps 1-5 for:
Single Coee: use the single lter holder, one shot of coee, an espresso, cappuccino of latte cup.
Double Espresso: use the double lter holder, two shots of coee and two espresso cups.
Double Coee: use the double lter holder, two shots of coee, two espresso, cappuccino or latte cups.
The machine is tted with a pre-infusion feature, which puts a 1second on/o pre-infusion on to the single
espresso and single coee. The pre-infusion is activated in the following procedure:
1) Turn the machine o at the mains on/o switch.
2) Press and hold the rst button on the left hand keypad, then turn the machine back on via the mains on/o
switch, until the light on the rst keypad ashes.
3) Turn the machine o at the mains on/o switch, wait 5 seconds then turn the machine back on, the pre-
infusion should now be on for the rst 2 buttons.
4) To turn the pre-infusion back o repeat above but use the second button on the left hand keypad.
Note: The Pre-infusion is only active on the single espresso and coee buttons
1) Remove the lter holder from the group.
2) Pull the lever down until it reaches the stop at the bottom.
WARNING: Do not let the lever go at this point as it will return to the upright position in a quick and forceful
manner, which may cause injury and/or damage to the machine. Always stand to the side of the lever
E
A
Pre-infusion
Heating the Group
Pre-infusion
R
M
a
d
e
i
n
E
n
g
l
a
n
d
15 seconds
5 sec
23
The machine is fitted with a pre-infusion feature, which puts a 1second on/off
Retro - Making Coee
2
doubt contact Fracino for advice.
17
Other manuals for Heavenly
1
This manual suits for next models
12
Table of contents
Other Fracino Coffee Maker manuals

Fracino
Fracino PID 2 User manual

Fracino
Fracino Heavenly User manual

Fracino
Fracino Roastilino User manual

Fracino
Fracino ATTIMO User manual

Fracino
Fracino Vesuvius User manual

Fracino
Fracino GE948 User manual

Fracino
Fracino FWB-Gas User manual

Fracino
Fracino Cybercino User manual

Fracino
Fracino Bambino User manual