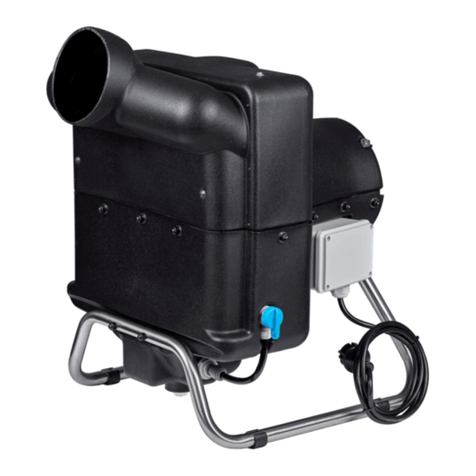
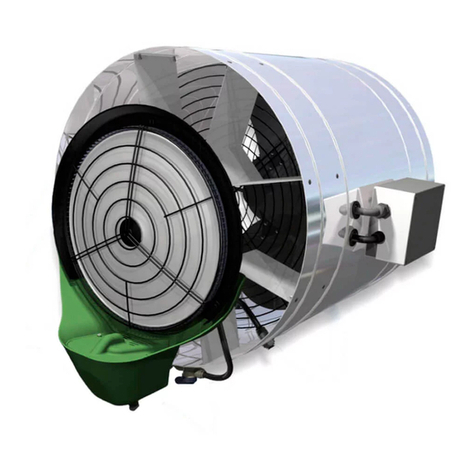
FRANCO PH Instruction manual

INSTRUCTION MANUAL FOR
USE AND MAINTENANCE
PH
PROFESSIONAL
HUMIDIFIER
TRANSLATION OF ORIGINAL INSTRUCTIONS
ENGLISH
Read this manual carefully before
install and operate the machine.
Rev.: 01/2022 Franco s.r.l. - Via Nazionale, 80 12010 Cervasca (CN)

FRANCO s.r.l. User and maintenance manual - PH
2
INDEX
INDEX......................................................................................................................................2
1 - INTRODUCTION.................................................................................................................3
1.1 General safety instructions .............................................................................................3
1.2 Guidelines for the correct disposal of the product...........................................................3
1.3 Conventions used in this manual....................................................................................3
1.4 Keeping and updating the instruction manual.................................................................4
1.5 Target readers................................................................................................................4
1.6 Pictograms......................................................................................................................5
1.7 Applications ....................................................................................................................7
1.8 Versions..........................................................................................................................7
1.9 Identification data and CE plate...................................................................................... 7
1.10 Description of equipment..............................................................................................8
1.11 Transport and handling.................................................................................................9
1.12 Warranty.......................................................................................................................9
1.13 Manufacturer's identification data .................................................................................9
1.14 Declarations..................................................................................................................9
1.15 EC Declaration of Conformity ..................................................................................... 10
2 - INSTALLATION.................................................................................................................11
2.1 Preliminary operations..................................................................................................11
2.2 Positioning....................................................................................................................11
2.3 Electrical connections...................................................................................................12
2.4 Hydraulic connections...................................................................................................12
2.5 Suction and discharge ducting...................................................................................... 12
3 - OPERATION..................................................................................................................... 13
3.1 Preliminary operations..................................................................................................13
3.2 First start-up.................................................................................................................. 13
3.3 Starting up ....................................................................................................................13
3.4 Adjustment.................................................................................................................... 13
3.5 Water discharge (bleed-off) ..........................................................................................14
4 - MAINTENANCE................................................................................................................15
4.1 Access to internal components.....................................................................................15
4.2 Cleaning the disc .......................................................................................................... 15
4.3 Cleaning the tank..........................................................................................................16
4.4 Replacing the nozzle ....................................................................................................16
4.5 Replacing the pump...................................................................................................... 16
4.6 Replacing the fan..........................................................................................................16
4.7 Replacing the rotating disc............................................................................................ 17
4.8 Replacing the float........................................................................................................18
4.9 Accessories .................................................................................................................. 18
5 - TECHNICAL CHARACTERISTICS...................................................................................19
5.1 Technical data ..............................................................................................................19
5.2 Electrical connections...................................................................................................20
5.3 Spare parts list..............................................................................................................21
6 - TROUBLESHOOTING GUIDE.......................................................................................... 23

FRANCO s.r.l. User and maintenance manual - PH
3
1 - INTRODUCTION
1.1 General safety instructions
This appliance must only be used for the function for which it was designed: "Professional Humidifier".
Any other use is to be considered improper and dangerous. Franco s.r.l. cannot be held responsible for
any damage resulting from improper, incorrect and unreasonable use or if the appliance is used in
installations which do not comply with the safety regulations in force.
- Check the integrity of the appliance when you open the packaging, paying particular attention to the
presence of damage or deformation to the plastic parts which may lead to breakage and/or malfunction
during use. In such cases, do not connect the machine to the mains power supply. Periodically carry out
a general inspection of the machine.
- Before connecting the appliance, make sure that the data on the rating plate correspond to those of
your electricity distribution network. The data label (see par. 1.9) is located on the back of the appliance.
- Comply with the safety rules prescribed for electrical equipment, and in particular:
•Follow the installation instructions of the appliance.
•Do not place objects on the humidifier.
•Prevent children and/or incapacitated persons from using the device without proper supervision;
•Do not touch the humidifier during operation or while the disc is stopped;
•Never immerse the appliance in water or any other liquid.
•Do not place any objects inside the tank as this could cause irreparable damage to the appliance.
•Do not use accessories, spare parts or components not intended for or supplied by the
manufacturer.
•Avoid touching the device with wet or damp hands
•Do not pull on power cables or expose them to risk of shearing.
•Do not leave the appliance exposed to the elements (rain, sun, etc.).
•In the event of a fault or malfunction of the appliance, switch it off immediately and disconnect
the power supply. Do not attempt to open or tamper with the appliance: contact a qualified
technician.
•Do not try to fill or empty the tank when the appliance is in operation.
1.2 Guidelines for the correct disposal of the product
Pursuant to European Directive 2012/19/EU:
At the end of its lifecycle, the product must not be disposed of with municipal waste.
It can be handed in at the separate waste collection centres set up by the municipalities,
or at retailers who provide this service. Disposing of the product separately avoids possible
negative consequences for the environment and for health deriving from its improper
disposal and allows the recovery of the materials of which it is composed in order to obtain
a significant saving of energy and resources. To emphasise the obligation to dispose of
electrical and electronic equipment separately, the product is marked with a crossed-out wheeled bin.
1.3 Conventions used in this manual
The manual is divided into chapters. The operators to whom the instructions are addressed are
specified, where necessary, in order to operate the machine safely.
The sequence of chapters follows the temporal logic of the machine life.
To facilitate immediate understanding of the text, terms, abbreviations and pictograms are used, the
meaning of which is indicated below.

FRANCO s.r.l. User and maintenance manual - PH
4
ABBREVIATIONS
Cap. = Chapter
Par. = Paragraph
Page = Page
Fig. = Figure
Tab. = Table
UNITS OF MEASUREMENT
The units of measurement used are those of the International System (SI).
1.4 Keeping and updating the instruction manual
The instruction manual must be kept with care and must accompany the machine at all times during its
life. Parts must not be removed, torn or arbitrarily modified.
The manual should be stored in an environment protected from moisture and heat and in the vicinity of
the machine towhich it relates. The manufacturer can supply additional copies ofthe machine instruction
The Manufacturer reserves the right to modify the design and make improvements to the machine
without informing the Customers, and without updating the Manual already delivered to the user.
However, in the event of changes to the machine installed at the Customer's premises, agreed with the
Manufacturer and entailing the amendment of one or more chapters of the Instruction Manual, it will be
the Manufacturer's responsibility to send the users concerned the chapters affected by the change.
It is the responsibility of the User to replace the old chapters, homepage and table of contents with the
new ones in all copies in his possession.
The Manufacturer is responsible for the original version in Italian; in the event of any doubts regarding
the translated versions, please refer to the Italian language and contact the Manufacturer
(support@francosrl.com) for due verification.
1.5 Target readers
This manual is intended for the installer, the operator and qualified personnel authorised to service the
machine.
OPERATOR: means the person or persons responsible for installing, operating, adjusting, cleaning,
repairing and moving machinery and for carrying out the simplest maintenance operations;
QUALIFIED PERSONNEL/QUALIFIED WORKERS: these are people who have attended specialised
courses, training, etc. and have experience in the installation, commissioning and maintenance, repair,
transport of the machine.
The machine is intended for industrial use, and therefore professional and not general use, so its use
must be entrusted to qualified personnel, in particular who:
•have reached the age of majority;
•are physically and mentally fit to carry out work of particular technical difficulty;
•have been properly instructed in the use and maintenance of the machine;
•have been judged by the employer to be suitable for the task;
•are able to understand and interpret the operator's manual and safety instructions;
•are familiar with emergency procedures and their implementation;
•have the ability to operate the specific type of equipment;
•are familiar with the specific rules of the case;
•have understood the operating procedures defined by the machine manufacturer.

FRANCO s.r.l. User and maintenance manual - PH
5
The appliance may be used by persons with reduced physical, sensory or mental capabilities, or lack
of experience or knowledge, provided that they are supervised or have received instructions
concerning the safe use of the appliance and can understand of the hazards involved.
1.6 Pictograms
This section explains the meaning of the pictograms indicating the operator's qualification, the state of
the machine, the hazards and the obligations/prohibitions to be respected. Their use makes it possible
to provide rapid and unambiguous information necessary for the correct and safe use of the machine.
PICTOGRAMS RELATING TO OPERATOR QUALIFICATION
Symbol
Description
General labourer: operator without specific skills, able to carry out only simple tasks on the
instructions of qualified technicians.
Driver of lifting and handling equipment: an operator qualified to use lifting and handling
equipment and machines (strictly following the manufacturer's instructions), in accordance
with the laws in force in the country of the machine user.
Mechanical maintenance technician: qualified technician, able to operate the machine
under normal conditions, to make it work with protections disabled, to intervene on the
mechanical parts to carry out the necessary adjustments, maintenance and repairs.
Typically, he is not qualified to work on live electrical installations.
Electrical maintenance technician: qualified technician, able to operate the machine under
normal conditions, to make it work with protections disabled, is proposed to all interventions
of an electrical nature of regulation, maintenance and repairs. He is able to work in the
presence of voltage inside cabinets and junction boxes.
Manufacturer's technician: a qualified technician made available by the manufacturer to
carry out operations of a complex nature in particular situations or, in any case, as agreed
with the user. The skills are, depending on the case, mechanical and/or electrical and/or
electronic and/or software.

FRANCO s.r.l. User and maintenance manual - PH
6
SAFETY PICTOGRAMS (ISO 7010)
Pictograms contained within a triangle indicate DANGER.
Pictograms contained within a circle impose a PROHIBITION/OBBLIGATION.
Pictogram
Description
Dangerous electrical voltage.
General danger.
Do not remove safety devices.
It is forbidden to clean, oil, grease, repair or
adjust moving parts by hand.
Obligation to switch off power before starting
work or repairs.
Protective gloves are mandatory.
Compulsory safety footwear.
Helmet compulsory.

FRANCO s.r.l. User and maintenance manual - PH
7
1.7 Applications
In industry, the PH humidifier is installed in premises where a certain level of humidity must be
maintained, for example in cold storage rooms for fruit and vegetables, in curing warehouses, in the
paper and tobacco industries and in textile factories.
In agriculture it is used to humidify mushroom- and greenhouses, and for pest control treatments.
In livestock farming, it is used to maintain humidity in enclosures and installations that spray
disinfectants or other solutions into the environment.
The materials used guarantee reliability and durability, they are not affected by the corrosive action of
water and acids and make the PH a machine suitable for working even in very critical environments.
The PH combines humidification capacity with ease of installation and handling and, as it operates
without nozzles, is not subject to clogging due to impurities and limescale.
The water pressure required is that of the water mains (2 to 4 atm).
This machine must only be used for the purpose
for which it was designed:
Room humidification
All other uses are improper and potentially dangerous.
1.8 Versions
The PH professional humidifier is available in the following
versions:
3308400 Version PH3 - up to 2.5kg/h - 280m³/h - 230V 50Hz
3308500 Version PH5 - up to 5.0kg/h - 330m³/h - 230V 50Hz
3308200 Version PH7 - up to 7.5kg/h - 390m³/h - 230V 50Hz
3308410 Version PH3 - up to 2.5kg/h - 280m³/h - 230V 60Hz
3308510 Version PH5 - up to 5.0kg/h - 330m³/h - 230V 60Hz
3308210 Version PH7 - up to 7.5kg/h - 390m³/h - 230V 60Hz
1.9 Identification data and CE plate
Each machine is identified by a CE plate on which the machine's
reference data are indelibly marked.
Always quote these references for any communication with the
manufacturer or service centres.
Fig.1.9.1

FRANCO s.r.l. User and maintenance manual - PH
8
1.10 Description of equipment
Fig.1.10.1
Components of centrifugal humidifier
Fig.1.10.2
Rotary disc
Nozzle
Motor
Fixed disk
Electrical connection box
Protection grid
Support
Fan
Electric motor
Regulating valve
Centrifugal atomiser
Partition wall (PH3 version)
Grid (PH5; PH7)
Air Outlet (PH3)
Handle
Pump
Floater

FRANCO s.r.l. User and maintenance manual - PH
9
1.11 Transport and handling
The machine is properly packed before being placed in sturdy cardboard containers.
Avoid damage to machine components by taking great care when opening the packaging.
Check the integrity of the machine by checking that there are no visibly damaged parts.
Do not dispose of packaging elements in the environment, they should be placed in
appropriate collection points.
The PH can be lifted and moved using the handle fitted.
ATTENTION!
Before moving the appliance you must:
a. stop the machine,
b. switch off the power supply,
c. cut off the water supply.
If needed, use suitable lifting gear to lift the machine (see specifications).
1.12 Warranty
This appliance is guaranteed for 12 months from the date of manufacture for all faults attributed to a
proven manufacturing or material defect. The warranty does not cover all parts damaged by transport,
bad or incorrect maintenance, neglect, inability to use, improper use, tampering by unauthorised
personnel and in any case by causes beyond the control of Franco s.r.l. of Cervasca (CN). During the
warranty period, Franco s.r.l. undertakes to replace or repair free of charge those parts which prove to
be defective at the origin.
The service intervention shall be carried out by a qualified technician authorized by Franco s.r.l..
1.13 Manufacturer's identification data
Manufacturer
FRANCO S.r.l.
Legal and administrative headquarters
VIA NAZIONALE, 80 - 12010 CERVASCA (CN) - ITALY
Contact
Tel.: (0039) 0171 - 61.16.63
Email: customer@francosrl.com
Web: www.francosrl.com
1.14 Declarations
The machine is manufactured in accordance with the relevant Community Directives applicable at the
time of placing on the market.
The machine is not included among those mentioned in All. IV of Directive 2006/42/EC.

FRANCO s.r.l. User and maintenance manual - PH
10
1.15 EC Declaration of Conformity
THE MANUFACTURER
FRANCO s.r.l.
Company
Via Nazionale, 80 12010 CN
Address Postcode Province
Cervasca Italy
City Country
DECLARES under its own responsibility that the machine
Humidifier PH3; PH5; PH7
Description Model
3308400; 3308500; 3308200; 3308410; 3308510; 3308210
Article number
PH Professional Humidifier
Trade name
Room humidification
Intended use complies with the following European Directives:
2006/42/EC Machinery Directive
(2014/35/EU) (Low Voltage Directive)
2014/30/EU Electromagnetic Compatibility Directive
Harmonised standards and reference specifications used:
EN 12100:2010
EN 60335-1:2012 + A11 +A13 +A1 + A14 + A2 +A15:2021
EN 60335-2-98:2003/A11:2019
EN 60335-2-41:2003/A2:2010
EN 60034-1:2010
EN 55014-1 :2017, EN 55014-2:2015, EN 61000-6-1:2016, EN 61000-6-3:2010
Legal entity authorised to establish the Technical File:
FRANCO s.r.l.
Name
Via Nazionale, 80 12010 CN
Address Postcode Province
Cervasca Italy
City Country
Place and date of document
The manufacturer
Cervasca, 22/02/2022
Signature
Rev. 00/2022
Marco Fantino
Administrator

FRANCO s.r.l. User and maintenance manual - PH
11
2 - INSTALLATION
2.1 Preliminary operations
In order to operate the PH humidifier, it is necessary to have:
•Electrical network with voltage and frequency characteristics suitable for the machine,
with grounding and protection devices in compliance with standards;
•Water supply connection: required pressure 2-4 atm (0.2-0.4 MPa);
•Ambient temperature during operation: must be between 1°C and 40°C
•Temperature of the water and liquids used: must not exceed 35°C.
•Drinking water with low fixed residue, or treated water. The quality of the water affects the frequency
of maintenance operations and the correct functioning of the humidifier.
•Timed tank drainage control with bleed-off function to keep the machine in optimal hygienic and
operating conditions.
The installation must comply with the applicable European, national and local
standards in force. In particular, follow the requirements of standard UNI 8884
"Characteristics and treatment of water in cooling and humidification circuits"
where conductivity must be less than 100 μS/cm and total hardness less than 5° fH
(50 ppm CaCO3) or another equivalent national standard.
2.2 Positioning
The PH humidifier must be installed in a horizontal position, with the stand on the floor
or on a suitable support structure (shelf, etc.).
If necessary, use the Ø6 holes on the support to secure the machine, after removing the
feet with a screwdriver. Always keep the machine in a horizontal position. The distance
between holes is shown in figure 2.2.1.
Hole location on support
Hole distances
Fig. 2.2.1

FRANCO s.r.l. User and maintenance manual - PH
12
2.3 Electrical connections
•Electrical connections must be made by authorised and qualified
technicians in accordance with current regulations.
•Ensure that the supply voltage characteristics comply with the information
on the nameplate of the appliance.
•It is mandatory to connect the appliance to an efficient earth line.
The unit is equipped as standard with a power cord and Schuko plug for connection to a grounded 230V
50Hz single-phase power supply. An external humidistat or thermostat can also be used to control the
automatic start and stop of the machine depending on the humidity or ambient temperature; for manual
control, the humidifier can be operated e.g. by an external On/Off switch provided in the electrical
system.
2.4 Hydraulic connections
Make the connection to the water supply and drainage lines at the points provided. The
following options are available:
•Quick water inlet connection for connecting a Ø 3/8" hose.
•Quick-connect drain orifice with cap for connection of a Ø 3/8" hose (optional).
A specific accessory is available for the direct connection of a hose by means of a hose barb.
2.5 Suction and discharge ducting
It is possible to fit a Ø 200mm hose to the humidifier's inlet, in order to draw air from outside or from a
different room. The PH3 and PH5 version also allows the supply air to be ducted, a Ø 125mm pipe can
be connected to the circular outlet (Fig. 2.5.1).
Fig.2.5.1

FRANCO s.r.l. User and maintenance manual - PH
13
3 - OPERATION
3.1 Preliminary operations
Before starting up the humidifier, check that
1. All connections, both electrical and hydraulic, have been made according to the instructions in this
manual;
2. The humidifier is free and clean;
3. The water supply tap is open
3.2 First start-up
- Check the correct direction of air flow (Fig. 3.4.1);
- Make sure that all wires are positioned evenly and that they are not squashed or pulled too tightly;
- Ensure that all hydraulic connections have been made correctly;
- Open the water supply tap and check that there are no leaks in the filling circuit;
3.3 Starting up
The machine starts automatically as soon as power is supplied.
The pump circulates the water and brings it to the rotating disc, which nebulises it inside the humidifier.
The special shape of the PH means that only the smallest and lightest water particles are carried away
by the flow of air created by the fan.
3.4 Adjustment
Adjust the water flow rate by adjusting the ball valve until a fine mist is achieved without
droplets dragging from the rotating disc (Fig. 3.2.1). Centrifugal humidifiers produce
droplets with an average size of between 10 and 30 mm. The size of the droplets
produced depends on the setting of the flow rate and various environmental factors.
Excessive water flow may cause an increase in droplet size and adversely affect fog
quality.
Fig. 3.4.1
ATTENTION!
Do not insert objects into
the humidifier!
Air flow
OPEN
CLOSED

FRANCO s.r.l. User and maintenance manual - PH
14
The pump must not operate without water
The temperature of the liquids used must not exceed 35°C.
3.5 Water discharge (bleed-off)
The machine is equipped with a drain plug located at the bottom of the accumulation tank. The tank can
be emptied by unscrewing the cap with a 19 mm spanner.
ATTENTION!
Stagnant water can cause the growth of harmful bacteria and microorganisms. It is
therefore necessary to prevent stagnation.
As well as for safety reasons, regular water renewal is also necessary to keep the
appliance clean and free from limescale, mould, etc. It is therefore recommended to provide a
periodic automatic or manual drainage system for the water collection tank. It is therefore
recommended that the water collection tank be periodically drained, either automatically or
manually.
If the machine is only used occasionally, empty the tank after each use. Never leave water in the
tank when the machine is not in use.

FRANCO s.r.l. User and maintenance manual - PH
15
4 - MAINTENANCE
The operations described in this chapter must only be carried out by authorised and qualified
personnel, using suitable personal protective equipment. Before carrying out any work,
disconnect the appliance from the electricity and water supplies.
Check periodically that the water flow rate to the centrifugal disc is correct. Adjust the flow regulator if
necessary. Keep discs, water tank and internal components clean to prevent dirt build-up.
4.1 Access to internal parts
To access internal components for maintenance purposes, open the machine as described below:
1) Disconnect the power supply and ensure that it cannot be switched on again during maintenance
operations;
2) Switch off the water supply to the machine
3) Remove the rear protection grille by unscrewing the 4 screws with a hex 7 spanner (Fig. 4.1.1);
4) Remove the two M5 screws with nut on the inlet port with an hex 8 spanner (fig.4.1.2).
5) Remove the 11 M5 screws that join the two parts of the machine (Fig. 4.1.3) using an hex 8
spanner;
6) Gently lift the upper part of the crankcase.
4.2 Cleaning the disc
•Keep the disc clean to prevent limescale build-up or dirt accumulation that could cause increased
vibration or coarse spraying.
•To clean the rotating disc, use a soft, damp cloth and a non-toxic, solvent-free cleaning agent, wiping
without applying excessive pressure.
•Do not use solvents.
•The fixed disk should be cleaned with a brush with stiff bristles, rubbing the teeth taking care not to
damage them. Any limescale deposits can be removed with vinegar, lemon or another specific, non-
toxic, solvent-free product.
Fig. 4.1.3
Fig. 4.1.1
Fig. 4.1.2

FRANCO s.r.l. User and maintenance manual - PH
16
4.3 Cleaning the tank
Clean the water collection tank periodically (see also section 3.5).
To facilitate cleaning, disassemble the humidifier motor (4 screws - spanner size 10) and remove the
float ball and pump.
To remove the ball, unscrew the plastic wing nut of the float arm (fig. 4.3.1).
To remove the pump, turn it to a vertical position (fig. 4.3.2), press down the stop ring in which the pump
is fitted with a 13 mm spanner and pull gently until it comes out.
Clean the inside of the tub with a cloth or sponge, rubbing gently on the walls. Do not use solvents.
Periodically check the operation and cleanliness of the pump and float switch.
Every 2 to 3 months wash the internal parts of the pump with lukewarm water.
IMPORTANT!
Refit the pump and the float in the correct position, ensuring that the water level in the
humidifier is exactly sufficient to cover the pump body. If the water level is too high or too low,
the motor and/or pump may malfunction.
Fig. 4.3.1 Fig. 4.3.2
4.4 Replacing the nozzle
After removingthe rotating disc (see par. 4.7), remove the nozzle by unscrewing the two screws 2.8x9.5.
Push the grey ring on the elbow connector (see spare parts list, item 22) to the rear of the disc and,
while holding it down, pull out the nozzle to be replaced.
Position the new nozzle by repeating the sequence in reverse.
4.5 Replacing the pump
To remove the pump it is necessary to rotate it vertically (fig. 4.3.2, holding down the stop ring in which
the pump is fitted with a hex 13 spanner and pulling gently until it comes off.
Repeat the sequence in reverse, always checking that the water level in the tank is correct.
4.6 Replacing the fan

FRANCO s.r.l. User and maintenance manual - PH
17
Use a hex 7 screwdriver key to unscrew the fixing screw in the centre of the fan hub. Then remove the
fan.
Before replacing the new fan, grease the motor shaft, taking care not to lose the torque pins. Tighten
the fan fixing screws and refit the protective grille.
4.7 Replacing the rotating disc
1.
Using a hex 7 screwdriver key, unscrew the M4
screw that secures the disc to the motor shaft
and remove the corresponding washer.
2.
Insert the M6x40 screw (supplied with the
machine) into the centre hole of the disc.
3.
Use a hex 13 screwdriver to tighten the screw,
which will push the disc out effortlessly as it
enters the hole.
4.
Once the disc is removed, remove the M6x40
screw.
5.
Apply some grease on the motor shaft and insert the new disc, checking that the keys are aligned
and pressing on the centre, without tapping or forcing. Replace the washer, M4 screw and plug.
Check that the distance between the rotating disc and the fixed disc is approximately 5mm and that
the spacers (4mm + 1mm) are correctly fitted.
SCREW
M8x40
M4 SCREW
+ WASHER
7
13

FRANCO s.r.l. User and maintenance manual - PH
18
4.8 Replacing the float
Disconnect the water supply and remove the 3/8" fitting with a
spanner (Fig. 48.1).
Remove the four M6 screws securing the motor with a 10 mm
spanner, loosen the motor grommet and disconnect the supply
pipes on the fixed disk.
Then remove the motor. Unscrew the plastic ring nut shown in fig.
4.8.1 with a hex 30 spanner and remove the float body. Position
the new float and repeat in reverse the sequence (refit the 4 plastic
washers under the motor feet), make sure that the water level
inside the tank covers the pump exactly.
4.9 Accessories
A full range of accessories is available to match your PH, such as electronic humidity regulators,
thermostats, timed tank drainage systems, electrical wiring and plumbing accessories.
Ask your supplier for the accessories catalogue for more details.
3/8"
connection
quick coupling
Ring nut
Fig. 4.8.1

FRANCO s.r.l. User and maintenance manual - PH
19
5 - TECHNICAL CHARACTERISTICS
5.1 Technical data
PH3
PH5
PH7
Atomisation capacity
lt/h
up to 2.5
up to 5.0
up to 7.5
Power supply
single-phase
single-phase
single-phase
Weight
kg
13
13
13
Air flow rate*
m³/h
280
330
390
Humidifier/fan motor
Power
W
250
250
250
Voltage
V
230
230
230
Current
A
2.3
2.2
2.0
Frequency
Hz
50
50
50
Pump
Power
W
14
14
14
Voltage
V
230
230
230
Frequency
Hz
50
50
50
* with free air outlet
PH7: 420; PH3,PH5: 507

FRANCO s.r.l. User and maintenance manual - PH
20
5.2 Electrical connections
Ensure that the characteristics of the electrical supply current complywith the specification
table.
Install a magnetic differential circuit breaker in the electric system upstream of the unit.
A manual reset thermal protector that stops the motor in case of
overheating is located on the back side of the electrical box. If the thermal
protector trips, wait a few minutes and then press the reset button to reset
the device (Fig. 5.2.1). If the appliance does not start, or stops again
during operation, have it checked by a qualified technician to identify and eliminate
the cause of overheating.
Fig. 5.2.1
Ensure that all connections on the box are locked, that the box cover is securely fastened and that the
locking screws are tightened securely to ensure the required degree of protection.
Other manuals for PH
1
This manual suits for next models
9
Table of contents
Other FRANCO Humidifier manuals

FRANCO
FRANCO UCP Series Instruction manual

FRANCO
FRANCO UCP-1 User manual

FRANCO
FRANCO UF Mobile Instruction manual

FRANCO
FRANCO UX Series Instruction manual

FRANCO
FRANCO UCP Fly Series Instruction manual

FRANCO
FRANCO UCP Instruction manual

FRANCO
FRANCO UX Series Instruction manual

FRANCO
FRANCO PH Instruction manual

FRANCO
FRANCO PH5 Instruction manual
Popular Humidifier manuals by other brands

proWIN
proWIN proWIN AIR BOWL quick start guide

Guardian
Guardian H965 user manual

Trion
Trion Herrmidifier Herrtronic 6000 Series Installation, operation & maintenance manual

Carel
Carel HeaterSteam 4 UR002 user manual

Carel
Carel humiSteam Basic user manual

Breville
Breville Easy Mist LAH300 Instruction book