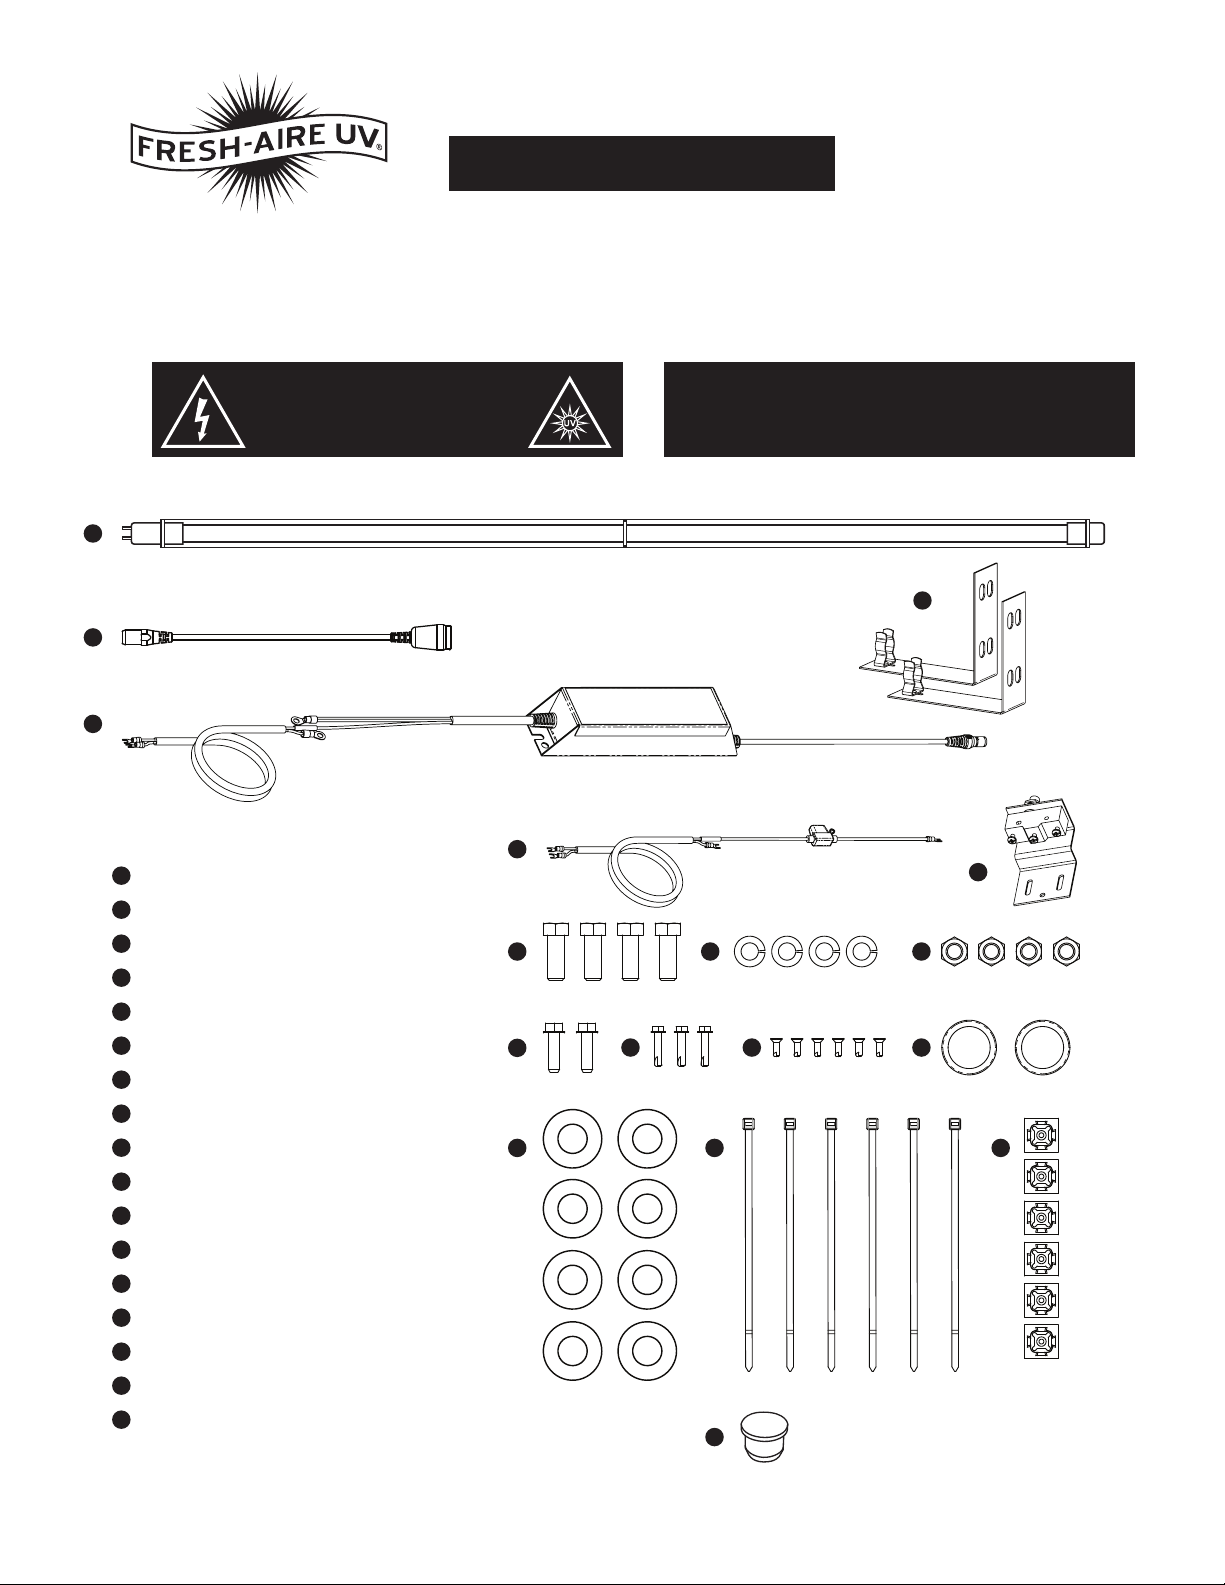
Installation
The Fresh-Aire UV Bus Kit is
designed to reduce biological
fouling of a/c coils and
blowers in commercial buses.
Germicidal UV light improves
indoor air quality and reduces
maintenance costs.
The Fresh-Aire UV lights (2)are
mounted in the (2) a/c units
between the evaporator and
blower wheels.
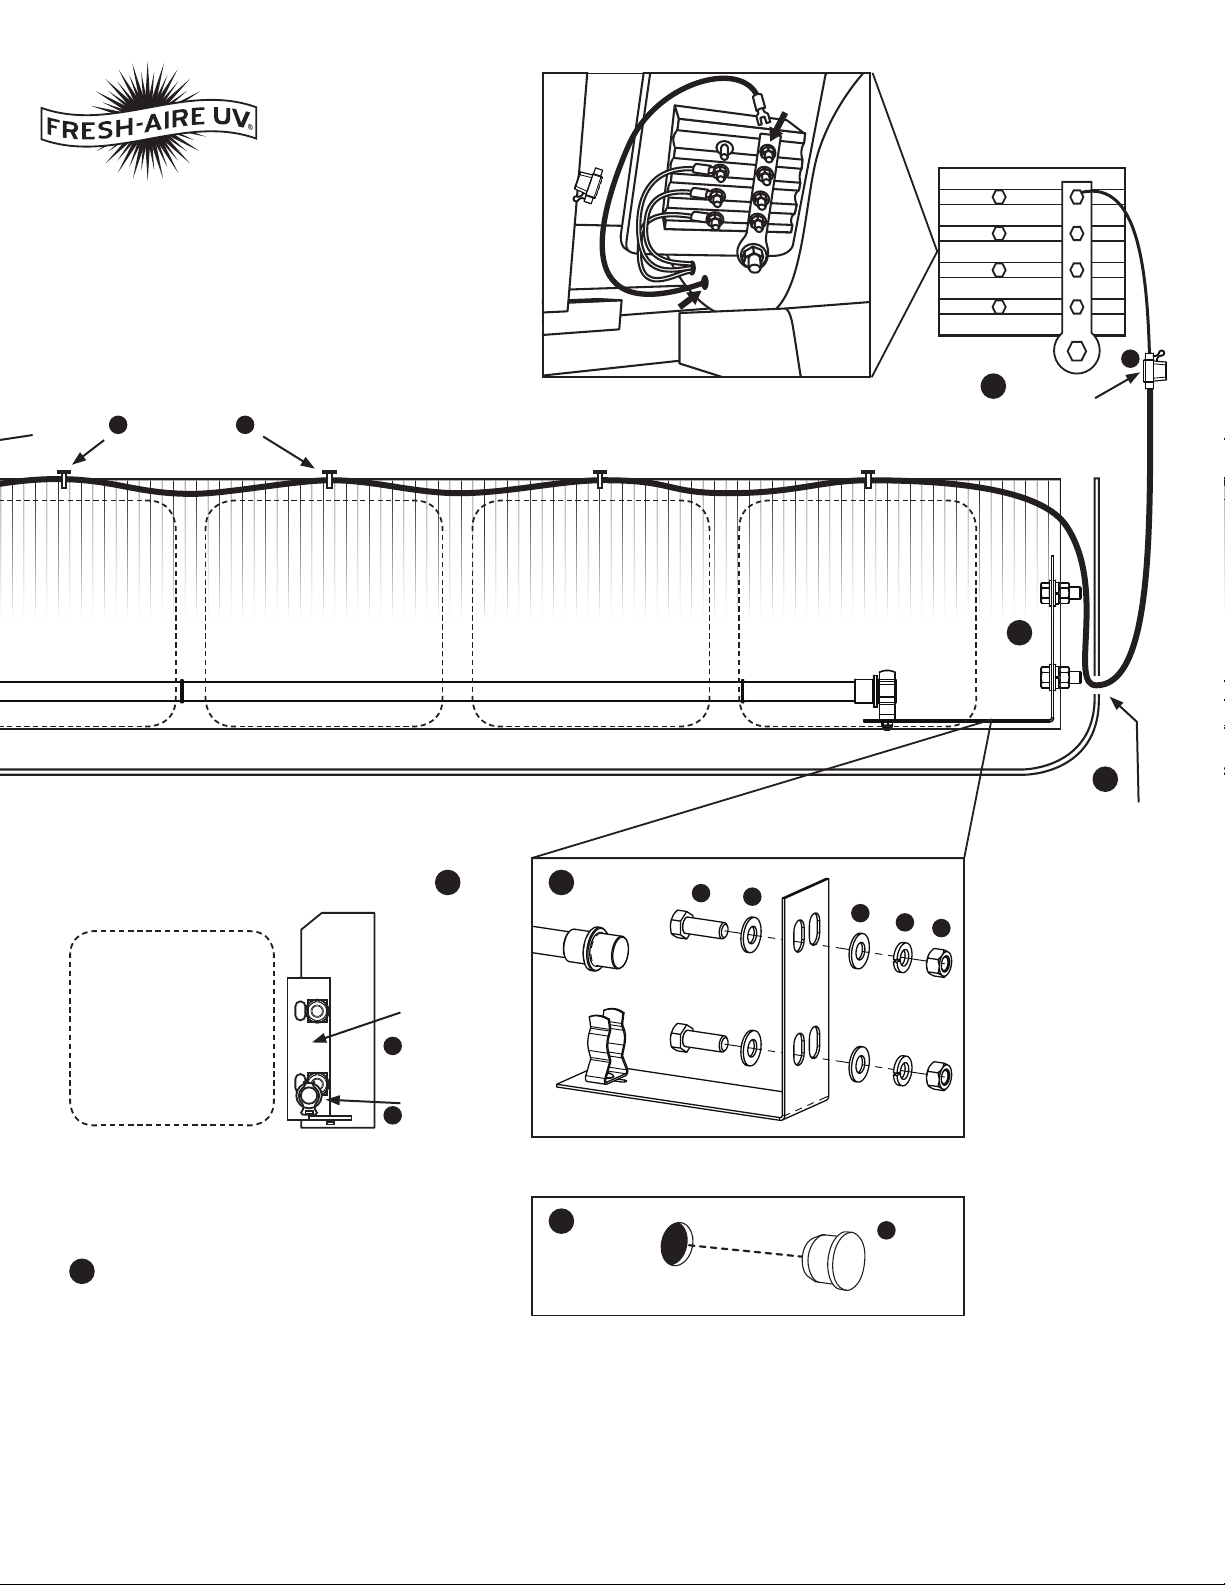
To start, remove the a/c access
panels from the roof. Then, from
the inside of bus, remove each
access corner panel from both
sides of the return.
1From the roof a/c access,
drill a 1” hole on each corner
near the back to allow the
power wire and lamp cable to
pass through to the ballast and
fuse block locations on either
side. Install ¾” bushing in each
hole. Seal hole if needed.
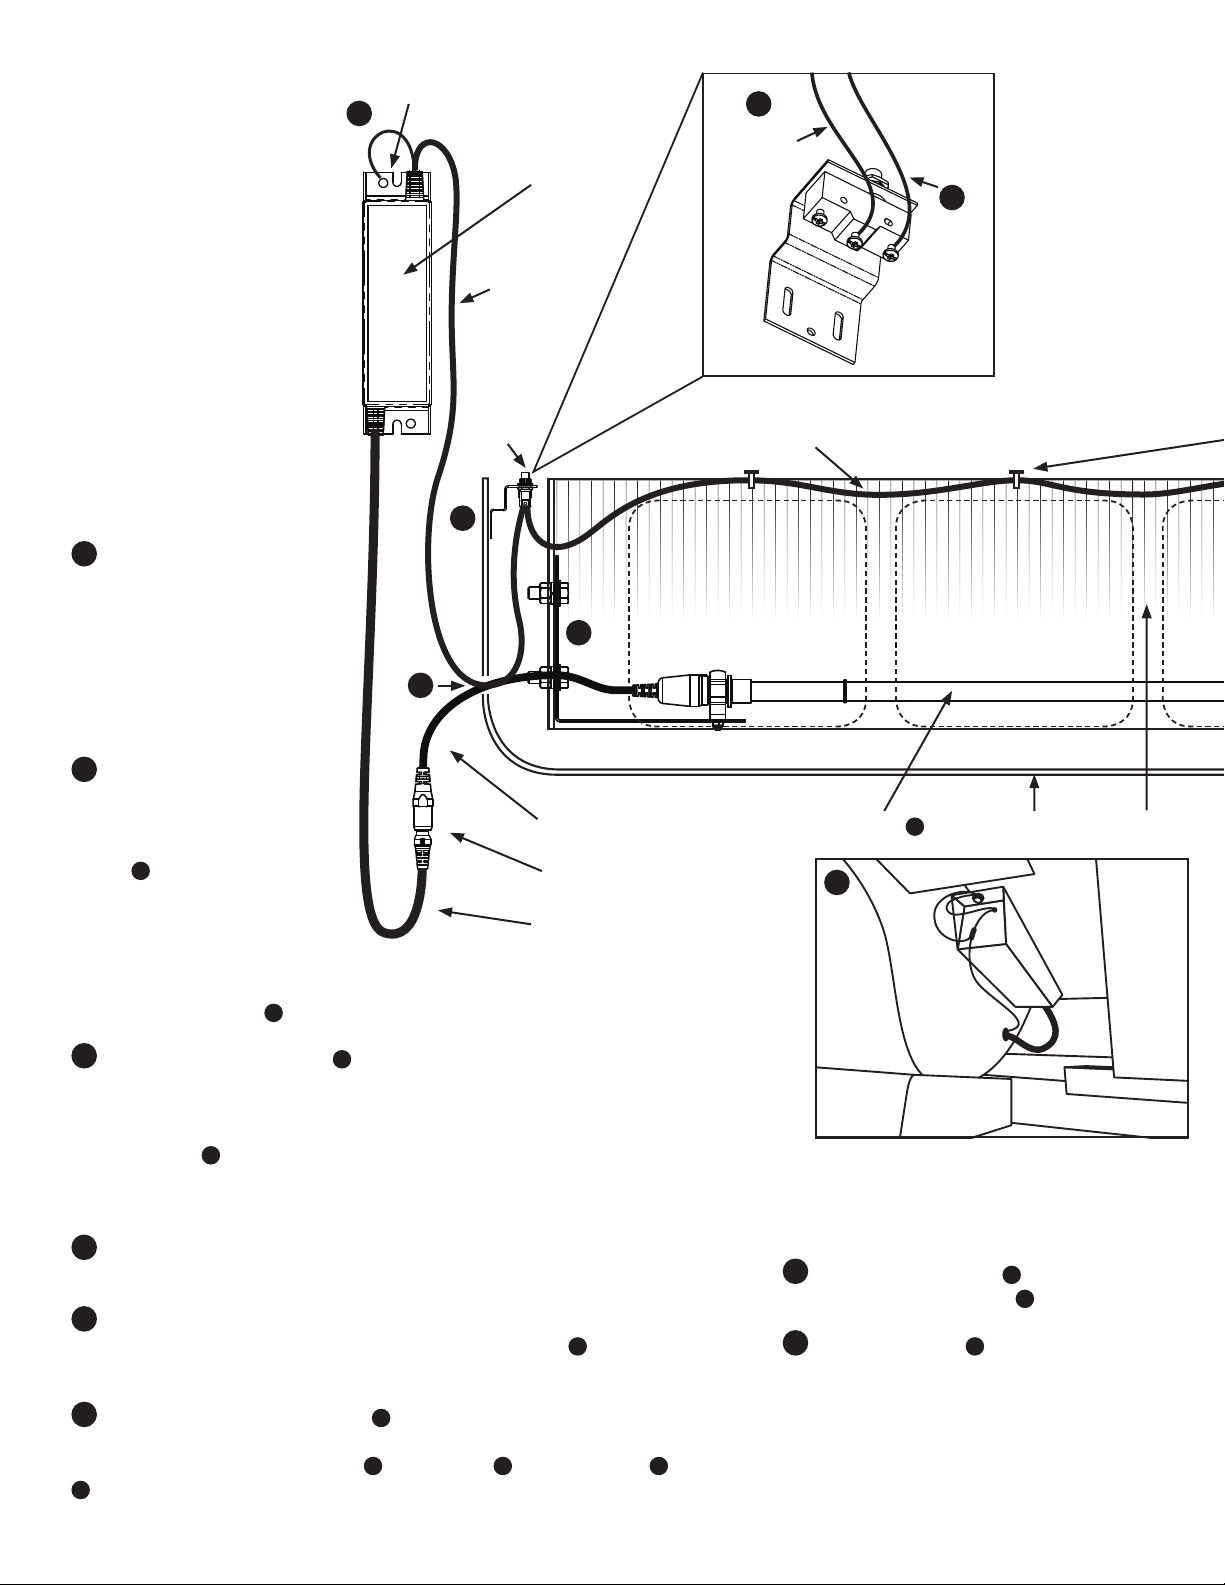
2Mount the 24 VDC ballast
on the side without the fuse
block , securing to the top
framing with self-tapping
screws J. There are two power
wires on the ballast, attach the
shorter one to the grounded
terminal, then pass the longer
one through the ¾”hole from
step 1. It will connect to the
Safety Interlock Switch F.
3The Safety Interlock Switch Fis intended to prevent accidental UV-C exposure
when servicing the a/c system. It will shut o power when the access cover is
removed. Installation is through the roof a/c access. The Safety Interlock Switch
is positioned on the left corner near the wire/lamp cable access hole. Use self-
tapping screws Kto secure the interlock bracket plate just below the gasket. The
push-button switch should be just above the a/c cabinet, so the switch is “on”
when the access panel is closed/secured.
4Attach the ballast power wire to the Safety Interlock Switch normally open
terminal.
5Attach the other wire to the common terminal, it will pass through the hole on
the other side of the cabinet. It connects to the In-Line Fuse Ewhich is connected,
with a shorter wire, to an open terminal on the 24 VDC Fuse Block.
6Install Lamp Mounting Brackets C(2 per a/c unit) to each side of the
evaporator coil framing supports between the coil and blower. Use existing holes
in the frame and fasten using bolts G, at washers N, spring washers H, and nuts
I. Check to make sure both brackets are level and properly secured to frame.
7Then mount UV Lamp Aonto each bracket
and connect to Lamp Cable B.
8Install Sight Glass Q. The Sight Glass allows
safe viewing of the UV light system when in
operation. Use an existing hole or drill a 1”hole
near the ballast location in the top of the HVAC
enclosure so the UV Light will be visible when
in operation. Press the base of the sight glass
through the hole until it snaps in.
2
2
1
3
4
5
6
A
Ballast
Ballast
Power
Wire
Long Power Wire
Blower Blower
UV Lamp
UV Lamp Cable
UV Lamp Cable Connector
UV Lamp Power Cable
Safety
Interlock
Switch
Safety Interlock Switch Detail
Mount Power Supply to top of coil & blower
enclosure using self-tapping screws.
Ground
HVAC Cabinet Coil
Long
Power
Wire
Ballast
Power Wire