120 or 230 VAC
POWER SUPPLY
UV LAMP
UV LAMP
BLACK
WHITE
GREEN
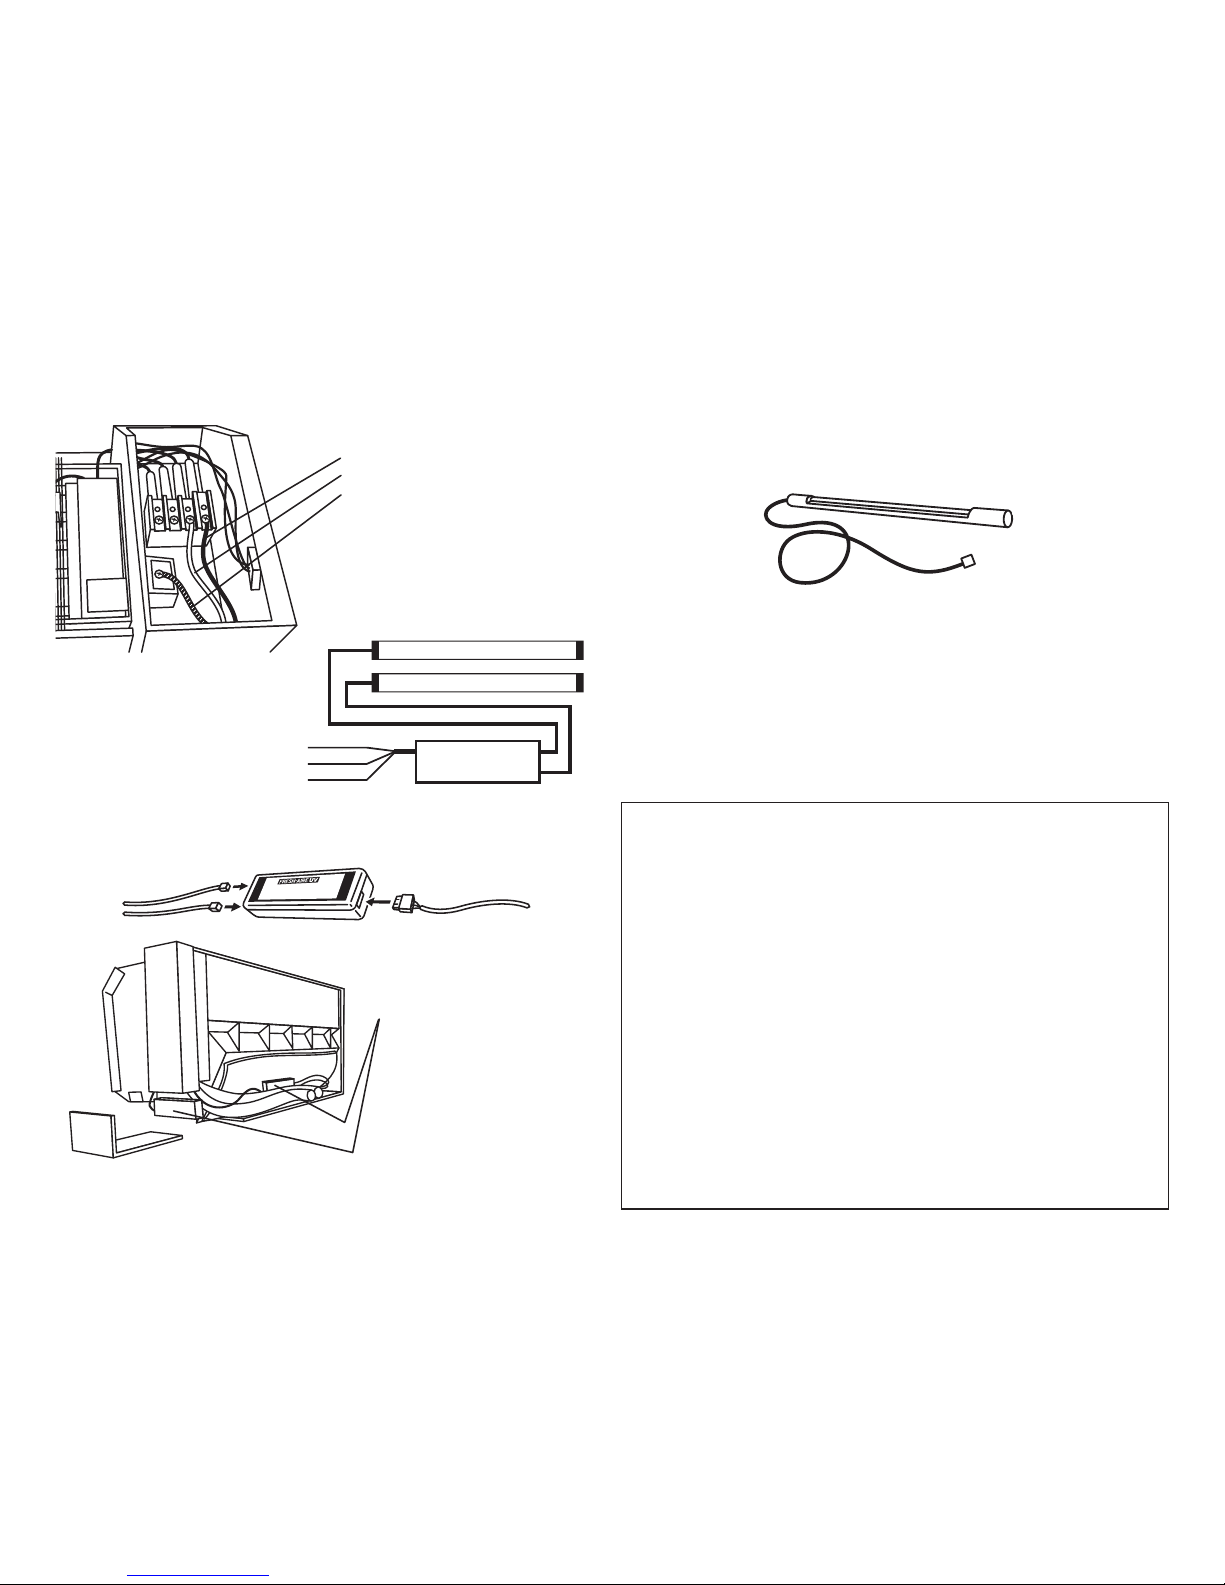
1. Remove the control box cover and
connect the wiring harness as shown.
For 120 VAC wiring
•Blacktohotterminal
•Whitetoneutral
•Greentoground
For 208 - 230 VAC wiring
•Blacktoline1
•Whitetoline2
•Greentoground
3. Insert the UV lamp cable connectors and wiring
harness connector into the power supply.
4. Tuck the power supply into the
line chase on the back of the
ac unit or place it in or under
the control box or other secure
location.
5. Return power to the system and
conrm that Mini UV is working.
6. Apply the UV warning sticker in
an appropriate location.
Note: It can take up to 10 minutes for the
UV lamp to warm up and fully illuminate.
2. Wiring Diagram
Note: Some indoor systems
may require additional wiring
to provide line voltage to the
Mini UV™ power supply.
LAMP CABLES POWER LEAD
The germicidal UV lamp in Fresh-Aire Mini UV® needs to be replaced yearly.
GermicidaleectivenessfallsoovertimesoUVlampreplacementisnecessary
even if the lamps continue to emit visible light after one year.
Power Supply Installation Lamp Replacement
Limited Warranty:
This warranty supersedes and replaces any warranty statements orally made by the Sales Person, Distributor or Dealer
or contained in the written instructions or other Brochures or informational documents in relation to this product. This
warranty gives you specic legal rights, and you may also have other rights which vary from State to State.
Manufacturer warrants the Mini UV to be free from defects in material and workmanship under the normal use and
service when operated and maintained in strict accordance with manufacturer’s instructions for one (1) year from the
date of purchase of equipment, including the Ultraviolet Lamp (Part# TUVL-MINI), which is warranted for UV germicidal
output for one (1) year. The UV lamp warranty does not cover cracked or broken lamps due to mishandling or improper
application.
Manufacturer’s obligation under this warranty is being limited to repairing or replacing any part found to its satisfaction
to be so defective. This warranty does not cover parts damaged resulting from misuse, abuse, or any other than its
intended use, accident, neglect, or from improper operation, maintenance, installation, modication or adjustments.
Triatomic Environmental, Inc. shall have no responsibility for charges incurred by the customer for installation or
removal of warranted items.
This warranty does not cover parts or equipment used with the Mini UV that are not made by the Manufacturer, since
these items are covered by warranties of the respective manufacturer. This warranty shall be void if UV lamps from
manufacturer’s other than Triatomic Environmental, Inc. are used with this equipment.
Manufacturer assumes no liability for any harm, which may occur as a result of the use of the equipment herein and shall
not be liable for consequential or any other damages whether or not caused by manufacturer’s negligence or resulting
from any express or implied warranty or breach thereof. Consequential damages for the purpose of this warranty shall
include, but not be limited to, loss of use, income or prot, or loss of or damages to property or injury or death to
persons or animals occasioned by or arising out of operation, use, the operation, installation, repair or replacement of
the equipment or otherwise.
THERE ARE NO WARRANTIES WHICH EXTEND BEYOND THE DESCRIPTION ON THE FACE HEREOF
Replace lamp only with part #TUVL-MINI
Note: Use of replacement UV lamps other than Fresh-Aire UV® voids warranty.
Caution: UV lamps contain small amounts of mercury - dispose of lamps in
accordance with local environmental regulations. For more information visit
www.lamprecycle.org