Fri-Jado BC 3-E User manual

BC
EN (Original Instruction) 9124222 / 1611
USER MANUAL
BC 3 –E
BC 3 –P
BC 5 –E
BC 5 –P
WARNING
Read the instructions before using the machine.

BC
EN 2 / 24
KEEP THIS USER MANUAL FOR FUTURE USE
© 2016 Fri-Jado Euro Products B.V., Etten-Leur, The Netherlands.
We advise you to contact your supplier for the guarantee period and conditions. Further we refer
to our General Terms and Conditions for Sales and Delivery that are available upon request.
The manufacturer does not accept any liability for damage or injury caused by failing to adhere to
these regulations or by not observing the usual caution or care in actions, operation, maintenance
or repair activities, even if not explicitly described in this manual.
As a result of constant commitment to improvement, it may happen that your unit deviates in detail
from what is described in this manual. For this reason, the given instructions are only a guideline
for the installation, use, maintenance and repair of the unit referred to in this manual. This manual
has been composed with the utmost care. The manufacturer shall, however, not be held
responsible for any mistakes in this manual nor for any consequences thereof. The user is allowed
to copy this manual for own use. Further all rights are reserved and nothing in this manual may be
reproduced and/or made public in any way.
Modifications:
In case of unauthorized modifications in or on the unit, every liability on the part of the
manufacturer becomes null and void.

BC
EN 3 / 24
Empty page.

BC
EN 4 / 24
CONTENTS
1. INTRODUCTION..............................................................................................................6
1.1 General.............................................................................................................................6
1.2 Identification of the unit.....................................................................................................6
1.3 Pictograms and symbols...................................................................................................6
1.4 Safety instructions ............................................................................................................7
1.4.1 General........................................................................................................................7
1.4.2 Outdoor use restrictions...............................................................................................7
1.5 Hygiene ............................................................................................................................8
1.6 Service and technical support...........................................................................................8
1.7 Storage.............................................................................................................................8
1.8 Disposal............................................................................................................................8
2. DESCRIPTION OF THE UNIT..........................................................................................9
2.1 Technical description........................................................................................................9
2.2 Intended use.....................................................................................................................9
2.3 Accessories......................................................................................................................9
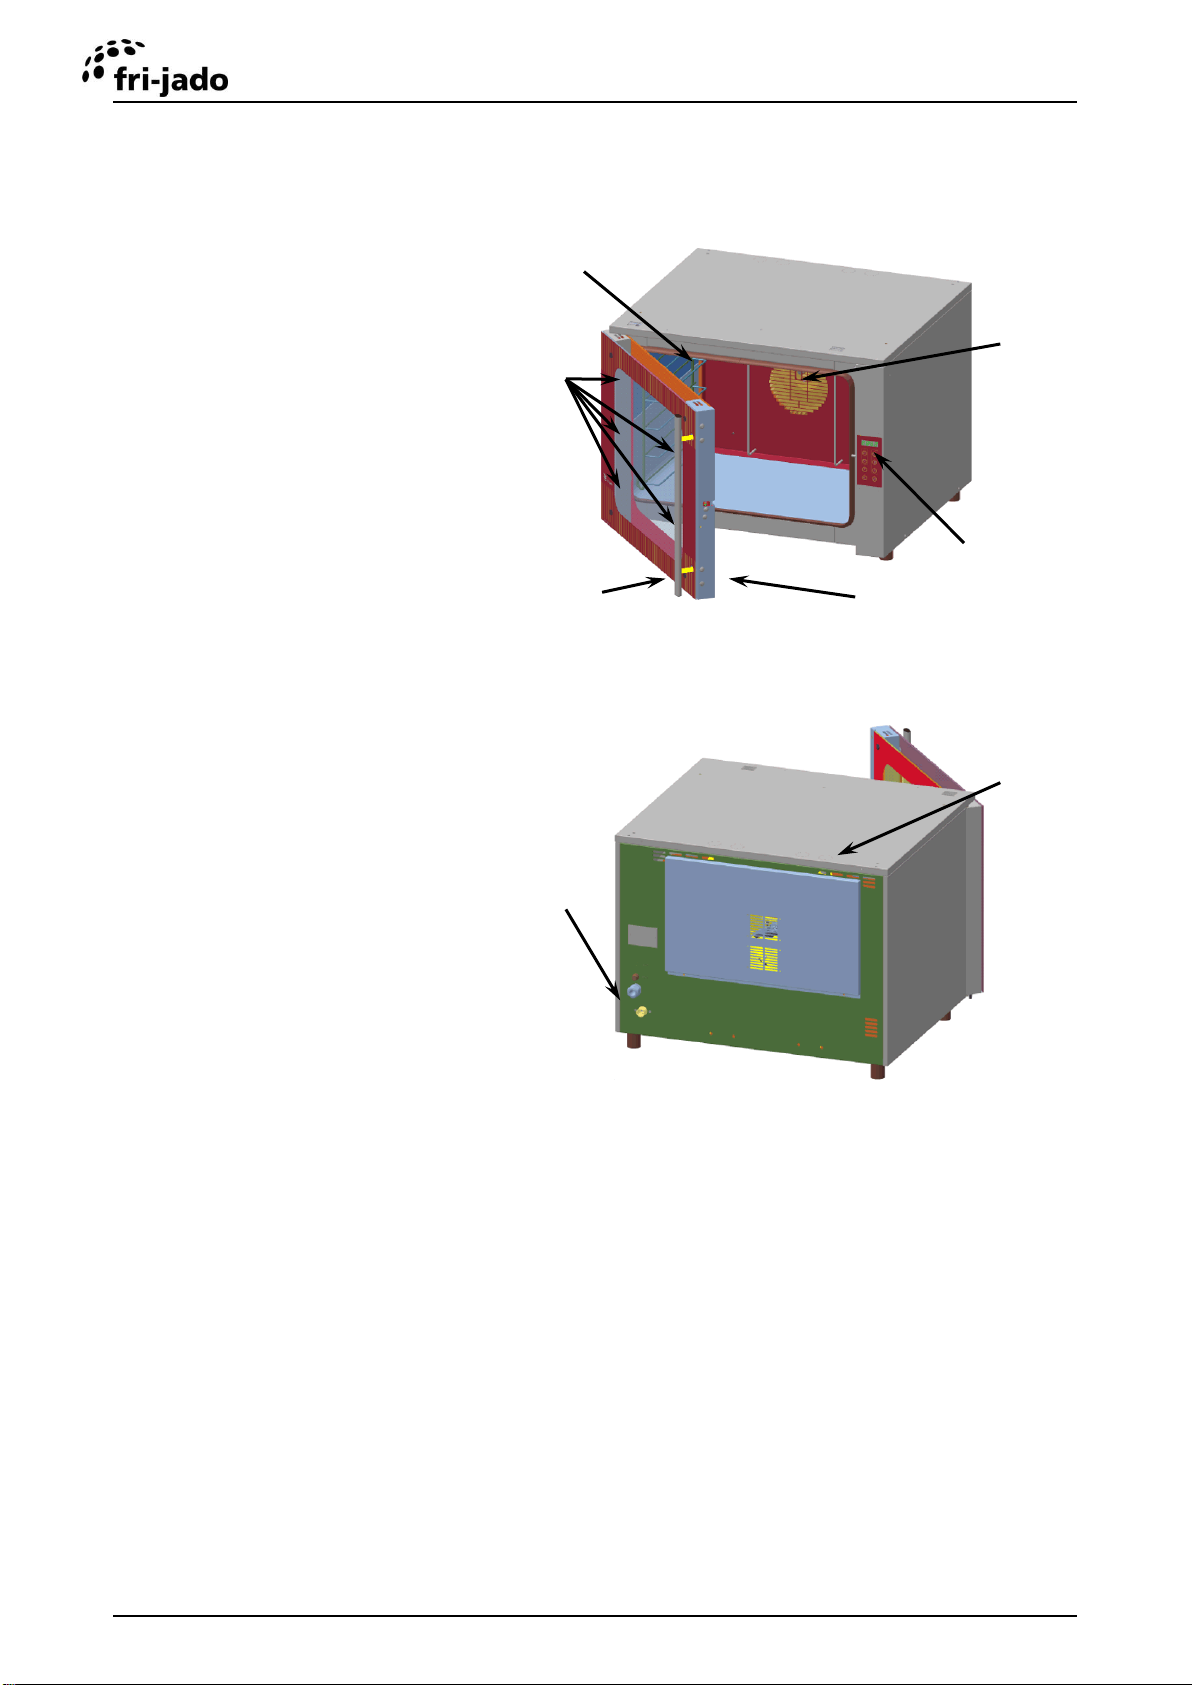
2.4 Parts...............................................................................................................................10
3. INSTALLATION AND FIRST USE .................................................................................11
3.1 Unpacking the unit..........................................................................................................11
3.2 Installation and positioning..............................................................................................11
3.3 First use..........................................................................................................................12
3.3.1 Metal odour ...............................................................................................................12
4. OPERATION AND USE ................................................................................................. 13
4.1 Control Panel..................................................................................................................13
4.2 Switching-on the unit.......................................................................................................13
4.3 Switching-off the unit.......................................................................................................13
4.4 Open and close the door.................................................................................................14
4.5 Operation of Basic Convection-E....................................................................................14
4.5.1 The baking process ...................................................................................................14
4.5.2 View and change the temperature while baking.........................................................15
4.5.3 View and change the baking time while baking..........................................................15
4.5.4 Stop during the baking process .................................................................................15
4.6 Operation of Basic Convection –P .................................................................................15
4.6.1 Manual operation.......................................................................................................15
4.6.2 Automatic operation...................................................................................................16
4.6.3 View and change the temperature while baking.........................................................16
4.6.4 View and change the baking time while baking..........................................................16
4.6.5 Stop during the baking process .................................................................................17
4.6.6 Set a new programme or change an existing programme..........................................17
4.6.7 Delete a programme..................................................................................................18
4.6.8 View a programme.....................................................................................................18

BC
EN 5 / 24
5. CLEANING AND MAINTENANCE................................................................................. 19
5.1 Maintenance schedule....................................................................................................19
5.2 Daily Cleaning.................................................................................................................20
5.3 Clean the rear panel .......................................................................................................20
6. MALFUNCTIONS AND SERVICE..................................................................................21
6.1 Replace the mains cord..................................................................................................21
7. TECHNICAL SPECIFICATIONS .................................................................................... 22

BC
EN 6 / 24
1. INTRODUCTION
1.1 General
This manual is intended for the user of the BC (Basic Convection). The features and controls are
being described, along with directions for the safest and most efficient use, in order to guarantee a
long life of the unit.
All pictograms, symbols and drawings in this manual apply to all BC models.
1.2 Identification of the unit
The identification plate can be found on the outside of the machine, and contains the following
data:
Name of the supplier or the manufacturer
Model
Serial number
Year of construction
Voltage
Frequency
Power consumption
1.3 Pictograms and symbols
In this manual, the following pictograms and symbols are used:
WARNING
Possible physical injury or serious damage to the unit, if the instructions are not
carefully followed.
WARNING
Hazardous electrical voltage.
WARNING
Danger of getting injured by hot surfaces.
Suggestions and recommendations to simplify indicated actions.
Recycling symbol.
Direction of view symbol.

BC
EN 7 / 24
1.4 Safety instructions
WARNING
The outside of the unit can be very hot.
WARNING
The maximum load on top of the unit may never exceed 50 kg (110 lbs).
WARNING
Risk of slippery floor: Spills may cause slippery surfaces, clean-up promptly.
1.4.1 General
The user of the unit will be fully responsible for abiding the locally prevailing safety- rules and
regulations.
The unit may be operated by qualified and authorized persons only. Anyone working on or with this
unit must be familiar with the contents of this manual and carefully follow all guidelines and
instructions. Never change the order of the steps to be performed. The management must instruct
the personnel on the basis of this manual and follow all instructions and regulations.
The pictograms, labels, instructions and warning signs attached to the unit, are part of the safety
measures. They may never be covered or removed, and have to be clearly visible during the entire
lifetime of the unit.
Immediately repair or replace damaged or illegible pictograms, warnings and instructions.
To avoid short-circuiting, never clean the unit using a water hose. For cleaning instructions,
see section 5.
During the use, the unit can get very hot.
The unit must be cleaned regularly to ensure proper functioning and prevent fire hazard
(over heating).
When opening the door, hot vapour and/or steam can escape from the oven. Stay standing
in front of the oven when opening the door.
Do not place racks with hot products against the side panels of the oven or on top of the
oven.
This appliance can be used by children aged from 8 years and above and persons with
reduced physical, sensory or mental capabilities or lack of experience and knowledge if
they have been given supervision or instruction concerning use of the appliance in a safe
way and understand the hazards involved.
Children shall not play with the appliance.
Cleaning and user maintenance shall not be made by children without supervision.
1.4.2 Outdoor use restrictions
The unit is not suitable for outdoor use.

BC
EN 8 / 24
1.5 Hygiene
The quality of a fresh product always depends on hygiene. Hands or tools that have been in
contact with raw meat must be cleaned thoroughly.
1.6 Service and technical support
The electrical schematics of your unit is included. In case of malfunctions you can contact your
dealer/service agent. Make sure you have the following data available:
Model.
Serial number.
This data can be found on the identification plate.
1.7 Storage
If the unit will not be used temporarily, and will be stored, follow these instructions:
Clean the unit thoroughly.
Wrap the unit from getting dusty.
Store the unit in a dry, non-condensing environment.
1.8 Disposal
Dispose of the machine, any components or lubricants removed from it safely in
accordance with all local and national safety and environment requirements.

BC
EN 9 / 24
2. DESCRIPTION OF THE UNIT
2.1 Technical description
The oven contains a heating element that heats the air in the oven. A fan evenly spreads the hot
air across the entire chamber. The direction of rotation of the fan regularly changes. This results in
an even temperature all across the oven, ensuring nicely and evenly baking of the products. The
electronic control keeps the temperature in the oven to the set value during the set time. Halogen
light will illuminate the oven chamber during the entire process.
The P-model oven has been provided with steam injection. For the generation of steam in the
oven, water pulses are given which the fan sprays and blows around the elements. The number of
water pulses and the moment of injection can be set to ensure correct air humidity in the oven
chamber at any moment during the baking process.
The oven contains two beams on which one to three (Basic Convection 3 models) or one to five
(Basic Convection 5 models) baking trays can be placed. This allows economic arrangement in the
oven, depending on the product height.
The P-model oven has a programmable control with the option of saving up to 25 programs. Each
program consists of 3 baking phases for which the baking time, temperature, the number of steam
pulses and the steam mode can be set.
2.2 Intended use
The oven is designed solely for rising and baking bread or heating snack products. Any other use
will not be regarded as intended use.
The manufacturer accepts no liability whatsoever for loss or injury caused by failing to strictly
adhere to the safety guidelines and instructions in this manual or due to carelessness during
installation, use, maintenance and repair of the unit referred to in this manual and any of its
accessories.
Use the unit in perfect technical condition only.
2.3 Accessories
Your unit contains the following standard accessories:
Spanner for dismounting and mounting the fan plate
Water filtering system
Baking tray 40x60
Silicone mat for baking tray 40 x 60
Baking tray 40 x 60 perforated and coated
Rack 40x60
Oven gloves
Oven gloves, long
User manual.

BC
EN 10 / 24
2.4 Parts
Overview of the unit
Front view
A. Lighting
B. Baking tray guide strip
C. Fan
D. Control panel
E. Door
F. Grip
Rear view
G. Steam / condensate outlet
(P-model only)
H. Water connection
(P-model only)
H
G
D
E
B
C
F
A

BC
EN 11 / 24
3. INSTALLATION AND FIRST USE
All packing materials used for this unit are suited for recycling.
After unpacking, check the state of the unit. In case of damage, store the packing material, and
contact the transporter within fifteen working days after receiving the goods.
3.1 Unpacking the unit
Your unit is packed in a plastic top cover, protective corners and a carton box around it.
All units are placed on a wooden pallet. Around the box there are two tightening straps.
1. Remove all parts from the unit.
2. Remove the foil from all metal parts.
3. Remove all packaging materials from the unit.
4. Make sure that all parts belonging to the model you have ordered are present.
3.2 Installation and positioning
WARNING
Position the unit on a flat and horizontal surface. A temporally inclined plane of
maximum 5° is allowed.
Position the unit flatly on a sufficiently sturdy base using a spirit level. For example, a solid
working bench. Take the weight of the unit into account.
Make sure there is a clearance of 100 mm / 4 inch between the back and side panels and
the walls or other equipment.
The opening between the unit and the base must be free from obstacles to ensure good
ventilation in the electrical compartment.
Use the correct couplings for the water connection in order to prevent water leakage.
If the oven has not been connected to an outlet channel, make sure there is at least
500 mm / 20 inch free space above the oven.
Allow for enough space for the oven, so you can easily place the baking trays into and take
them out of the oven.
Find a suitable place for the unit. Points of interest:
If the oven is installed on a base, the floor must be completely level. This facilitates a good
operation of the door lock.
Make sure there is 900 mm / 35 inch free space on the front side of the oven for operation
and maintenance and for unloading products.
The products in the unit must be well visible.
Ensure the unit’s accessibility for maintenance and service activities.
Do not allow children on the service side.
The unit is not suited for use in a rainy or very moist environment in view of danger of short
circuit.
There must be a water supply connection with an aerated tap valve with a ¾ inch screw
connection nearby (P-model only).
The environmental temperature must be between 10 and 35°C / 50 and 95°F. The unit is
not suitable for outside use.

BC
EN 12 / 24
3.3 First use
When using the unit for the first time, clean the interior thoroughly with soap suds and heat up the
unit, see section 3.3.1. After commissioning discoloration of the cooking/grilling area can occur.
3.3.1 Metal odour
To remove the metal odour that will appear at first use, the unit must be heated at the maximum
temperature (250°C/482°F) for at least half an hour.
Warm through the Basic Convection
Action
Operation
Display (after operation)
1
Switch on the oven
Last set baking time
2
Set the time to 30 minutes
/
_ 30
3
Select the temperature
Last set temperature
4
Set the temperature to 250 °C
/
_250
5
Start the preheating
The set baking time
6
After having finished the preheating,
the oven will give a sound signal and
Load appears on the display
Start the heating-through process
The set baking time expires
7
After having finished the heating
through, the oven will give a sound
signal and End appears on the display
Last set baking time
8
Switch off the oven

BC
EN 13 / 24
4. OPERATION AND USE
4.1 Control Panel
A1 Display
A2 Up button
A3 Down button
A4 Programme button (P-model only)
A5 On/off button
A6 Time button
A7 Temperature button
A8 Steam button (P-model only)
A9 Start/stop button
Button
Function
A2 Up button
Increase the values of settings.
A3 Down button
Decrease the values of settings.
A4 Program button
Set, change or delete a program.
A5 On/off button
Switch the oven on and off.
A6 Time button
Select the baking time
A7 Temperature button
Select the baking temperature.
A8 Steam pulses button
Select the steam injection.
A9 Start/stop button
Start and stop a program.
4.2 Switching-on the unit
Press the button.
The LED above this button will light constantly.
4.3 Switching-off the unit
Press the button.
The LED above this button will go out.
The oven switches off itself when no baking process has been active for more than 2
hours.
When the oven temperature is still too high when switching off the oven, the oven will first cool
down before fully switching off. For this the fan remains active. When the oven is off and this
automatic cooling is active, everything will be off on the front panel except for the display showing
”cool”. The oven will switch off automatically when the oven temperature drops below 80°C /
176°F.
You can speed up cooling by opening the door.
A1
A6
A7
1
A8
1
A9
A2
A3
A4
A5

BC
EN 14 / 24
4.4 Open and close the door
WARNING
Do not lean on the opened oven door and do not put anything on top of it.
Do not pull the cable beneath the door and do not hang anything on it.
Do not knock into the door. The glass may break when firmly knocked.
The oven door can be opened at all times. The oven door is unlocked by pushing the handle to the
left and releasing it. The door can be opened. If the oven has a swing door, the oven door can be
unlocked by pushing the handle down and pulling the door towards you.
You can close the oven door by closing the door and pressing the lock. If the oven has a swing
door, you can close this by moving the door up and backwards and then pushing it into the lock.
4.5 Operation of Basic Convection-E
WARNING
Never touch the interior of the oven when it is hot without protecting your hands.
Use oven gloves.
4.5.1 The baking process
The baking process can be started as described below.
Action
Operation
Display (after operation)
1
Switch on the oven
Last set baking time
2
Set the required baking time
/
Required baking time
3
Select set temperature
Last used temperature
4
Set the required baking time
/
Required baking time
5
Start the preheating
PREh and the LED above is
flashing
6
After the preheating has expired,
the oven will give a sound signal
and Load will flash on the display
Now put the products
into the oven.
Load, (flashing) The
temperature is not maintained
while loading the products.
7
Start baking the products
The set baking time expires
8
After the baking time has expired,
the oven will give a sound signal
and End appears on the display
Take the products
out of the oven.
Last set baking time
9
Switch off the oven or go to step 2
The LED above the button will flash while the oven is busy with a process
started by the user. For example, while pre-heating, loading and recipe
processing.
Pressing the button while pre-heating will abort the pre-heating. The oven
will then immediately proceed with baking the products.

BC
EN 15 / 24
4.5.2 View and change the temperature while baking
You can view and change the temperature while baking.
During baking, press the button to make the set temperature appear on the display. You can
change the set temperature using the and buttons.
4.5.3 View and change the baking time while baking
You can view and change the baking time while baking.
During baking, press the button to make the remaining baking time appear on the display. You
can change the set remaining baking time using the and buttons.
4.5.4 Stop during the baking process
After pre-heating, you can interrupt the baking process at all times by pressing the button.
4.6 Operation of Basic Convection –P
WARNING
Never touch the interior of the oven when it is hot without protecting your hands. Use
oven gloves.
The Basic Convection 3-P and the Basic Convection 5-P can be operated both manually and
automatically.
4.6.1 Manual operation
Action
Operation
Display (after operation)
1
Switch on the oven
The last set baking time
appears
2
Set the required baking time
/
Required baking time
3
Select set temperature
Last used temperature
4
Set the required temperature
/
Required temperature
5
Start the preheating
PREh and the LED above is
flashing
6
After the preheating has expired, the
oven will give a sound signal and
Load will flash on the display
Now put the
products into the
oven.
Load, (flashing) The
temperature is not maintained
while loading the products.
7
Steam can be supplied while baking
stea (flashing) Steam supply
remains active until the button is
released (max. 8 minutes).
8
After the baking time has expired,
the oven will give a sound signal
and End appears on the display
Take the products
out of the oven or
press
Last set baking time
9
Switch off the oven and go to step 2
The LED above the
button will flash while the oven is busy with a process
started by the user. For example, while pre-heating, loading and recipe
processing.
Pressing the
button while pre-heating will abort the pre-heating. The oven
will then immediately proceed with baking the products.

BC
EN 16 / 24
4.6.2 Automatic operation
Action
Operation
Display (after operation)
1
Switch on the oven
The last set baking time
appears
2
Select a programme mode
The LED above lights up
and the last used programme
will appear on the display
3
Select the required programme
/
Selected programme
Now put the
products into the
oven if a
programme
without pre-heating
has been selected
and proceed with
step 6
4
Start the programme
PREh and the LED above is
flashing
5
After the preheating has expired, the
oven will give a sound signal and
Load will flash on the display
Now put the
products into the
oven.
Load, (flashing) The
temperature is not maintained
while loading the products.
6
Start baking the products
The set baking time expires
7
After the baking time has expired,
the oven will give a sound signal
and End appears on the display
Take the products
out of the oven or
press
Last used programme
8
Switch off the oven and go to step 3
The LED above the button will flash while the oven is busy with a process
started by the user. For example, while pre-heating, loading and recipe
processing.
Pressing the button while pre-heating will abort the pre-heating. The oven
will then immediately proceed with baking the products.
4.6.3 View and change the temperature while baking
You can view and change the temperature while baking.
During baking, press the button to make the set temperature appear on the display. You can
change the set temperature using the and buttons.
4.6.4 View and change the baking time while baking
You can view and change the baking time while baking.
During baking, press the button to make the remaining baking time appear on the display. You
can change the set remaining baking time using the and buttons.

BC
EN 17 / 24
4.6.5 Stop during the baking process
After pre-heating, you can interrupt the baking process at all times by pressing the button.
4.6.6 Set a new programme or change an existing programme
Action
Operation
Display (after operation)
1
Switch on the oven
The last set baking time appears.
2
Open the programme mode
3 sec
P with the first unused programme and
the LED above is flashing.
3
Select a programme number
/
P with the selected programme
4
Confirm the programme number
_ 0 and the LED above is flashing
5
Set the pre-heating temperature
/
PH=0no pre-heating
PH=1pre-heating
6
Select the baking time
_ 0 and the LED above is flashing
7
Set the required baking time for
baking phase 1
/
_ and the required baking time
8
Select the baking temperature
_ 0 and the LED above is flashing
9
Set the required baking
temperature for baking phase 1
/
_ and the required baking
temperature
10
Select steam pulses
_ 0 and the LED above is flashing
11
Set the number of steam pulses.
Enter 0 when no steam is required.
/
_ and the required number of steam
pulses
12
Select the steaming method
_nn0 and the LED above is flashing
13
Select the steaming method:
Enter 0 when no steam is required.
/
_nn0 at the beginning of the step
_nn1 spread over the step
14
Go to step 2 to programme the
second or third baking step or go
to step 12 to save the programme.
2x
= 0 step 2
= 0 step 3
15
Save the programme
SAVE and Done alternately
16
Exit the programme mode
3 sec
The last set baking time appears.
17
Switch off the oven

BC
EN 18 / 24
4.6.7 Delete a programme
Action
Operation
Display (after operation)
1
Switch on the oven
The last set baking time
appears.
2
Go to the programme mode
P 01
3
Select a programme number
/
P with the selected programme
4
Delete the programme
5 seconds
del? and programme
alternately
5
Confirm or cancel the deletion.
confirm:
cancel: any other
button
del and done alternately after
confirmation.
P with the selected programme
after cancellation.
6
Exit the programme mode
The last set baking time
appears.
7
Switch off the oven
Protected programmes cannot be deleted. At any attempt to do so, read + only will
alternately appear and after this you can select another programme.
See the service manual for additional information about protecting programmes
4.6.8 View a programme
Action
Operation
Display (after operation)
1
Switch on the oven
The last set baking time
appears.
2
Go to the programme mode
P 01
3
Select a programme number
/
P with the selected programme
4
View all settings
, and/or
Step and the set value
5
Stop viewing the programme
P with the selected programme
6
Exit the programme mode
The last set baking time
appears.
7
Switch off the oven

BC
EN 19 / 24
5. CLEANING AND MAINTENANCE
WARNING
Appliance must be disconnected from the power supply during cleaning or
maintenance and when replacing parts.
Do not use aggressive or abrasive materials. These will damage the surface which
will make it more difficult to remove dirt.
Clean the inside, the removable parts and the accessories thoroughly with cleanser
and water before putting the unit into use. Follow the cleaning instructions as
described in this chapter.
Treat the outer surface of the interior window with a soft cleaning agent to protect
the reflection layer.
Do not touch the halogen lamps with bare hands. Protect hot lamps from cold
water.
WARNING
Never use a water hose for cleaning. Water can seep into the unit through the
ventilation holes of the unit.
5.1 Maintenance schedule
For hygiene matters and optimum state of your unit, it is advised to maintain a fixed
daily cleaning schedule.
Item
Action
Frequency
Interior
Clean, see section 5.2.
Daily
Exterior
Clean the exterior with a small amount of water to which
a mild cleaning agent has been added and a soft brush
or sponge.
Dry the exterior with a cloth.
Use Stainless Steel cleaning spray to remove stains, and
restoring the gloss.
Weekly
Windows
Open the door.
Clean the windows with warm soapy water or Fri-Jado
Cleaner.
Weekly
Door switch
Check if the door switch can move freely (P-model only).
Have a door switch that cannot move freely replaced.
Clean the visible part of the door switch with a dry cloth.
Weekly
Foil of the
operating panel
Check the foil of the operating panel for damage.
Replace a torn foil.
Weekly
Mains lead
Inspect the electrical cord for damage.
Have a defective mains lead replaced by an authorized
installer.
Monthly
Rubber door
seal
Check the rubber door seal for cracks.
Replace the rubber if cracked.
Monthly
Rear panel
Clean the rear panel and the space behind it, see
section 5.3.
Monthly
Hinges
Spray moving parts with silicone oil.
Every 6
months

BC
EN 20 / 24
5.2 Daily Cleaning
The unit can be cleaned best shortly after use, when it is still lukewarm.
The best cleaning can be achieved by using special oven- or grill cleaner.
Remove the baking trays and/or racks and the beams from the oven.
Clean the racks and/or baking trays and the beams with hot water to which a suitable
cleaning agent has been added. Preferably use Fri-Jado Cleaner, except with aluminium
baking trays.
Remove the soap residues from the rack and/or the baking tray and the beams with
sufficient hot water.
Sweep crumbs, seeds and other residual from the oven.
Clean the interior of the oven with a moist cloth with cleaning agent.
Also clean the area beneath the oven.
5.3 Clean the rear panel
WARNING
Avoid bumping against the fan blades to prevent imbalance.
Allow the oven to cool to avoid burning.
Remove the plug from the wall socket before removing the rear panel.
1. Remove the racks or baking trays and the beams
supporting the racks or baking trays.
2. Remove the four nuts using the spanner delivered
with the oven and keep them carefully.
3. Pull the rear panel forward and remove it from the
oven.
4. Clean the rear panel with hot water and Fri-Jado
Cleaner. In case of heavy contamination, spray
with Fri-Jado Cleaner, let it soak and rinse
thoroughly.
5. Remove dirt from the bottom of the oven and from
the now visible inner rear panel with a soft brush.
6. Place back the rear panel and tighten the four nuts
with the delivered spanner.
This manual suits for next models
3
Table of contents
Other Fri-Jado Convection Oven manuals